Point Editing is a useful tool in Silhouette Studio® when you want to manipulate a line portion, aside from simply moving, removing, or resizing the line. This is great for refining your own shapes and lines when drawing from scratch, or if you want to modify an existing design from the Design Store or elsewhere. To enter the Point Editing Mode, either double click an image or use the Edit Points Tool on the left, which will open the Quick-access Toolbar.
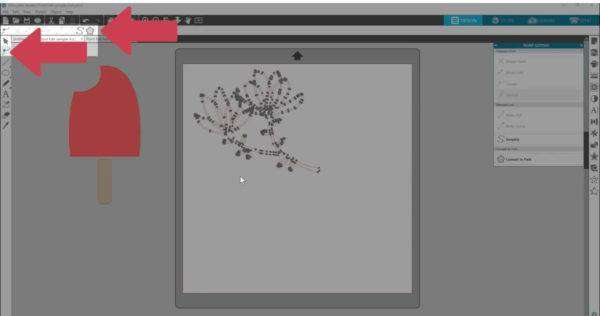
The options in the Quick-access Toolbar are the same as in the Point Editing panel, but in the panel that opens by double-clicking on a design, you’ll see descriptions for the icons. Point Editing allows you to edit any point or points on your design. Only single ungrouped shapes can be point edited. If you try to double-click a design or use the Edit Points tool and nothing happens, you probably need to ungroup your design or make it a compound path. In Point Editing mode, you’ll see all the points, or nodes, of the image. These points are where the line takes a new direction or changes from being straight to curved.

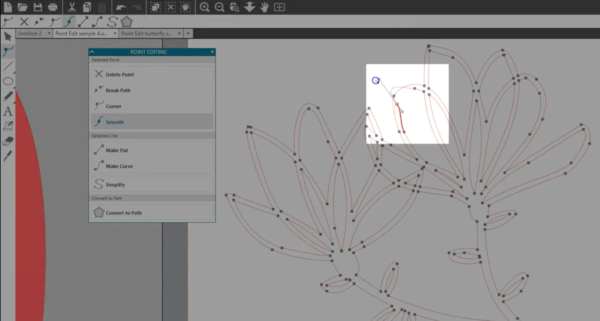
Before we talk about manipulating nodes individually, let’s look at this design as a whole. You can see it’s got quite a lot of nodes, so the first thing I’m going to do to this design is click “Simplify,” which looks like the letter S with editing points.
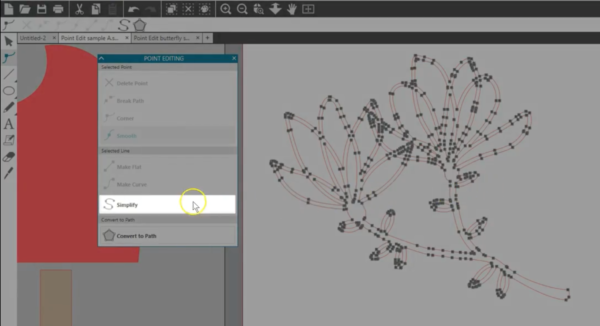
This simplifies the design by reducing the number of points, and can help smooth out certain designs. With fewer points, there is less information to process, which means easier designing and faster, cleaner cuts. Not every design needs this Simplify function applied with Point Editing, but we do go here if a design is giving us trouble. One click is enough in most cases to simplify the design. That removed a lot of extra information at the corners of this design but didn’t affect the appearance of the design itself.

Remember, you can click your Undo button if you don’t like the results. Now let’s look at editing individual points. You’ll see a tiny arrow appear as you approach a line or a node. If you click on a line where there is no node, you will add a node there which can then be manipulated.

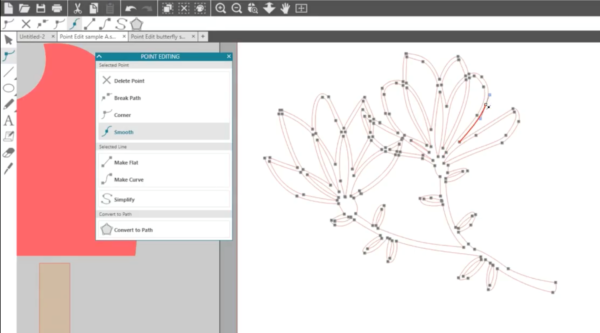
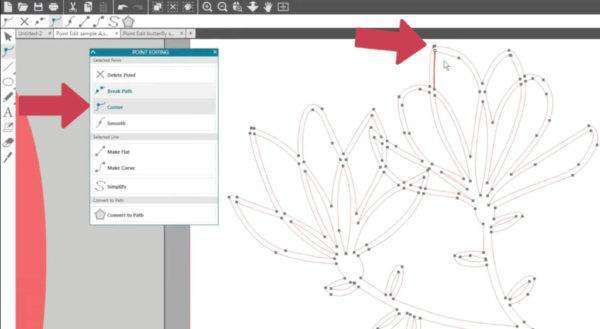
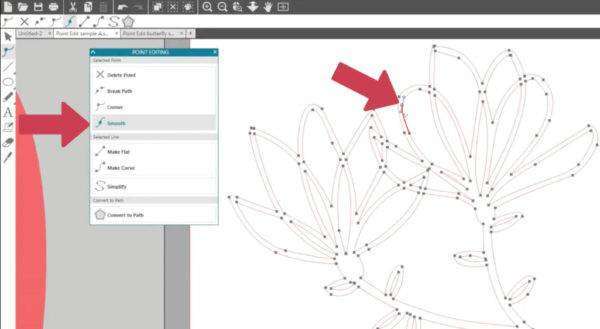
When you click on a node, it will turn white when selected. Now you have all these options for Delete Point, Break Path, Corner, Smooth, Make Flat, and Make Curve.
Delete Point will simply delete the selected point, while leaving the rest of the line intact.

Break Path will break the line apart at that point. You’ll see a red dot form, and the line can be dragged apart. Any two ends of a broken path can be linked together as you drag one toward the other, as long as they are part of the same compound path.

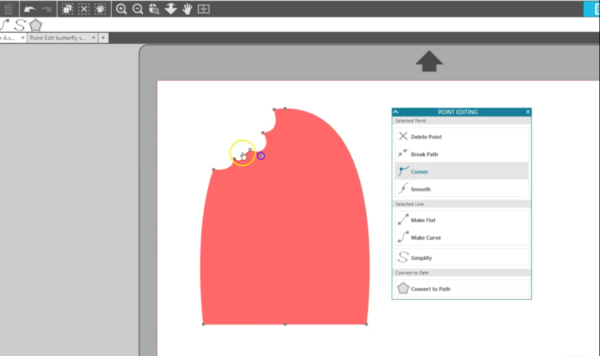
“Corner” means the line can change direction at that point, and that can be either a smooth transition or a sharp transition.
“Smooth” means the line does not change direction at that point, so the drag handles control the Bezier curve in relation to each other on either side of that point.
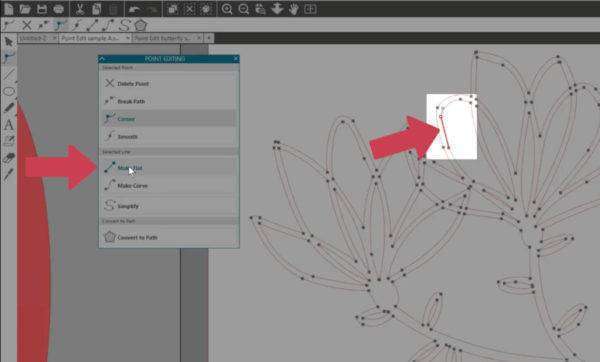
Those were actions or properties for a selected POINT. The next two are for the selected LINE. Notice the line segment turns a darker red when the point it’s connected to is selected. “Make Flat” will make the selected line portion go flat or straight. This can also turn the selected point into a corner.
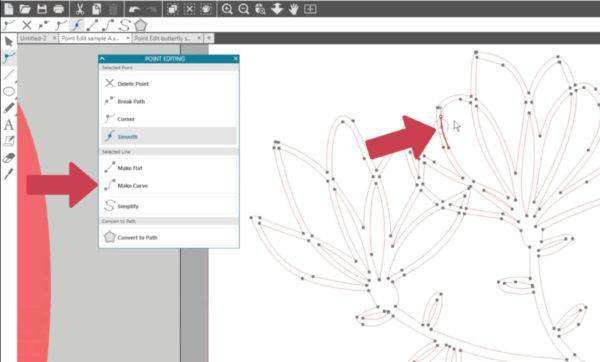
“Make Curve” turns the selected line portion into a curve and often converts the selected point to Smooth.
All these points and line segments interact with each other, so just experiment to see where to go with it. Drag the handles around on a selected point, up, down, in, out, closer to, and farther from the selected edit point. Some of these interact with the handles on the next point in the line, so you’re often working with more than one point to control the direction and curve of a line segment.
To exit Point Editing mode, click on a blank part of your screen or click on the Select Tool located to the left of the workspace.

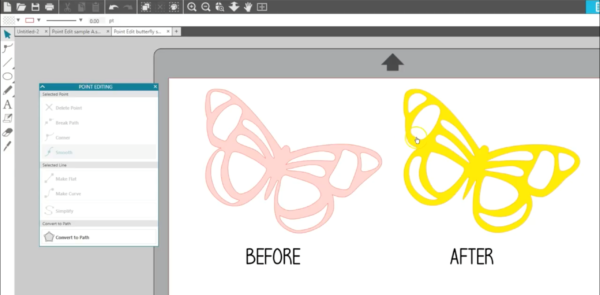
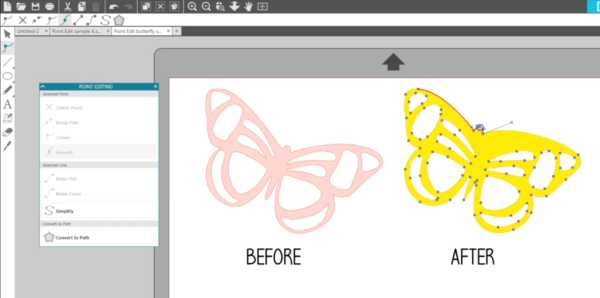
We’ve seen how editing points can simplify a design to reduce information being sent to the cutter. You can also make a design easier to cut by moving points to thicken interior lines. Look at the before and after for this butterfly. The first one might be hard to cut cleanly from paper, but with some point editing we were able to adjust those points and also smooth out sharp corners.
If you want to select multiple edit points, you can hold your Shift key and click on multiple nodes or hold Shift while dragging a selection box around multiple nodes. Then they can be nudged all together with your keyboard’s arrow keys or dragged with the mouse.
Finally, you can use edit points to manipulate a design in very specific ways. We want to change the bite mark on this popsicle, so we will just double click to enter Point Editing, then we will add nodes, make them into corners, and adjust the direction of the lines to get the effect we are going for.
Point Editing is a great tool for making minute adjustments that can really impact your designs.