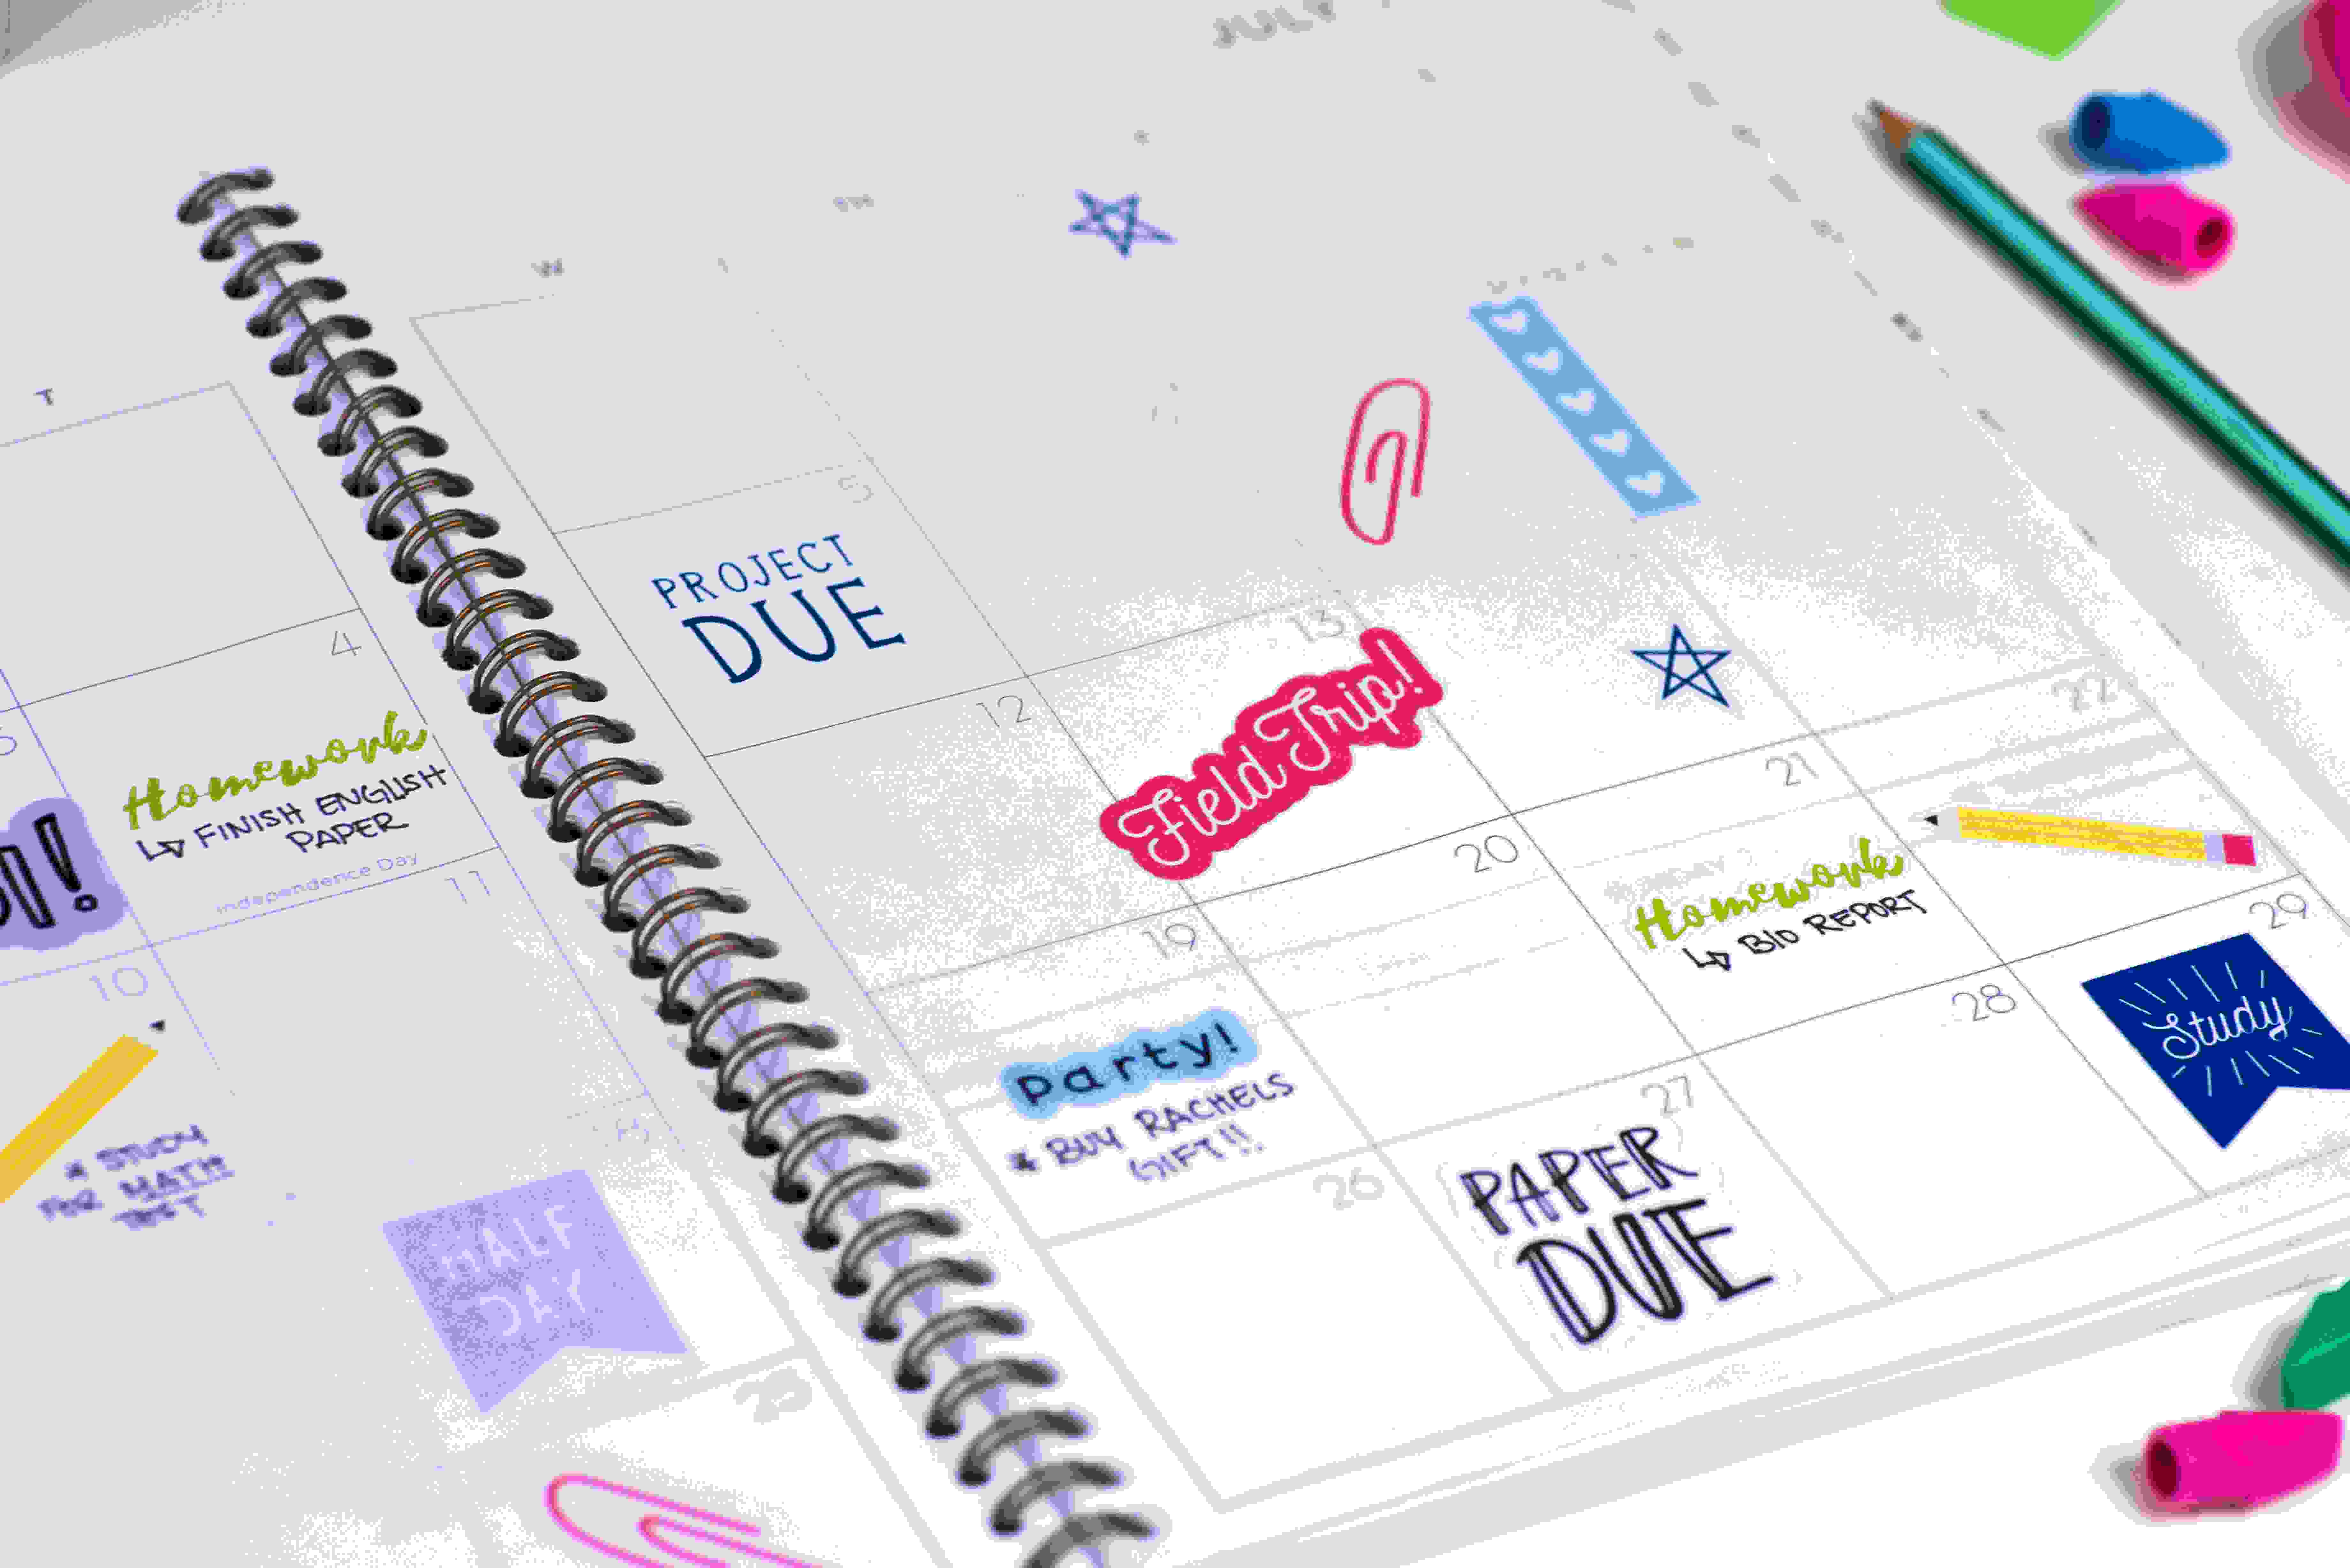
There’s just an indescribable feeling about opening a brand-new planner and beginning to fill in the pages. We love to fill in our pages with stickers that we’ve cut with our Silhouette cutting machines. If you’d like to learn how to create these planner stickers follow along and see how we made them in just two simple steps!
Supplies Needed:
- Silhouette CAMEO® or Silhouette Portrait® or Silhouette Curio™
- Silhouette Cutting Mat
- White Sticker Paper
- Printer
- Design ID # 211790
Step One: Setting Up The Design
- Select the Page Setup Window (this icon can be found on the tool bar on the left-hand side of your page) and adjust your width and height to 8.5 inches by 11 inches. The White Sticker Paper comes in sheets that are large enough to feed through a printer so you will want your page to reflect that size.
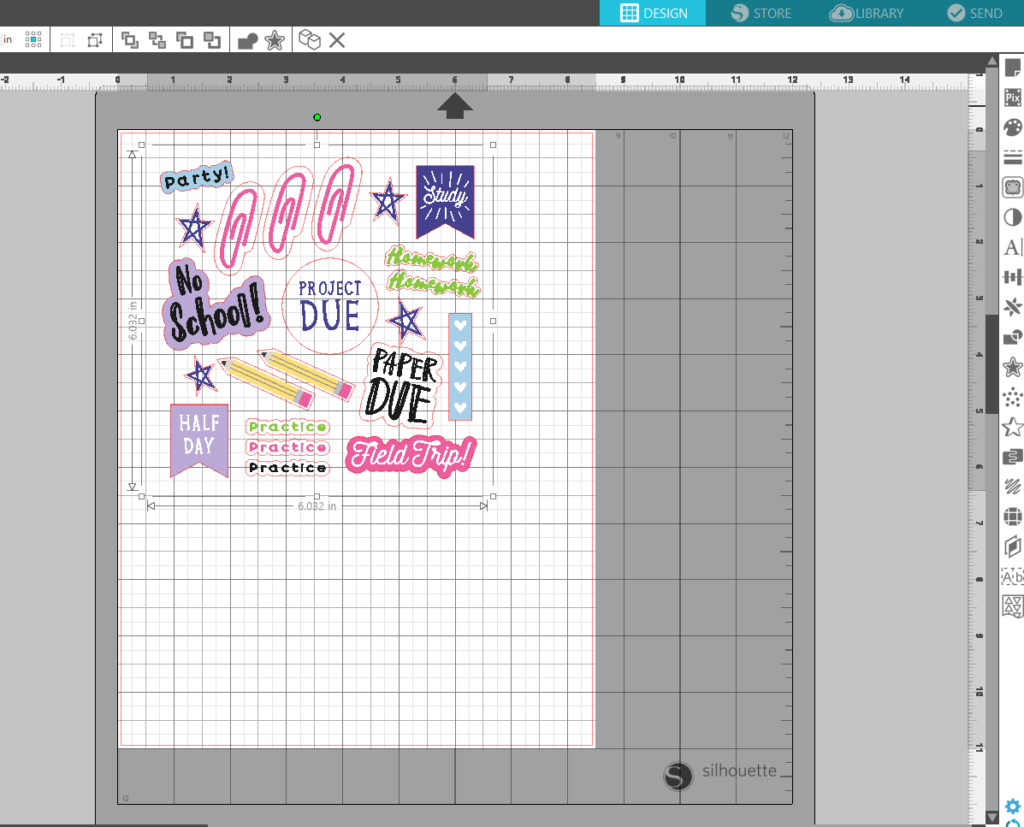
- Open Design ID # 211790 in Silhouette Studio® by locating the design in your library.
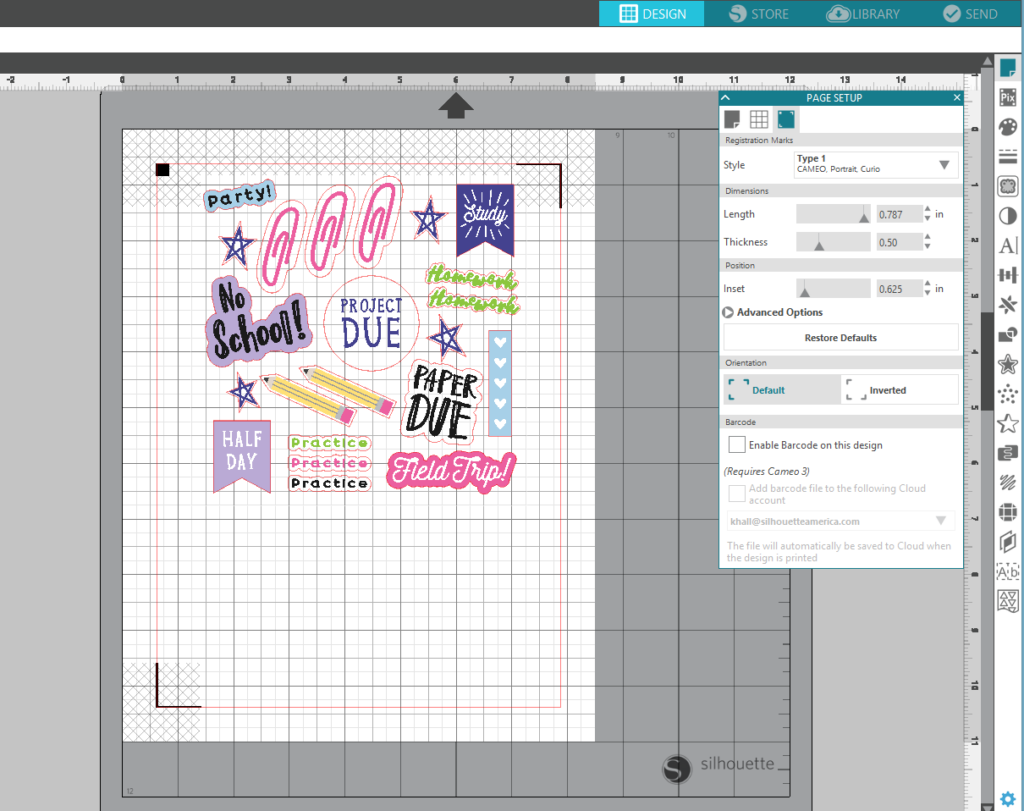
- In the Page Setup Window turn on the registration marks by setting the style to Type 1. Adding registration marks is important because your machine reads these in order to cut your shapes out perfectly.
- Adjust the size of the design by selecting it and dragging the outer corner to make it larger or smaller.
Step Two: Print & Cut The Design
- Print out your design on the White Sticker Paper by selecting the printer icon.
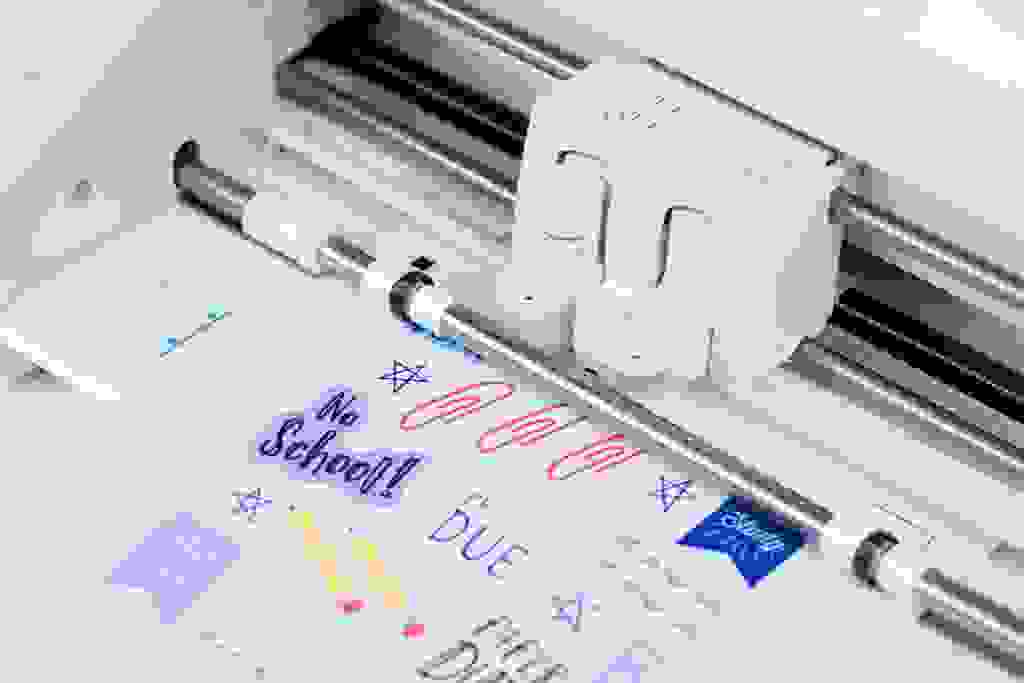
- Once it has been printed, place your printed design on your cutting mat. Load the cutting mat into your machine.
- In Silhouette Studio®, select the Send window in the top right-hand corner. Select the White Sticker Paper cut setting and select Send (remember that if you don’t have an Autoblade, you will need to adjust your blade settings).
- Your machine will read the registration marks and then cut out your design (Tip: If your machine is having trouble reading your registration marks. Try manually moving the blade directly over the square registration mark. You can do this by moving the blue arrows in the send window in your studio).
- Once your machine has cut out each design, remove the sticker paper from the cutting mat. Add your stickers to the pages of your planner and you’re done!

Naszenaturalne
September 2, 2025
Really love your style
Kelly Wayment
June 28, 2024
You can use it with vinyl as long as it is smooth and flat to allow the static charge to hold on to it. Rolled vinyl that wants to go back to its rolled shape will not necessarily work well, and it would need to be trimmed to fit the ES mat cutting area.
Kelly Wayment
June 28, 2024
Yes, you can use the heat pen while using the ES mat. 🙂
Yurii
March 2, 2024
Hello. May it be used with heat pen?
Thanks
Jerome
February 24, 2024
Hi, works this with the normal vinyl foils or only with printer papter etc?
Kelly Wayment
February 16, 2024
Once you’ve pushed the mat up against the rollers, just press the “Load” arrow button (bottom right on the display). Does a regular sticky mat load into the machine for you?