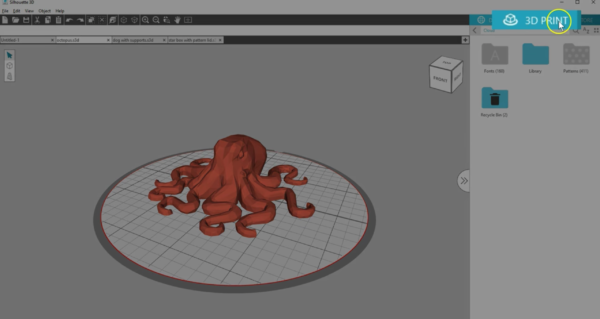
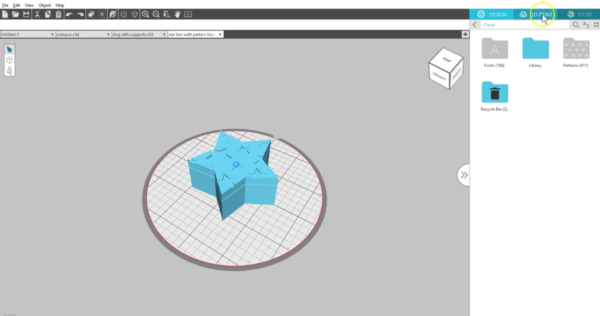
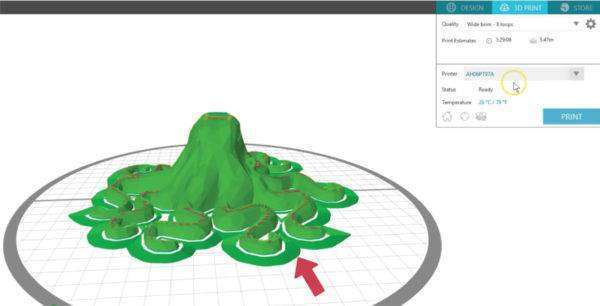
In this tutorial for Silhouette 3D™, we’ll go over Slicing and Print Settings. Once you have your design created in the workspace and are ready to print it as a 3D object, Save it, and then go to the 3D Print tab in the upper right area of your screen.
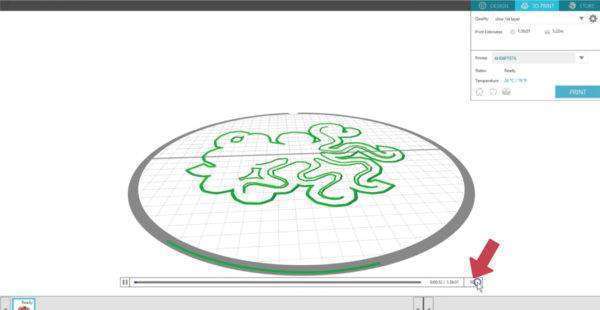
You’ll notice a “Slicing” Progress bar appear at the bottom of the screen. Slicing just means that the software breaks down your shape into the layers it needs to print with PLA filament. The progress will take longer for larger or higher-quality prints.
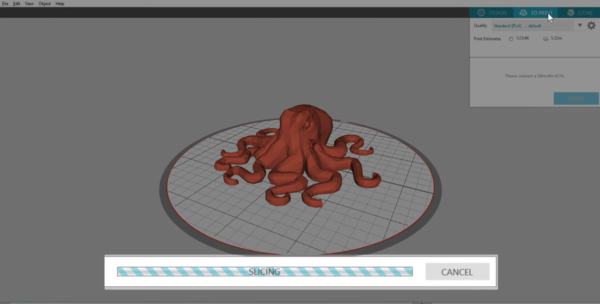
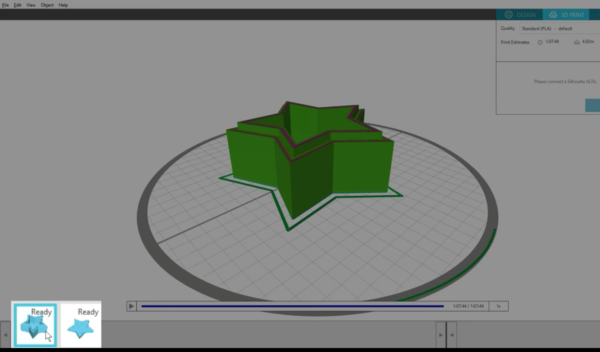
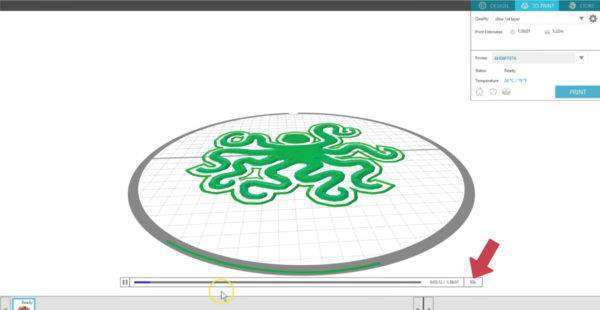
Slicing and printing are mostly interchangeable terms when talking about 3D printing. Silhouette 3D™ automatically constructs a 3D model according to the default print settings, and you can see how the printer will construct and print your shape.
If you have objects on your work page that are not grouped, the software puts each into its own print job, which you can see at the bottom of the window.
If your Silhouette Alta® is not yet connected and turned on, you should do that now.
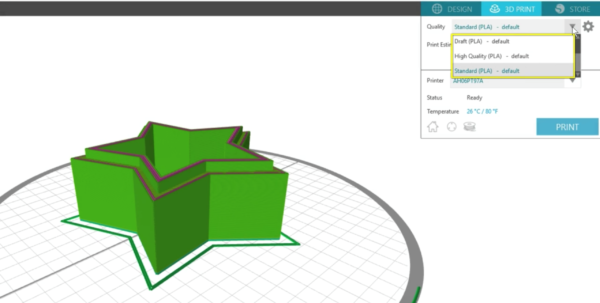
You have three preset quality settings for Draft, High, and Standard. The setting you choose depends on what kind of 3D print you’re making. A model for test purposes that doesn’t need to last long is probably fine with Draft print settings. For a model that needs to look nicer, the high-quality print setting is more appropriate. Standard is somewhere in between.
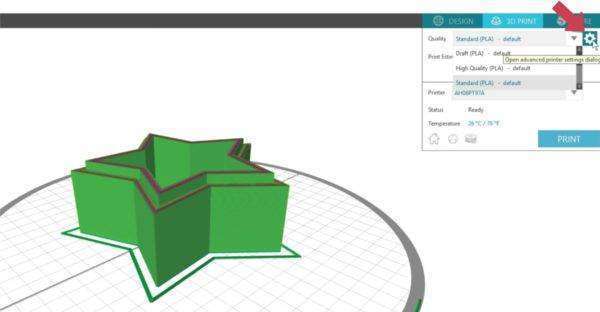
You can also change any preset print settings to create your own print profiles by clicking on the gear icon here. The settings you choose will depend on what you’re making and what you want to use it for, and you’ll find those kind of recommendations as you discuss and read online resources for 3D printing with PLA material.
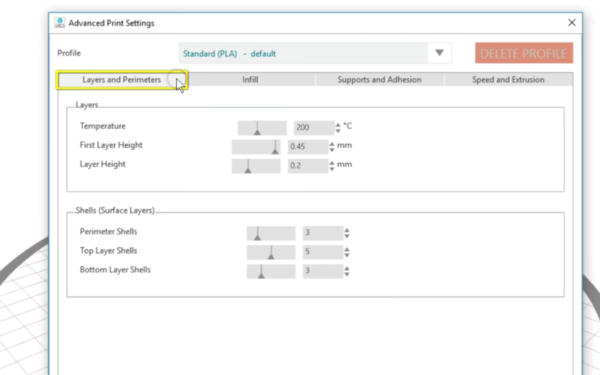
Start with an existing profile, and then make your adjustments in these tabbed sections. Changes can be saved as a new profile and will not save over one of the three default profiles.
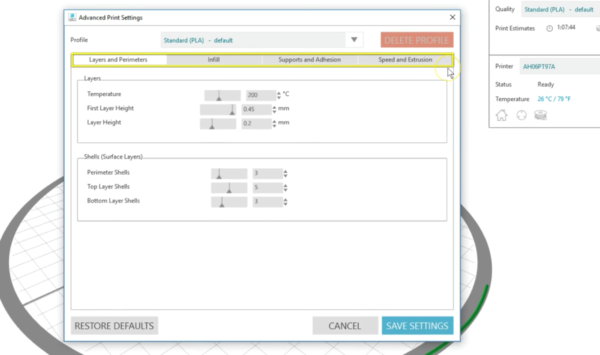
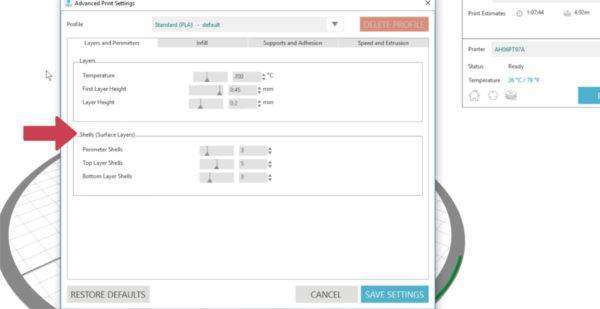
Layers and Perimeters is where you can adjust temperature, layer heights, and shells. As you hover your mouse over these settings, you’ll get a helpful popup hint that explains a little more about each setting. Temperature is for the temperature of the filament layers of the 3D print. This is what you would adjust if you are having trouble with webbing or with brittle prints. First layer height is for the height of the first layer of your printed image. This first layer is important because it’s the foundation of your print. Layer height is for the height of each layer of filament, which is comparable to a resolution setting. Thicker layers mean less detail.
Shells is another name for Surface Layers, and this is where you adjust the number of each kind of shell. Perimeter shells adjust how many layers will print AROUND the infill and are not part of the infill itself. Top-layer shells adjust how many layers print on top of the print. Bottom-layer shells adjust how many layers will print at the bottom of the object.
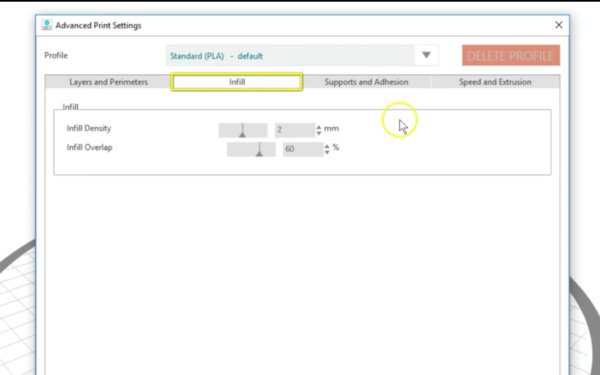
The next tab is for Infill. Infill density controls how much plastic is printed inside your model, or the thickness of the support material inside your design. Infill Overlap controls how much the infill overlaps the edge walls of the print. This can be adjusted to prevent gaps between the perimeter and top layers.
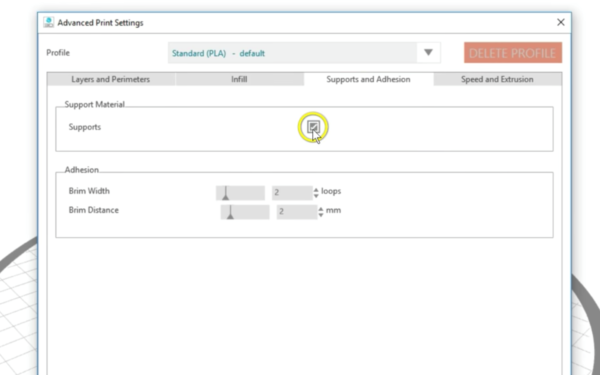
The next tab is Supports and Adhesion.
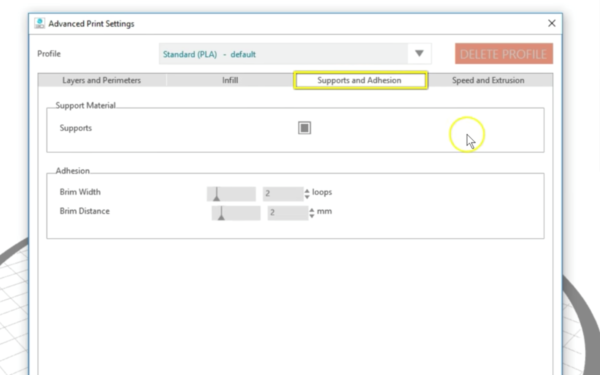
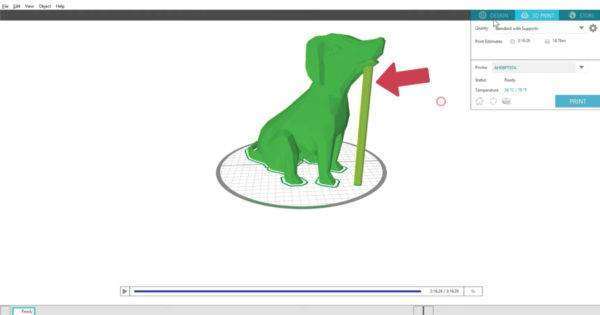
The Supports setting is off by default but can be checked on to add support material if the object has any pieces that will print at an angle greater than 45 degrees. This enables those overhanging parts of a model to print correctly.
Adhesion relates again to that important first layer.
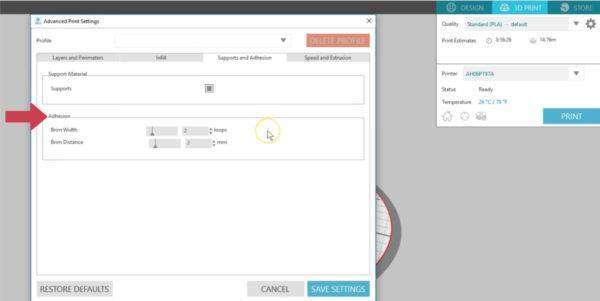
Brims help stick the first layer to the bed. Brim Width determines how many perimeter loops go around the first layer to help support the base and reduce warping. More loops for a wider brim make it less likely to come unstuck from the print bed. Brim Distance controls the size of gap between the brim and the first layer. A 0 mm distance actually connects the brim to the model, which can then be pulled away once cooled. Here you can see that extra wide brim we created.
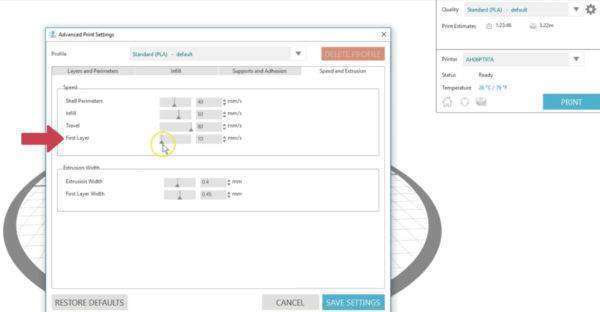
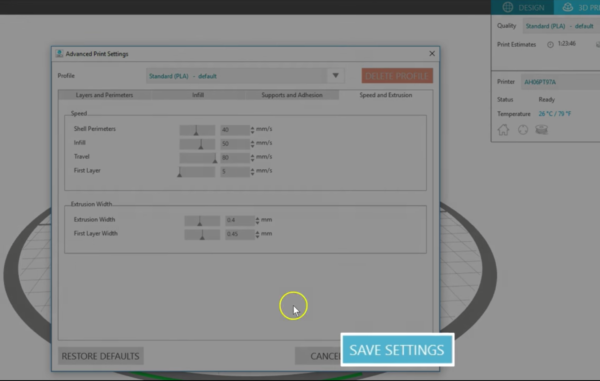
The final tab for adjusting print settings is Speed and Extrusion.
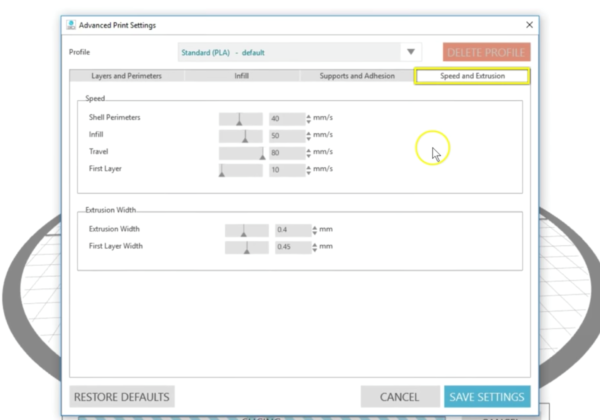
You can change the speed at which each layer is printed. This often depends on the quality of the print and temperature of the filament. Generally the faster the machine is printing, the lower the print quality. Here’s the first layer speed, so if you have trouble with warping or the model coming off the bed during printing, you may choose to reduce the first layer speed. If you lower your temperature in the Layers and Perimeters tab, you may want to increase your print speed.
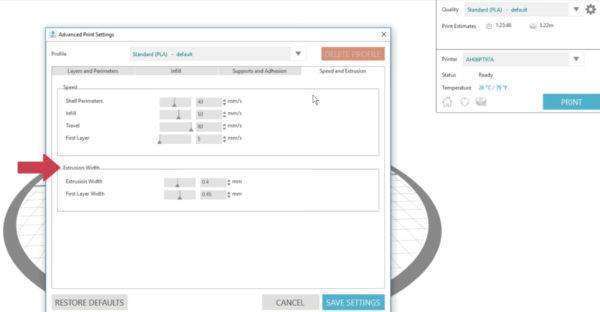
Extrusion Width controls how thick or wide each layer is when printed.
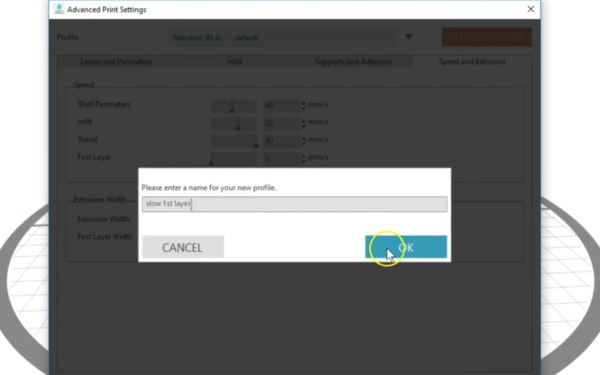
If you make changes to the print settings, you’ll be prompted to save your changes as a new print profile.
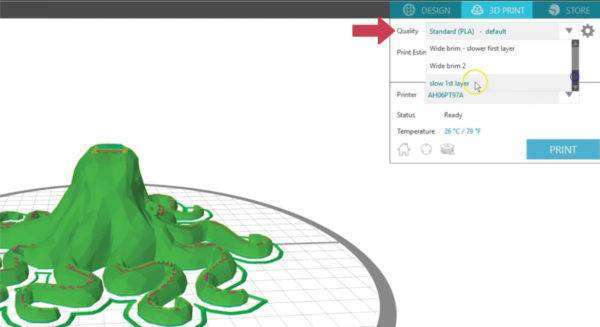
Any of the default or user-created profiles can be selected from the Quality drop-down list.
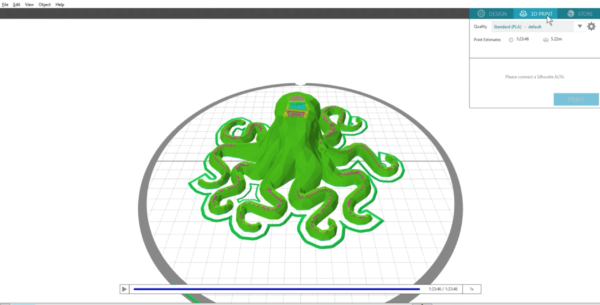
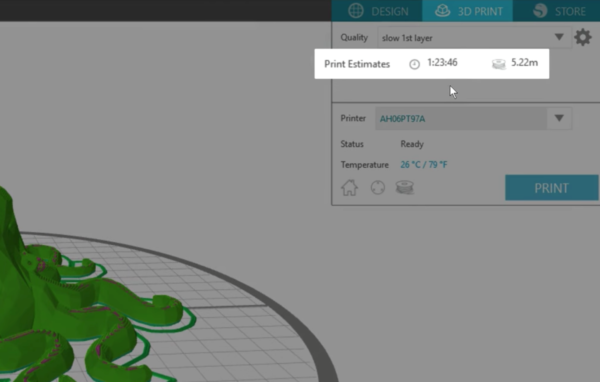
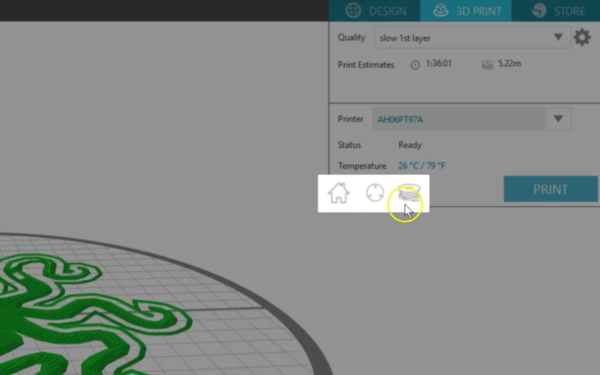
You’ll always see a print estimate time and material usage estimate, and this changes based on your print profile. Adjustments like the High Quality print setting and slower print speeds increase your printing time and material usage. You’ll see a visual difference in the print project for these changes, such as the addition of supports or wider brims as we’ve shown you.
You can even press play to see how the print will be made and adjust the speed at which the preview plays.
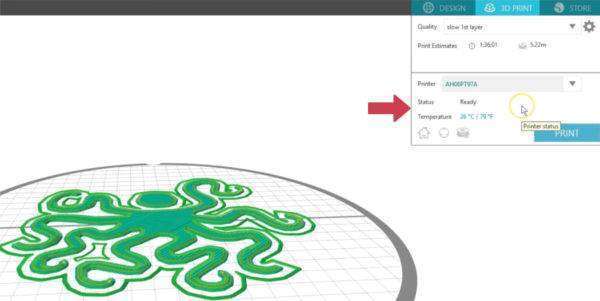
This 3D Print tab also shows the printer selected, its current status, and current temperature.
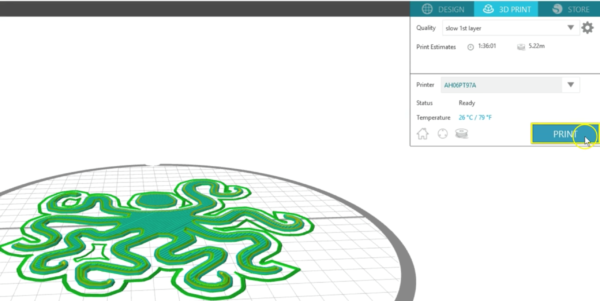
When you’re ready to start your 3D print, click Print.
When you’re not printing, you can use these icons to move the print head to home position, calibrate the print head, and change the filament. The calibration and filament-changing options lead you step-by-step through the process with easy-to-follow on-screen instructions.
That’s it for adjusting print settings in Silhouette 3D™.
Kelly Wayment
June 28, 2024
You can use it with vinyl as long as it is smooth and flat to allow the static charge to hold on to it. Rolled vinyl that wants to go back to its rolled shape will not necessarily work well, and it would need to be trimmed to fit the ES mat cutting area.
Kelly Wayment
June 28, 2024
Yes, you can use the heat pen while using the ES mat. 🙂
Yurii
March 2, 2024
Hello. May it be used with heat pen?
Thanks
Jerome
February 24, 2024
Hi, works this with the normal vinyl foils or only with printer papter etc?
Kelly Wayment
February 16, 2024
Once you’ve pushed the mat up against the rollers, just press the “Load” arrow button (bottom right on the display). Does a regular sticky mat load into the machine for you?
Michelle a goodall
January 24, 2024
Hello! I just got my new electrostatic mat and have watched every video i can find on it. However, what i can t find is why it wont feed into my cameo 5/ it slides right up the rollers but wont go any further. and yes- iam pushing the into button. help!