Printable heat transfer is one of the most versatile materials that Silhouette offers. You can print any design and put it on any fabric surface. Today we’ll show you how to create and apply this applique to a onesie as well as how to create a gift box for it. It’s really easy—we promise! Follow along to see how it’s done!
Supplies Needed:
- Silhouette CAMEO® or Silhouette Portrait®
- Silhouette Cutting Mat
- Silhouette Cutting Blade
- Silhouette Studio®
- Printable Heat Transfer – Light Fabrics
- Printer
- Onesie
- Design ID #271649
- Design ID #13190
- Design ID #41611
Step One: Prepare the Design to Cut
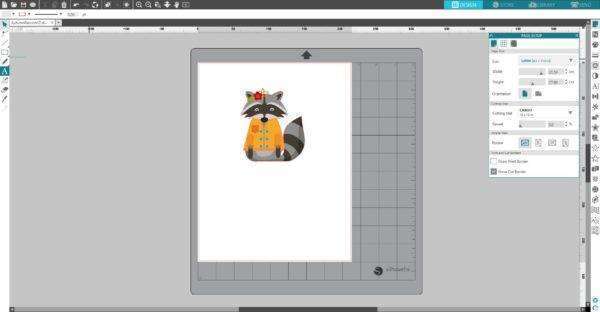
1. Open the “Autumn Racoon” design (Design ID#271649) in Silhouette Studio®. In the Page Setup panel, change page size to Letter. Resize the design so that it will fit on the onesie.

2. MIRROR THE DESIGN SO THAT IT IS REVERSED. To do that, select your image. Then go to the Object menu (top left panel on the screen), select Mirror, and then Flip Horizontally. Or you can right-click your image and select “Flip Horizontally.”
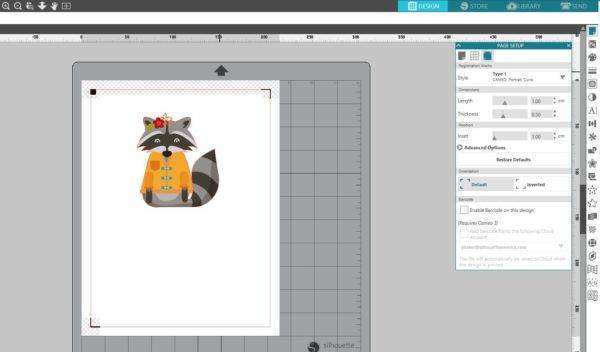
3. In the Page Setup window, turn on the registration marks by setting the style to Type 1.
4. Feed the Printable Heat Transfer material into your inkjet printer so that it will print on the blank side (not the grid side).
![]()
5. Place the printed sheet on your mat and feed it into your Silhouette machine.
![]()
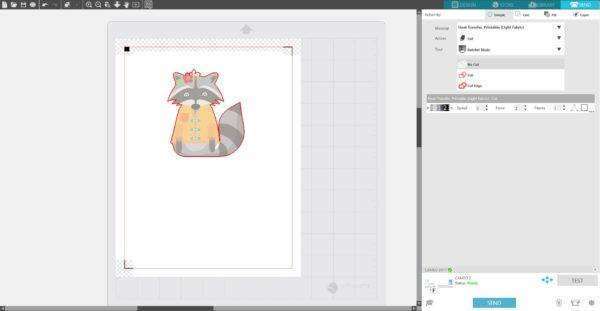
6. In the Send panel, choose “Heat transfer, printable (light fabric)” as your material type. Adjust your blade if necessary and send your cut job to your Silhouette machine.
Step Two: Apply the Heat Transfer to the Onesie
1. Peel the excess transfer material away leaving only your design on the film backing.
![]()
2. Place the sheet face down on your fabric with the film backing on top and cover the film with a cloth or excess fabric. With an iron (on the cotton setting) press down on the image for 30–40 seconds.
![]()
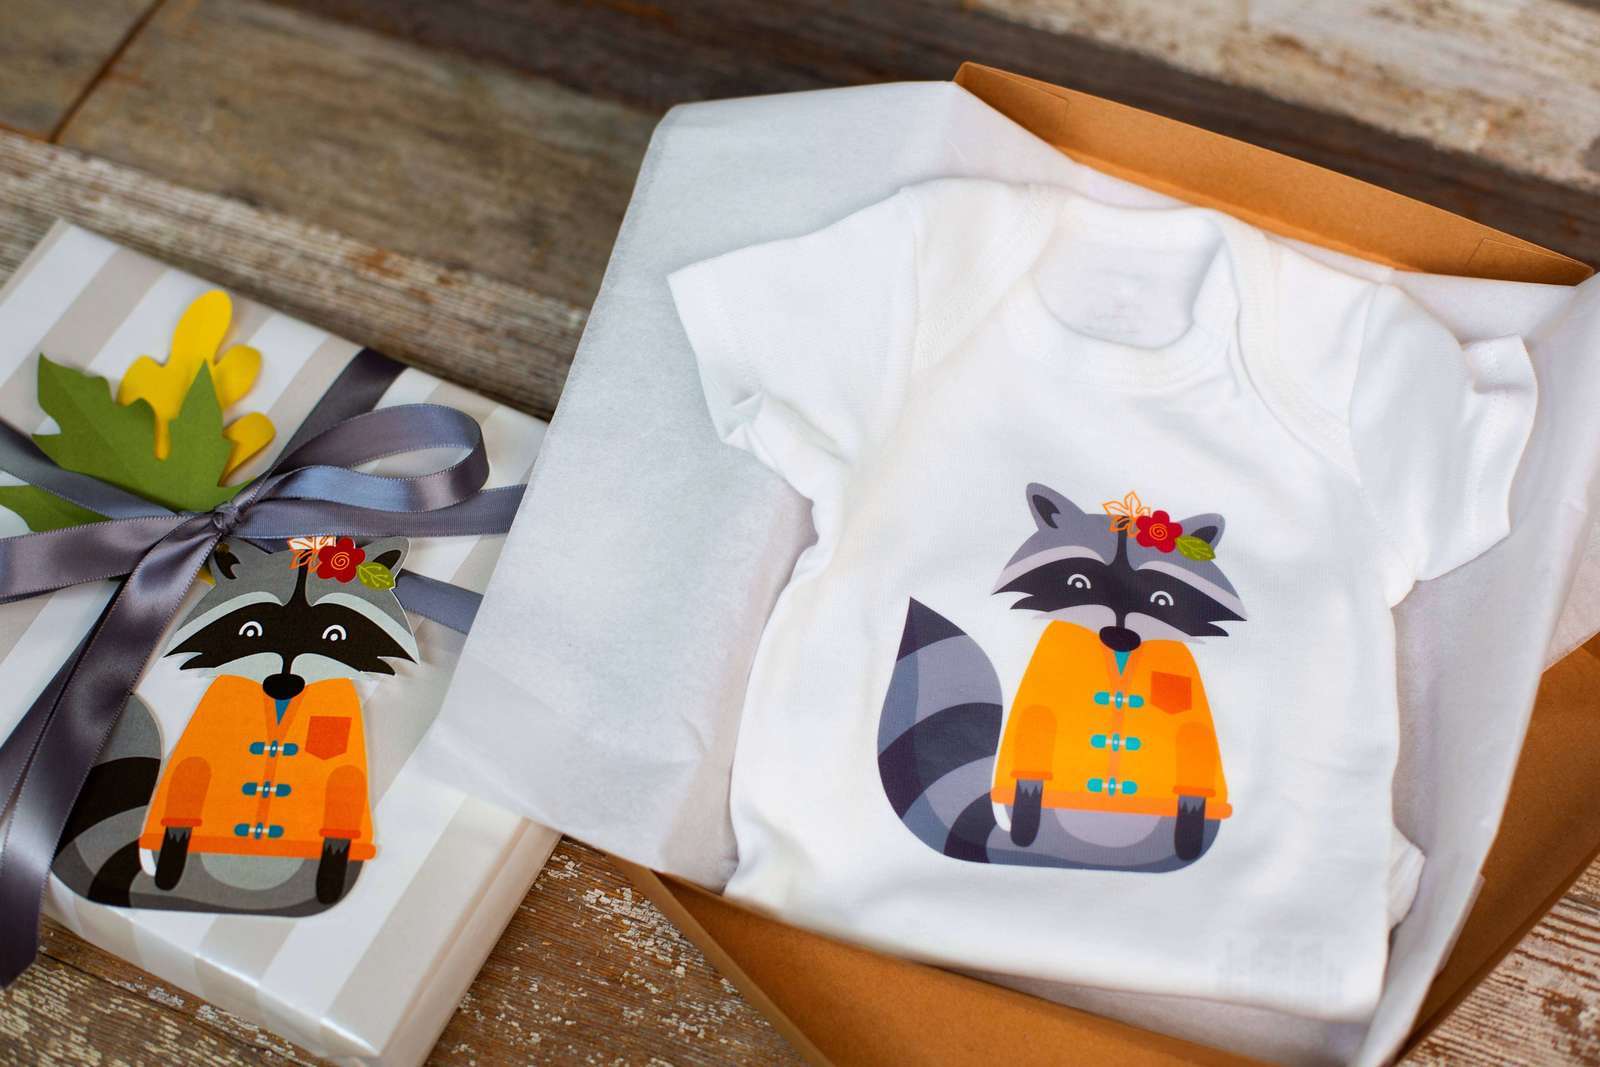
3. Allow the fabric to cool before peeling off the heat transfer backing. We’ve finished our onesie! For longer lasting results, wash your clothing inside out on a cold, gentle cycle and tumble dry.
![]()
Step Three: Arranging a Gift Box
1. Make your own box using Design ID #41611 and wrap it. Print a raccoon design on the white cardstock and cut it with your Silhouette. Also you can add some leaves cut from colored cardstock (Design ID #13190) to your gift box.
![]()
Nasze Naturalne
September 3, 2025
Your authentic voice really shines through in everything you create and share
Naszenaturalne
September 2, 2025
Really love your style
Kelly Wayment
June 28, 2024
You can use it with vinyl as long as it is smooth and flat to allow the static charge to hold on to it. Rolled vinyl that wants to go back to its rolled shape will not necessarily work well, and it would need to be trimmed to fit the ES mat cutting area.
Kelly Wayment
June 28, 2024
Yes, you can use the heat pen while using the ES mat. 🙂
Yurii
March 2, 2024
Hello. May it be used with heat pen?
Thanks
Jerome
February 24, 2024
Hi, works this with the normal vinyl foils or only with printer papter etc?