Silhouette ModelMaker™ is capable of producing a Print & Cut document that can be cut with a Silhouette machine. When your models are designed and ready, you can print the document in the Output Window with registration marks on a home printer, and then that document can be cut with a Silhouette machine. You can also choose to skip the printing if you don’t need the colors on screen, and directly cut it with the material of your choice with a Silhouette machine. Let’s look at a Print & Cut first.
Registration marks are needed on printed documents in order to align the printed page properly on the Silhouette machine. To make sure registration marks will print, go to File > Fabrication, and choose Use Registration Marks.

You’ll notice that you now have less printable area in the Output Window. Rearrange the nets in the Output Window so they fit within the printable area, as shown by these borders.
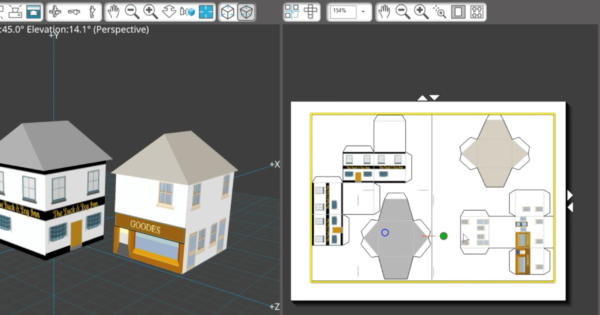
That includes choosing a different permutation if the shape allows it.
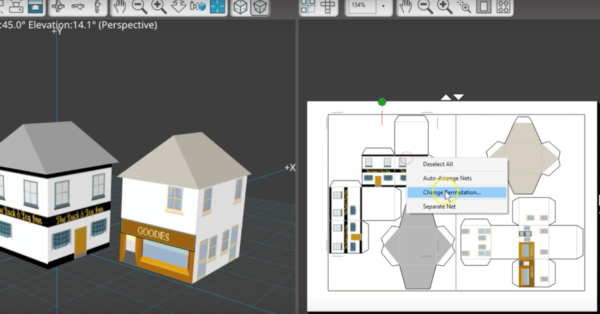
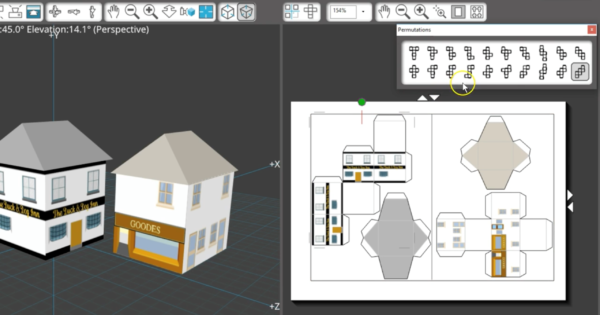
For more information on arranging shapes in this window, check our tutorial on the “Output Window and Nets in Silhouette ModelMaker™.”
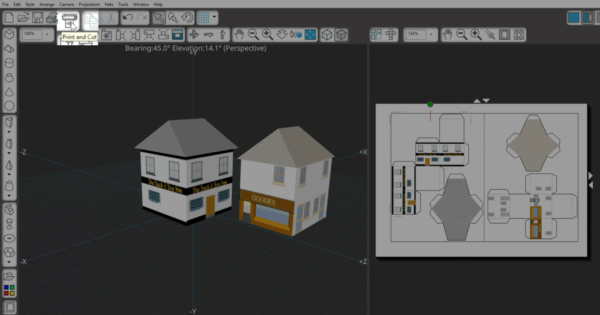
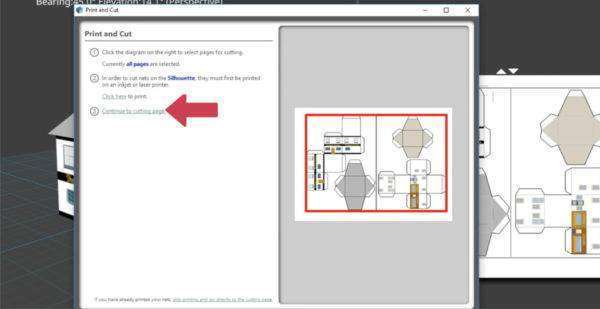
These pages are ready to Print & Cut, so just click the cutting machine icon. The pop-up says Print and Cut.
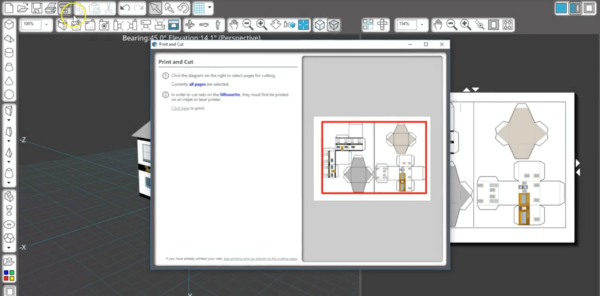
The dialog box that comes up lets you choose which pages to print. The red border shows which pages are selected to print. Then click here to print.
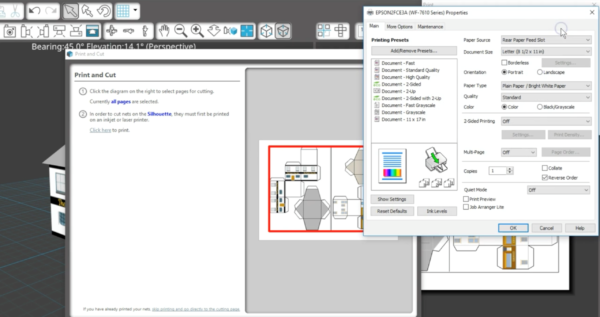
You can enter a name or skip it. A name is helpful in a classroom setting where one printer may be used for many similar printouts.

Now you can select your printer and choose specific properties, such as print quality and orientation.
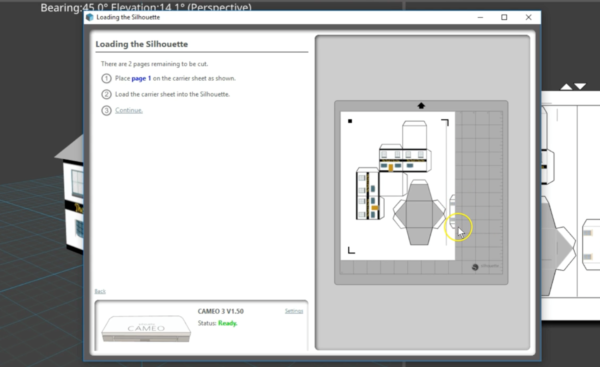
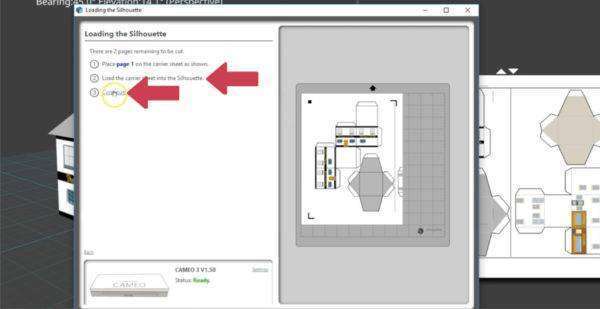
The pages have now printed with registration marks, and we are ready to cut, so we will click Continue to cutting page.
The software recognizes your machine if it’s turned on and connected, and it tells you which page to place on the cutting mat.
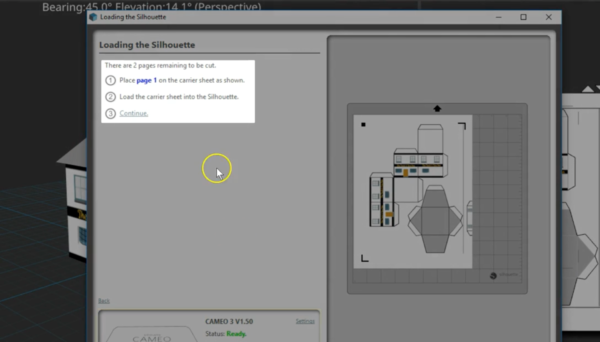
Page numbers are printed on the document, along with the name if you chose to name your document. Use the visual representation to see where to place the paper on the mat. Don’t worry if you get a little extra printout on your page if your shapes are tightly spaced. As long as you’re within the borders in the Output Window, the designs will cut just fine.
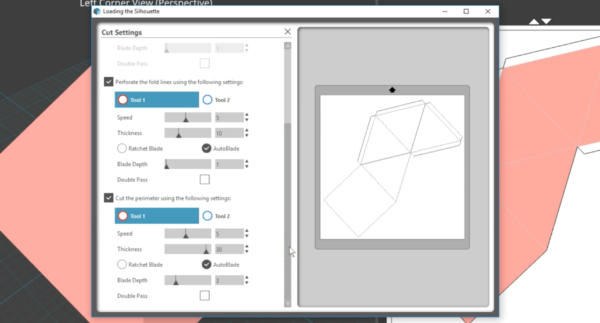
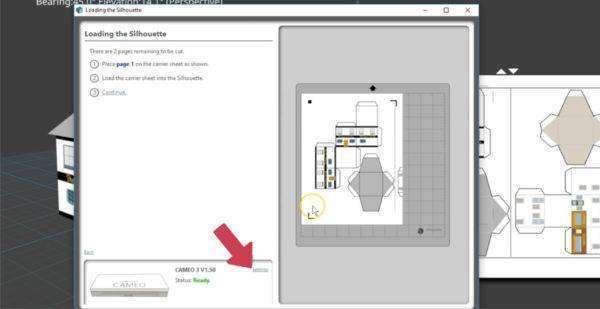
Check your mat and cut settings by clicking here for Settings.
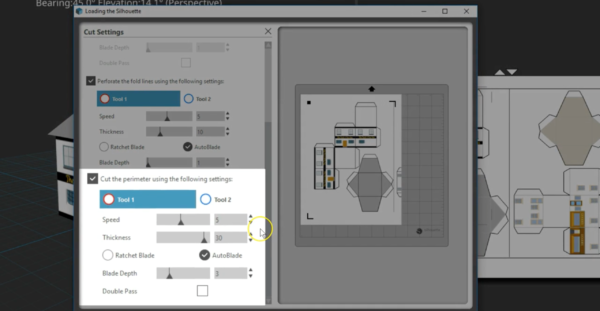
Choose Score OR Perforate for the fold lines, and change the settings if necessary. We are using cardstock, so would choose 1 for scoring thickness and blade depth. To perforate cardstock, we use thickness 10 and blade depth 1. Choose ratchet blade or AutoBlade and Tool 1 or 2, depending on your machine and preference.
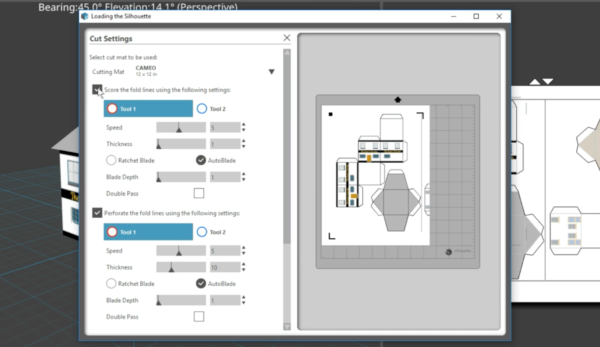
We’ve set it to cut the perimeter with speed 5, thickness 30, and blade depth 3, which is what we use for most smooth cardstock.
Click X to close, and then follow the instructions to load the carrier sheet or cutting mat into the Silhouette. Click Continue.
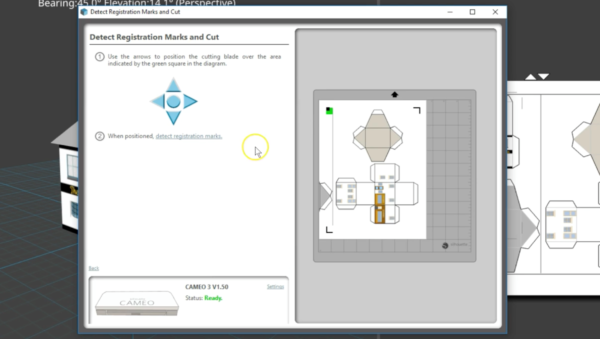
Click to detect the registration marks automatically, and the optical eye will read the marks. If it’s successful, click to Cut page 1.
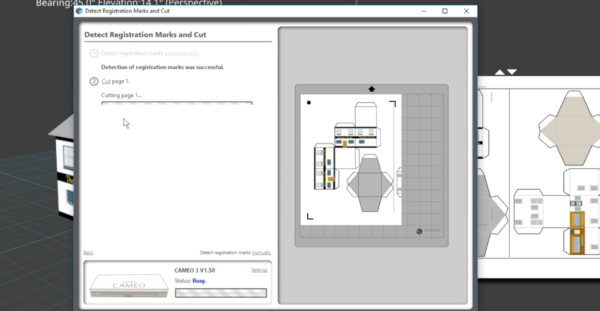
It will score or perforate first, followed by cutting the outside edges. Unload the mat, remove the cutouts and excess paper, and follow the instructions to continue with subsequent pages.
If you have a registration-mark failure, click to detect manually, then follow the instructions and use the arrows to position the blade over the upper left square, and detect manually.
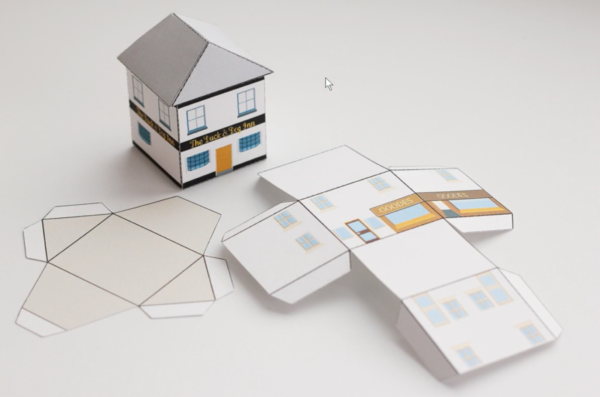
That’s how to Print & Cut in ModelMaker™. These buildings are ready to assemble.
But you may want to simply cut a shape from colored cardstock and don’t need to print any colors or textures. To cut without printing is simple. Go to File > Fabrication, and choose No Registration Marks.

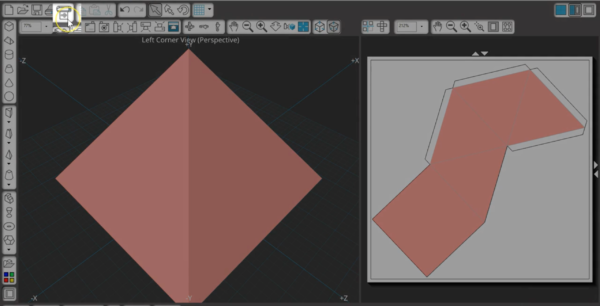
If you’re using a CAMEO, you can cut up to 12-inch-by-12-inch paper by changing the paper size. To do this, go to File > Custom Paper Size. On the window that comes up, you can choose from a variety of presets, including 12 inches by 12 inches.
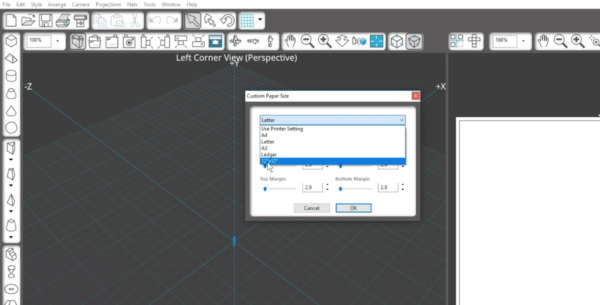
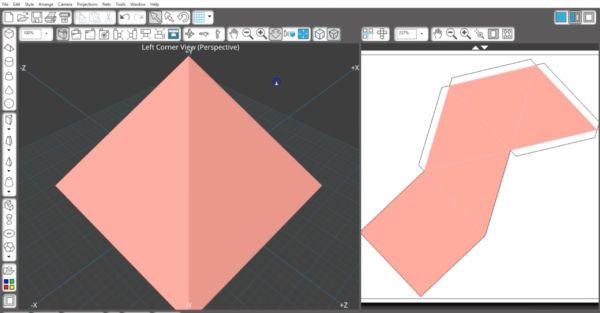
For this design, I’ve got quite a large pyramid I want to cut, but I can fit it on a 12 x 12 page.
This time when I go to the button for cutting, it simply says Cut.
There are no registration marks involved, so it simply tells me to place my paper, load the mat, and cut. If there were multiple pages, you would see additional instructions for subsequent pages.
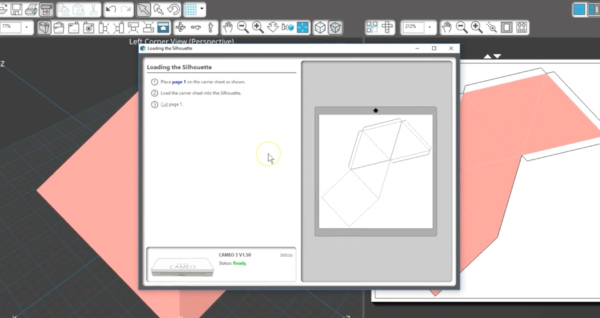
Remember to click on Settings and choose the blade settings you need for your material, just like we did with the Print & Cut.