
We love everything pumpkin! Whether it’s pumpkin cookies, pumpkin pie, carving pumpkins, or paper pumpkins: we love it all. So can you guess what our inspiration was for today’s post? That’s right—PUMPKINS!
Supplies Needed:
- Silhouette CAMEO® or Silhouette Portrait® or Silhouette Curio™
- Silhouette Cutting Mat
- Silhouette Cutting Blade
- Silhouette Studio®
- Orange Cardstock
- Glue
- Design ID #226308
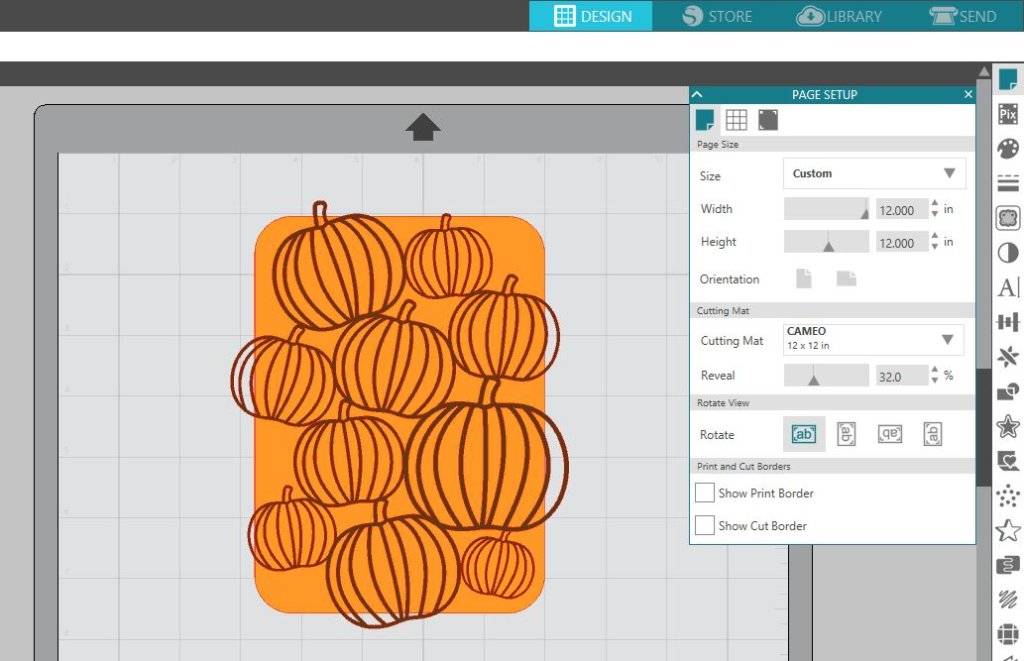
Step One: Set Up The Design
- Select the Page Setup icon located on the toolbar on the right-hand side of your page. Adjust your page width and height to 12 inches by 12 inches. We are using the CAMEO, but if you are cutting with another machine, set the width and height according to the dimensions of your machine’s workspace.
- Locate Design ID in your library and double-click to open the design in Silhouette Studio®.
- Adjust the size of the design by selecting it entirely and dragging the outer corner to make it larger or smaller. We wanted our card to be about 7 inches by 5 inches.
- Now that the card is to your desired size, it is time to cut it out.
Step Two: Cut The Design
- When cutting your card, you will want to separate each layered piece or else your machine will cut the project incorrectly. Pull the Pumpkin part of the project off the cutting mat in Silhouette Studio® to cut the backing first.
- Now select the Send icon in the top right-hand corner of Silhouette Studio®. Select the material you are cutting and adjust your blade to the correct blade setting. If you are using an AutoBlade, do not worry about adjusting your blade manually.
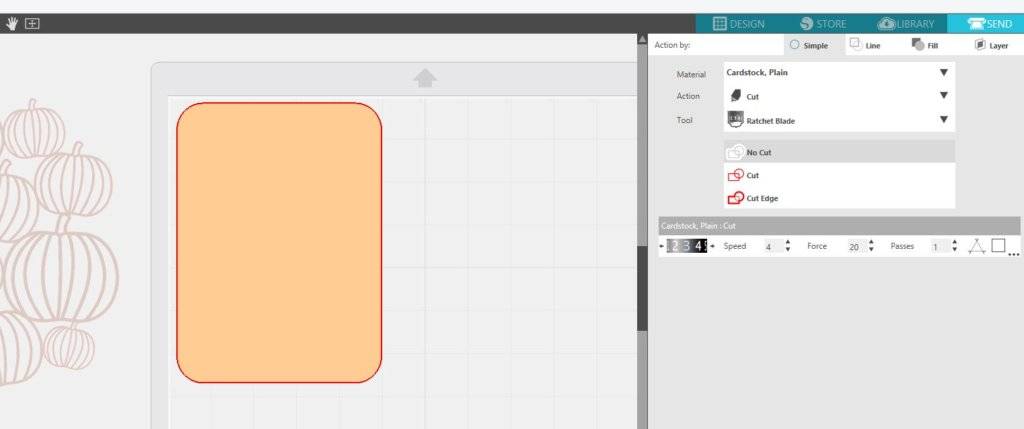
- Load your card stock onto your cutting mat and hit Load on your machine. When you are ready to perform the cut, click Send.
- After the backing is cut, go back to the Design page and place the pumpkin design onto the cutting mat.
- Select the Send icon once more and adjust the material and blade setting if needed.
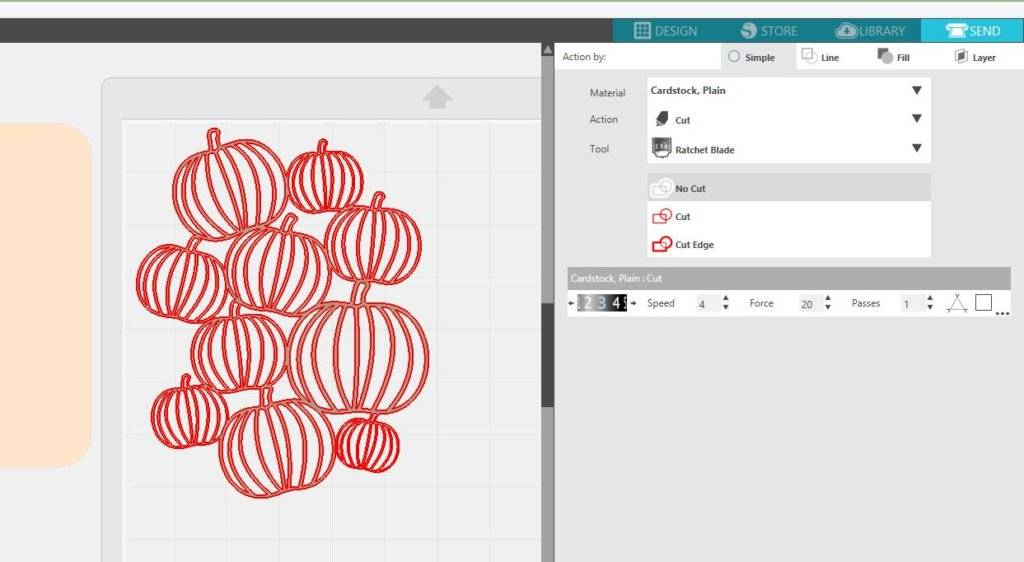
- Load a different colored cardstock onto your cutting mat and hit Load on your machine. When you are ready to perform the cut, click Send.
- When removing the pumpkin design from your cutting mat, be very careful because the design is delicate.
Step Three: Assemble
- Gather your back piece, pumpkin piece, and glue. Flip over your pumpkin piece and add small drops of glue all around your design. Because the design is very thin, you will want to add lots of tiny dots to ensure that it’ll stick (Tip: Remember to not place glue on the pieces of your design that will hang over the backing of the card).
- Instead of flipping your pumpkin part over the backing of the card, simply place the backing face down on your card. This will make it easier to center the design.
- Allow the glue to dry and, voila, you’ve got a perfect fall-layered card!
Nasze Naturalne
September 3, 2025
Your authentic voice really shines through in everything you create and share
Naszenaturalne
September 2, 2025
Really love your style
Kelly Wayment
June 28, 2024
You can use it with vinyl as long as it is smooth and flat to allow the static charge to hold on to it. Rolled vinyl that wants to go back to its rolled shape will not necessarily work well, and it would need to be trimmed to fit the ES mat cutting area.
Kelly Wayment
June 28, 2024
Yes, you can use the heat pen while using the ES mat. 🙂
Yurii
March 2, 2024
Hello. May it be used with heat pen?
Thanks
Jerome
February 24, 2024
Hi, works this with the normal vinyl foils or only with printer papter etc?