
Sometimes I want to make a cute seasonal project that is fast and inexpensive. Here’s an idea for a quick spring welcome sign that uses vinyl on a dollar-store sign, along with paper or premade wooden accents.
I’ve got two variations of this welcome sign – one for general springtime and one for Easter. Both use the same base wooden sign blank. You can adapt the size of your elements to fit whatever blank you are using.
Supplies:
- Silhouette Cameo® or Portrait®
- Cutting mat and 1mm blade
- Silhouette Studio® Software
- Adhesive vinyl
- Transfer tape
- Wooden sign blank (approx. 15.75 in. x 5.75 in.)
- Cardstock in white + spring colors (optional)
- Wooden bunny cutouts (optional)
- Weeding tool
- Adhesive or hot glue
- Design ID #40897 by Jillibean Soup
Step One: Cut Top Portion of Design
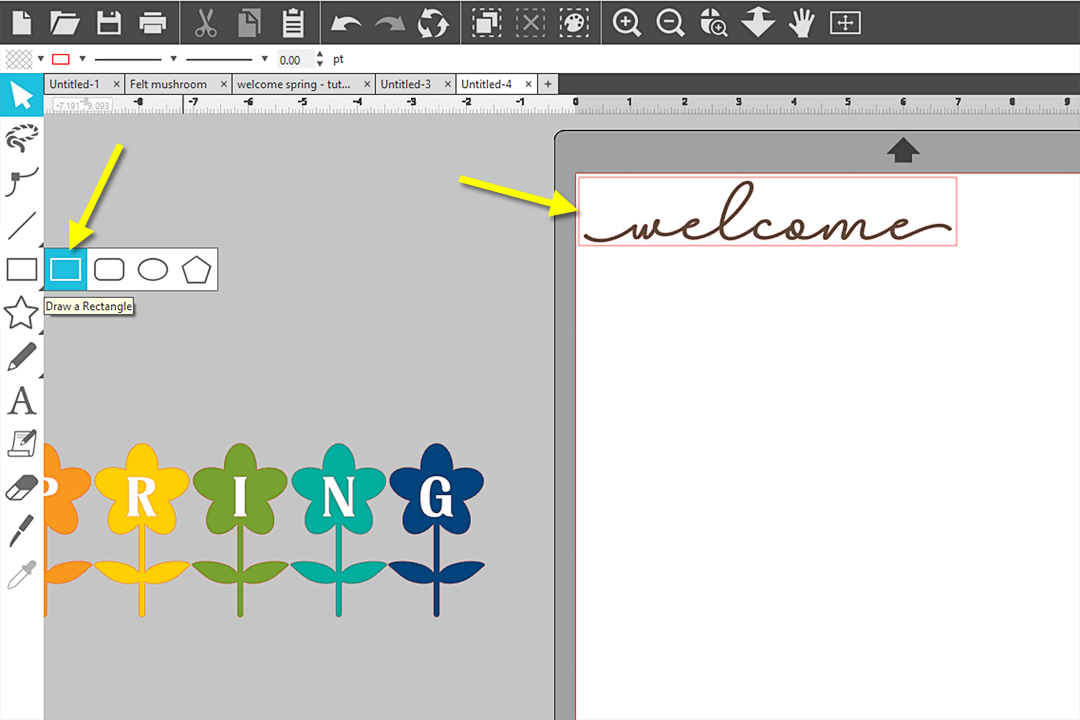
In Silhouette Studio®, open the Welcome Spring design.
Ungroup the design once.
Measure the space available on your frame for the design. If using the Dollar Tree wooden sign blank that measures 15.75 in. x 5.75 in., then you have a little over an inch in height available for the “welcome” portion.
Select just the “welcome” part of the design and resize it to 1.125 in. tall in the Scale section of the Quick Access Toolbar (keep the aspect ratio locked before inputting 1.125 in. as the height).

Move the flowers off into the blank holding area of the screen so only the “welcome” sentiment remains on the virtual mat.
Position the “welcome” on to the virtual mat in the upper left corner to save material. Make sure your Page Setup Panel settings match the machine and mat and media size you are using. I’m cutting from a small segment of 12-in. wide vinyl, so I’m using my cutting mat.
If you want, draw a rectangle around the “welcome” to create a weeding box for ease of weeding.
Go to the Send Panel and set your Material to “Vinyl, Glossy” and adjust your settings based on a practice cut on this material.
Tip: I typically use Blade Depth 2, Force 8-10, Speed 5-10 for Silhouette adhesive vinyl when my blade is in average condition, and that works for most brands of smooth vinyl I’ve tried. Always test cut first!
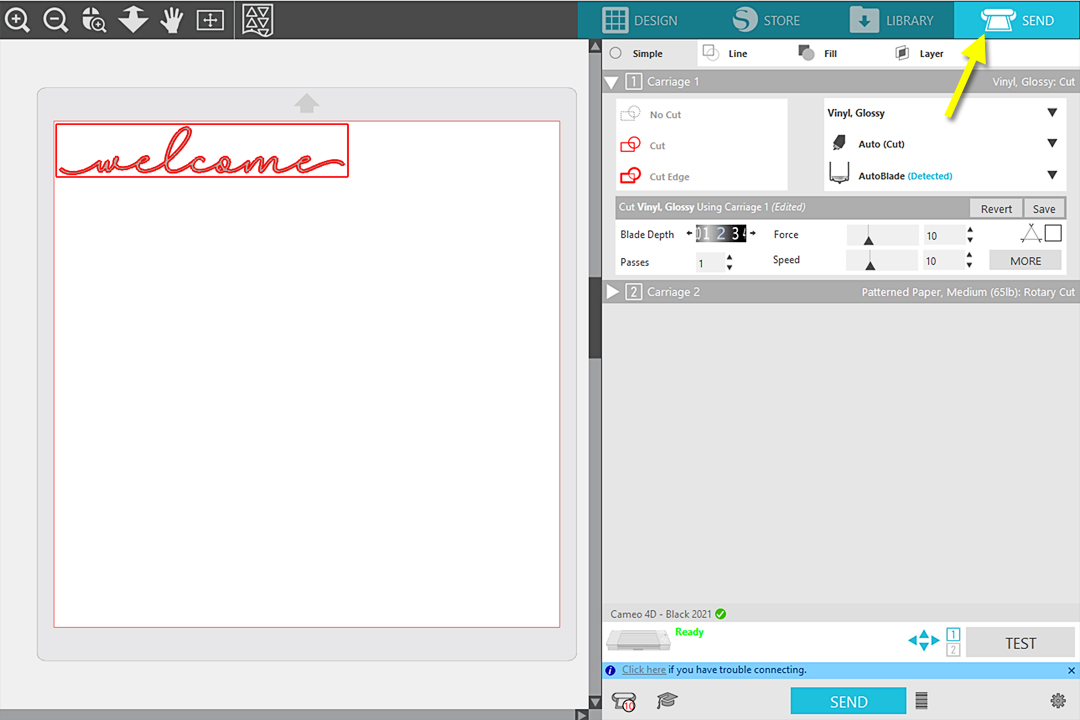
Place your adhesive vinyl on your cutting mat and load it into the machine (or load your vinyl directly into the machine, if you have set it up that way).
Send to cut when ready.
Unload and weed away the excess vinyl.
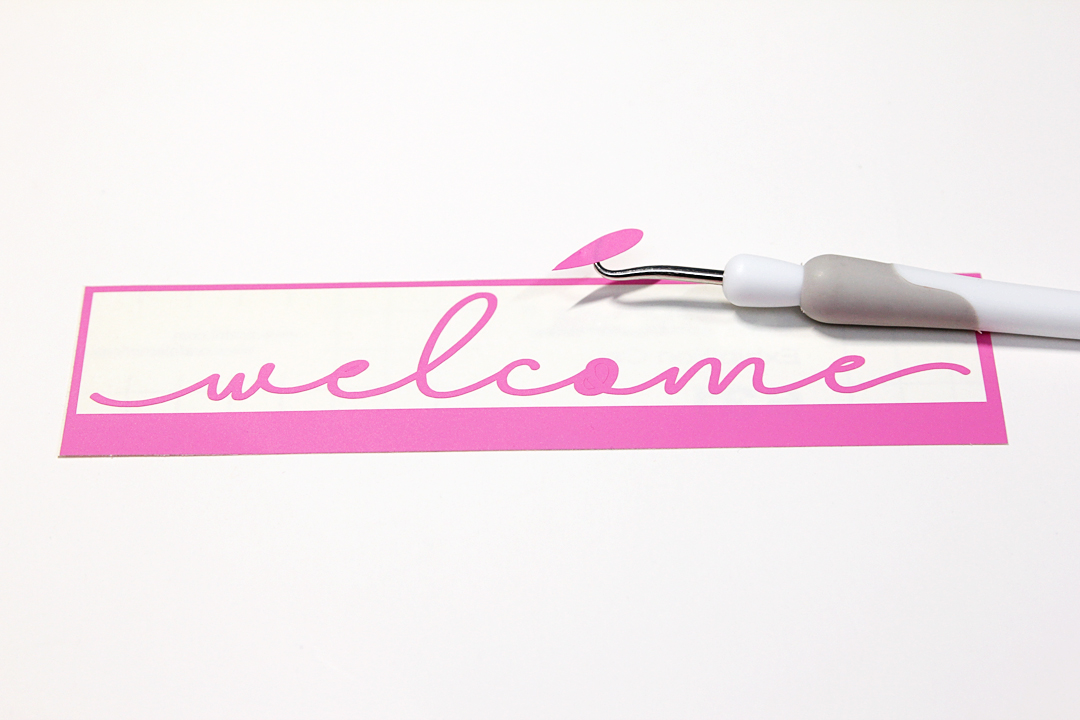
Use transfer tape to lift the design and place it in the top center of the wooden sign. I like to enlist the help of a ruler when centering my vinyl.
Remove the transfer tape and save it on its backing for another job later.
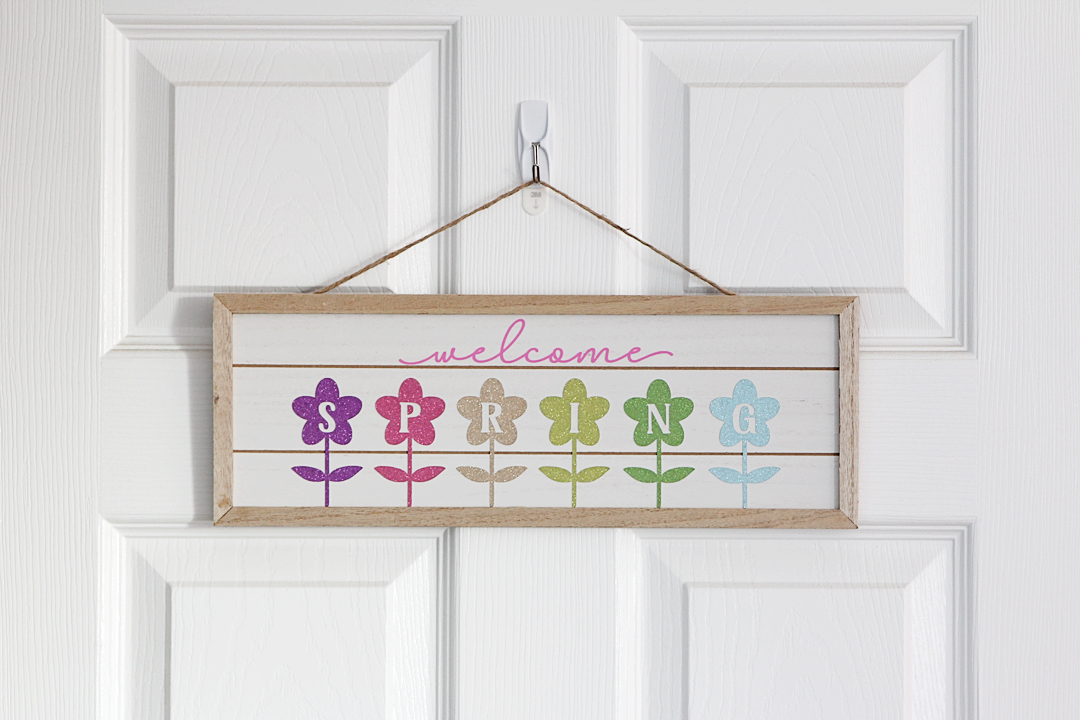
Step Two: Add Flowers (Option 1)
This next section tells how to add the lettered flowers to your sign. If you prefer to make an Easter sign with bunnies, move on to Step Three.
Go back to the Design Tab and move the “welcome” sentiment off the virtual mat.
Bring the spring flowers to an area you can work with them easily.
Ungroup the flowers, then click and drag a white portion of the flower layer to drag it away from the colored pieces.
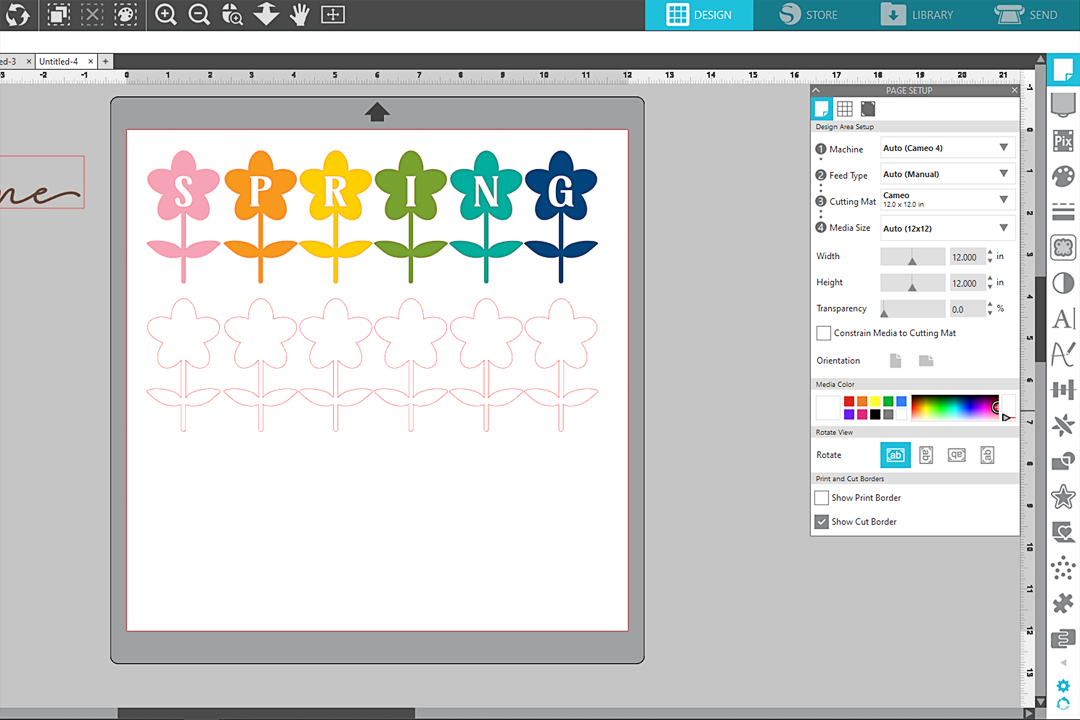
If your wooden background is white, you can discard the white flower layer. If your wooden background is dark or busy, you should cut out the white flowers from white cardstock to layer underneath the colored flowers.
You will need to select colored pieces of cardstock in whatever spring colors you like. You can use plain cardstock, glitter cardstock, or even vinyl. This part is up to you! I cut my flowers with six different colors of thin glitter cardstock in spring colors.

Any flower you are not actively cutting can be moved over to the holding area of the Design Page. Only the items within the cutting area on your virtual mat will cut.
Remember to test cut to make sure your settings are correct for each type of media.
Save the centers of the P and the R for manual placement as you attach the flowers to the wooden sign.
Glue each letter onto the frame. Again, I find it helpful to use a ruler for placement.

Step Three: Add Bunnies (Option 2)
This variation of the sign uses premade wooden bunny cutouts from the Dollar Tree instead of flower cutouts. You can use any wooden cutouts you like, or cut out bunnies from cardstock or vinyl. Design ID #316190 is a good option for bunnies to cut with your Silhouette machine.
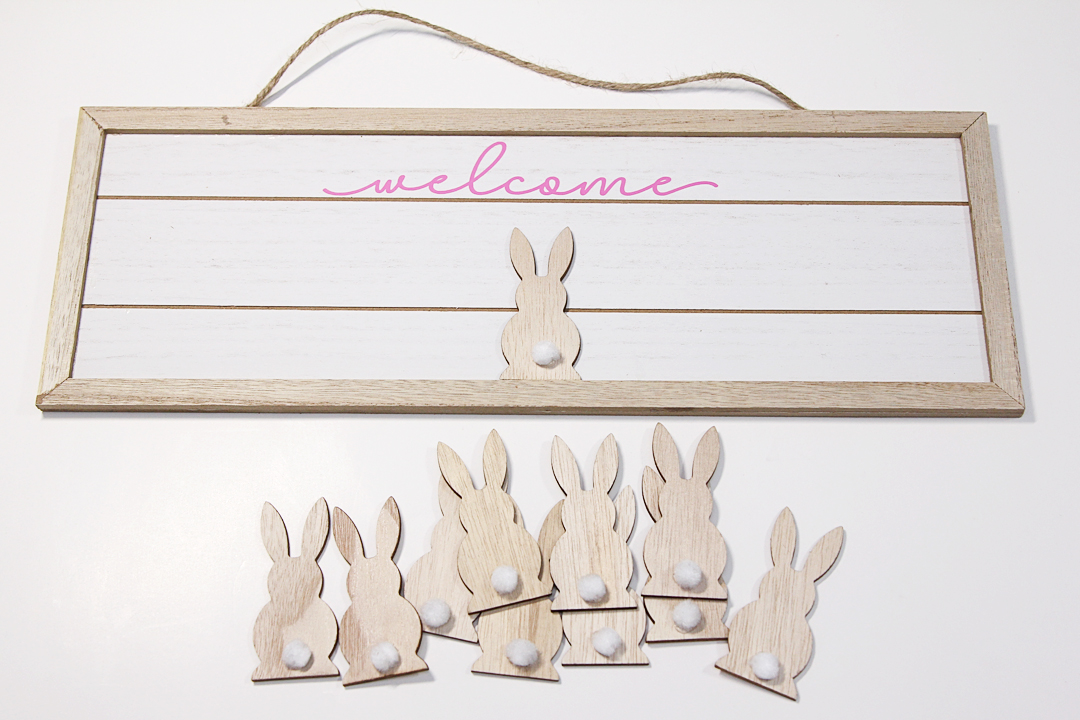
Dry arrange wooden bunnies across the bottom of your wooden sign. Use as many or as few as you like.
Hot glue the bunnies in place.
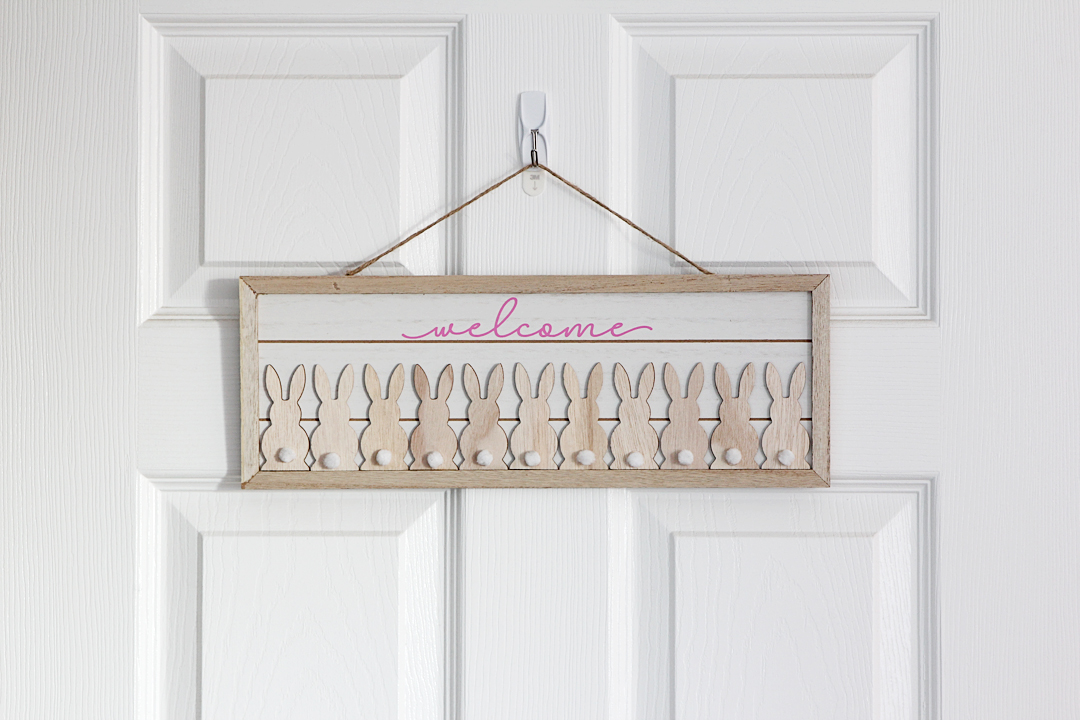
No matter which variation of the sign you make, I hope it brings a little springtime cheer into your home!
 Free Class - Father's Day Apron Set
  Free Class - Custom Graduation Tumbler
Nasze Naturalne
September 3, 2025
Your authentic voice really shines through in everything you create and share
Naszenaturalne
September 2, 2025
Really love your style
Kelly Wayment
June 28, 2024
You can use it with vinyl as long as it is smooth and flat to allow the static charge to hold on to it. Rolled vinyl that wants to go back to its rolled shape will not necessarily work well, and it would need to be trimmed to fit the ES mat cutting area.
Kelly Wayment
June 28, 2024
Yes, you can use the heat pen while using the ES mat. 🙂
Yurii
March 2, 2024
Hello. May it be used with heat pen?
Thanks
Jerome
February 24, 2024
Hi, works this with the normal vinyl foils or only with printer papter etc?