
One of my favorite things about using a Silhouette machine is being able to customize things for friends and loved ones without breaking the bank. This cute design is from the Silhouette Design Store, applied with color-changing vinyl to a thrift-store mug. Check out the tutorial below!
You Will Need:
- Silhouette Cameo® or Portrait®
- Silhouette Studio® Software
- Mug (with straight sides)
- Heat-sensitive color-changing vinyl (available from various vinyl suppliers or on Amazon)
- Transfer tape
- Hook tool
- Cutting mat (optional) and blade for your machine
- Design ID #378841
Step One: Create Design
In Silhouette Studio®, open Design ID #378841. There are plenty of clever phrases in the Silhouette Design Store that should work well for your mug.
Ensure your Page Setup matches the machine, mat, and media size you will be using for your vinyl. I’ve chosen to use a cutting mat, but you can cut vinyl without a mat, as long as it is wide enough to fit securely between the rollers.
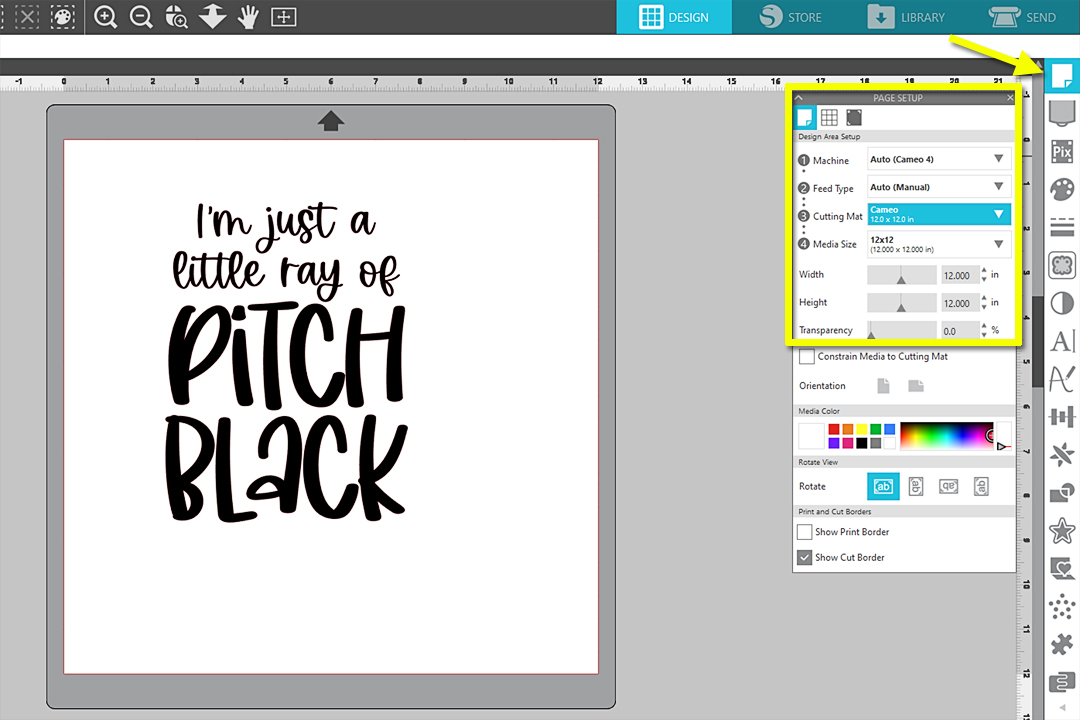
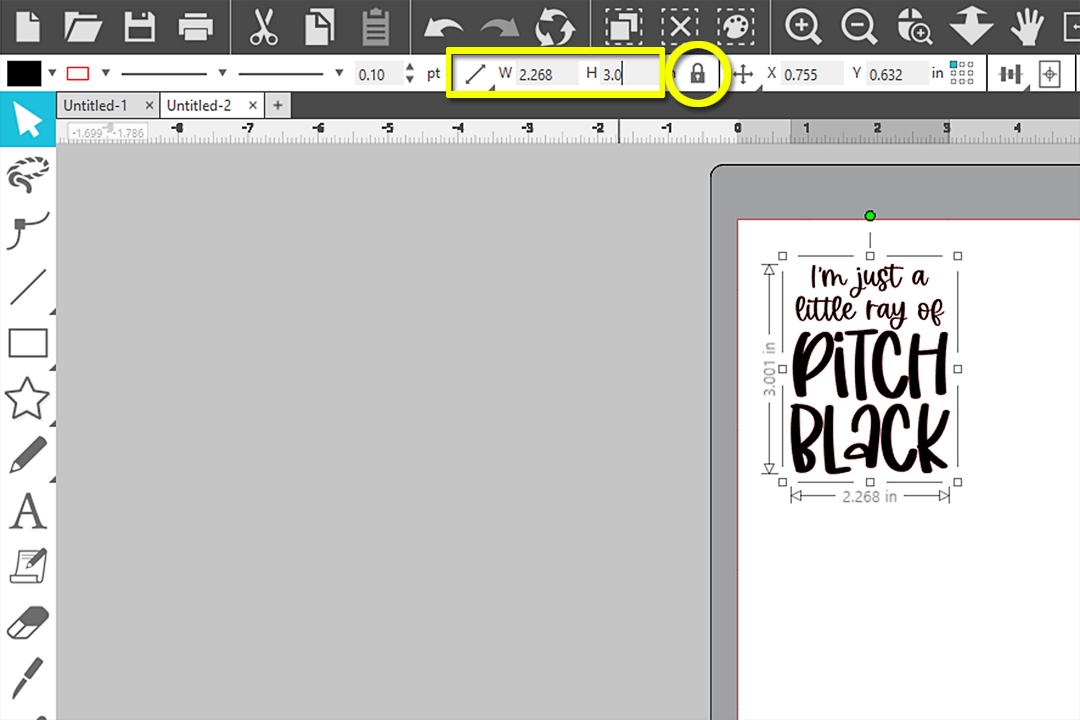
Measure your mug so you know how small your design must be to fit. Mine must be a maximum of three inches tall.
Note: For best results, use a mug that has straight sides. You do not want the mug to taper, and it also becomes tricky if there is a curve to it.
Select the design and resize it (lock the aspect ratio) by inputting the width or height you need.
Move your design over to an upper corner of your virtual mat to conserve vinyl. (Leave room for a test cut, if necessary.)
Step Two: Cut Design
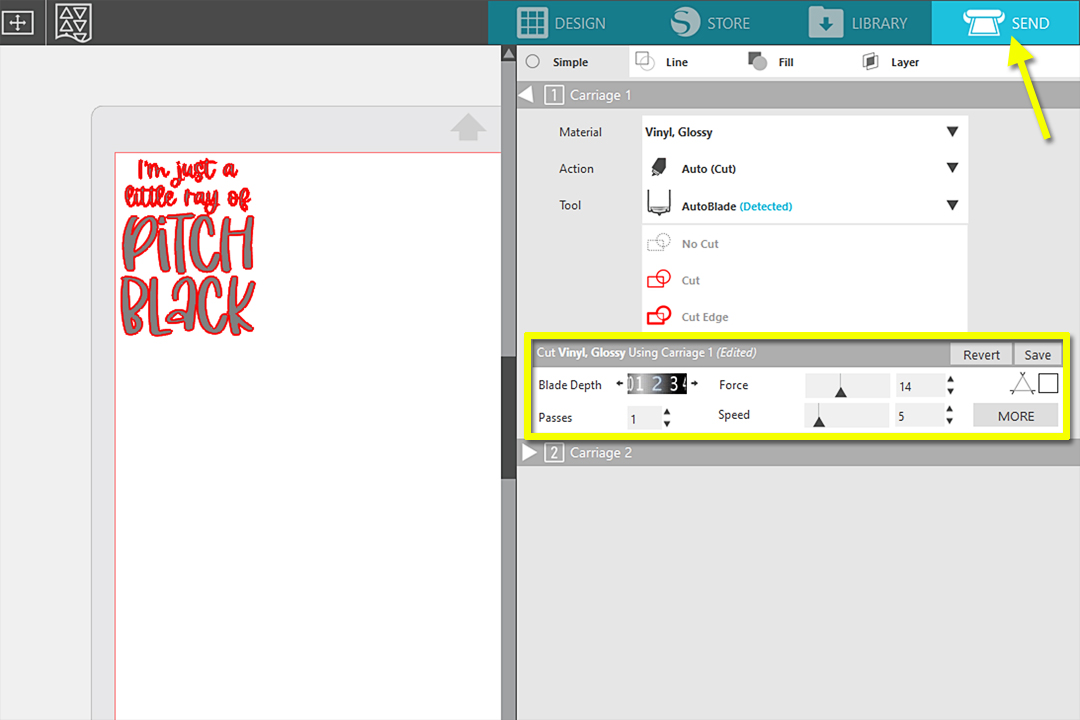
Go to the Send Panel to prepare your design for cutting.
I’m using a color-change vinyl from an unknown manufacturer, but Silhouette machines can cut adhesive vinyl from virtually any brand, with the right settings. It’s important to use the built-in test cut or choose a design for a practice cut to get the settings correct.
With a sharp blade, I used a blade depth of 2, Force 14-15, Passes 1, Speed 5. Your settings may be slightly different than mine, but just practice and adjust your settings without cutting the main design until you find out what works well for you.
Note: To avoid cutting your main design, you have a few options.
1- Use the TEST button in the Send Panel, and it will ignore your design and will instead cut a square and triangle in the upper left corner of your material.
2- Select the design you do not wish to cut and choose “No Cut” as an option in the Send Panel. You can turn cut lines on and off by selecting “Cut” or “No Cut” while objects are selected.
3- Drag your design you do not wish to cut off of the virtual cutting mat, and it will be ignored. The machine only cuts the objects with cut lines turned on and within the cutting area of your virtual mat.
When you are ready, make sure your design is placed in an area of the virtual mat that is clear from any practice cuts.
Load your mat with the vinyl on it.
Press SEND.
Step Three: Weed and Apply Vinyl
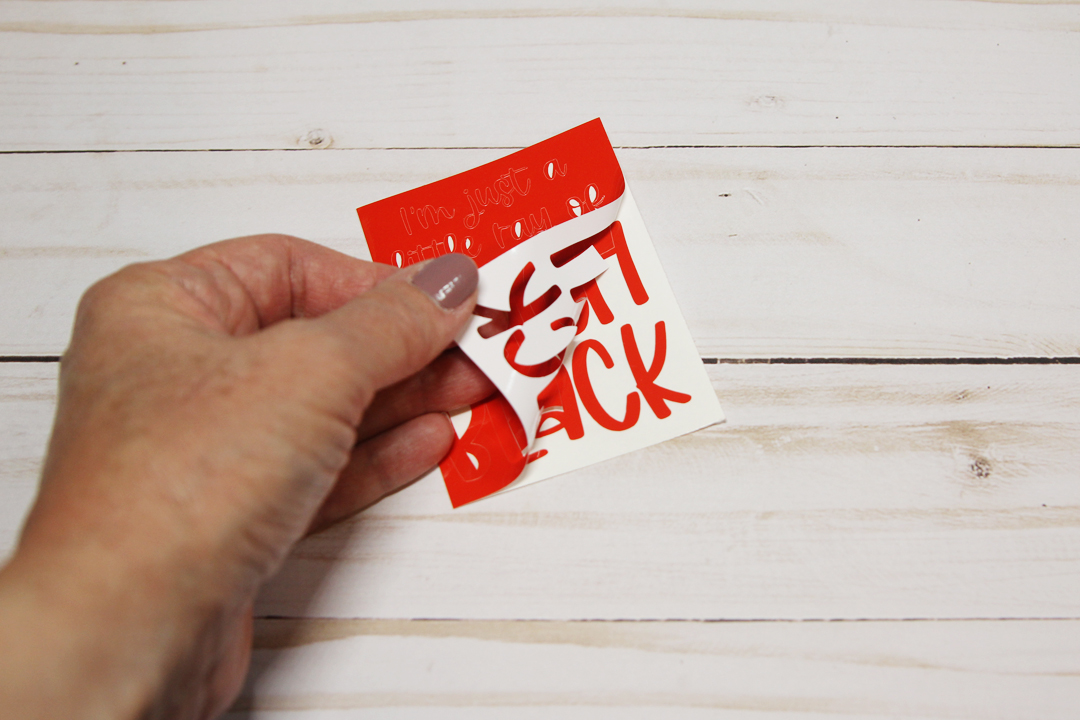
Once the cutting is finished, unload the mat and trim down the area you wish to weed.
Use a hook tool to weed away all the parts of the design you don’t need, such as the inner pieces of letters and the outer edge of the vinyl.
With a piece of transfer tape slightly larger than your design size, place it on the weeded vinyl design, press it well with your fingers or a scraper tool, and lift it all away so the design sticks to the transfer tape.
Place it evenly on your mug and press it on well.
Remove the transfer tape, and your mug is finished! You can use any permanent-adhesive vinyl on your mug, but this heat-sensitive color-change vinyl is a fun option.

What fun designs have you put on mugs?
 Free Class - Father's Day Apron Set
  Free Class - Custom Graduation Tumbler