Did you know that there are designs in the Silhouette Design Store that are specifically for creating rhinestone projects? We love all things sparkly, so this tutorial left us with some heart eyes. Follow along to see how you can make your own rhinestone design!
Supplies Needed:
- Silhouette CAMEO®, Silhouette Portrait®, or Silhouette Curio™ (with the large 12-inch base)
- Silhouette Cutting Mat
- Silhouette Cutting Blade
- Pick-Me-Up™ tool
- Rhinestone Template Kit
- Rhinestones:
- 10ss yellow, 16ss yellow
- 10ss metallic or black, 16ss metallic or black, 20ss metallic or black
- 10ss green, 16ss green
- 10ss aqua, 16ss aqua
- 10ss pink, 16ss pink, 20ss pink
- Rhinestone positioning brush
- Iron
- T-shirt
- Piece of cloth or fabric
- Design ID#249232
Step One: Open the Design
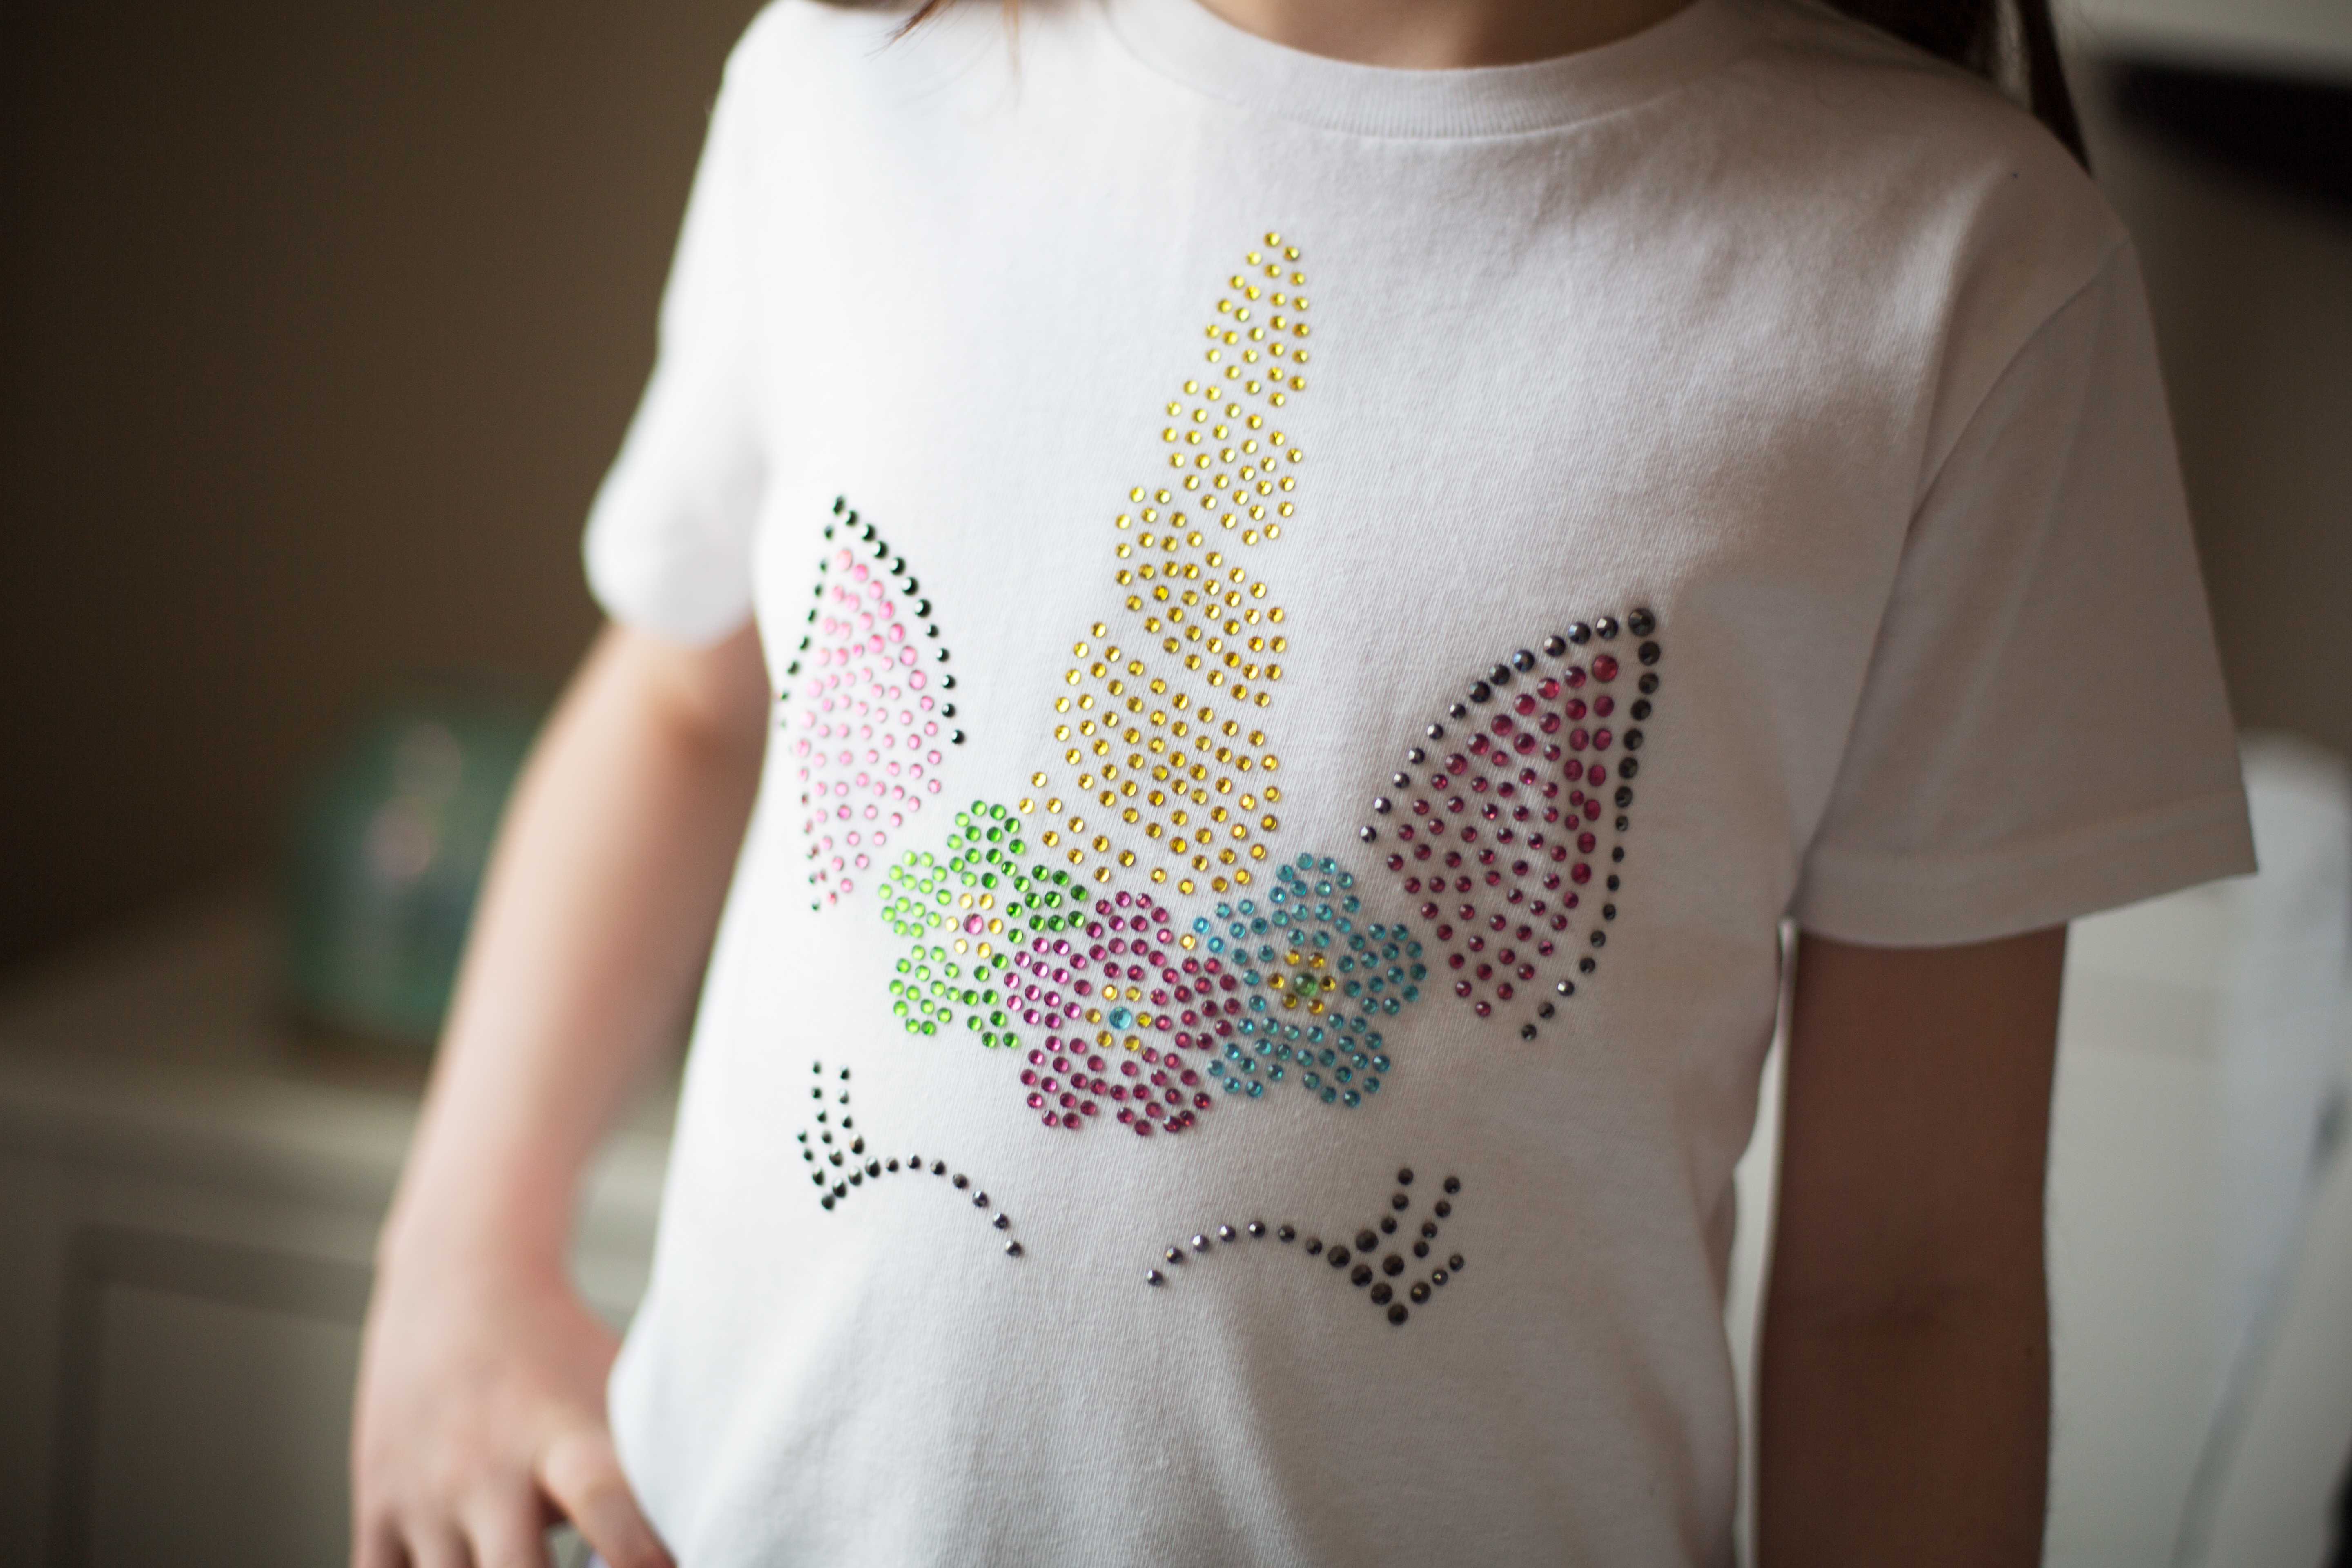
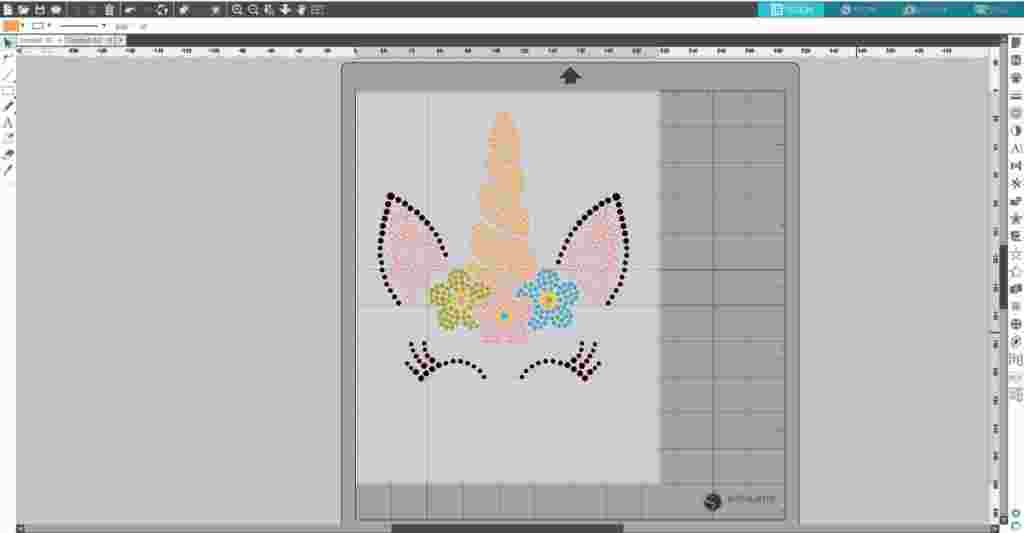
- Open the Rhinestone unicorn design (Design ID #249232) in Silhouette Studio®. Do not resize the rhinestone designs. Each tiny circle will fit an individual rhinestone. Fill the design with color (optional).
Step Two: Prepare the Rhinestone Template
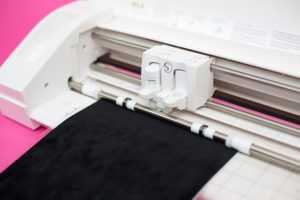
- Load your template material into your Silhouette. In your material tab in the Send panel, choose “Rhinestone Template Material.” Cut out your design.
2. Peel the black material off of the white material. It works best to do it quickly.
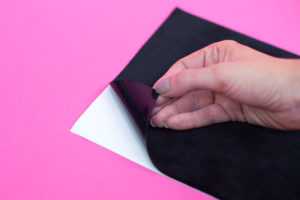
4. The black material is your template. Add it to your rhinestone backing board.

Step Three: Add the Rhinestones
1. Pour your rhinestones onto your design.
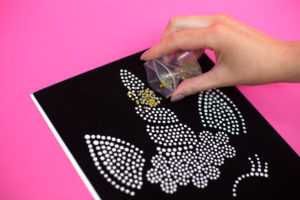
2. Gently brush the rhinestones into the template holes.
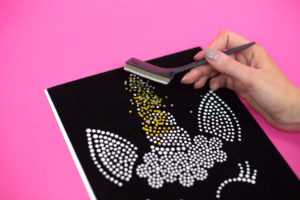
3. Use the Pick-Me-Up® tool to place individual rhinestones.
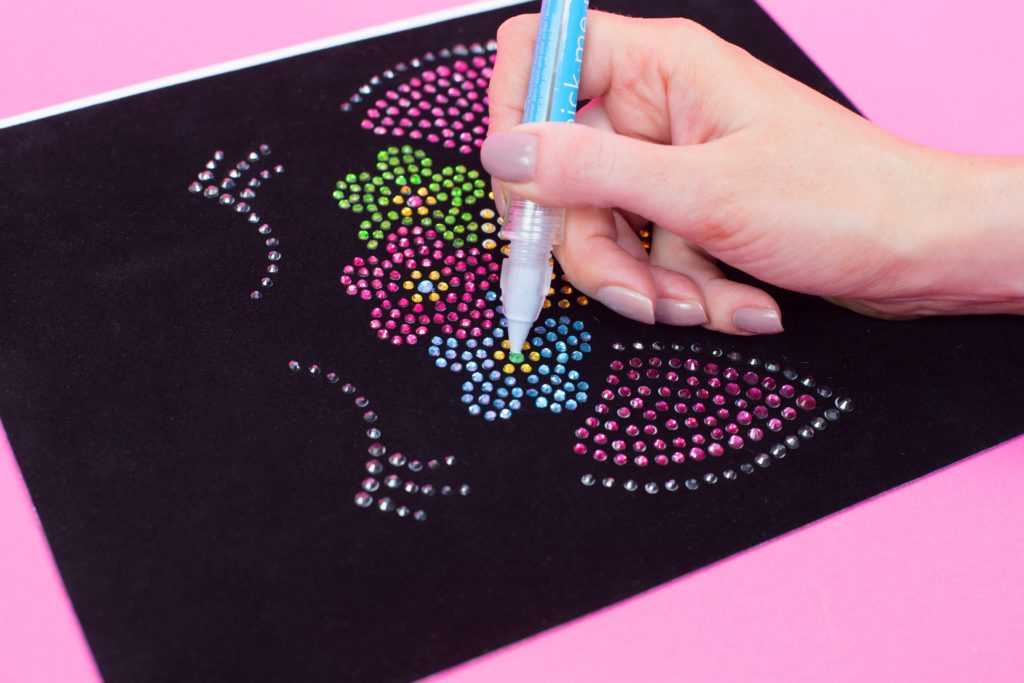
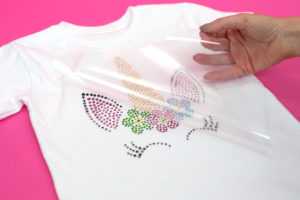
4. Once you have all of your rhinestones positioned face-up on your template, cover the design with a piece of transfer tape. Press firmly to adhere all of the rhinestones.
5. Lift your rhinestones attached to the transfer tape and position them on your project.

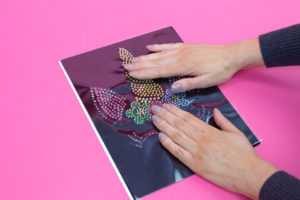
6. Place a cloth over the design and iron your rhinestones into place. Your iron should be on the wool setting, and you should hold it in place for 45–60 seconds.

7. Remove the cloth and the transfer tape.

Depending on your version of Silhouette Studio®, you will have different rhinestone options. With the Basic Edition, you will need to use a rhinestone design from the Silhouette Design Store. With the Designer Edition, you have the option to create your own design using the Rhinestone icon. With the Designer Plus Edition, you have access to Advanced Rhinestones, which opens up many more possibilities.
What rhinestone design do you want to make?
Nasze Naturalne
September 3, 2025
Your authentic voice really shines through in everything you create and share
Naszenaturalne
September 2, 2025
Really love your style
Kelly Wayment
June 28, 2024
You can use it with vinyl as long as it is smooth and flat to allow the static charge to hold on to it. Rolled vinyl that wants to go back to its rolled shape will not necessarily work well, and it would need to be trimmed to fit the ES mat cutting area.
Kelly Wayment
June 28, 2024
Yes, you can use the heat pen while using the ES mat. 🙂
Yurii
March 2, 2024
Hello. May it be used with heat pen?
Thanks
Jerome
February 24, 2024
Hi, works this with the normal vinyl foils or only with printer papter etc?