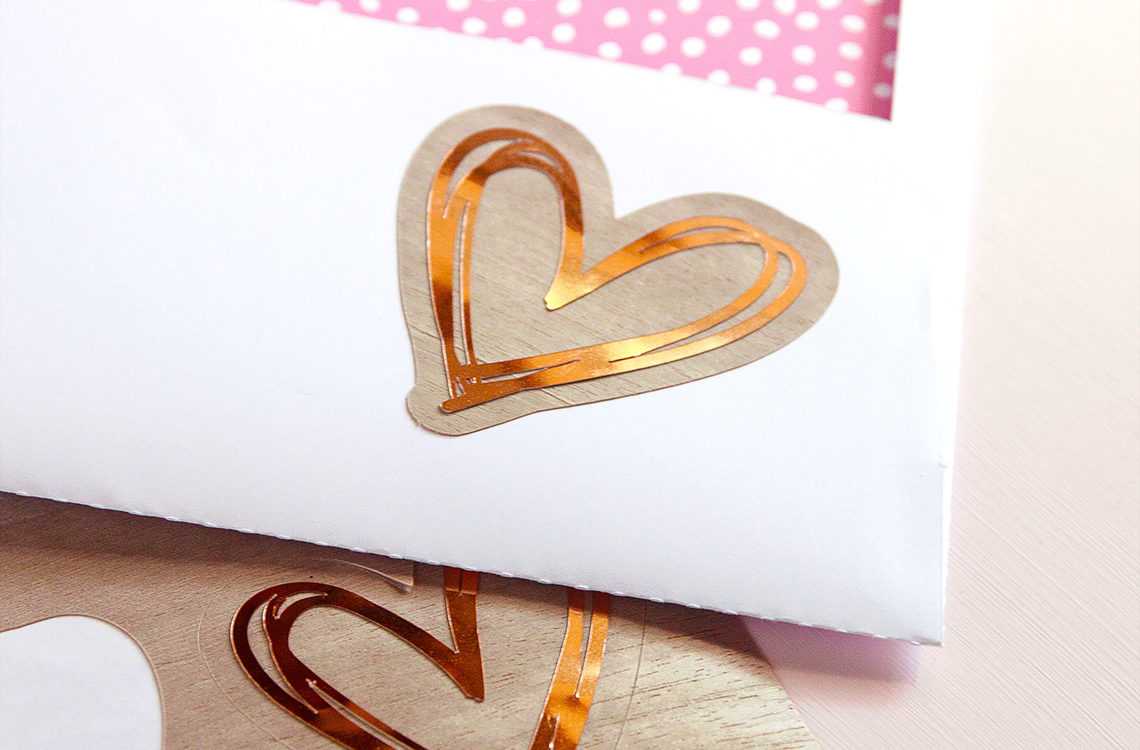
These stickers combine rose gold foil and wood grain for a look that’s sweet, modern, and full of texture. Use them as seals on envelopes for wedding invitations and greeting cards or as embellishments for party favors, food packaging, and more!
Supplies Needed:
- Silhouette CAMEO®, Silhouette Portrait®, or Silhouette Curio®
- Silhouette Cutting Mat
- Silhouette Cutting Blade
- Silhouette Studio®
- Silhouette Scraper Tool
- Silhouette Wood Sheets
- Silhouette Rose Gold Foil Sticker Paper
- Design ID #174661
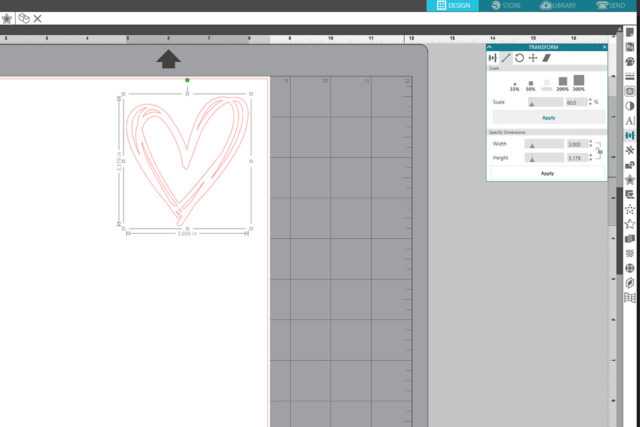
Step One: Open and Resize the Design
- Open the design (Design ID #174661) in Silhouette Studio®. Resize the design to the size that you prefer. I resized this design to 60% of its original size by going to the Transform panel located on the right-hand side toolbar. Choose the diagonal arrow to select the scale settings.
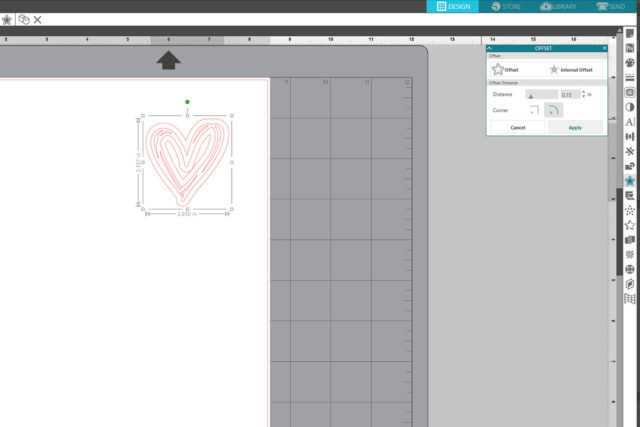
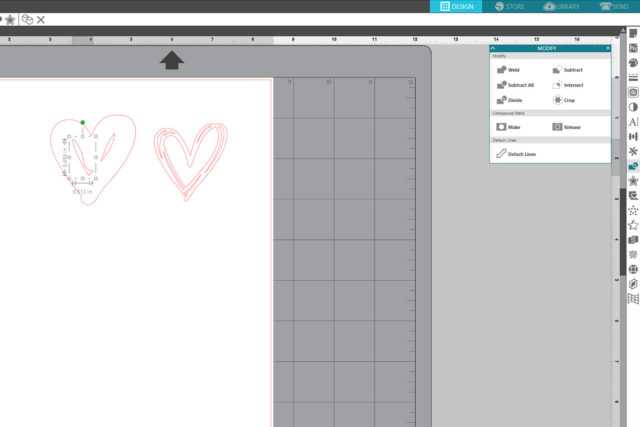
Step Two: Create an Offset Mat
- With the design still selected, open the Offset panel and set the distance to your preference. I set the distance to 0.15 inches. Then click the Apply to create the offset mat.
- Click and drag the offset mat to the side. There are still a couple of internal areas that are set to cut. We want the shape to be a solid outline, so click to open the Modify panel, and click the Release button in the Compound Paths area to release the paths.
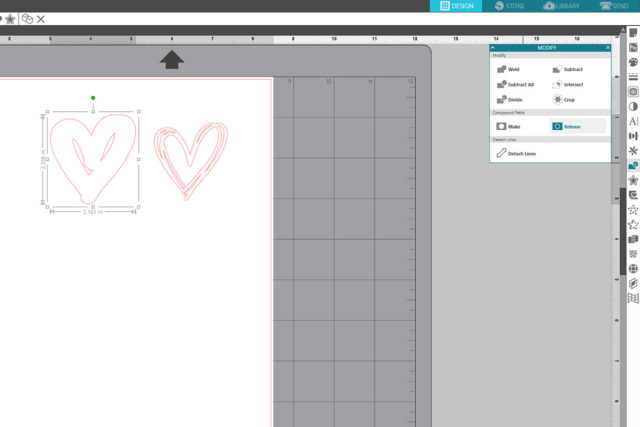
- After the compound paths are released, you’ll see boxes pop up around the internal shapes on the matte. Click them to select, then press backspace on your keyboard to delete the shapes.
Step Three: Copy the Sticker Shapes and Mat
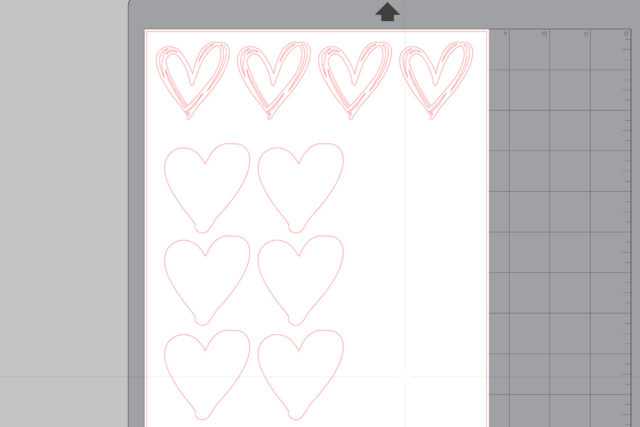
- Press Control or Command + C to copy the sticker shapes and mat, then Control or Command + V to paste the copies. The foil sticker sheets are 8 ½ inches x 11 inches, so we can fit 4 of the sticker shapes across and 5 rows down the full sheet for a total of up to 20 stickers. Tip: You can also use the Replicate panel (located on the toolbar on the right-hand side) to duplicate your design and fill the page with it. Just make sure you have the correct page size set before you duplicate the design.
- After we have as many copies of the stickers and mat as we’ll need, cut and paste all of the mat shapes to a new document. The wood sheets are 5 inches by 7 inches, so we can fit 6 of the matte shapes per sheet. Cut the stickers from Silhouette Rose Gold Foil Sticker Paper and the mattes from a Silhouette Wood Sheet. I used the gray wood sheets for this project because I really like how it looks with the rose gold foil.
Step Four: Assemble the Stickers
- Peel one of the cut stickers from the rose gold sticker sheet, line it up over top of one of the cut mat shapes on the wood sheet, and press it in place. Repeat this process for each of the stickers.

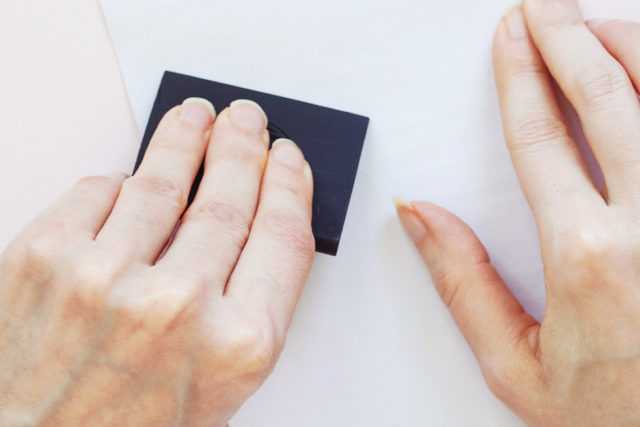
- After all of the stickers are pressed in place on the wood mattes, turn the wood sheet over and run a Silhouette Scraper firmly over the entire back of the sheet until the foil stickers are well adhered to the wood mattes.
- When you’re finished, just peel stickers from the wood sheet and adhere to envelopes, party favors, food packaging, and more!

Nasze Naturalne
September 3, 2025
Your authentic voice really shines through in everything you create and share
Naszenaturalne
September 2, 2025
Really love your style
Kelly Wayment
June 28, 2024
You can use it with vinyl as long as it is smooth and flat to allow the static charge to hold on to it. Rolled vinyl that wants to go back to its rolled shape will not necessarily work well, and it would need to be trimmed to fit the ES mat cutting area.
Kelly Wayment
June 28, 2024
Yes, you can use the heat pen while using the ES mat. 🙂
Yurii
March 2, 2024
Hello. May it be used with heat pen?
Thanks
Jerome
February 24, 2024
Hi, works this with the normal vinyl foils or only with printer papter etc?