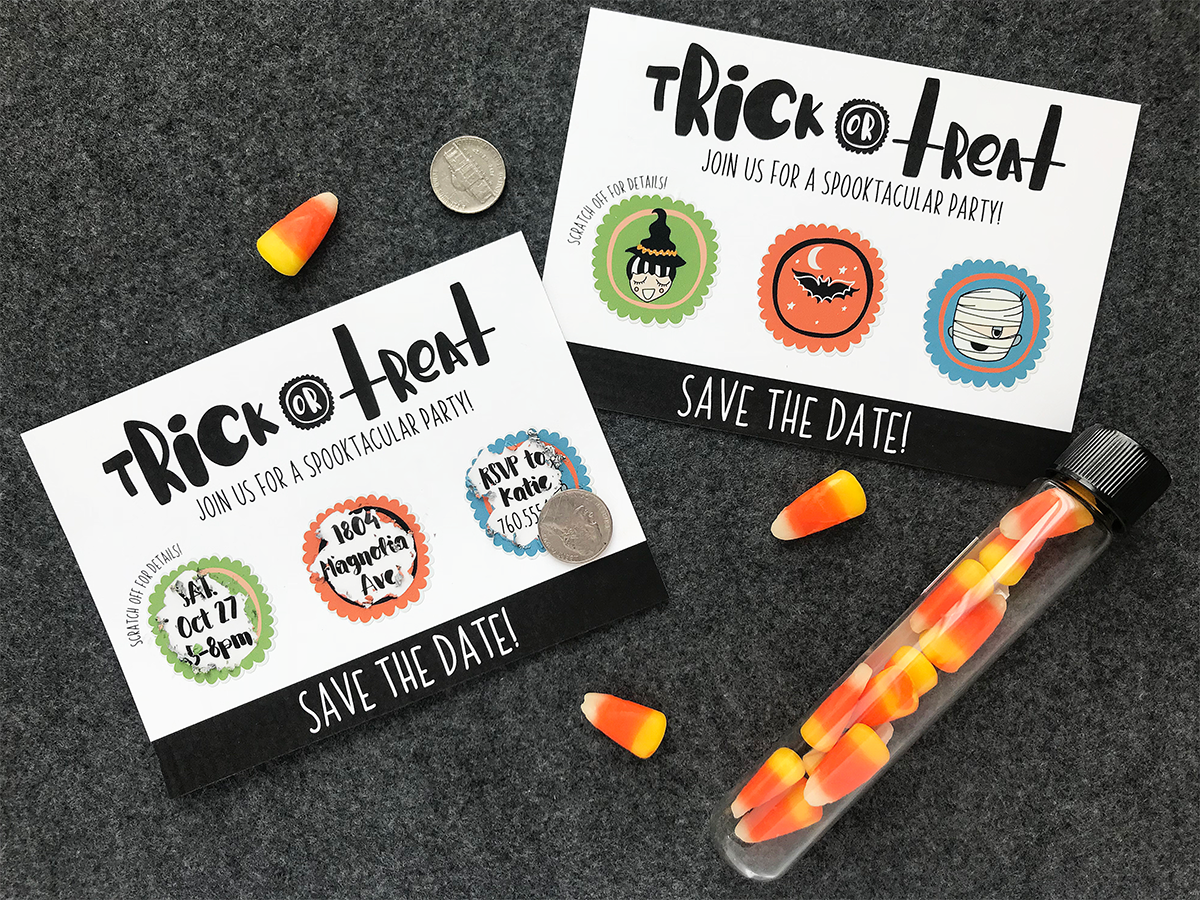
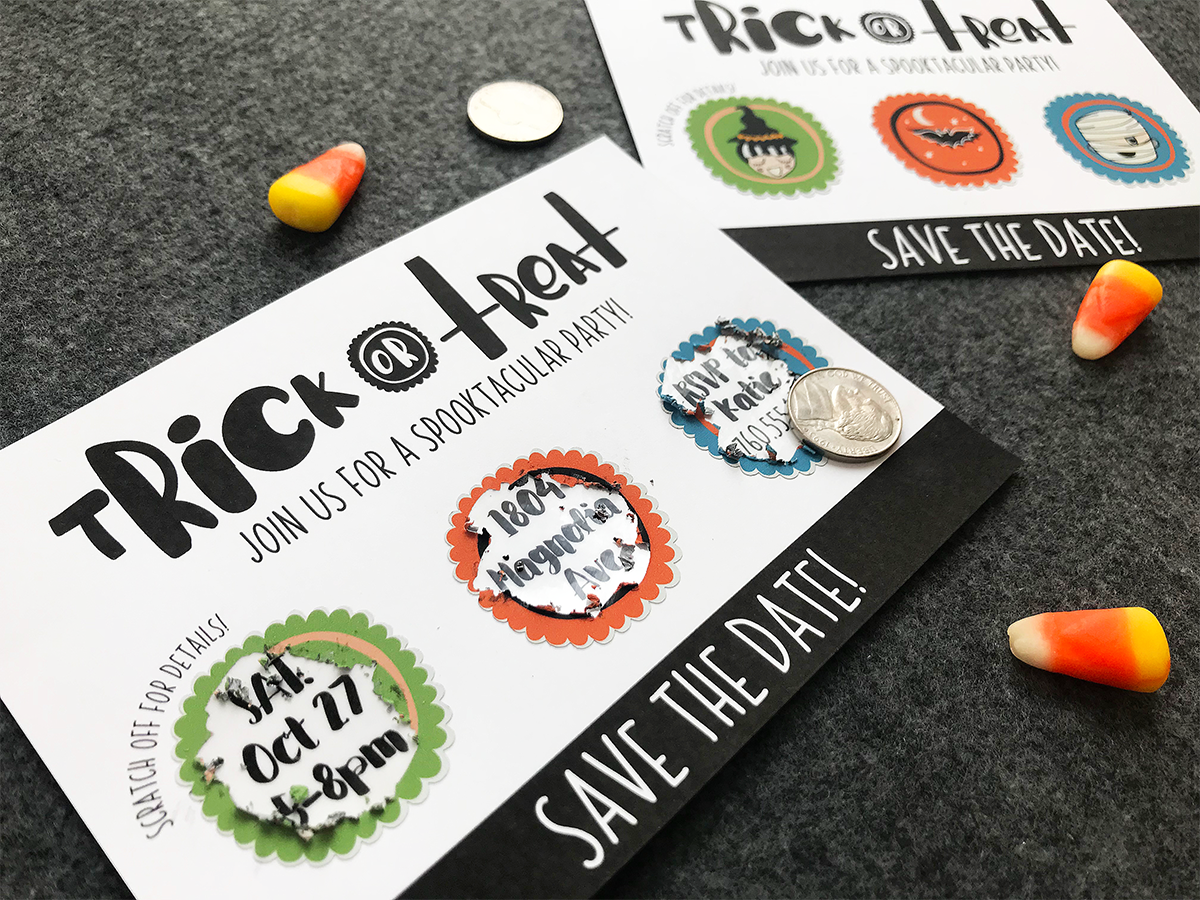
Halloween is hands down my favorite holiday! Aside from the ridiculous amount of candy, I really love how much creativity is put into this holiday, from costumes—especially the DIY ones—to house decorating. If you are hosting a monster bash, here is a one-of-a-kind DIY save the date card featuring scratch-off stickers that will surely get your guests frightfully excited!
Supplies Needed:
- Silhouette CAMEO® or Silhouette Portrait®
- Silhouette Cutting Blade
- Silhouette Studio®
- Silhouette Printable Scratch-off Sticker Paper
- Inkjet printer
- Cardstock
- Design ID#227028
- Design ID#227031
- Design ID#227043
- Design ID#220953
- Design ID#152629
- Design ID#236110
Step One: Design Card in Silhouette Studio®
- Determine what size card you want to use. For this project, the card measures 4.25 inches x 6 inches, so you’ll need to draw a rectangle with those dimensions.
- Draw another rectangle with dimensions of 0.675 inches tall by 6 inches wide and fill it with black (using the Fill panel).
- Then make the line color transparent (using the Line panel).
- Align the bottom this rectangle with the card rectangle.

- Align the right the two rectangles. Now the black rectangle should be at the bottom of the card.
- Add text “Save The Date!” with 48 pt using Carley Co Bold Font (Design ID#236110). Fill in with white color and make line color transparent, and center the text within the black rectangle.
- Open Design ID#220953 and resize it to fit inside the card. Don’t worry about getting it to a specific dimension. Then right-click and select ungroup.
- Remove the outer scallop border piece so that you just have the Trick or Treat sentiment remaining.
- Select the remaining parts of the design and fill in with black color and change the line color so that it is transparent.
- Select the letters of “Trick” and group together by right-clicking and choosing Group.
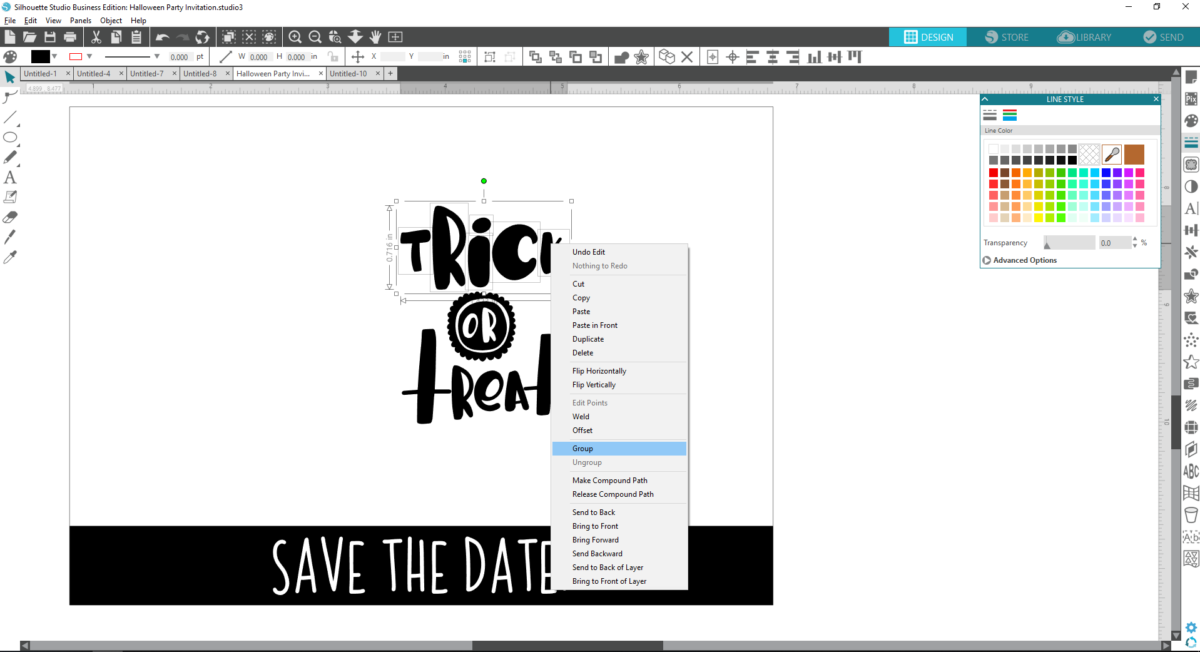
- Select the letters of “Treat” and group together by right-clicking and choosing Group.
- Resize “Trick” so that it is 2 inches wide. Resize “Treat” so that it is 1.875 inches wide.
- Move “Trick” and “Treat” so that they are either side of “or” to make the full “Trick or Treat” phrase.
- Group these three words together and move to top center of card.
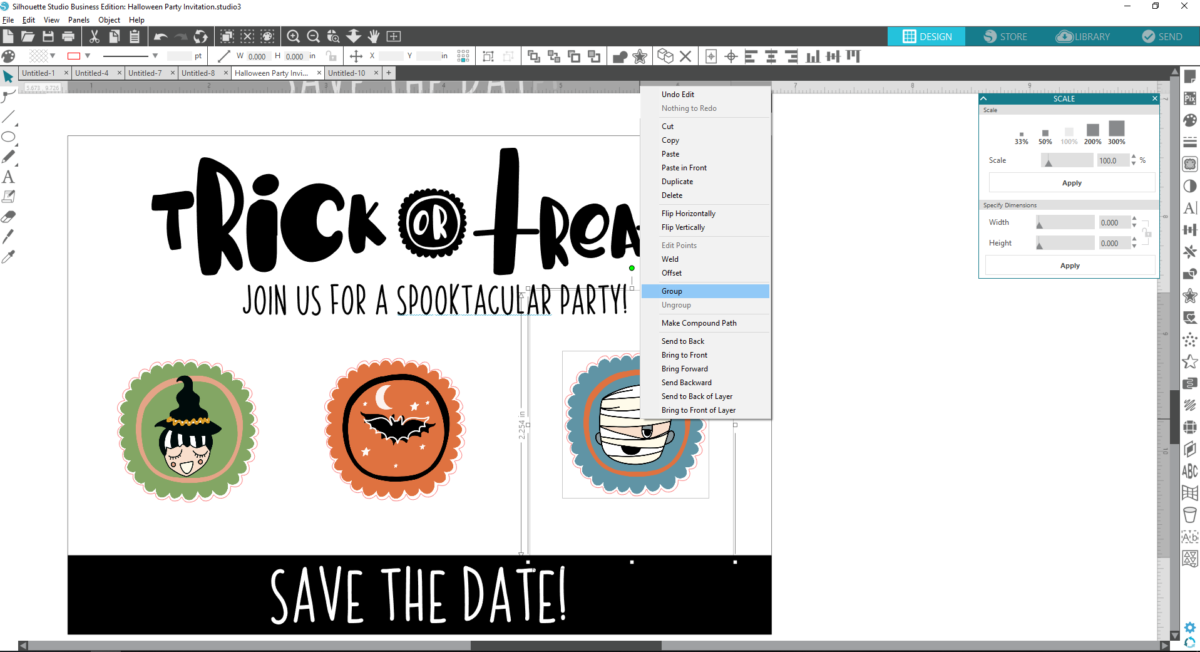
- Add text “Join Us for a Spooktacular Party!” or whatever phrase you would like! Resize as you see fit and place under “Trick or Treat.”
- Open Design IDs#227028, 227031, and 227043.
- For each design, open the Scale panel and scale each design down 33% two times.
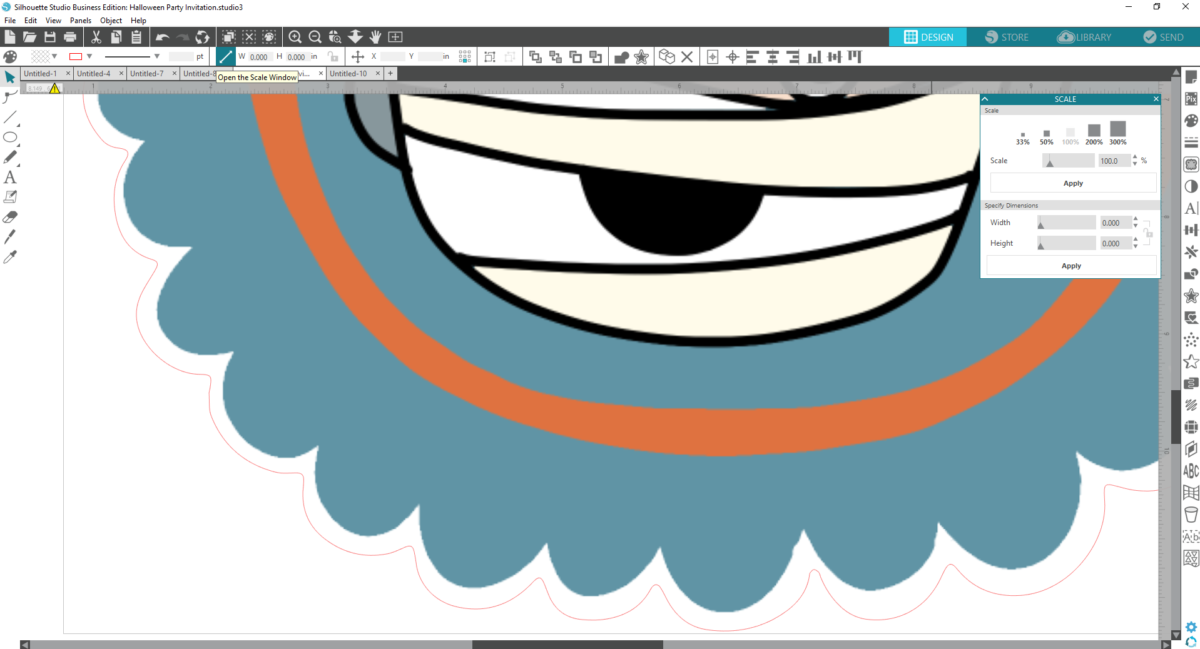
- Some of the seal designs will have an extra white layer that needs to be removed. Here is how to do that: Right-click on the first layer and choose Send to Back.
- Right-click on the second white layer (this is the one we don’t want) and select Delete.
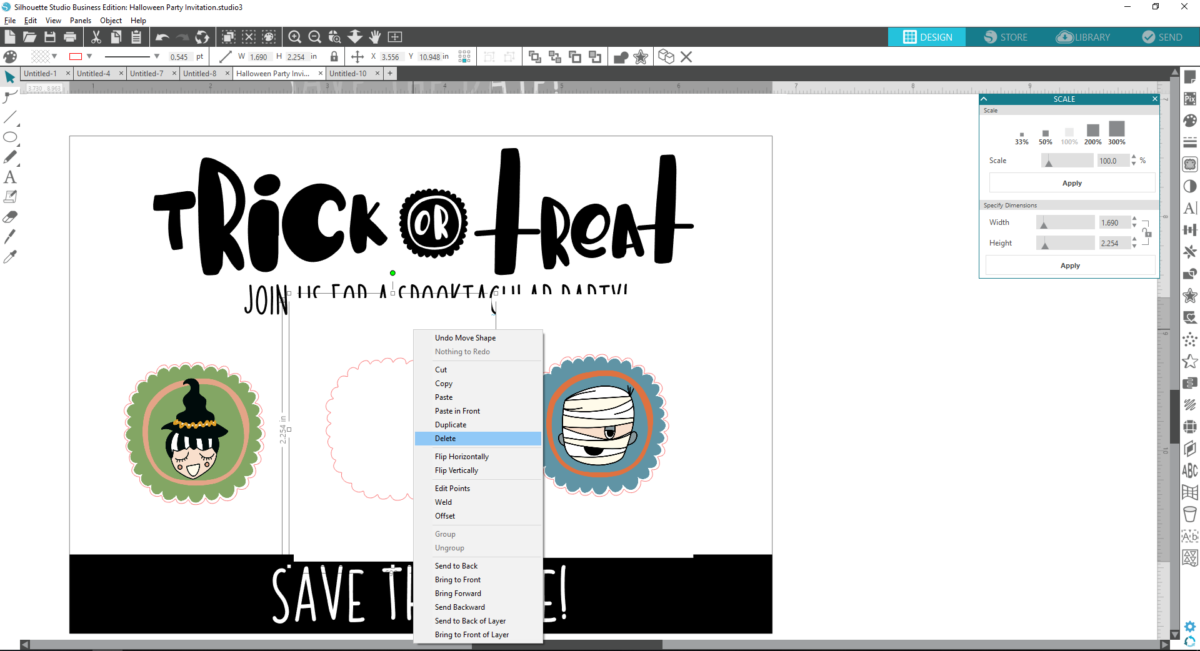
- Regroup each seal with its scalloped cut line.
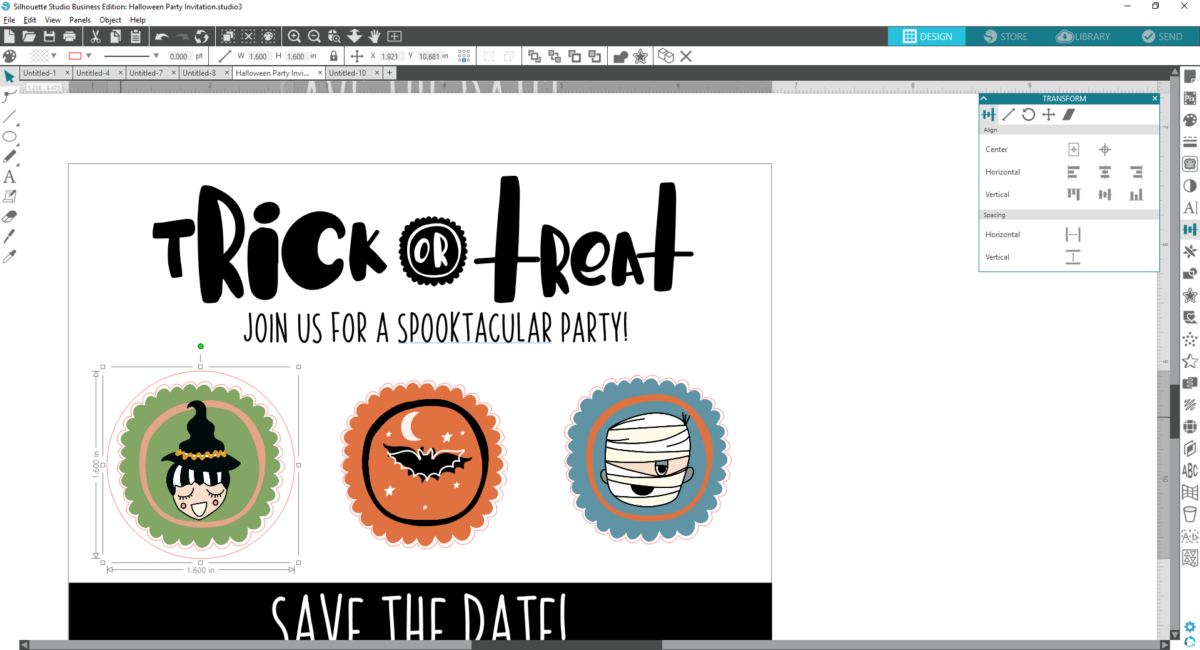
- Using the Scale panel with the Aspect Ratio locked, increase the width of each seal to 2 inches wide.
- Go to the Transform panel to space horizontally all three seals and them to the center of the card.
- Draw a 1.6-inch circle and place centered over the far-left seal.
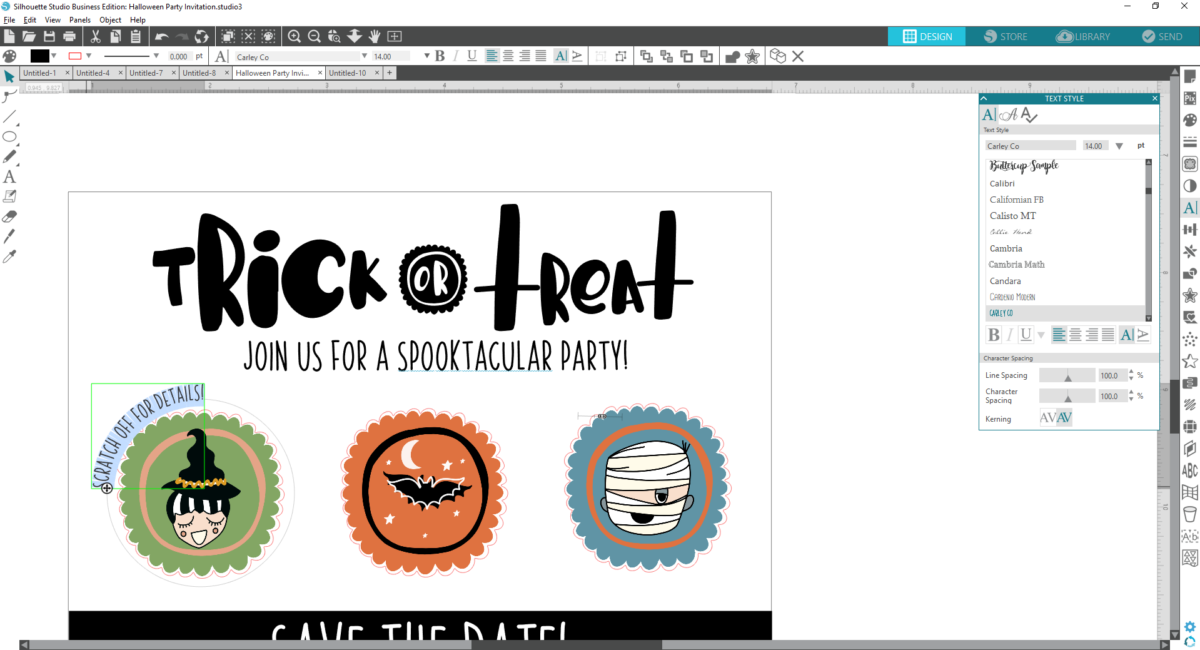
- Add Text with 14 pt font size “Scratch off for details!” using the Carley Co. font.
- Click on the cross-hair at the bottom left of the text box and move your mouse until it connects to the circle shape.
- Right-click and select Convert to Path.
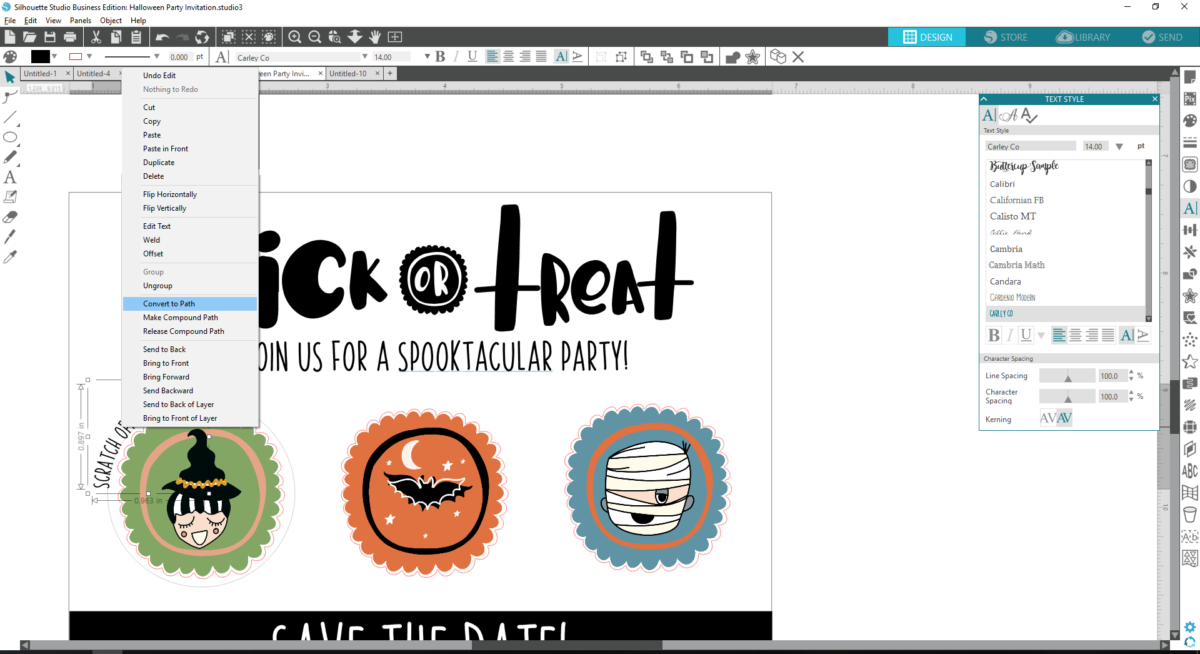
- Delete the circle shape.
- Copy the three seals and paste into a new project. This will be for Step Two.
- Return to your card design project and add your party event details by adding text boxes with text fitting within each seal space. Once you have all the event details, delete the seals.

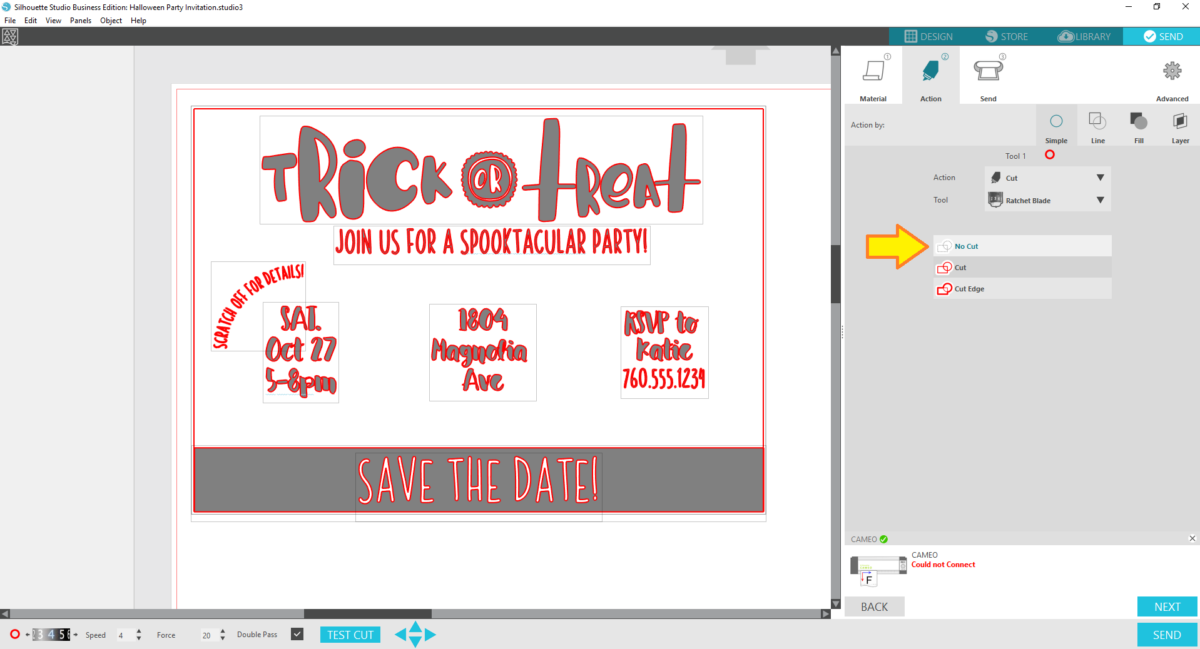
- Remove the cut lines from everything. To do so, go to the Send tab and click on No Cut under the Action subtab.
- Duplicate the card design so that you print two cards per sheet.
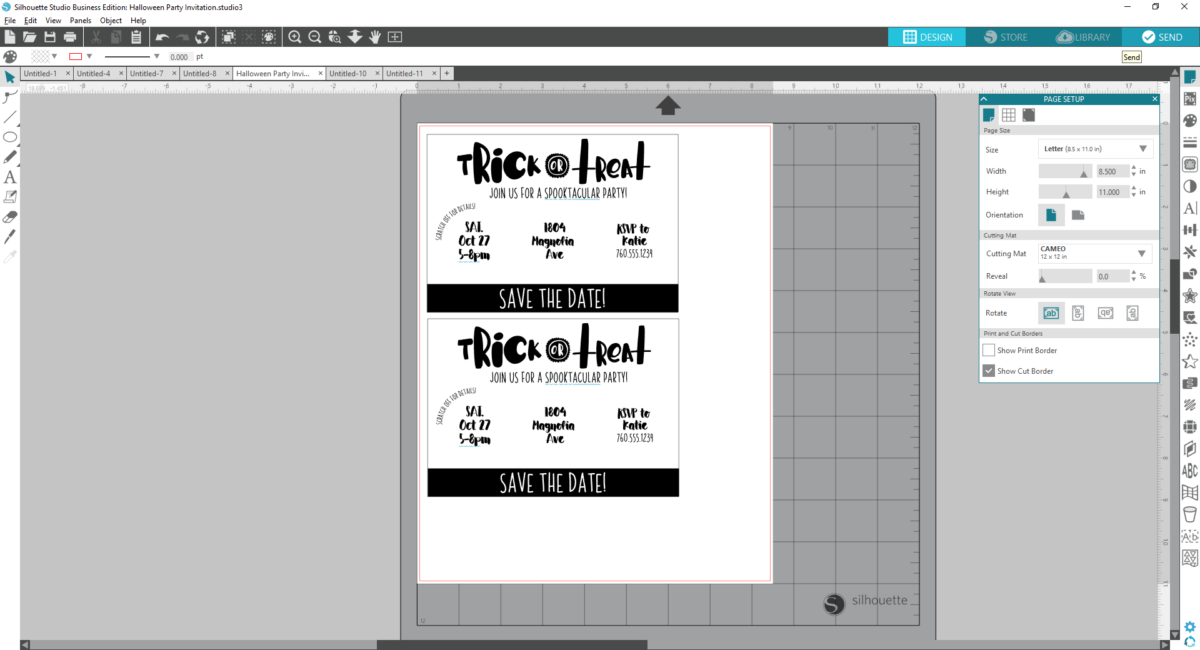
- Send to Printer and once fully dried, trim using scissors or a paper slicer.
Step Two: Create Printable Scratch-off Stickers
- Open the secondary project where you pasted the three Halloween seals.
- Set up your registration marks by going to the Page Setup panel and going to the Registration Marks tab. Tip: I recommend checking the “Show Print Border” and “Show Cut Border” boxes.
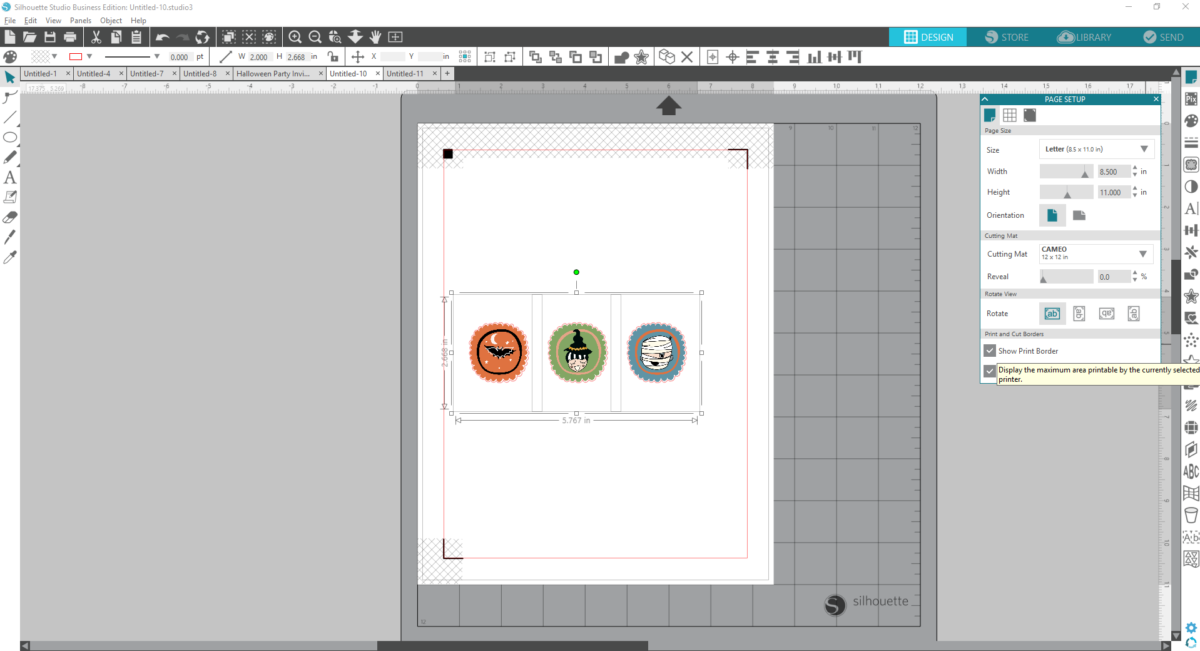
- Fill your sheet with as many seals as you can because once you print this sheet, you cannot reprint it.
- Check to make sure the scalloped circle border is set to Cut by going to the Action subtab under the Send Tab. A thick red outline indicates a cut line.
- Send to Printer. Be sure to feed the Scratch-off Sticker material into the printer so that it will print on the white side (the yellow side is the backside).
- Place your printed material on the cutting mat and feed it into your Silhouette cutting machine.
- Send to Silhouette with the proper cut settings.
Step Three: Finalize the Card
- Once your Silhouette is finished cutting, gently peel off the scratch-off sticker and place it over each event detail on the card.
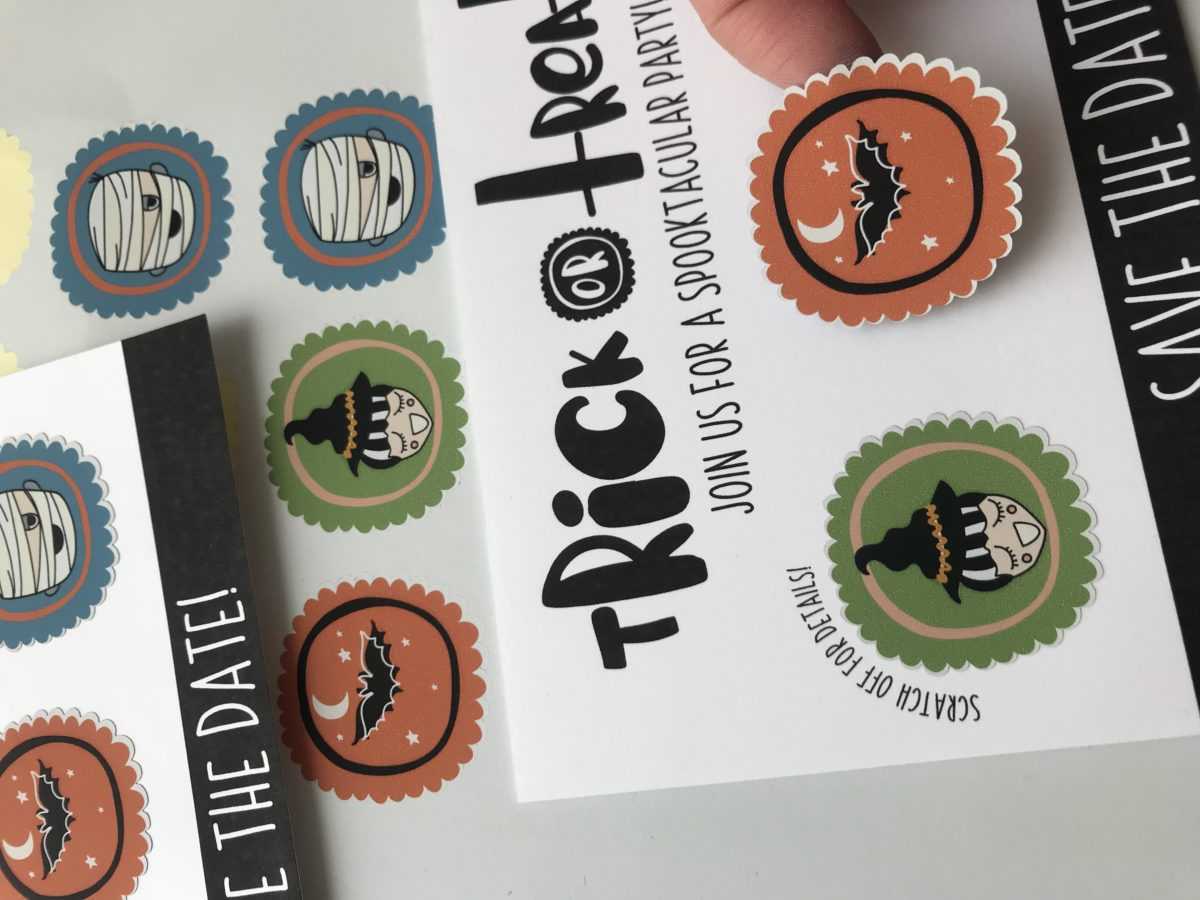
- The surface of the sticker sheet can later be scratched off to reveal the hidden event details!
Don’t you want to do this for all your future party invitations?! It’s such an easy and interactive way to get your guests excited!