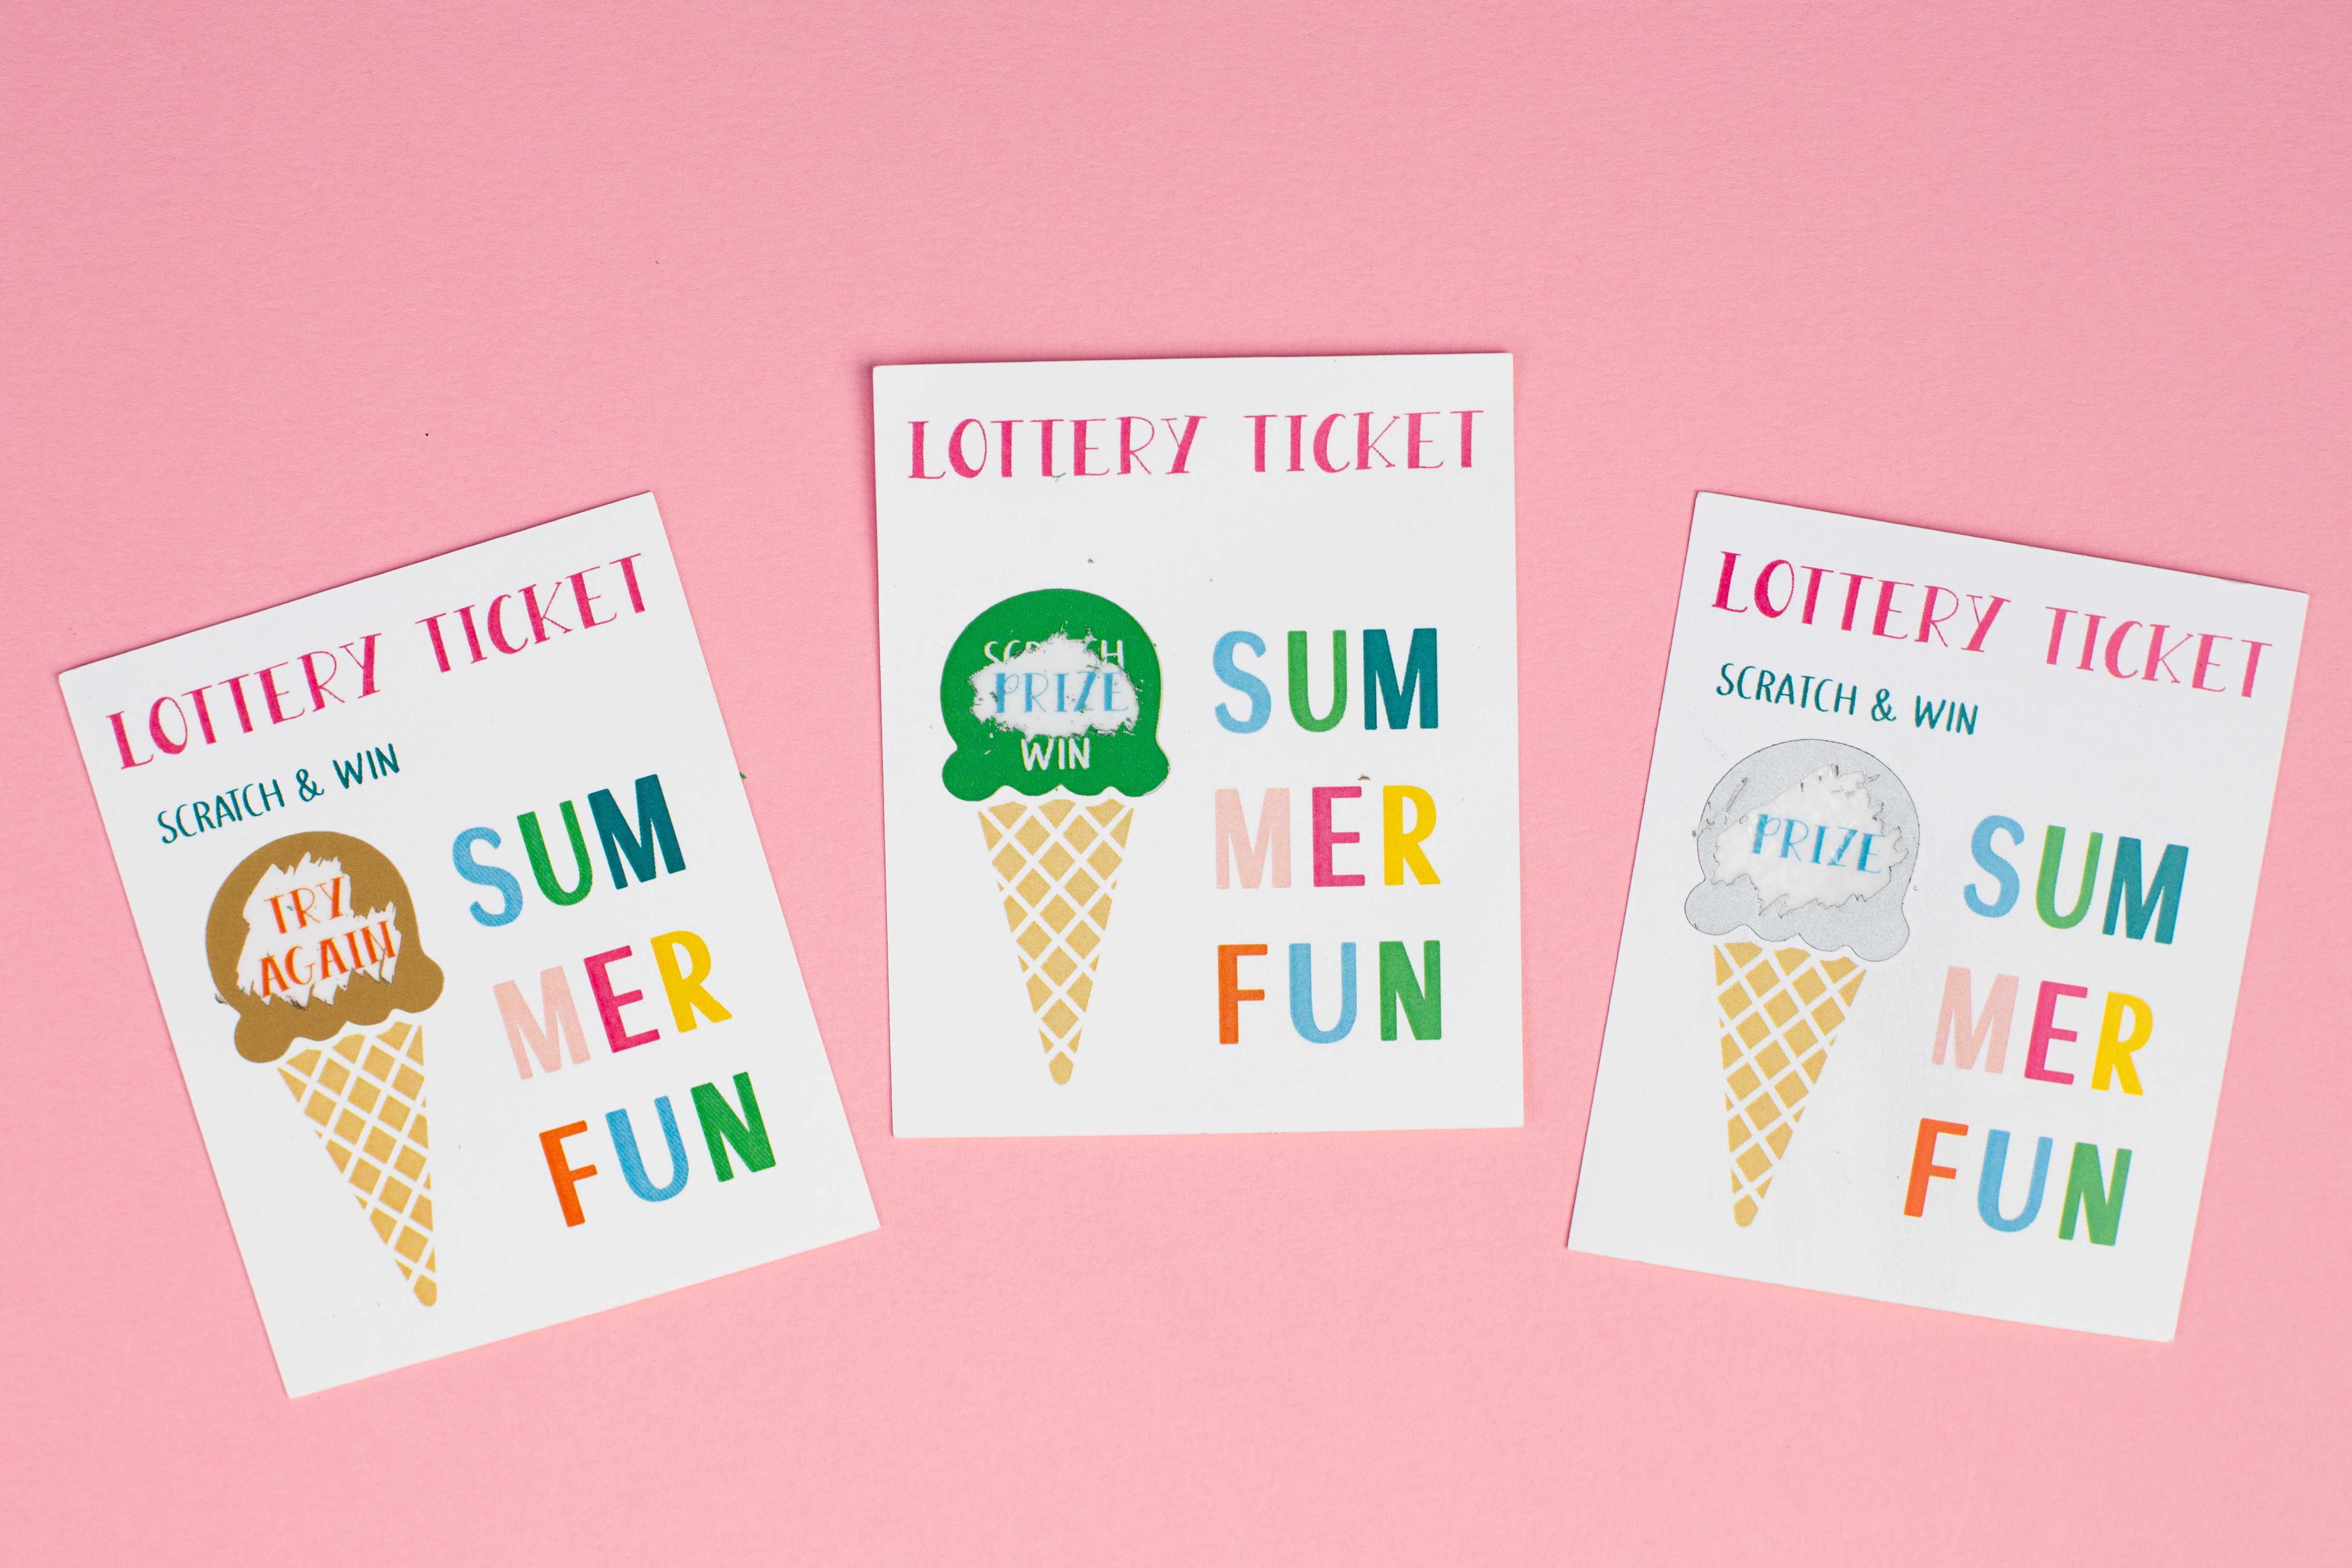
We’ve got another great summer-themed project for you to try. Check out these great lottery tickets that you can make! You can use these at a summer party to help give away goodies or you can use them as good behavior incentives for your kids. Follow the detailed tutorial below to see how you can create your very own scratch-off lottery tickets.
Supplies Needed:
- Silhouette CAMEO®, Silhouette Portrait®, or Silhouette Curio™ (with a big base)
- Silhouette Cutting Mat
- Silhouette Cutting Blade
- Silhouette Studio®
- Silhouette Scratch-off Sticker Paper – silver
- Silhouette Scratch-off Sticker Paper – gold
- Silhouette Scratch-off Sticker Paper – printable
- Cardstock – white
- Printer
- Design ID #269749
- Design ID #183262
- Design ID #246487
Step One: Preparing and Cutting Out the Designs
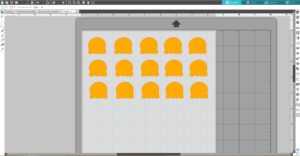
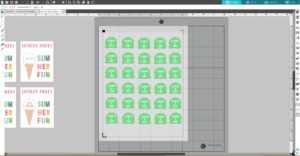
1. In the Silhouette Studio® draw a rectangle to represent the size you want your lottery ticket to be. Open the Summer Fun design (Design ID #269749) in Silhouette Studio® by locating it in your library. Resize the design so that it fits in the rectangle you drew. On the top of the lottery ticket type “LOTTERY TICKET” using the Hoodwink font (Design ID #183262). Above the ice cream cone, type “SCRATCH & WIN” using the Brown Bear font (Design ID #246487). You can color the words you just typed by picking one or more of the colors in the Summer Fun design by using the Color Picker tool from the Fill panel. Select the object you want to fill first. Then open the Fill Color panel and select the eyedropper. Hover over the image you want to pick the color from. Do you see the small box with the color sample that appears? This will show you a swatch of the color you can select. Once you have the color you want in the box, stop moving the mouse and click.
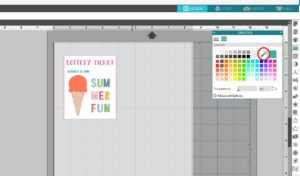
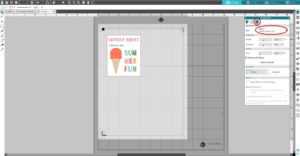
2. Add registration marks. To do so, click on the Page Setup icon located along the right-hand toolbar and select the style of registration marks. Type 1 registration marks are standard (and what you will most likely use), and Type 2 registration marks are for older machine models.
3. Ungroup the Summer Fun design (select design, right-click, and select ungroup). Ungroup the ice cream cone. Fill the ice cream top with no color and type inside what prize you want to be on the lottery ticket. Duplicate as many ticket copies as can fit within the registration marks border.
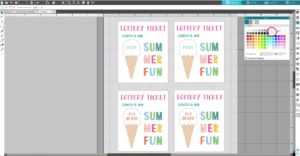
4. On white cardstock, print as many ticket copies as you need for tickets where you want silver or gold scratch-off sticker paper (for the printable scratch-off sticker paper, we will modify the ticket’s design). Place your printed sheet on the cutting mat and feed it into your Silhouette machine. Select “Cardstock, plain” as the material from the media list in the Send tab, select the designs, and select the Cut Edge option (for this, you just want to cut the outline of the tickets), adjust your blade accordingly (unless you use a machine with an AutoBlade) and click Send.
5. After the cutting process is over, remove the cut project from the cutting mat.
6. Turn off the registration marks in the Page Setup panel (under the registration marks tab). Place the ice cream top design on the workspace, and make as many copies as you need for the gold scratch-off sticker paper.
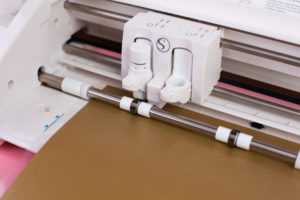
7. Place a sheet of the gold scratch-off sticker paper on the cutting mat and load it into the Silhouette cutting machine. Select “Scratch-off sticker sheet” as a material from media list in the Send tab, adjust your blade accordingly (unless you use a machine with an AutoBlade) and click Send.
8. After the cutting process is over, remove the cut project from the cutting mat.
9. Repeat the same steps for the silver scratch-off sticker paper.
10. For the printable scratch-off tickets, we will need to adjust our lottery ticket design. Copy the ice cream top and move the “SCRATCH & WIN” words onto the ice cream top. Color the ice cream top in your desired color.

11. Turn on the registration marks and print the lottery tickets on white cardstock.
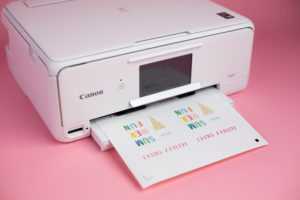
12. Place the design (as many copies as you need) for the printable scratch-off sticker paper on the working space. Print the ice cream topper design on the printable scratch-off sticker paper.
13. Load your printed sheet into your Silhouette using a cutting mat. Select “Scratch-off sticker sheet” as the material from media list in the Send tab, select the designs, and click the Cut Edge option (this will ensure that your machine will cut only the design outline), adjust your blade accordingly (unless you use a machine with an AutoBlade), and click Send.
14. Remove the cut project from the cutting mat.

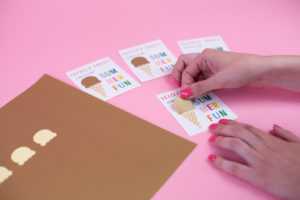
Step Two: Applying the Scratch-off Stickers on the Lottery Tickets
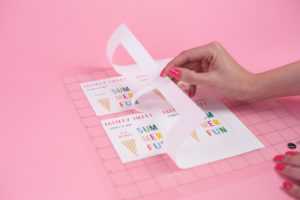
1. Peel off the scratch-off stickers from the backing and apply them on the printed lottery tickets.
Now our lottery tickets are ready to be used. Didn’t they turn out so cute?
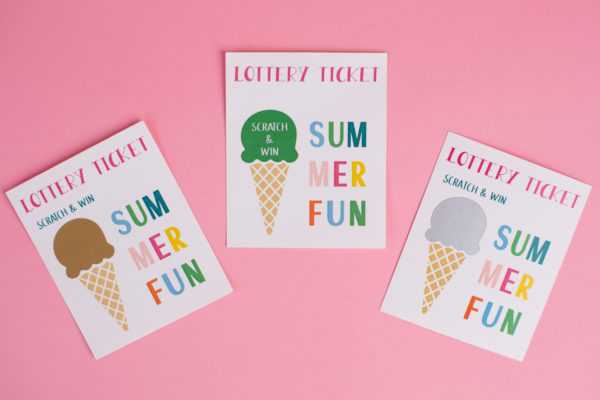

What are you going to use your scratch-off lottery tickets for?
Nasze Naturalne
September 3, 2025
Your authentic voice really shines through in everything you create and share
Naszenaturalne
September 2, 2025
Really love your style
Kelly Wayment
June 28, 2024
You can use it with vinyl as long as it is smooth and flat to allow the static charge to hold on to it. Rolled vinyl that wants to go back to its rolled shape will not necessarily work well, and it would need to be trimmed to fit the ES mat cutting area.
Kelly Wayment
June 28, 2024
Yes, you can use the heat pen while using the ES mat. 🙂
Yurii
March 2, 2024
Hello. May it be used with heat pen?
Thanks
Jerome
February 24, 2024
Hi, works this with the normal vinyl foils or only with printer papter etc?