
Have you ever had a chance to play around with Silhouette’s clear shrink plastic material? It’s lots of fun, and there are so many things you can do with it. Today we’re going to show you how to make a matching pendant and earrings set out of the clear shrink plastic. Follow along to see how it’s done!
Supplies Needed:
- Silhouette CAMEO® or Silhouette Portrait® or Silhouette Curio™
- Silhouette Cutting Mat
- Silhouette Cutting Blade
- Silhouette Shrink Plastic – Clear
- Printer
- Oven
- Baking tray
- Parchment paper
- Flat tool
- Hook earring wires
- Leather cord – black
- Plyers
- Design ID#259094
- Design ID #21861
Step One: Preparing the Design
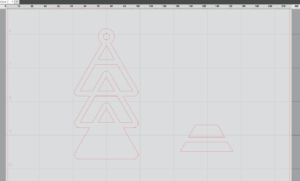
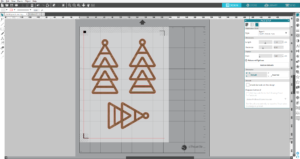
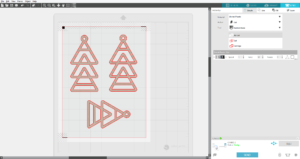
1. Open the earrings design in Silhouette Studio®. Ungroup it. In order to make a pendant, copy one earring and place it on the working space. Release the compound path. In order to do that, select the design, right-click, and select Release Compound Path. Place the two bottom trapezes aside.
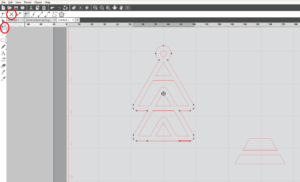
2. Select an outer line of the design and click the Edit Point icon on the left-hand side panel of the screen. Select one of the bottom edit points. Click the Point Delete icon on the top left panel and delete a bottom part of the design.
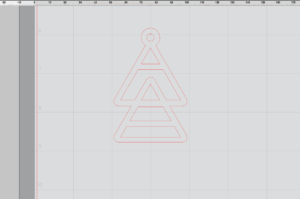
3. You can keep the design as it is or replace the inner parts of the bottom part of the design with trapezes, which we put aside earlier. Select the whole design, right-click, and select Make Compound Path.
4. Fill the designs with a Pattern by clicking Fill icon on the right-side panel of the screen. Go to Fill Pattern tab and click on the pattern you want to use for your project. Note: Change the transparency of the pattern approximately by 25%. After baking the plastic, the printed colors will be a couple of shades darker than what was originally printed, so for the best results, the colors of the design should be lightened. However, this method isn’t the best method if your image has overlapping details. If you do have overlapping details, changing the transparency could alter how some of the layers are printed. Another way to make your image lighter is to print your design using the low-quality printing settings.
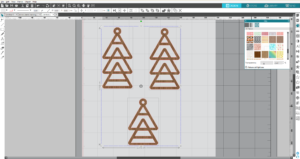
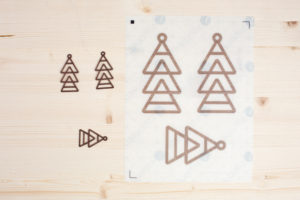
5. Resize the designs. Keep in mind that a baked piece will be approximately two to three times smaller than a printed one, as shown below.
6. If you are using shrink plastic for the first time, add a couple of extra designs that you can use as test items. Also, make sure to turn on the registration marks (found in the Page Setup panel).
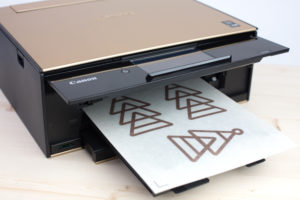
7. Feed the shrink plastic sheet into your home printer. If you are using the clear shrink plastic, print on the side with no Silhouette watermark. If you are using the white shrink plastic, print on the matte side.
8. Place the printed sheet on your mat and feed it into your Silhouette machine.
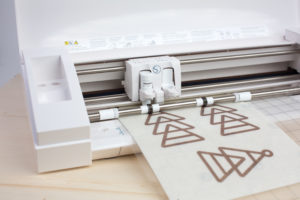
9. In the Send panel, choose Shrink Plastic as your material type. Adjust your blade if necessary and send your cut job to your Silhouette machine. (Tip: If your machine is having trouble reading the registration marks, try manually moving the blade over the black square by using the blue arrows in the Send panel.)
10. After cutting the designs, remove the designs from the cutting mat. Also remove Silhouette-branded liner before baking.

Step Two: Baking the Shrink Plastic
1. Preheat the oven to 290–325° F (140–160° C). We suggest testing your oven first by using a test piece to find the right temperature to bake the shrink plastic. For some ovens, 325° F (160° C) is normal for shrink plastic baking, but for other ovens, 290° F (140° C) is the perfect temperature because it’s not too hot.
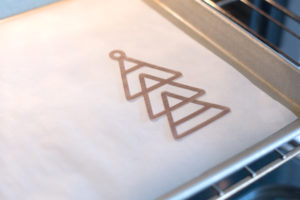
2. Place the shapes printed side up onto a parchment-lined cookie sheet. (Tip: If you are using shrink plastic for the first time, we recommend baking one piece at a time.)
3. The baking process takes approximately two minutes. Watch as the piece shrinks (it will curl and move and then lay flat again).
4. The shapes will be much smaller and thicker than the shapes you started with.
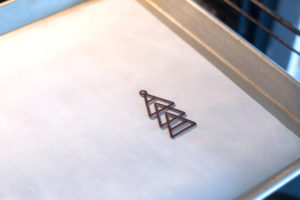
5. When you see that your piece is flat (or almost flat if you bake a bigger piece), quickly but carefully remove the cookie sheet from the oven. Right away, gently press the piece flat using a flat tool. You have a couple of seconds to flatten the piece because it cools down pretty quickly. The piece may stay slightly curled if you don’t flatten it fast enough.
6. Remove the piece from the cookie sheet, and repeat the process with each piece you have.
Step Three: Assembling the Pieces
1. Using hook earring wires, assemble the earrings. Put the pendant on the leather cord. Something good thing about clear shrink plastic is that you can see the image from both sides of your project.

Now you have a nice jewelry set to wear. Using shrink plastic, you can make all kinds of different jewelry projects and kids’ crafts.
Tell us about the projects you’ve made with shrink plastic.