I am so excited to share an in-depth tutorial for how to use my new Sketch & Stitch Silhouette cut files! If you love hand-stitching on your layouts, cards, and projects, these cut files are made just for you!
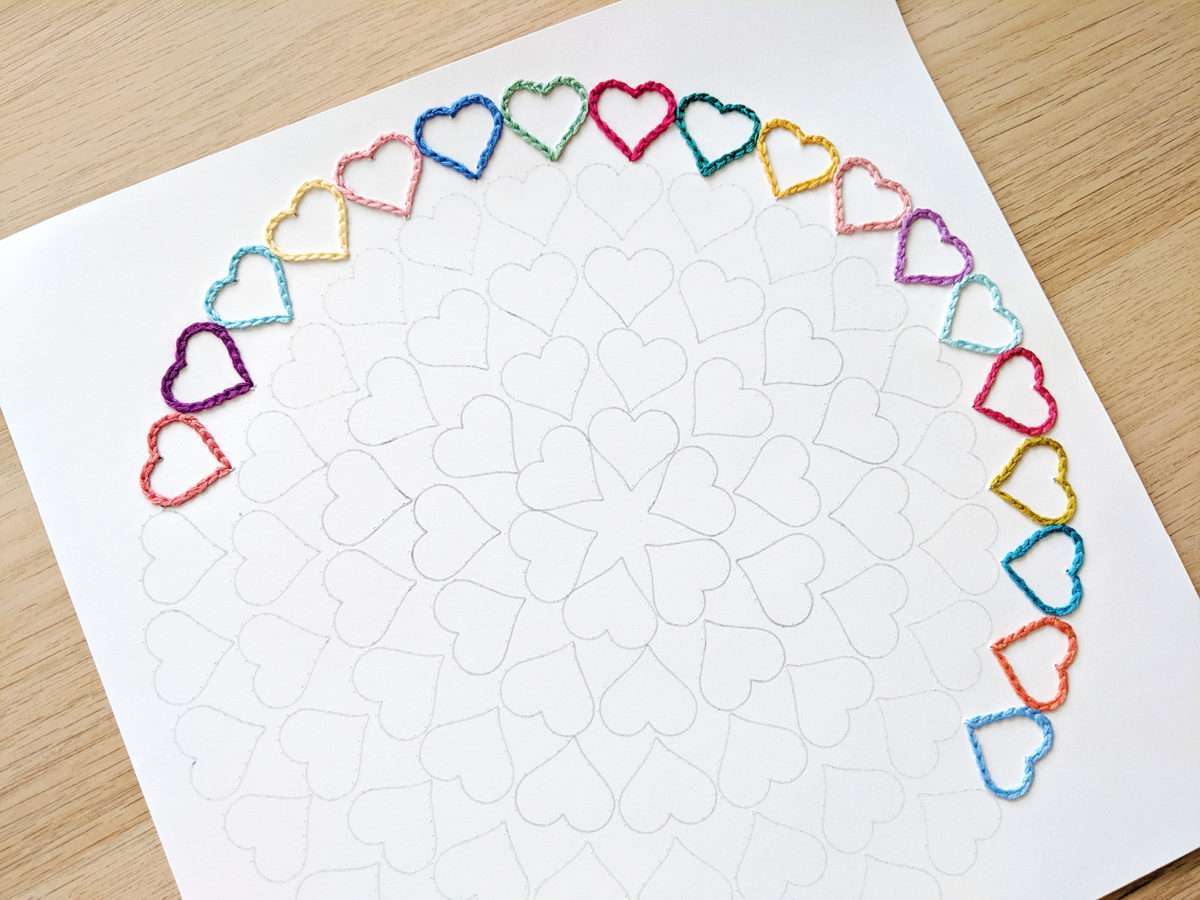
Previously when I did complex stitching designs on layouts, I found that when the holes were too close together, I didn’t know where to stitch next. But with these Sketch & Stitch designs, the guesswork is taken out of the equation! The Silhouette CAMEO® 3 will first draw the design with a Sketch Pen or Pencil Tool and then pierce the holes for stitching with a cutting blade! Now you won’t need to know where to stitch next because the design is drawn right on there. Easy peasy!
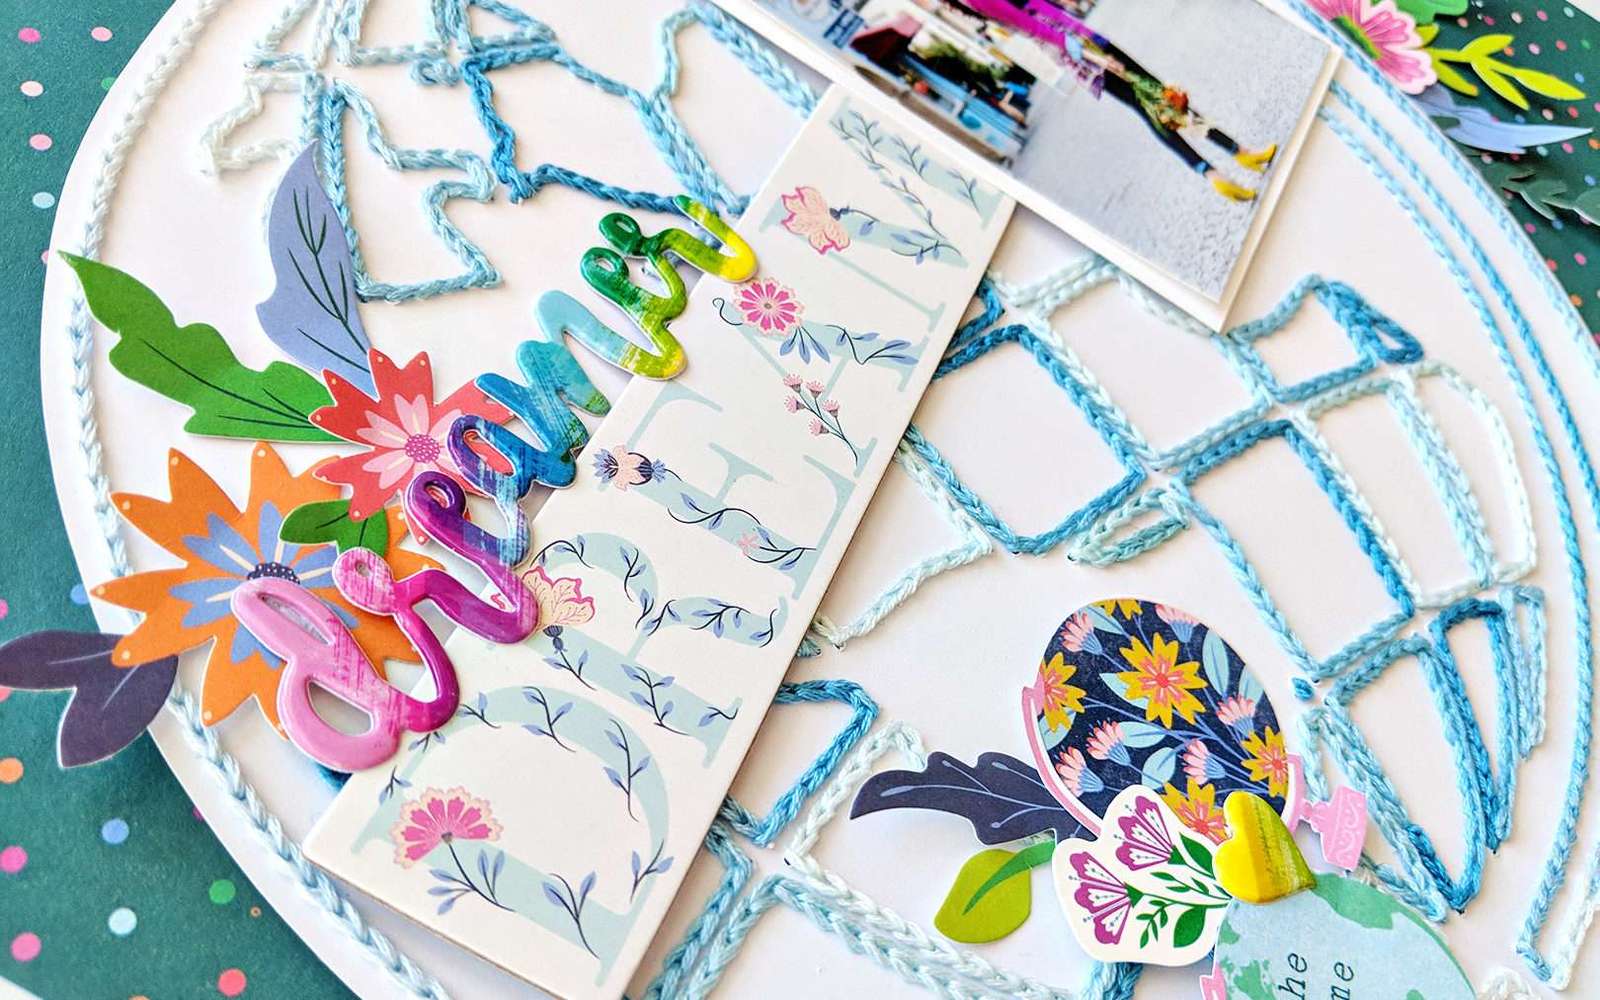
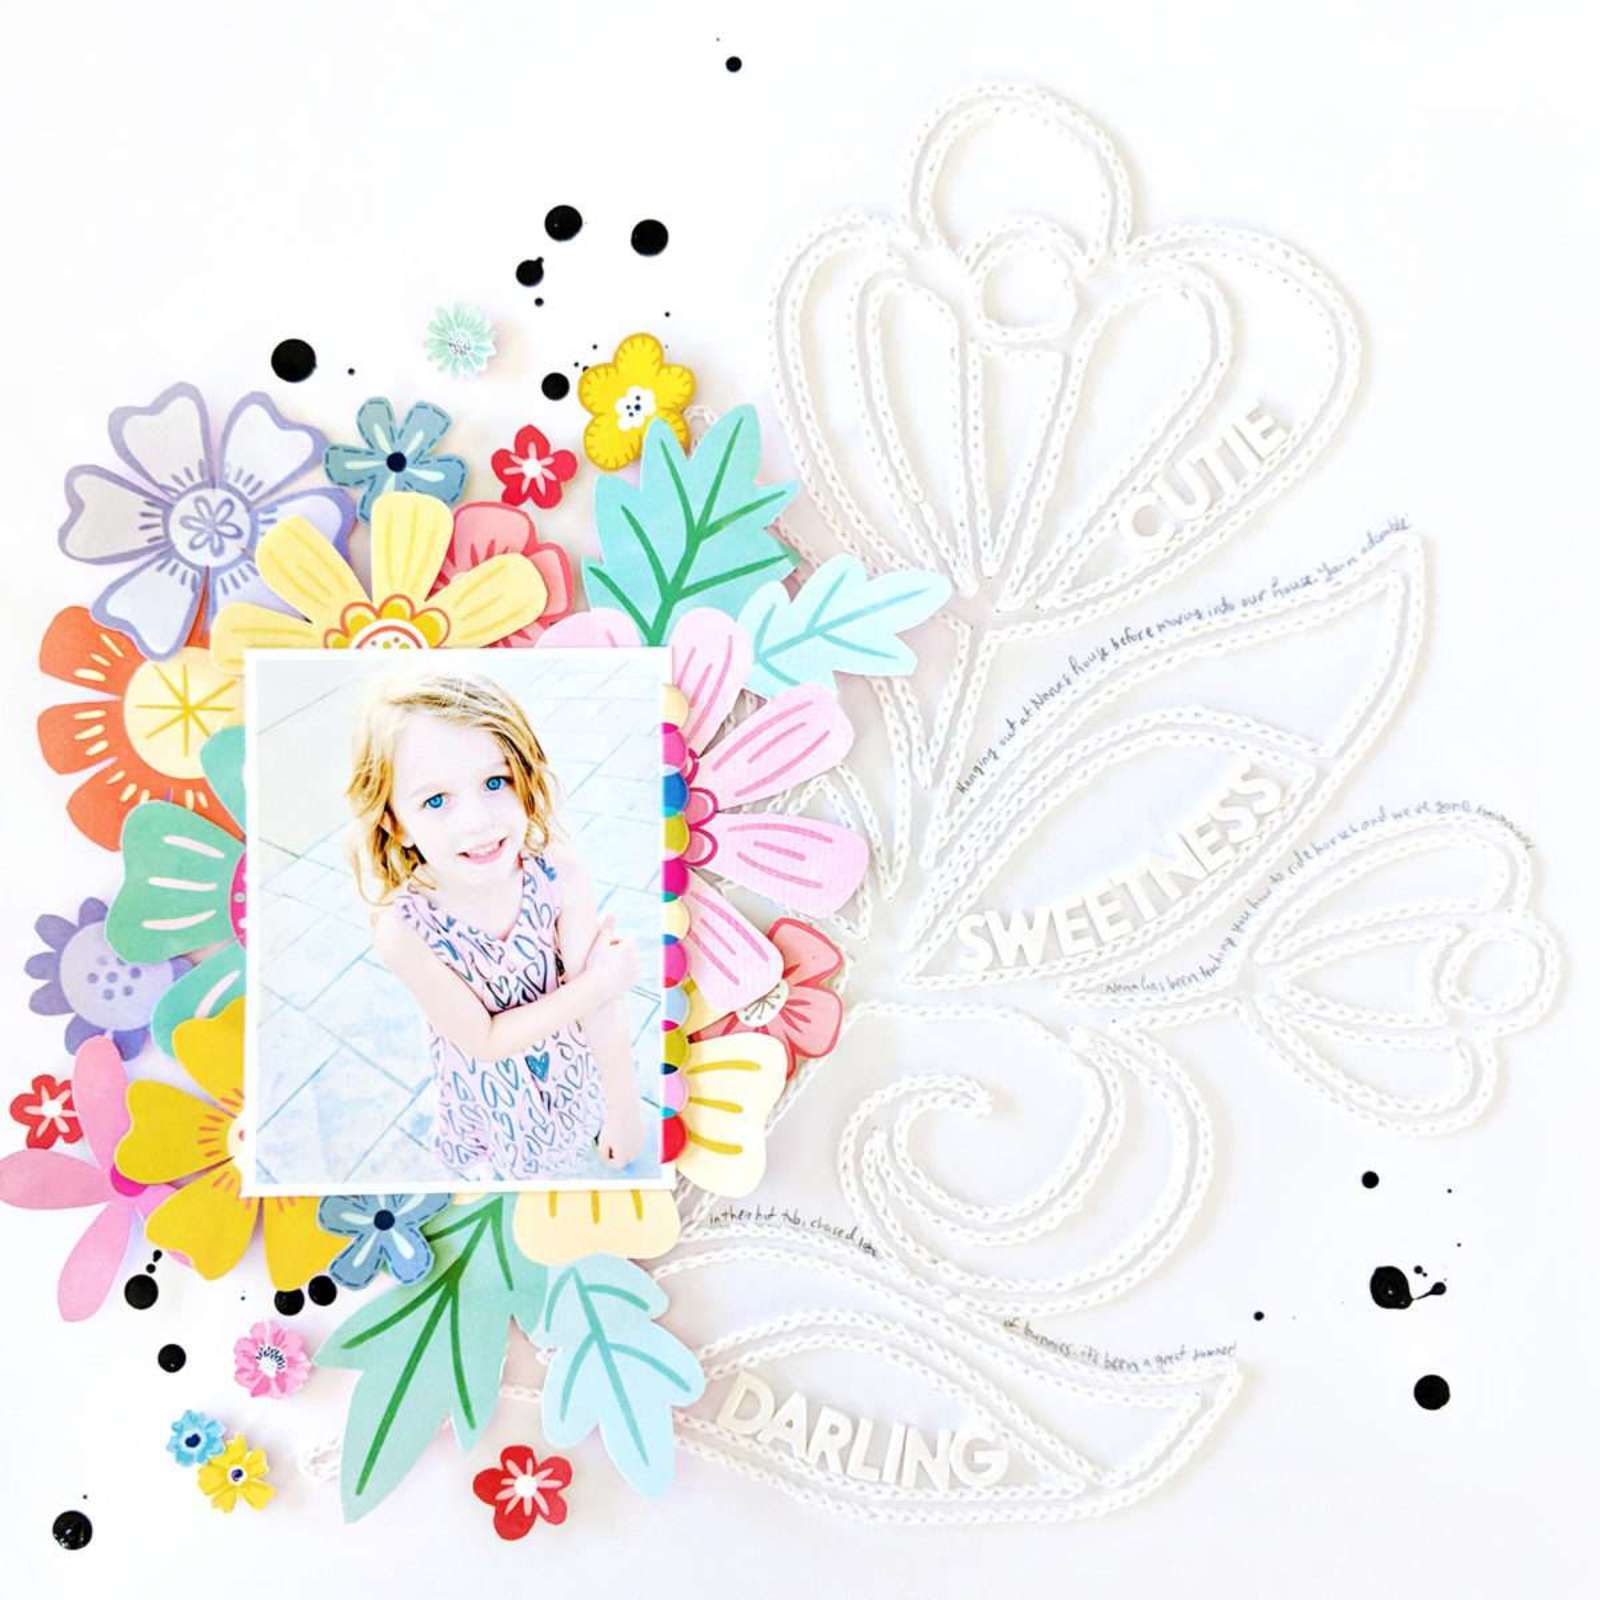
Check out these three finished examples of layouts using my Sketch & Stitch cut files and a work in progress:


I’ve created a YouTube tutorial if you learn best through process videos:
And now for a written tutorial with photos and descriptions if you learn better that way!
Supplies Needed:
- Silhouette CAMEO®
- Silhouette Studio®
- Silhouette Sketch Pens or Pen Holder
- Pencil
- Cardstock
- Needle
- Embroidery Floss
- Stickers and Other Embellishments
- Design ID #287531
Step One: Sketch Design and Add Stitching Holes
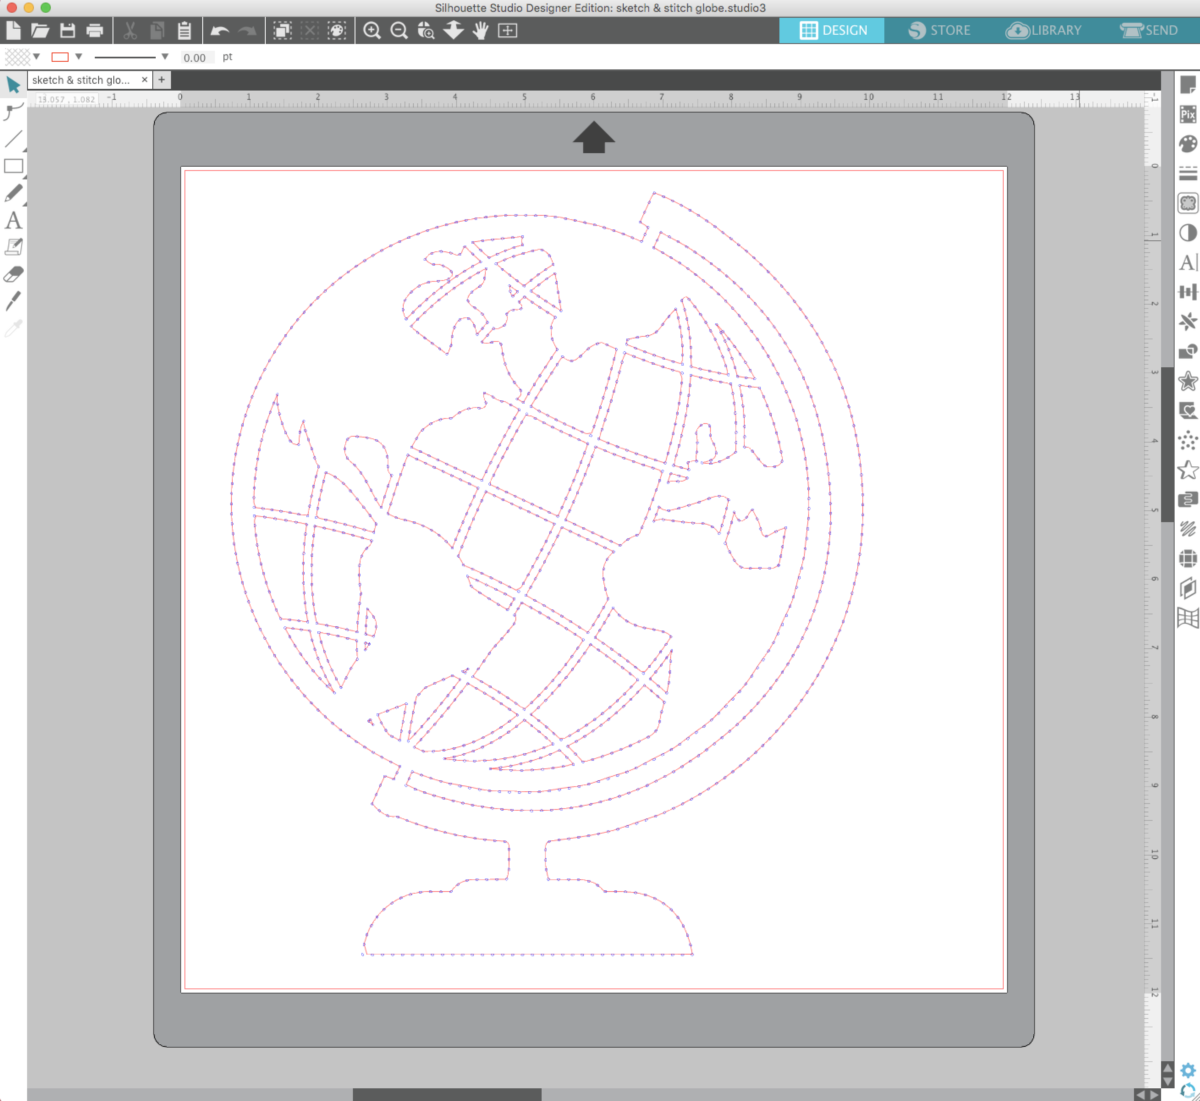
1. Download and open a Sketch & Stitch design (we are using Design ID #287531 here). If needed, use the Transform tools to center the lines and the stiches of the design on top of one another. It should look like this in Silhouette Studio® when you are finished:
For these particular cut files, you will need a Silhouette CAMEO® 3 machine with the two tool holders.

Note: You might be able to still get the same results with an original CAMEO or Curio by not unloading the mat between steps, but I haven’t tested that myself.
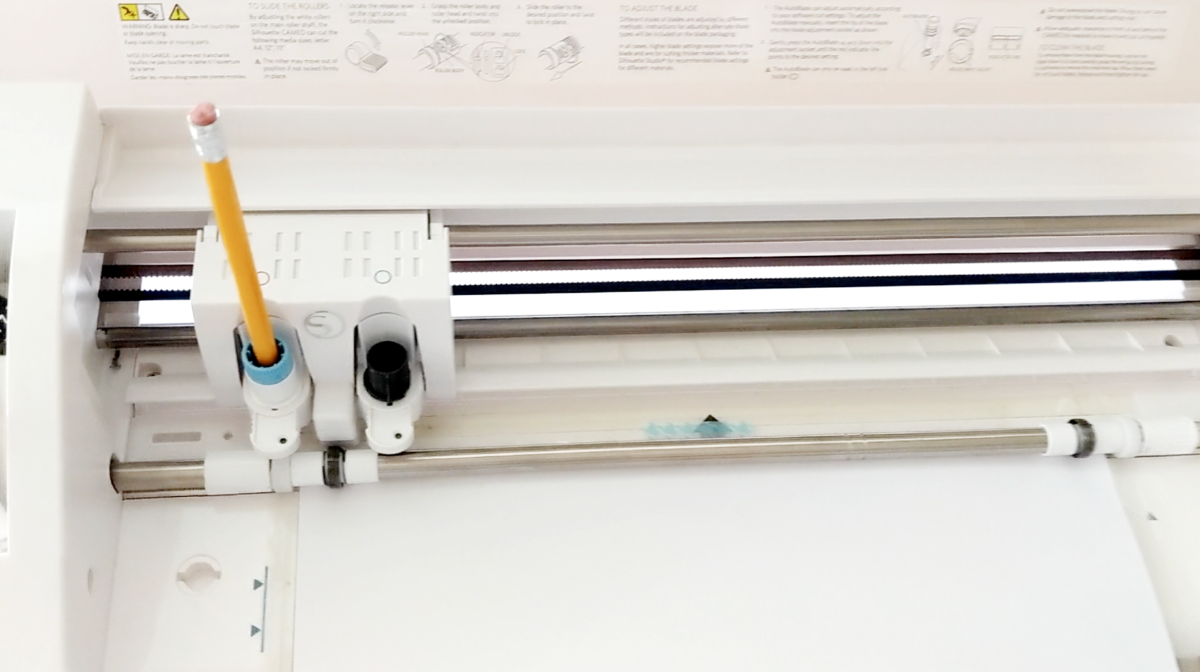
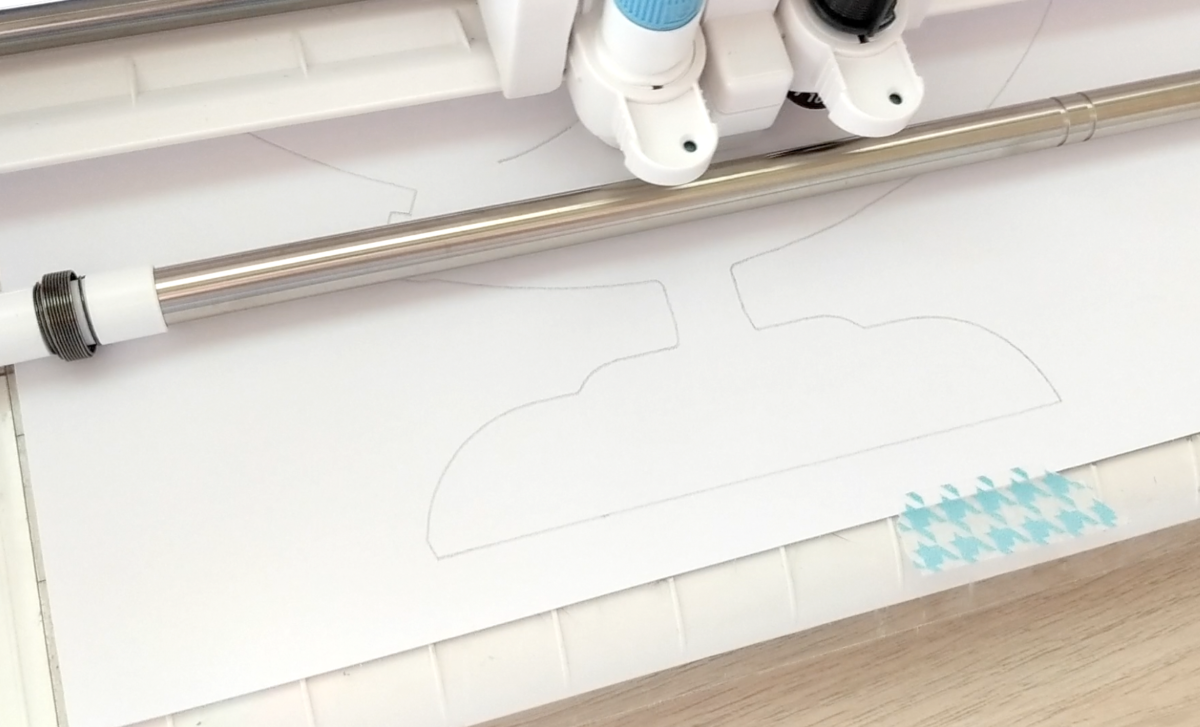
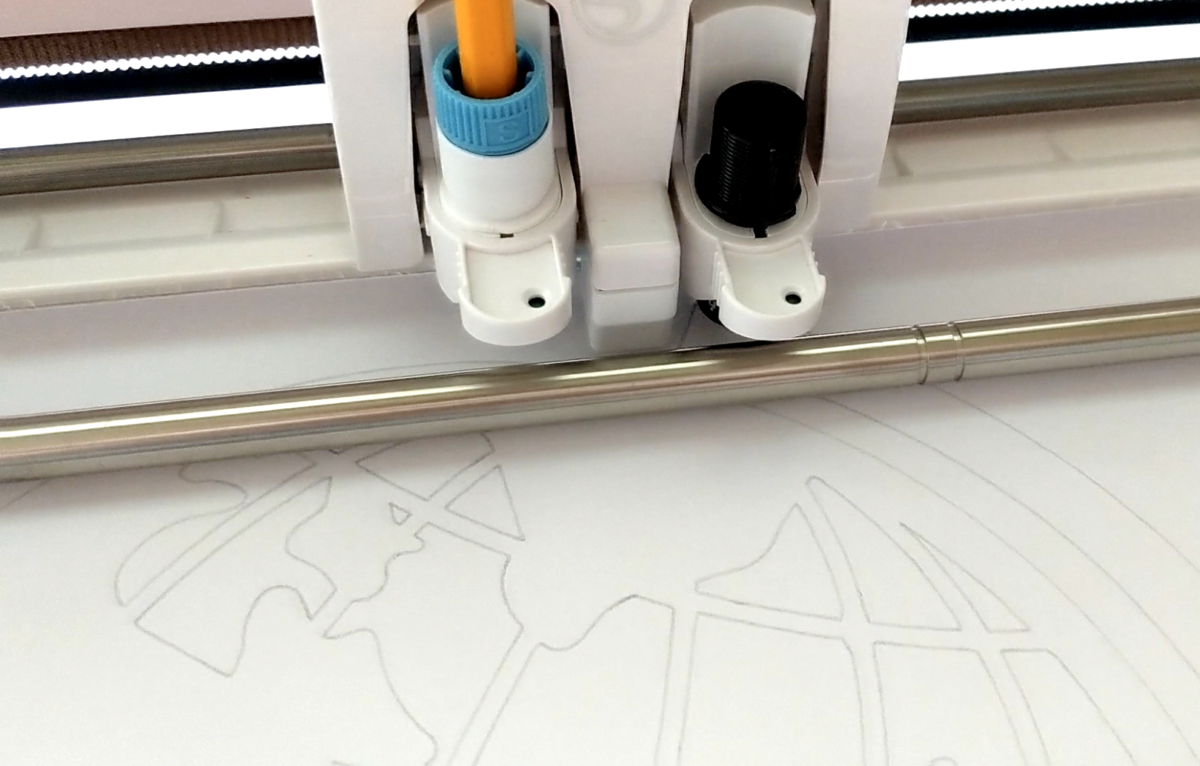
2. Load a Silhouette Sketch Pen or a pencil in the Pen Holder tool. (I prefer to use a pencil so that the lines are erasable if needs be) in the left tool holder. Load a Ratchet Blade set to a depth of 6 or 7 in the right tool holder.
2. Back in Silhouette Studio®, click the Send tab to open the Send panel. Choose Action by: Line. This is what you will see:
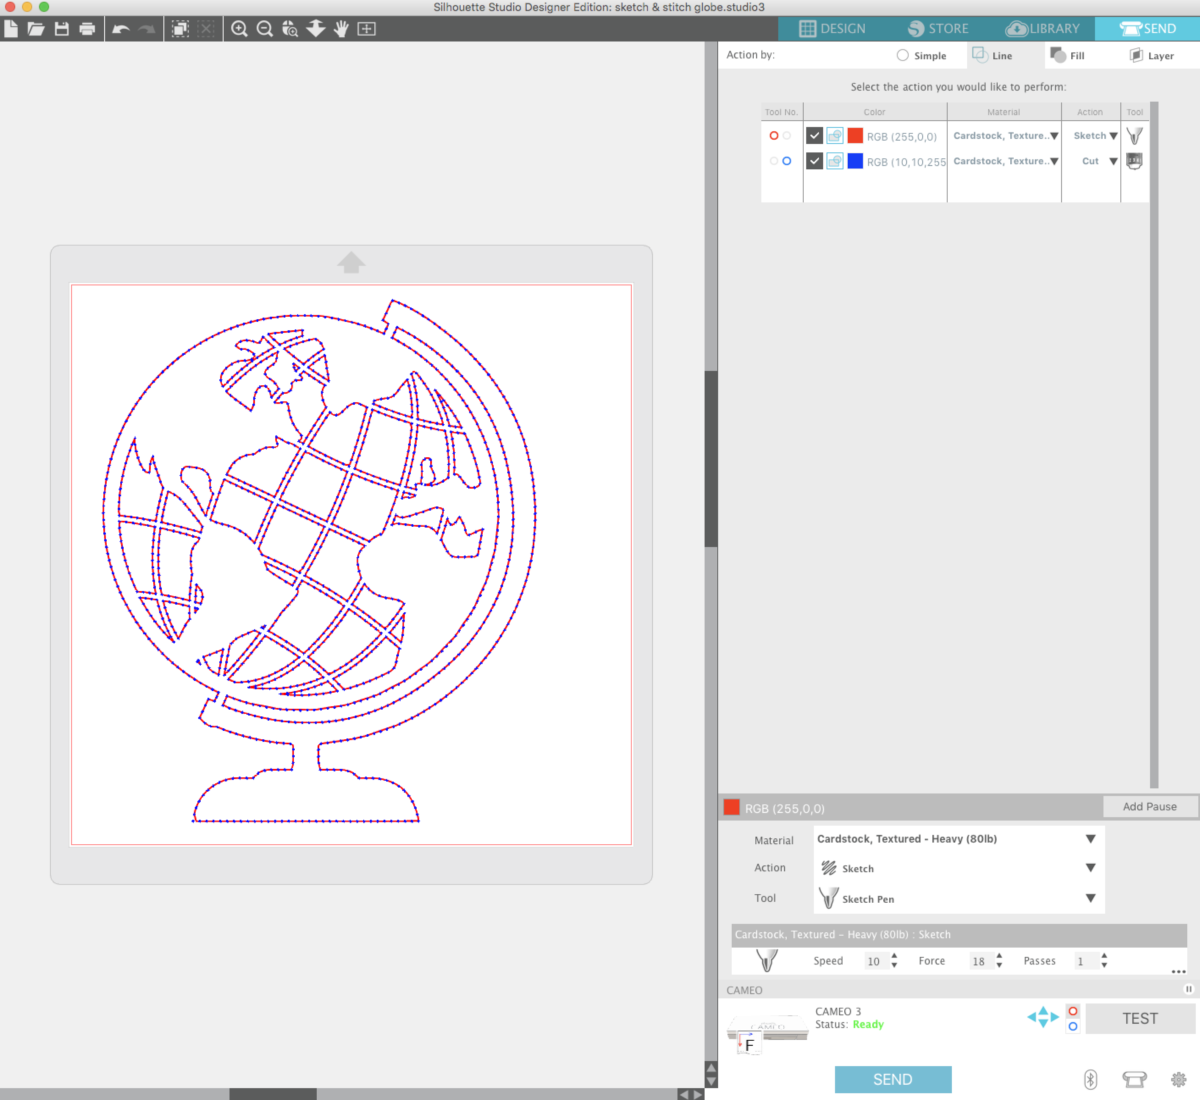
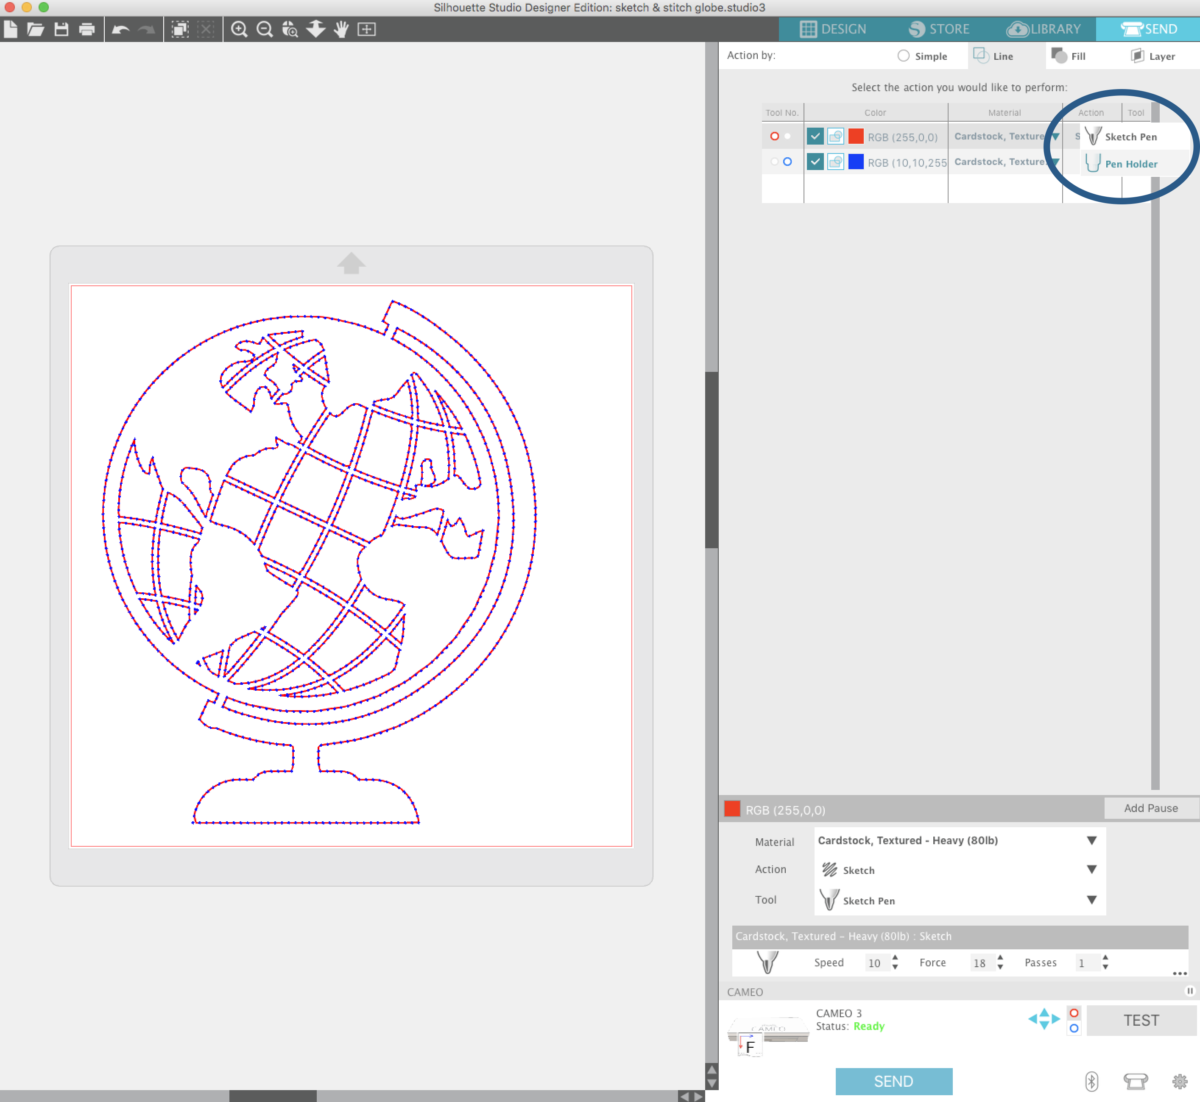
3. The tool with the red outline is at the top is first, so it will draw the design first. Make sure to select if you are using a Sketch Pen or Pen/Pencil Holder (I used a Pen/Pencil Holder with a pencil in it).
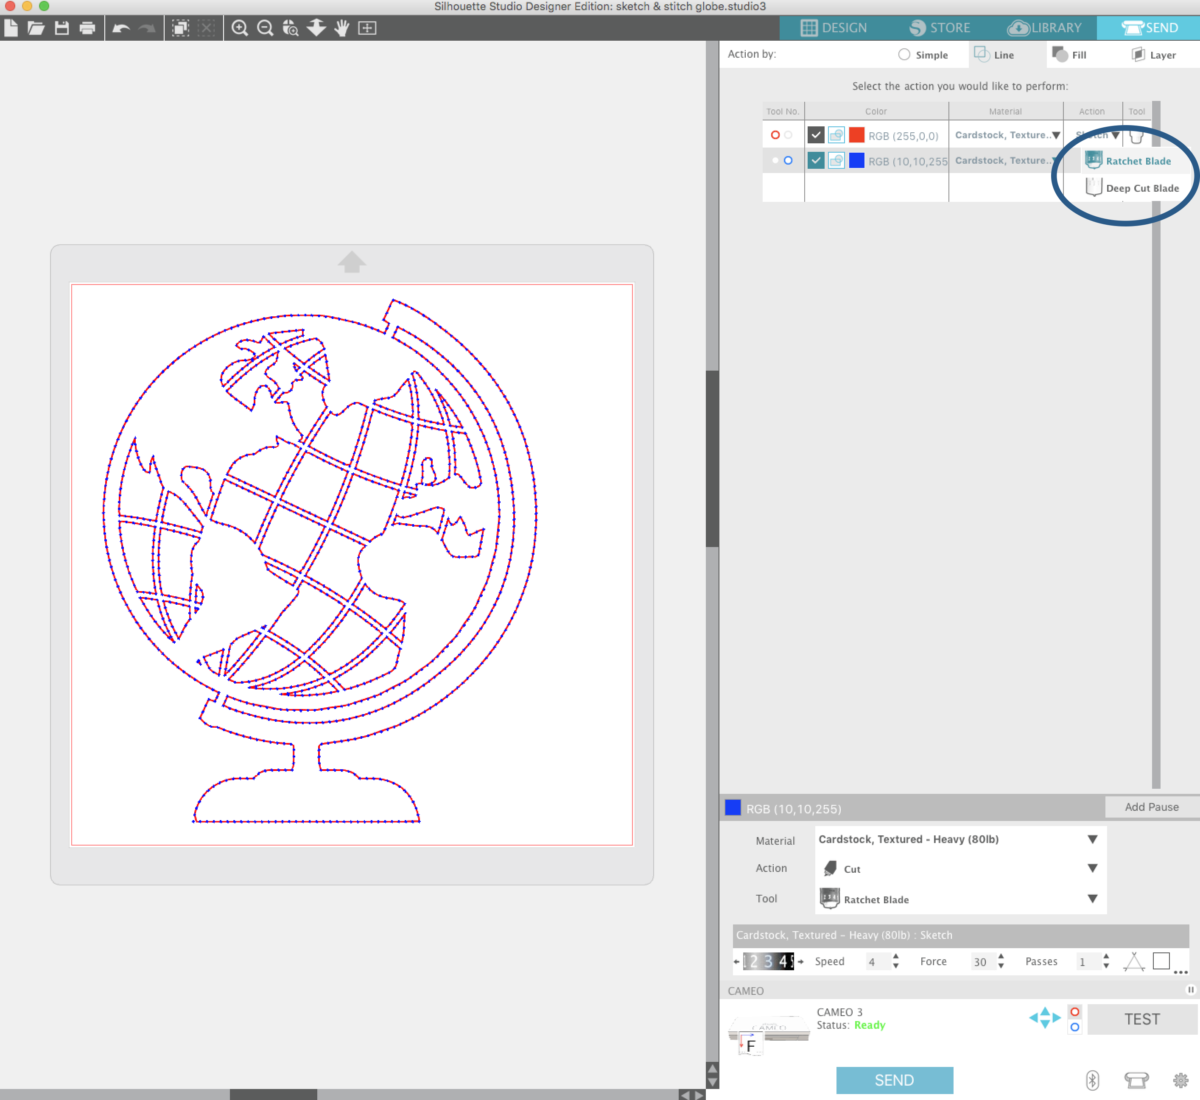
4. The tool with the blue outline is at the bottom and will cut the stitching holes right after the design is drawn. There is no need to unload and reload the mat—this is the awesome thing about having two tool holders! Be sure to select the Ratchet Blade as your tool.
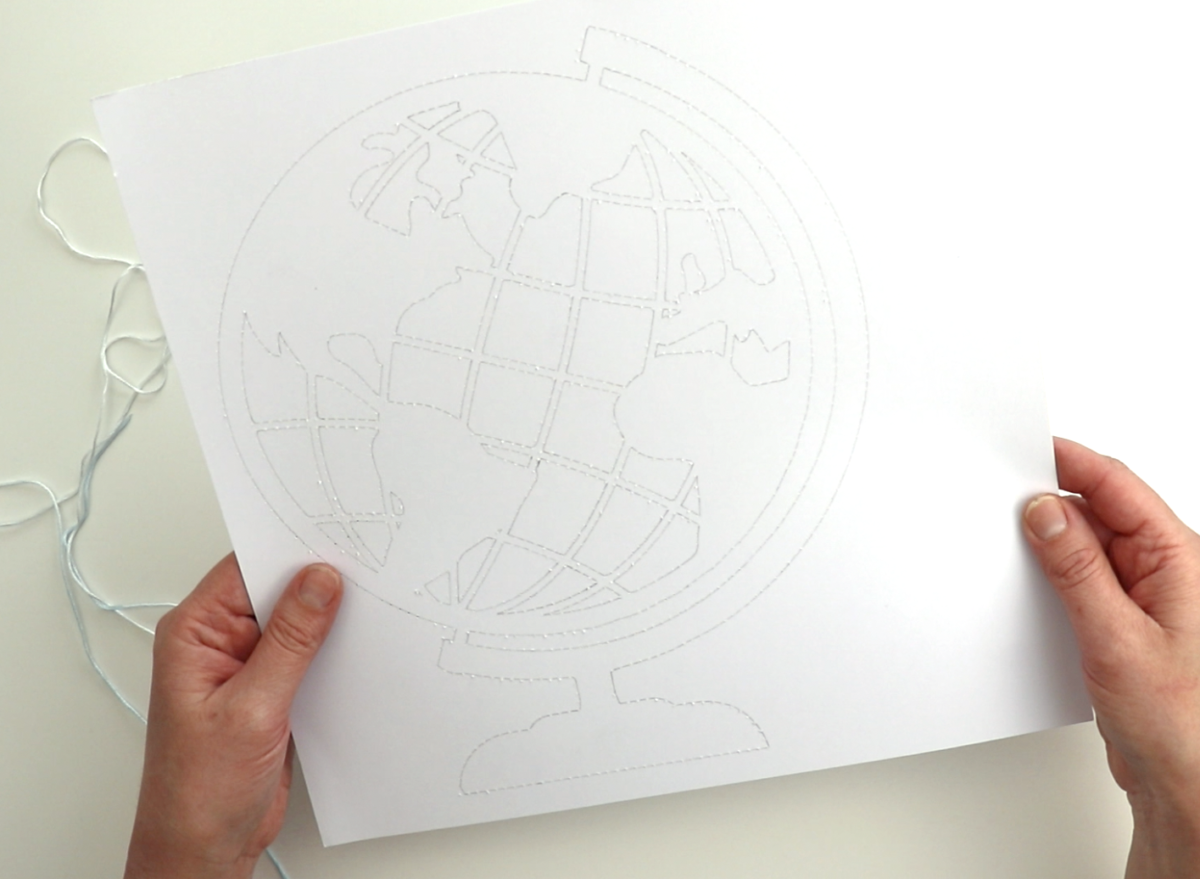
5. Click SEND! The time estimated is about 20 minutes, but it took about two hours for the machine to draw the globe and then make all the stitching holes. Afterall, it is an intricate design! So take this time to run some errands or work on other crafty projects. Then when you come back, it’s ready to go!
Here is the paper fresh off the mat, ready to be stitched!
Step Two: Add the Stitching
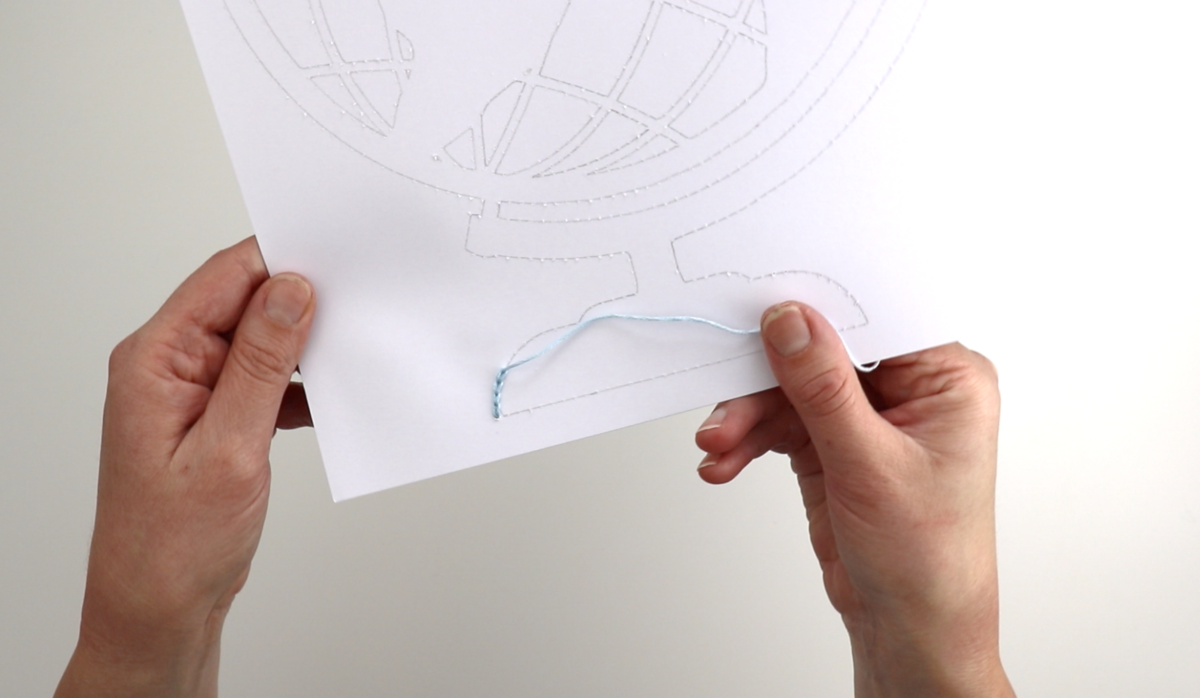
1. Lately I’ve been doing a chain link stitch on my projects—I LOVE the texture and pop of color it adds. So I spent about 8 hours stitching the globe with blue variegated thread. I know that’s a long time, but to me it’s worth it. I find it to be relaxing, and I love the results! You could do a simple back stitch, and it would take half the amount of time. This would still create a really cool texture.
2. Once I finished stitching the globe, I cut it out from the white background. I wanted to add it onto a darker colored background paper so it would POP! I used my new scrapbook collection with Pink Paislee called Horizon to decorate; it has a travel theme, so it went perfectly with this globe.

3. To finish up the layout, I added a photo, stickers, journaling, and embellishments like fussy cut globes and a whole ton of flowers.

I hope you are inspired to give these Sketch & Stitch cut files a go! I will be adding more to the Silhouette Design Store over the coming weeks! Do you have any requests? Any one of my previous designs can be turned into a Sketch & Stitch cut file, so let me know in the comments! Thanks for stopping by and have a great day!