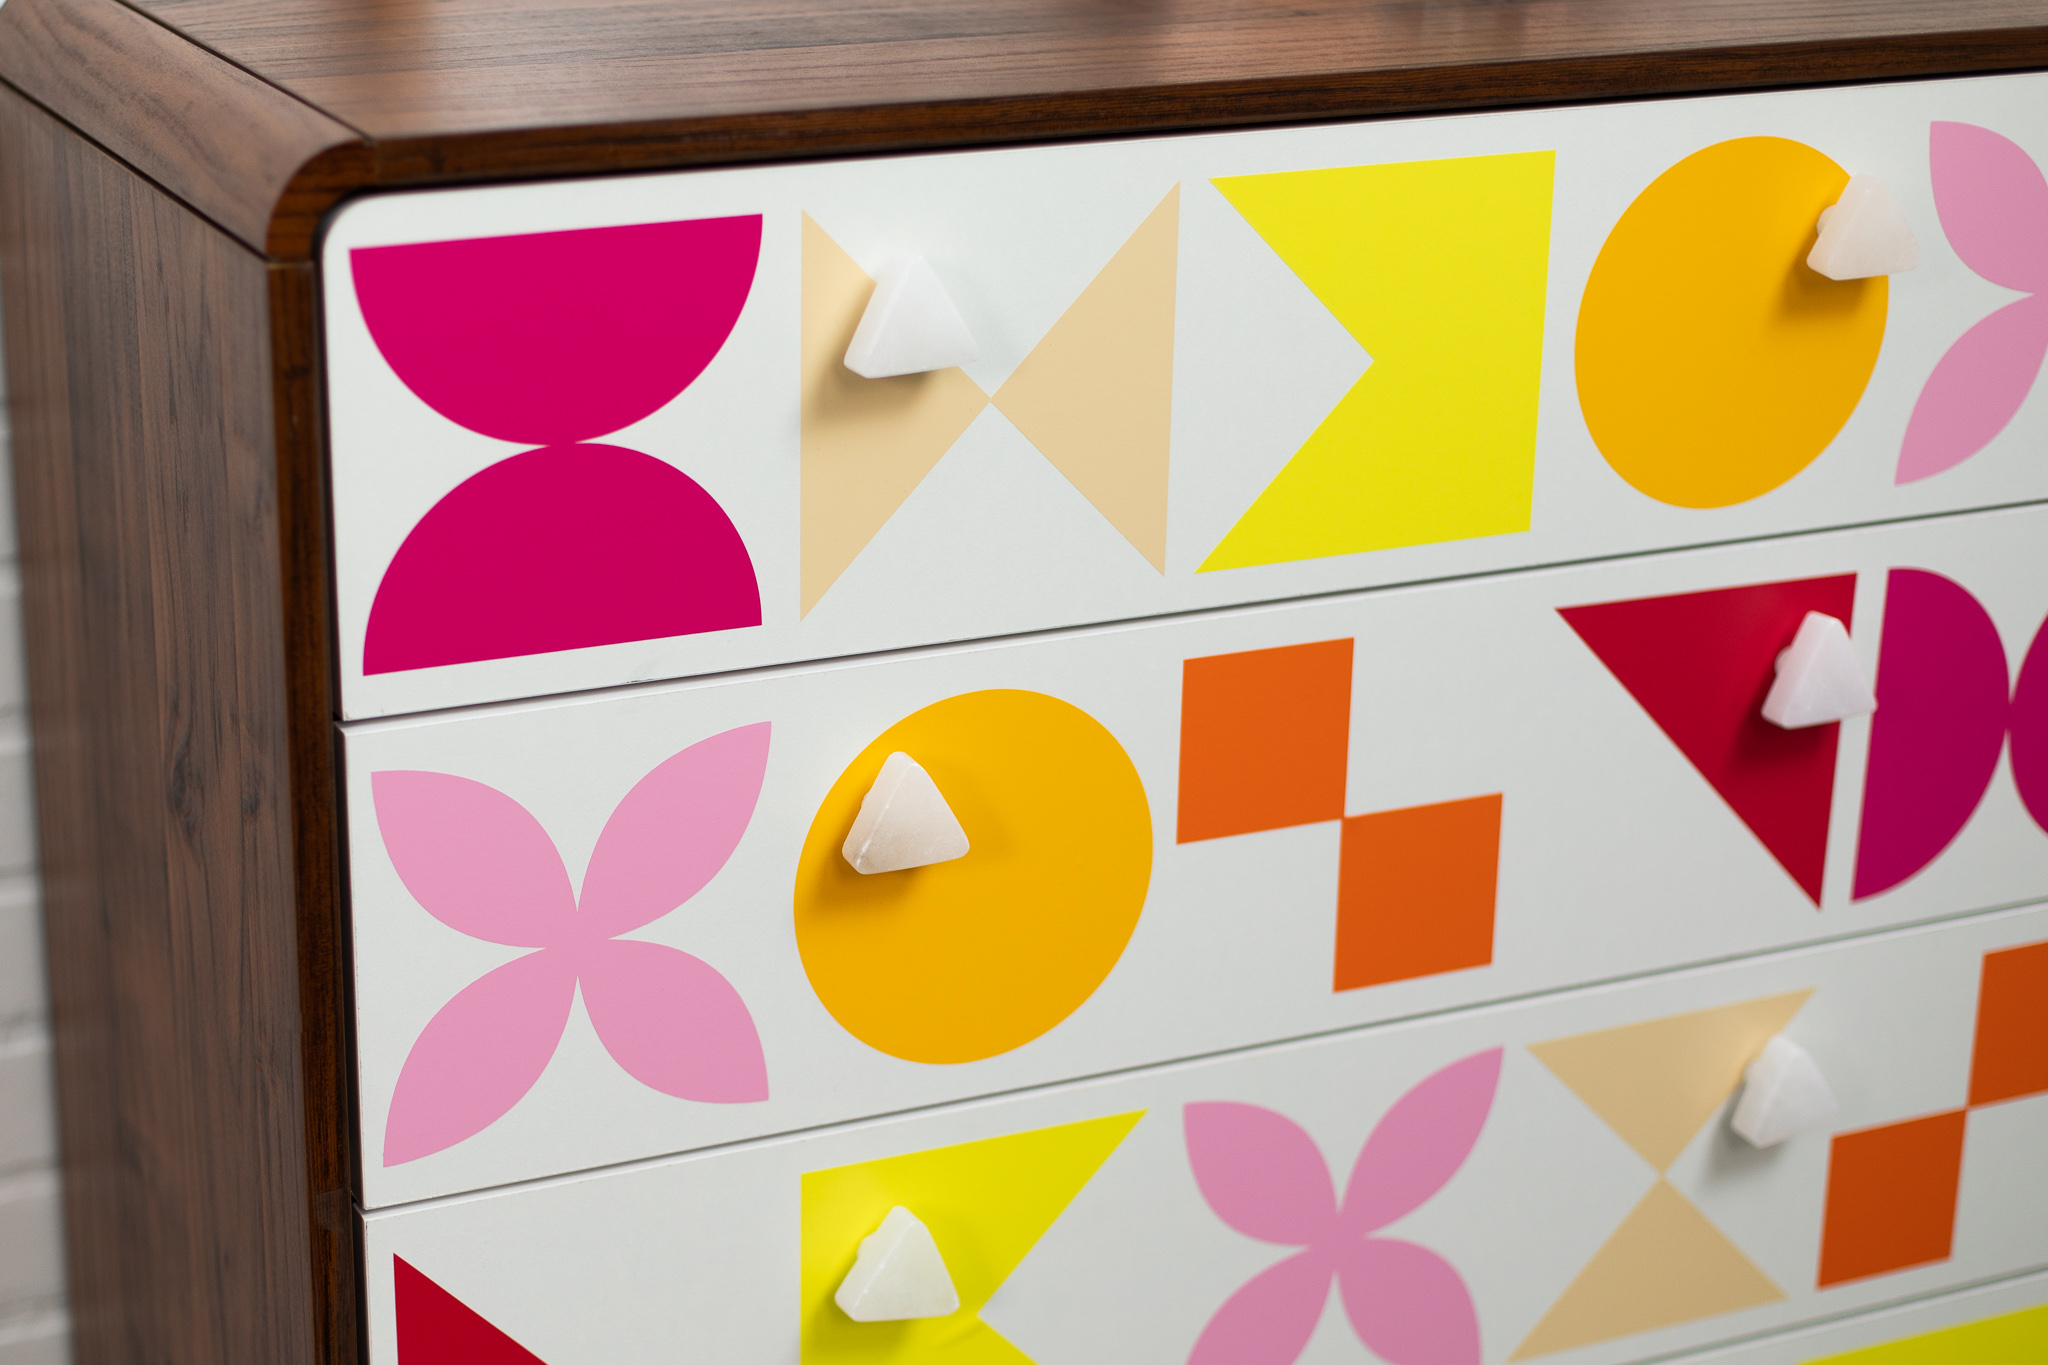
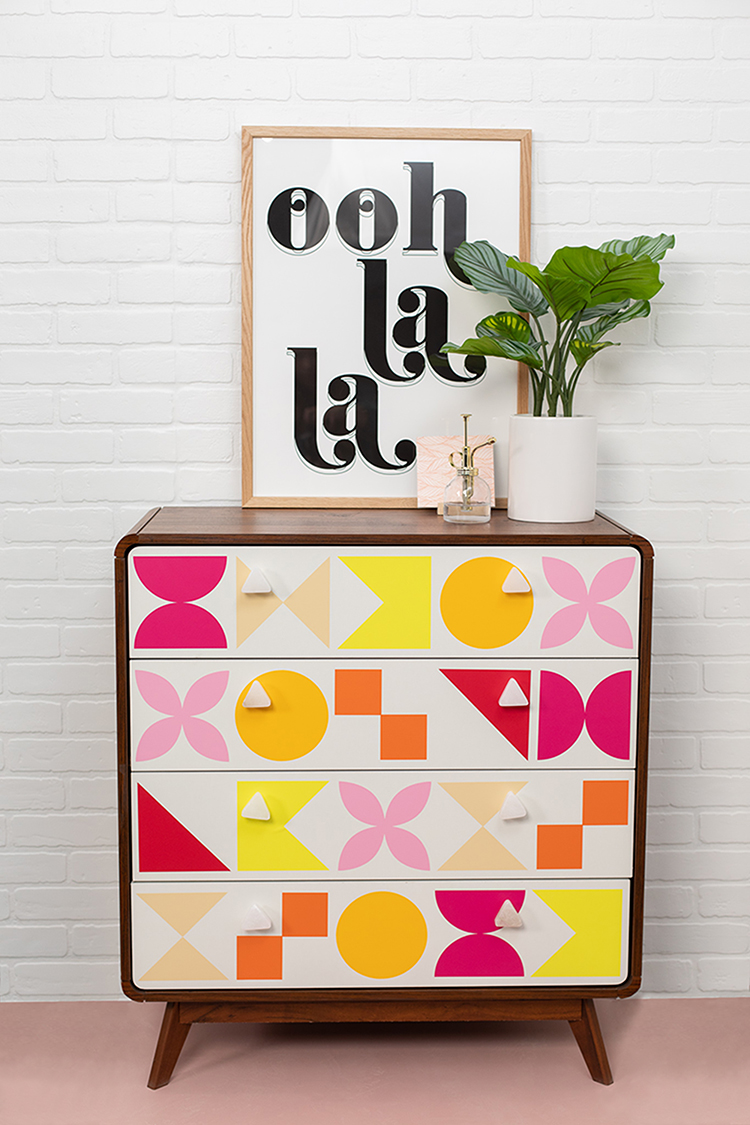
If you’re looking to give a room a refresh but aren’t quite ready to make drastic changes, dressing up your furniture with vinyl decals is a great way to do it! This mid-century modern dresser got a fresh look with It’s a Small World–inspired shapes in a warm color palette. It’s an easy project with a big impact!

Supplies Needed:
- Silhouette CAMEO® or Silhouette Portrait®
- Silhouette Studio®
- Silhouette Cutting Mat
- Silhouette Cutting Blade
- Matte Vinyl in various shades; we used beige, yellow, sunflower, orange, light pink, dark pink, red.
- Transfer Tape
- Design ID #2254; the rest of the shapes are made with Silhouette Studio® shape tools.
Step One: Preparing Your Designs
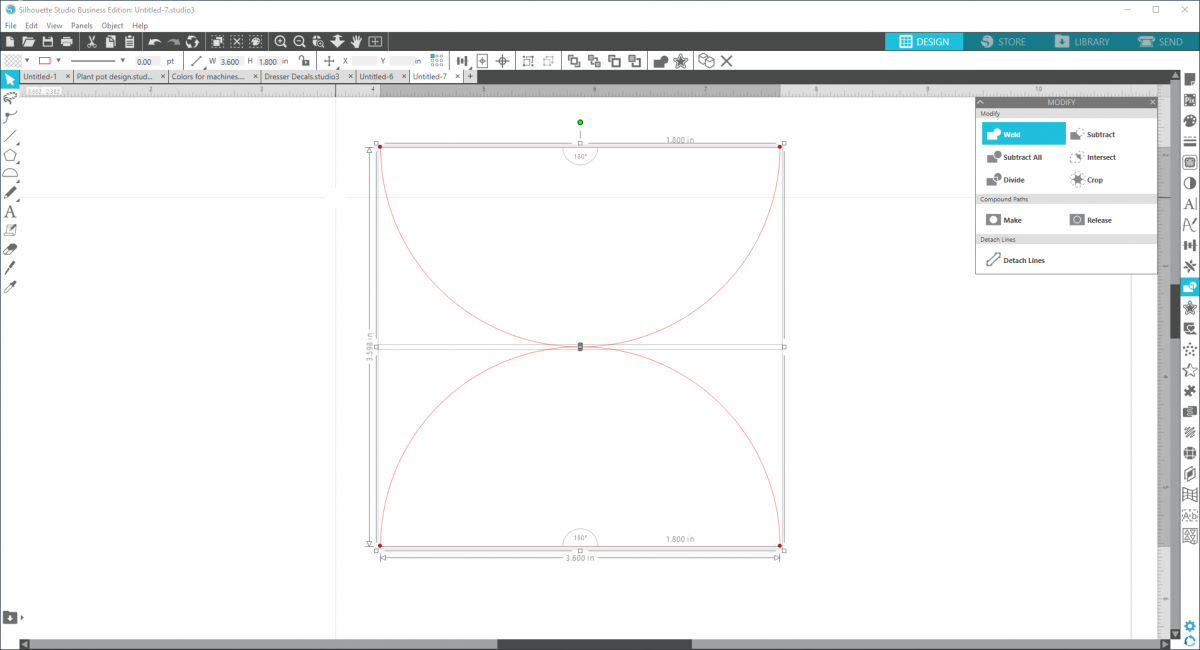
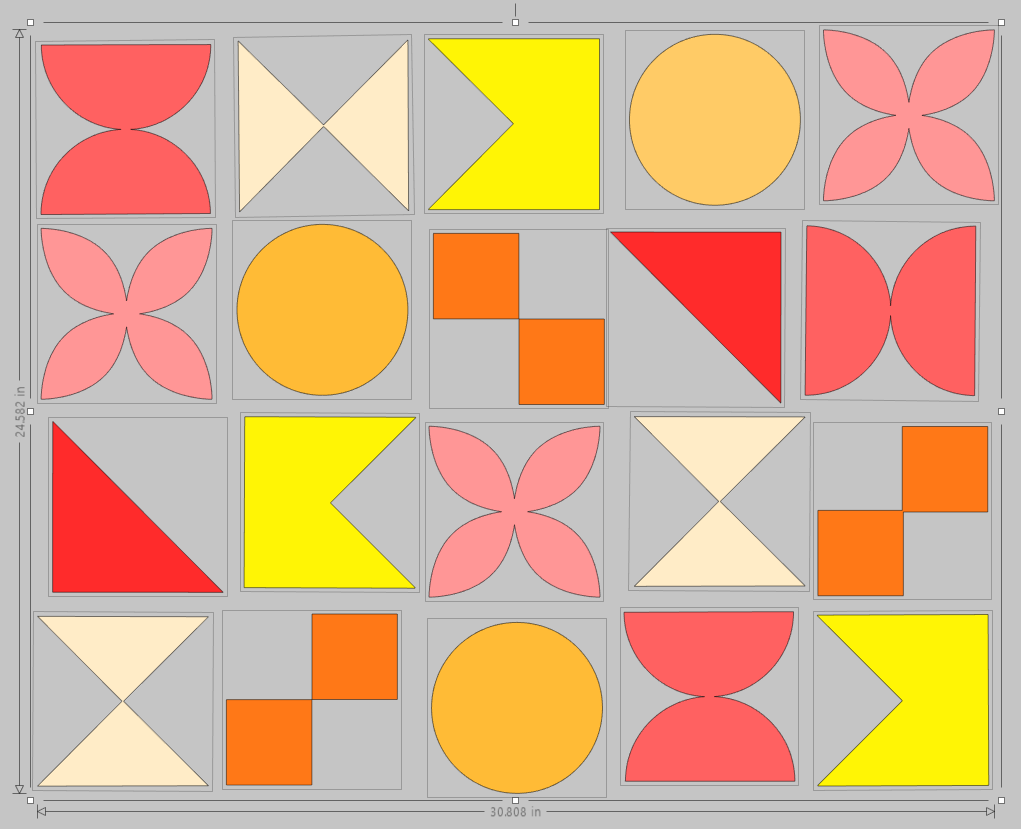
1. We used 7 decal shapes for the dresser, one for each color of vinyl we used. We’ll start by making the shapes: Insert (1) Design ID #2254, and then use the drawing and flexishape tools to create the additional designs: (2) a circle, (3) a right triangle, (4) two triangles, (5) a square with a triangle cut out, (6) two half circles, and (7) to squares. See photo below.
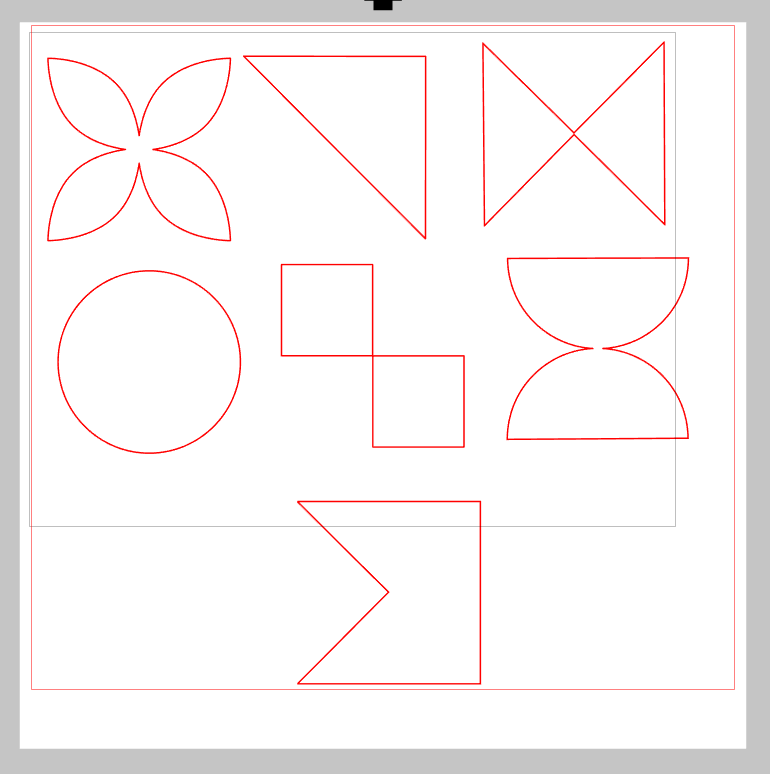
2. For the designs that include two shapes, you’ll want to overlap the two shapes just slightly and weld them together using the Modify Panel. This will turn the two shapes into one design which will cut out in one piece.
3. Take measurements of your piece of furniture to know exactly how large you should make your decals and how many you should make. We sized ours to be 5.5 inches square. Decide which color you’d like to make each decal.
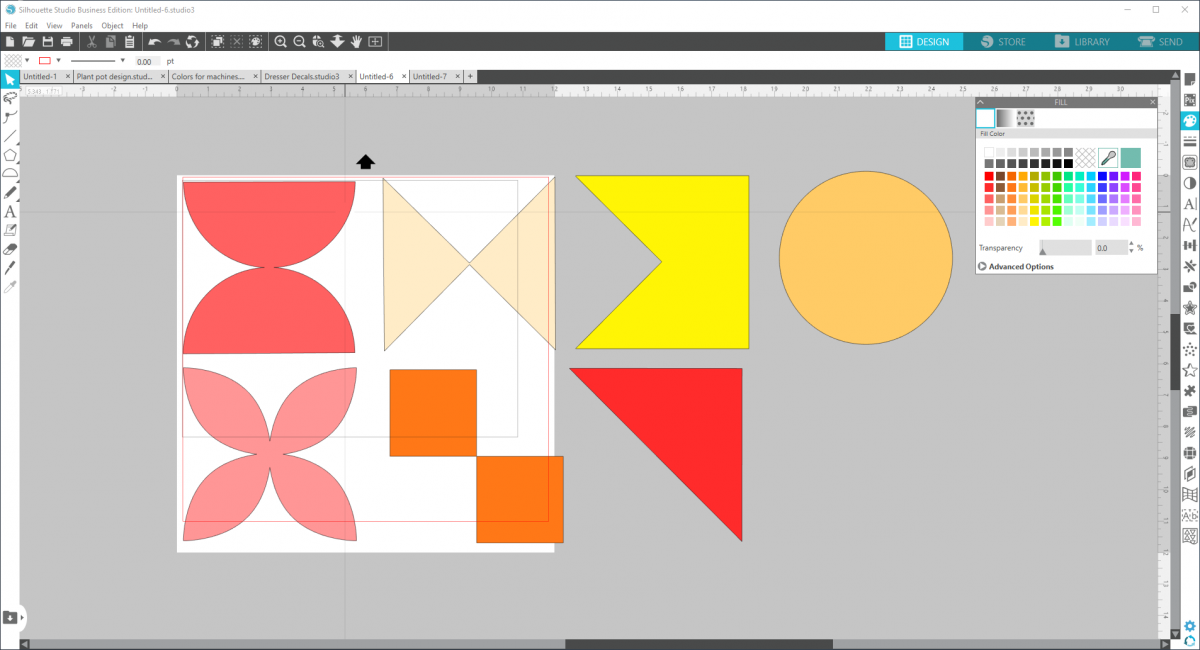
4. Use the gray space to arrange your designs in Silhouette Studio® how you’d like them to lay on your dresser. This allows you to experiment with the layout and know exactly how many of each design to cut.
5. Now you’re ready to cut your designs on the matte vinyl! Load into your machine, with or without a mat, and cut each shape/color out.

6. Cut close around each shape and weed the excess material.

Step Two: Applying the Vinyl Decals
1. Apply a piece of transfer tape onto each shape and secure with the scraper tool before removing the liner.

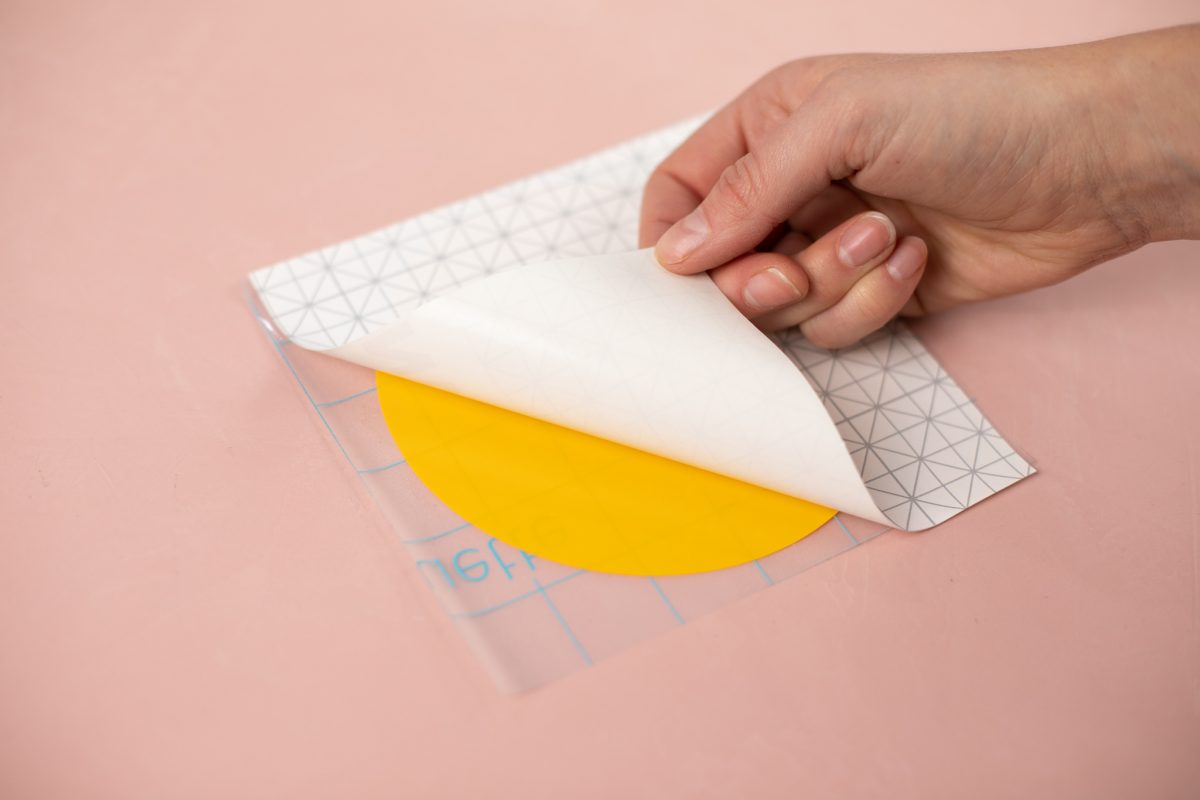
2. Prior to putting on your vinyl decals, measure and mark where you want each piece to go with a pencil so you can easily erase. Now lay out onto your piece of furniture and use the scraper tool to adhere.
Voila! A whole new look for a fraction of the cost of new furniture. Plus, you can always remove it if you get tired of it!
Nasze Naturalne
September 3, 2025
Your authentic voice really shines through in everything you create and share
Naszenaturalne
September 2, 2025
Really love your style
Kelly Wayment
June 28, 2024
You can use it with vinyl as long as it is smooth and flat to allow the static charge to hold on to it. Rolled vinyl that wants to go back to its rolled shape will not necessarily work well, and it would need to be trimmed to fit the ES mat cutting area.
Kelly Wayment
June 28, 2024
Yes, you can use the heat pen while using the ES mat. 🙂
Yurii
March 2, 2024
Hello. May it be used with heat pen?
Thanks
Jerome
February 24, 2024
Hi, works this with the normal vinyl foils or only with printer papter etc?