We’re nearing the end of summer, and that’s a little sad to us. Thankfully, we can use things like Silhouette’s window cling material and fun, colorful designs to keep a little bit of summer in our lives all year round. Keep reading to see how you can make your very own summer window clings!
Supplies Needed:
- Silhouette CAMEO® or Silhouette Portrait®
- Silhouette Cutting Mat
- Silhouette Cutting Blade
- Silhouette Studio®
- Window Cling – Clear and Window Cling – White
- Printer
- Design ID #271645, Design ID #190648, Design ID #269672, Design ID #269674, Design ID #269675, Design ID #75824, Design ID #136865, Design ID #177136, Design ID #177148, Design ID #177160, Design ID #195076, Design ID #268975
Step One: Preparing the Designs to Cut
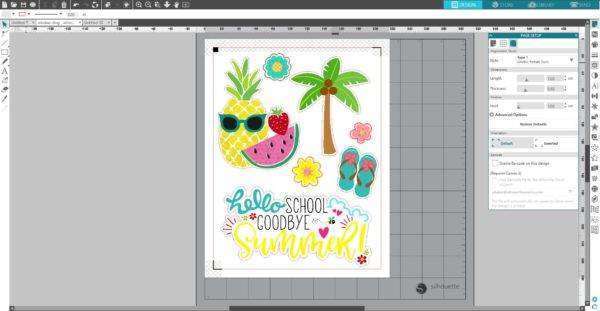
1. Open Silhouette Studio®. In the Page Setup panel, change page size to Letter. Then go to the Registration marks tab and turn on registration marks by setting the style to Type 1.

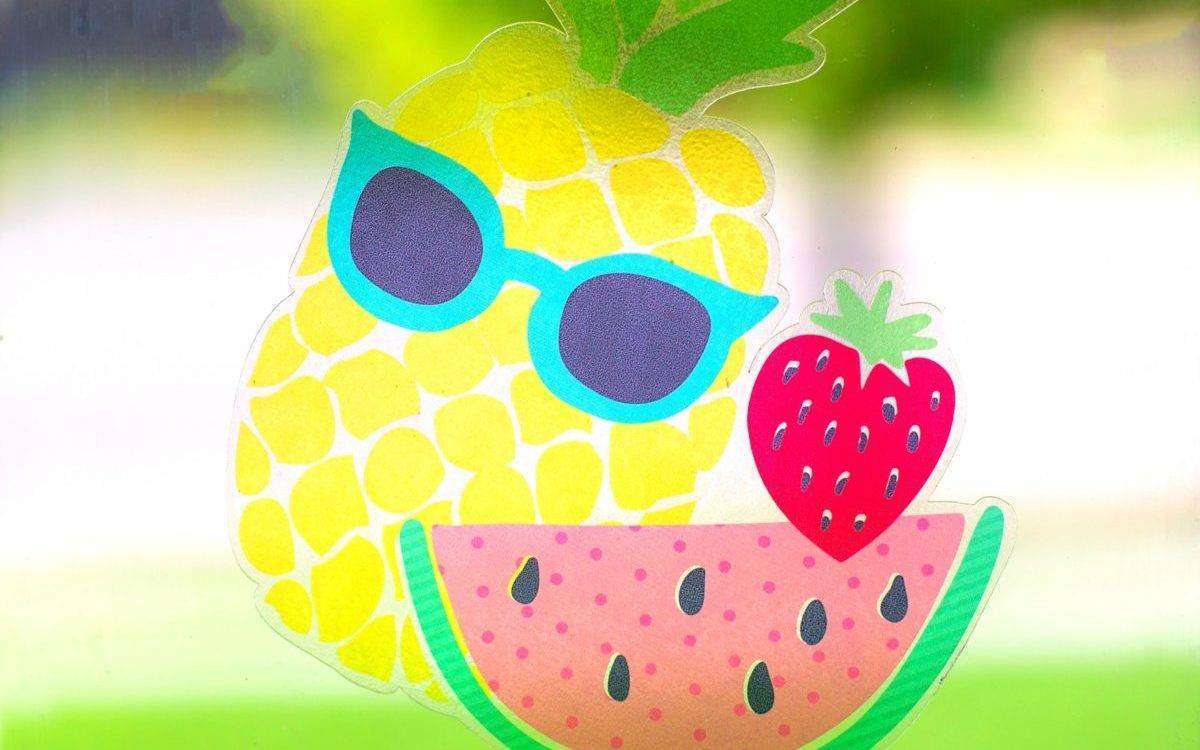
2. Open designs you want to print on the clear window cling material by locating them in your library. In this tutorial, for the clear window cling, we picked Designs #271645, 190648, 269672, 269674, 269675, 75824. If you want, you can add offset lines to your designs. To do that, select your image. Then go to the Offset panel or right-click your image and select “Offset.” You can choose to have the corners of your offset image either sharper or softer so that they are more bubbly or round in appearance. Clicking the offset action button provides a starting point. You can fine-tune the offset effect to be as wide or as skinny as you’d like with the slider bar or by typing in a specific measurement. Once your offset line is to your liking, click “Apply.”
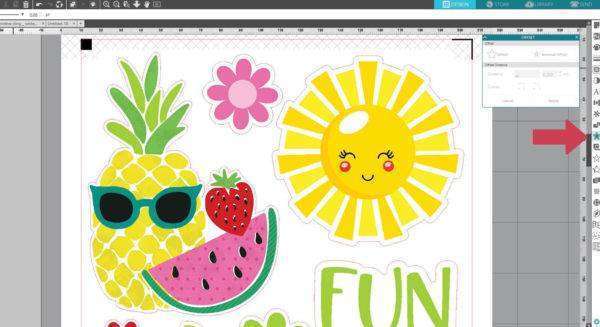
3. Arrange your designs so that they fit inside the registration marks borders. If a design is left outside of those marks, it will not be cut properly.

4. Repeat the same steps for designs you want to print on the white window cling material. In this tutorial, for white window cling we chose Designs# 271645, 136865, 177136, 177148, 177160, 195076, 268975.
Step Two: Print & Cut the Designs
1. Feed the window cling material into your inkjet printer. Make sure you print on the glossy side. Before you attempt to remove the sheet from your printer, make sure that the ink is dry.![]()
2. Place the printed sheet on your mat and feed it into your Silhouette machine.![]()
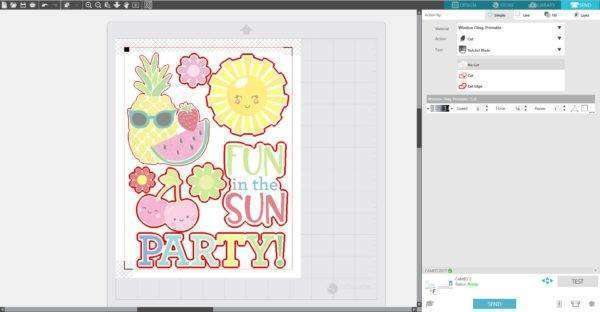
3. In the Send panel, choose “Window Cling” as your material type. Make sure your Silhouette machine will just cut out the outline of your shapes by selecting the Cut Edge option. Adjust your blade if necessary and send your cut job to your Silhouette machine. (Tip: If your machine is having trouble reading the registration marks, try manually moving the blade over the black square using the blue arrows in the Send panel.)
4. Remove your sheet from the cutting mat, and peel away your designs.
![]()
Something cool thing about the clear window cling material is that you can place the window clings on one side and you can see the images from both sides.


And when you finally feel like you’re ready to be done with your summer window decorations, you can put them away and pull them out when you’re ready for them again because they’re reusable. We hope you a fun time decorating your windows!