Have you heard about the new Silhouette ModelMaker™ software? Silhouette just released it to the general public for purchase last month, and I’m here to share some more information about it. Several of us on the design team will be talking about it this month, so be sure to visit the blog often!
Target Audience
This software is targeted to those who like creating 3D objects and models, especially students involved in science, technology, engineering, and math. I love working with 3D paper crafts, and I have kids who are the perfect age to be involved in educational projects like this, so this software is a winner for our household.
What Does It Do?
Simply put, ModelMaker allows you to design a 3D shape on your computer to be cut or Print & Cut with your Silhouette. You have multiple 3D shape options that can be drawn and manipulated in the software.
ModelMaker can send a job directly to your Silhouette machine and has no association with your Silhouette Studio® library.
First Things First
Here are a few helpful tips as you open the software for the first time.
User Manual
If you have the current version, you can access the user manual from the Help menu.
Preferences
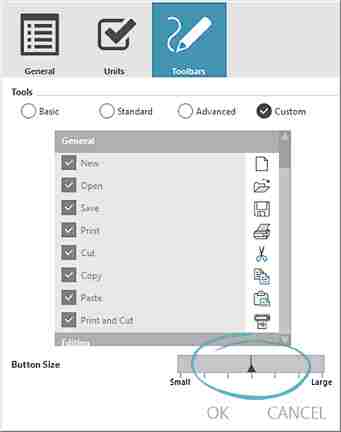
You may wish to change a few defaults up front, like displaying inches instead of centimeters, or button size. Go to File>Preferences to view your options.
- Use Units to choose inches instead of centimeters.
- Use Toolbars to choose a different button size (see image above).
- There are plenty of other things you can change, but these were the two I found necessary for myself.
Tools
I also found it helpful to show more than the basic options on my toolbars. On the top menu bar go to Tools and check Basic, Standard, Advanced, or Custom. Basic shows the least amount of tools and Custom shows the most. All of the toolbars can be customized in Preferences as discussed above.
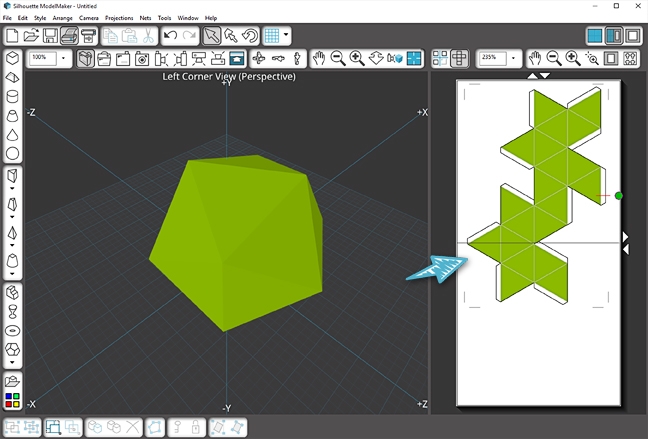
ModelMaker Layout
Windows
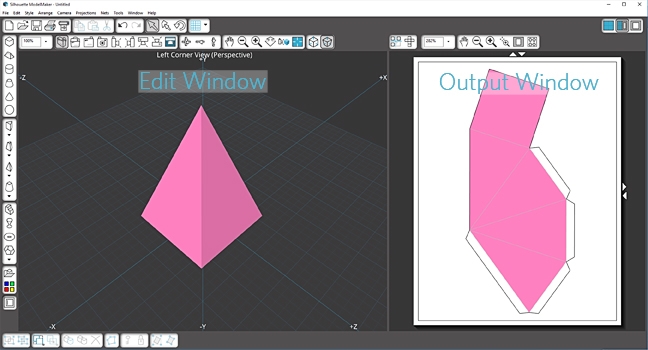
You will see two main parts to the main screen upon opening the software. The Edit Window and the Output Window.
- The Edit Window is where you draw, move, and edit the 3D designs.
- The Output Window is where you see the shape as it will fit on your paper in its flattened and segmented form (called a geometric net). The perforations and glue tabs are automatically provided.
Toolbars
You have two lines of tools across the top.

- The first row shows your basics, like Open, Print, Cut, Undo, Select, Rotate, and Grid options.
- The second row of tools over the Edit Window gives you options on how you view your shapes in their 3D form. It’s nice to have a variety of perspectives to get an idea of how your 3D shape looks from various angles.
- The tools over the Output Window include Projections vs. Nets, along with zoom tools and Auto-Arrange Nets (very handy when you’ve created multiple shapes).
![]()
Creating Shapes
Along the left side of the screen, you have the Shape library, the QuickShapes library, the colors/textures palette, and the Shape Wizard. I’ll just briefly touch on each.
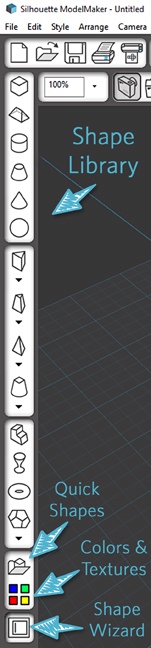
Shape Library
Choose the various shapes to draw. Some shapes have a dropdown menu (indicated with an arrow) for variants of that type of shape, such as a choice in number of sides.
QuickShapes
This contains shapes you can drag directly onto your workspace, along with premade printable street models like road tiles, buildings, houses, and vehicles.
Colors/Textures Palette
Change the color or texture of your entire shape, or just one face at a time.
Shape Wizard
This nifty little tool lets you design a shape by plugging in exact dimensions.
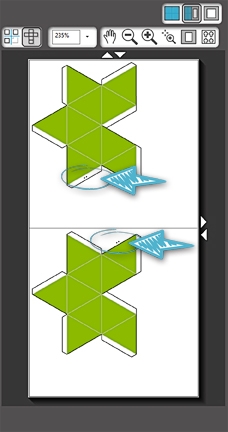
Favorite Feature
There’s so much more I could talk about, but I’ll just leave you with one of the features I love. It’s the option to Separate Nets in the Output Window.
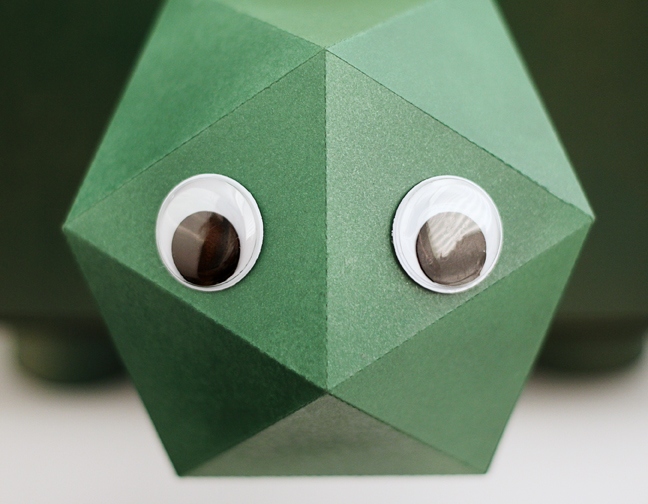
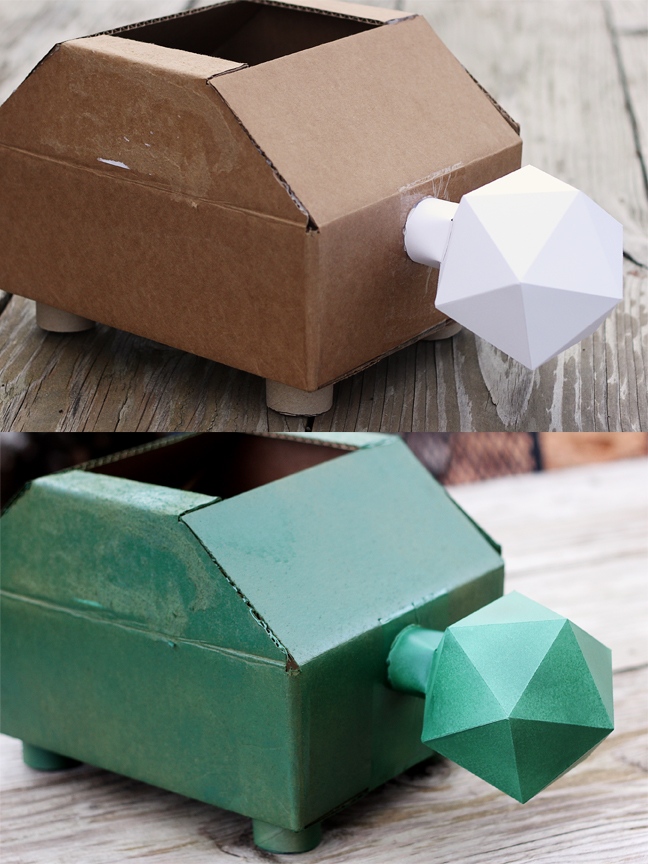
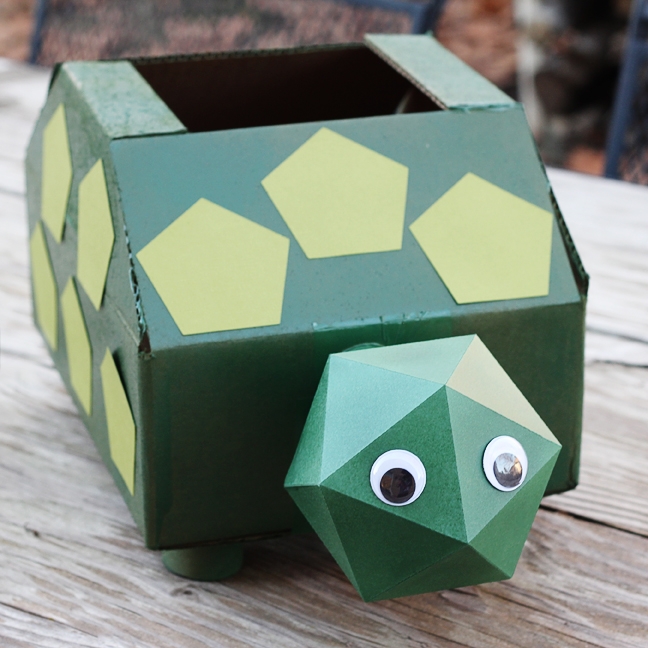
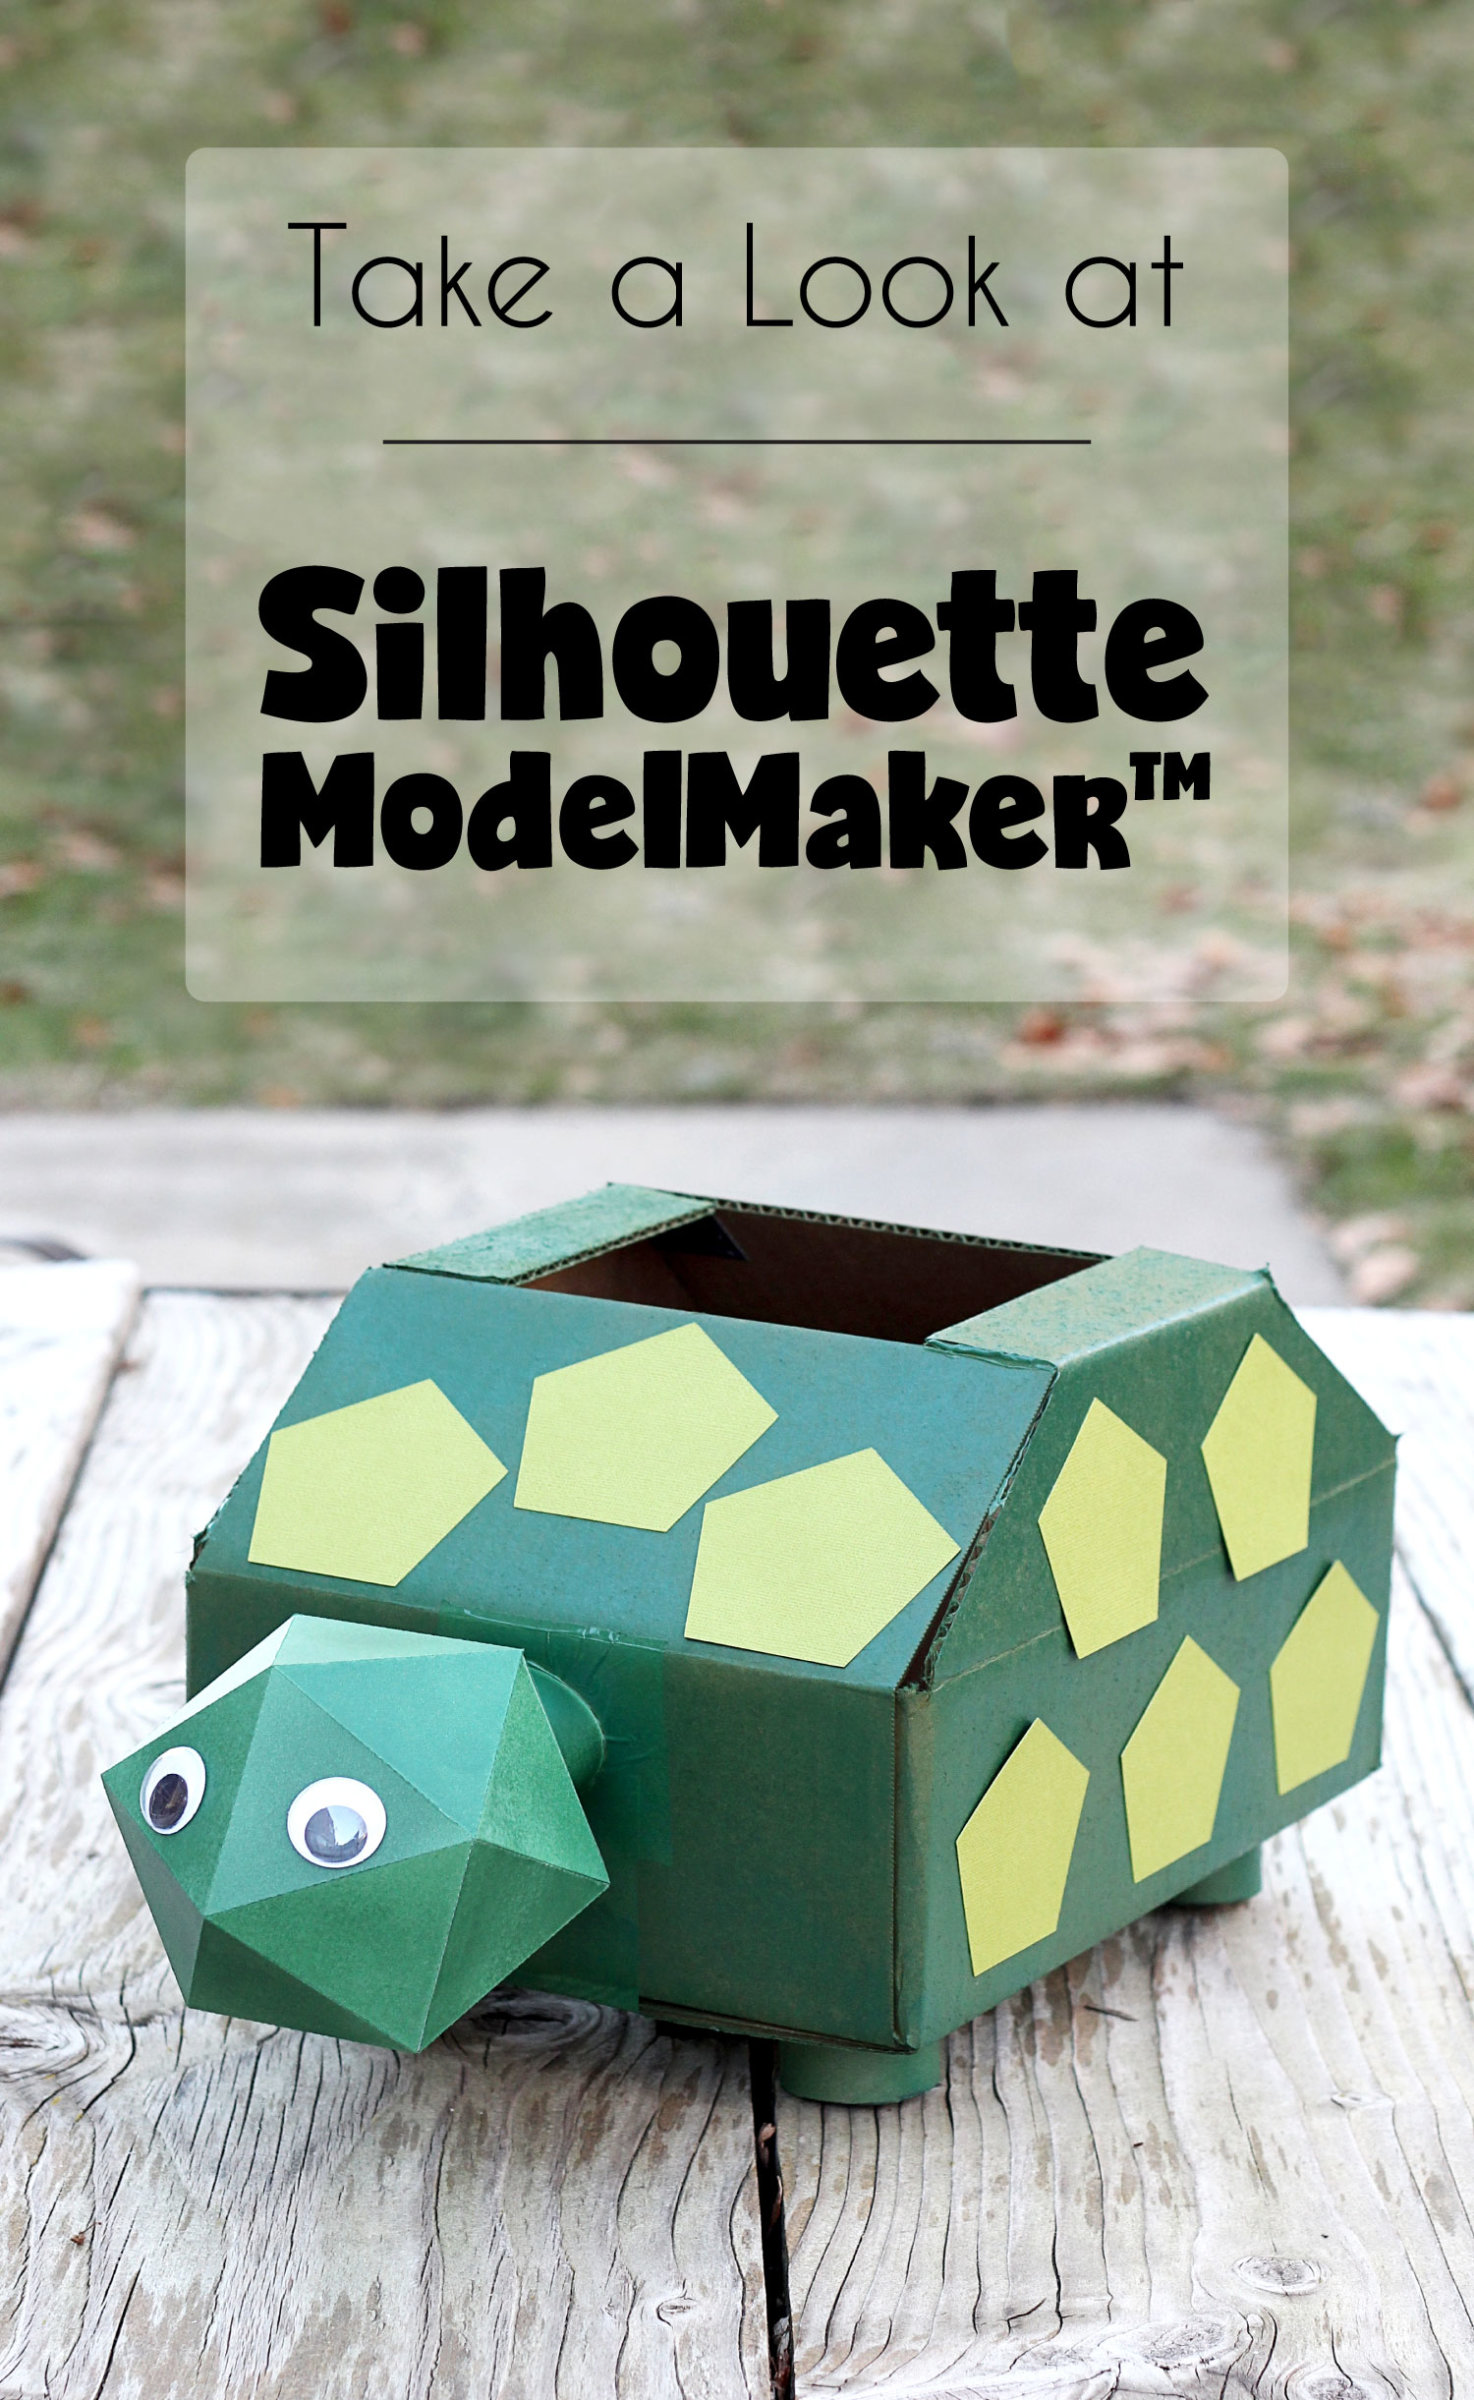
I chose an icosahedron shape (platonic solid) to use as a turtle head on my daughter’s valentine box this year, but the size I needed spread beyond my 12 in. x 12 in. page.
So I selected the net in the Output Window, right clicked, and chose Separate Net. This split the single long shape into two, with the additional glue tabs and reference marks to match the pieces up during assembly. I could now cut the full shape from two pieces of paper with appropriately-designed breaks and glue tabs.
I cut the ModelMaker shape from white cardstock, then attached the assembled icosahedron to a bigger box and spray painted it all green. Here’s her cute “box turtle” valentine collection box.
If you are interested in reading the manual before purchasing the software, you can find it HERE. (Remember, if you have ModelMaker open, you can get to the manual from the Help menu.)
What would you like to try with Silhouette ModelMaker™?
 Free Class - Father's Day Apron Set
  Free Class - Custom Graduation Tumbler
Kelly Wayment
June 28, 2024
You can use it with vinyl as long as it is smooth and flat to allow the static charge to hold on to it. Rolled vinyl that wants to go back to its rolled shape will not necessarily work well, and it would need to be trimmed to fit the ES mat cutting area.
Kelly Wayment
June 28, 2024
Yes, you can use the heat pen while using the ES mat. 🙂
Yurii
March 2, 2024
Hello. May it be used with heat pen?
Thanks
Jerome
February 24, 2024
Hi, works this with the normal vinyl foils or only with printer papter etc?
Kelly Wayment
February 16, 2024
Once you’ve pushed the mat up against the rollers, just press the “Load” arrow button (bottom right on the display). Does a regular sticky mat load into the machine for you?
Michelle a goodall
January 24, 2024
Hello! I just got my new electrostatic mat and have watched every video i can find on it. However, what i can t find is why it wont feed into my cameo 5/ it slides right up the rollers but wont go any further. and yes- iam pushing the into button. help!