Did you know that heat transfer can be used on a variety of media? There are so many options outside of fabric.
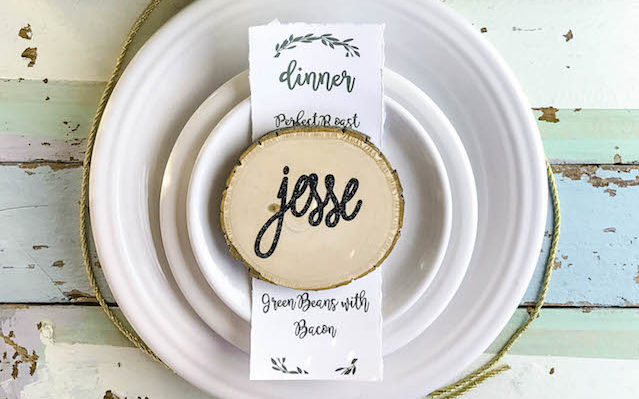
Today I’m showing you how to create easy, beautiful Thanksgiving place cards using heat transfer on wood. It adheres beautifully—and once you’re all done with Thanksgiving dinner, you can simply attach a ribbon to the back and turn them into ornaments for the tree. I love a double-duty craft!
Supplies Needed:
- Wood Slices (found at craft stores)
- Silhouette CAMEO®
- 12-Inch Glitter Heat Transfer (black)
- Ratchet Blade (included with your CAMEO)
- Iron (or heat press)
- Archer Font (ID #151172)
Step One: Setup Design In Silhouette Studio®
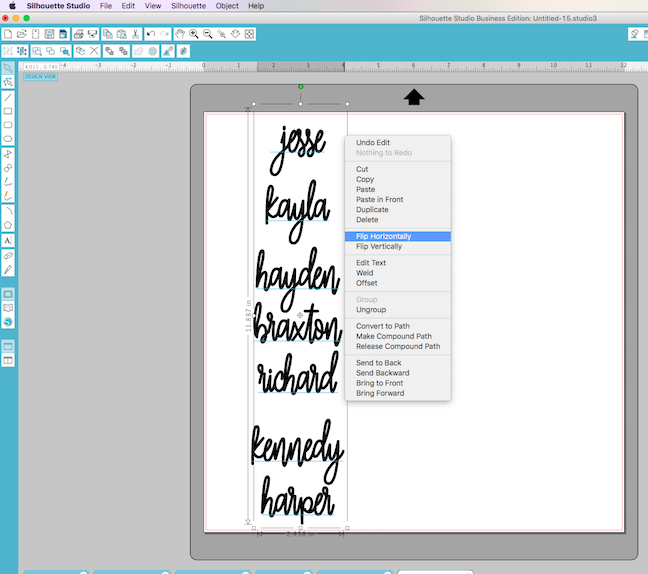
To set up your design, you’ll want to start by choosing a font and typing out the names you’ll be using. For this I’m using Archer Font, which can be found in the Silhouette Design Store. As this particular font is on the thinner side, I thickened the lines.
To thicken your font:

1. Select the Line Style icon.
2. In the panel that opens, increase the line thickness to 3.
For more help with thickening fonts, see this post here.
To make sure your design fits:
- Measure the width and height of your wood slices.
- Size the names accordingly.
Since we are working with heat transfer material, we will need to mirror our text before cutting.
The quickest way I’ve found to do mirror a design is:
- Right click on your design (CTRL + Click on a Mac®).
- Select “Flip Horizontally.”
Step Two: Cut And Weed Heat Transfer

To cut and weed your heat transfer:
- Load heat transfer into your Silhouette, glossy side down without a cutting mat.
- Select “Load material.”
If you’re using the 9-inch heat transfer, make sure you move the guides on the roller bar to the correct notches so that your machine can grip the heat transfer.
- Set your blade to 3 for glitter heat transfer.
- After cutting is complete, remove the negative space.
You can use the hook tool to get into all the tiny spaces. (This is my favorite part!)
For a more detailed tutorial on using heat transfer, see this post here.
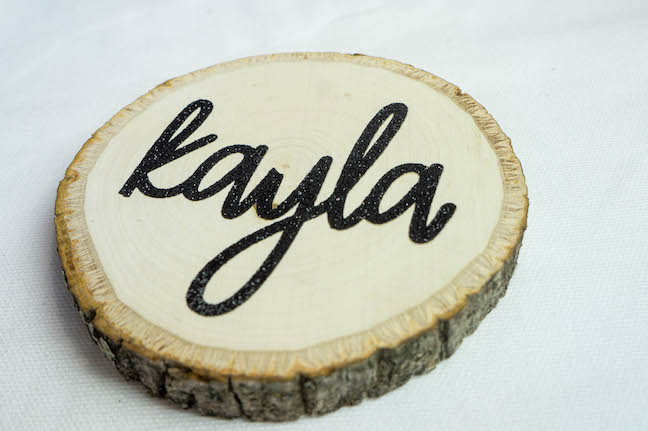
Step Three: Apply Heat Transfer
To prep your wood slice:
- Heat up your iron on the highest setting (which is typically cotton).
- Use the iron to warm up the wood for a few seconds.
- Carefully place your name down, this time glossy side up.
You should be able to see the glitter and the name should now read left to right.
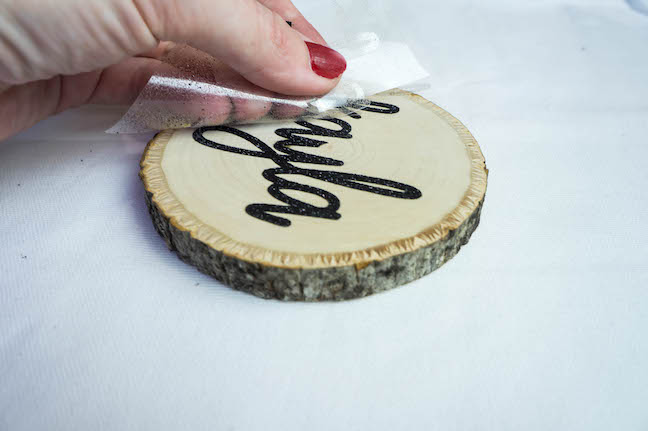
To apply the heat transfer:
- Apply pressure with the center of your iron for 20-30 seconds.
- Let the heat transfer cool completely before peeling away the clear backing.
If you happen to have any trouble spots that didn’t stick to the wood, lay the backing back down and use the tip of the iron to apply pressure to the area. (I almost always end up doing this because the edges of the iron aren’t as hot as the center so, the edges of the design tend to get less heat and pressure. Happens to the best of us!)
Step Four: Set The Table With Your Place Cards

Now that you’ve made a fancy place card for each guest, you can officially set the table and show them off. How fun would it be to attach a ribbon to each one and send every guest home with a keepsake?
I kept my place cards, pretty simple but you could also add the date to each one or you could even do each guest’s monogram. Southerners love monograms, y’all. 🙂
What are some unusual projects you’ve made using heat transfer material?
Nasze Naturalne
September 3, 2025
Your authentic voice really shines through in everything you create and share
Naszenaturalne
September 2, 2025
Really love your style
Kelly Wayment
June 28, 2024
You can use it with vinyl as long as it is smooth and flat to allow the static charge to hold on to it. Rolled vinyl that wants to go back to its rolled shape will not necessarily work well, and it would need to be trimmed to fit the ES mat cutting area.
Kelly Wayment
June 28, 2024
Yes, you can use the heat pen while using the ES mat. 🙂
Yurii
March 2, 2024
Hello. May it be used with heat pen?
Thanks
Jerome
February 24, 2024
Hi, works this with the normal vinyl foils or only with printer papter etc?