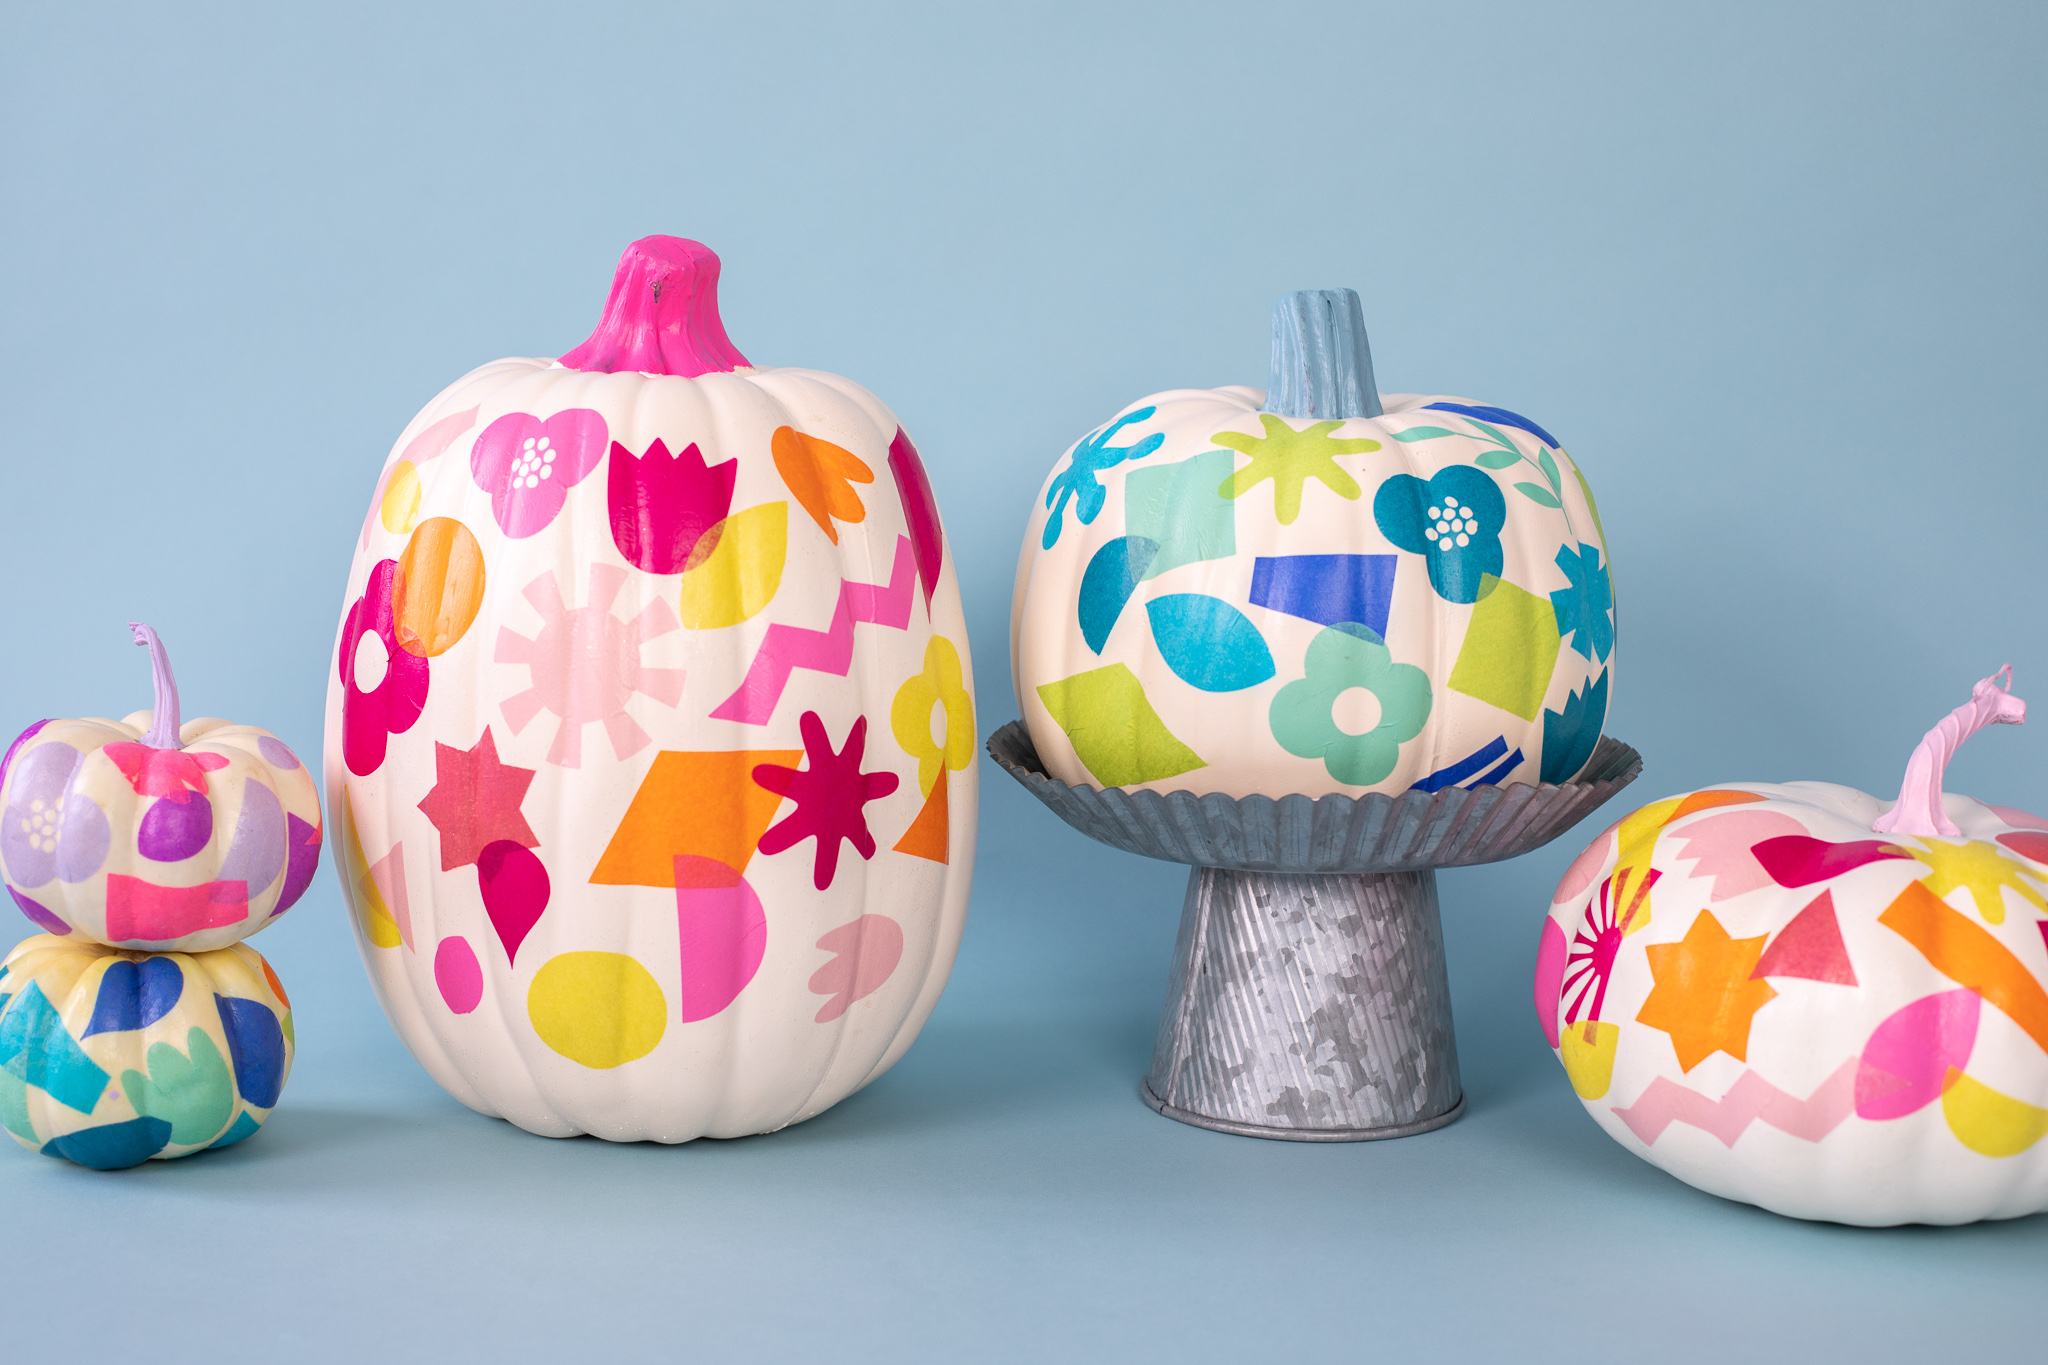
Create punchy patterned pumpkins with tissue paper shapes and Mod Podge! With a few simple steps, your Silhouette cutting machine can cut tissue paper! We used the AutoBlade for Cameo 4 on our Cameo 4, but you should be able to receive the same results with other versions of the machine. What’s your favorite way to decorate pumpkins? Are you more of a traditionalist or all about bright colors?
Supplies Needed:
- Silhouette Cameo® or Silhouette Portrait®
- Silhouette Studio®
- Silhouette Cutting Mat
- Silhouette AutoBlade or Silhouette AutoBlade for Cameo 4
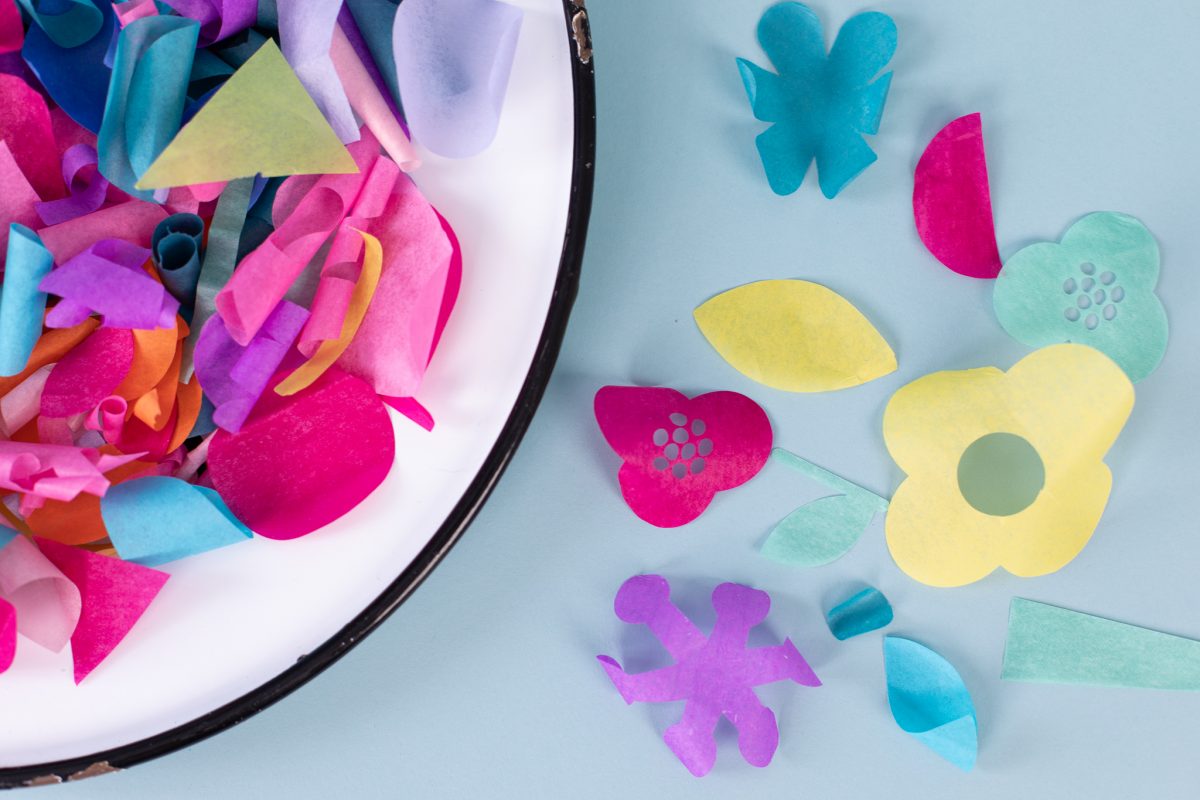
- Tissue paper in various shades, cut to 12-by-12-inch squares
- Cardstock
- A repositionable glue stick
- Mod Podge
- Paint Brush
- Pumpkins, real or faux work
- Design ID #22447 for retro shapes, #39582 for flower, #42251 for poppy, #40294 and #290106 for tulips, #32020 for starbursts. Remainder were shapes created in Silhouette Studio® 4.2, Designer Edition Plus, and higher.
Step One: Preparing Your Material
This is a way to cut tissue paper cleanly with your Silhouette cutting machine and avoid any tearing issues from peeling it off your mat.
1. Place a piece of 12-by-12-inch cardstock on your cutting mat. Coat the top of the paper with your repositionable glue stick (different glue sticks will often say Craft Bond on them).

2. Then lay a piece of tissue paper cut to 12 by 12 inches on top of the cardstock coated with glue. Smooth out with your scraper tool so it is stuck securely to the cardstock.
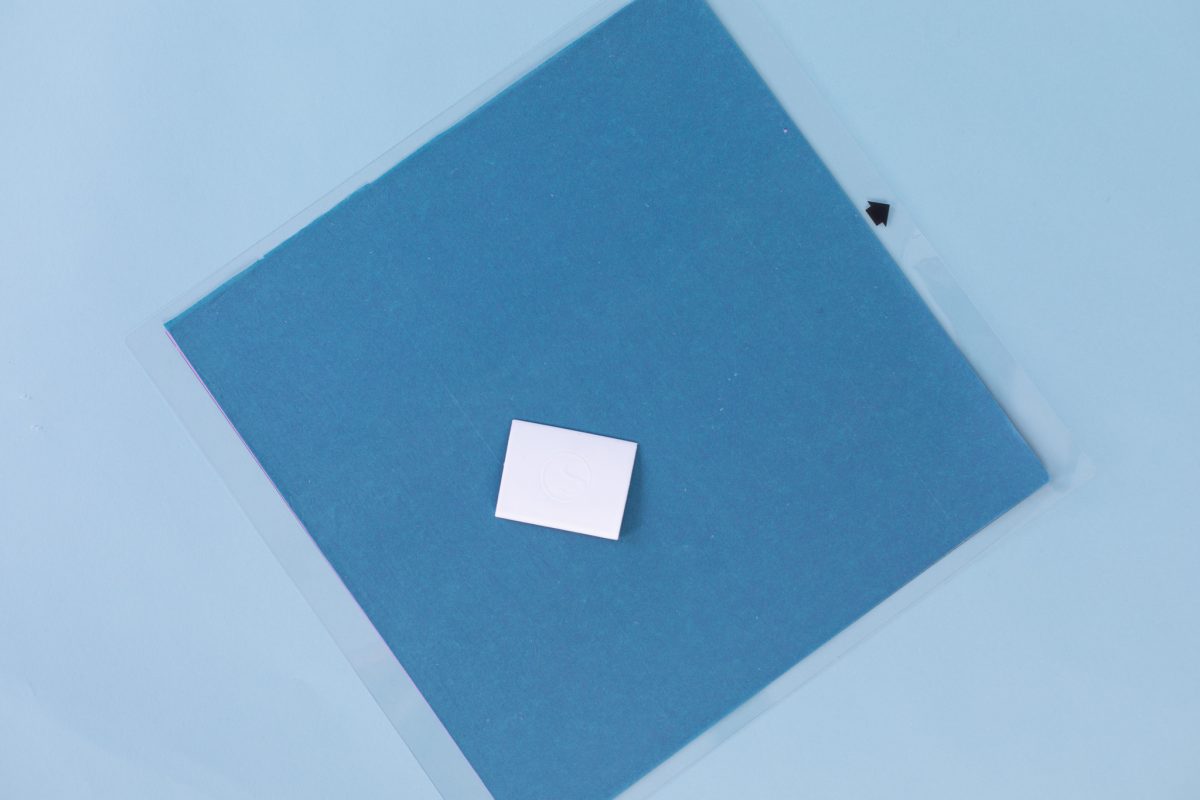
3. Insert your mat into your cutting machine.
Step Two: Formatting Your Designs
1. I used various Flexishapes (available in Silhouette Studio® Designer Edition) and a handful of abstract designs in the Design Store. Feel free to customize these to your liking, but I linked the ones I purchased from the Design Store above. Insert your desired designs into Silhouette Studio® and size them appropriately for your pumpkins.
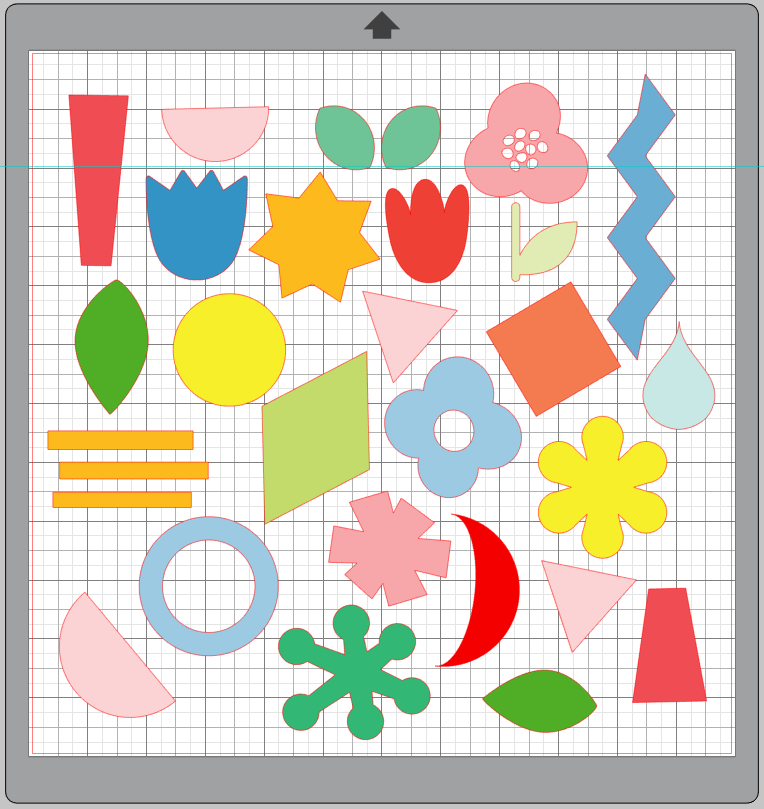
2. Under your Send panel, set your material to the appropriate weight of cardstock you’re using. I generally use Cardstock, Textured – Heavy (80lb). Press Send to have your Silhouette machine cut the designs. The heavy pressure will ensure the tissue paper won’t raise up when cutting.
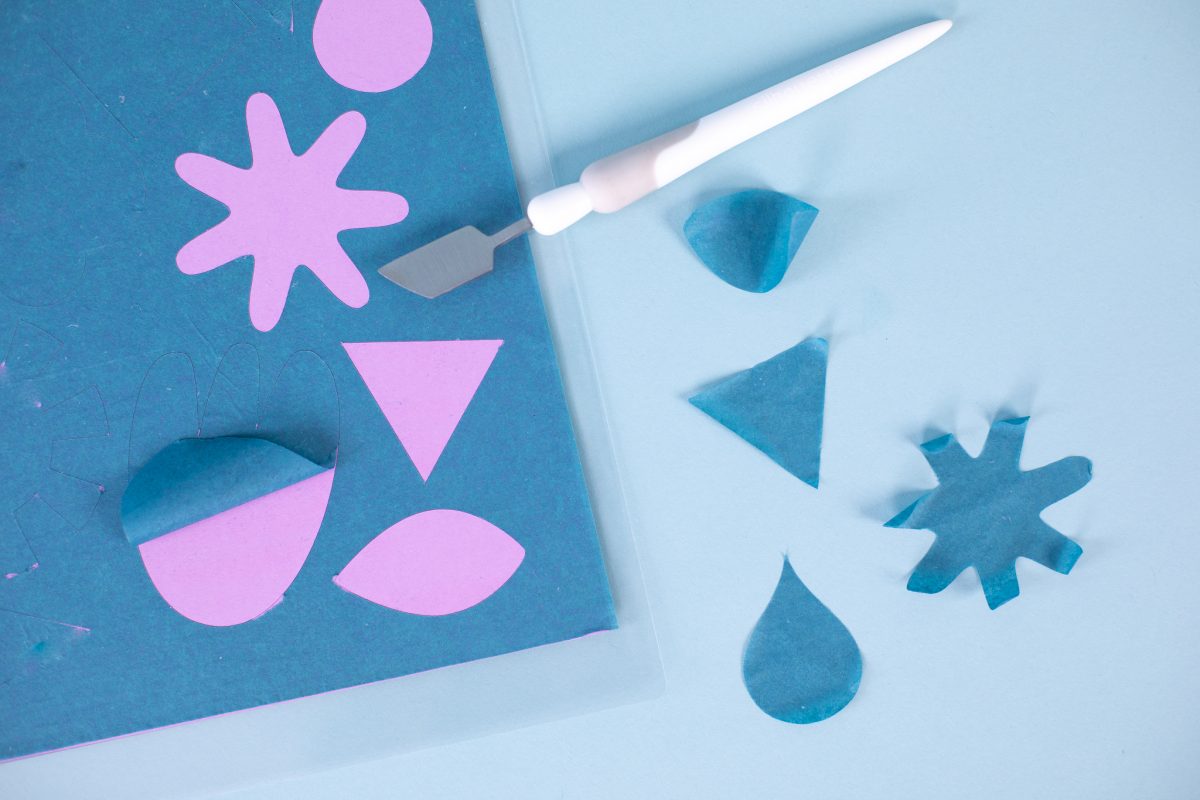
3. Unload your mat and gently remove your tissue paper shapes with the spatula tool. The glue will hold the designs in place while cutting but will easily allow you to lift them off once the cut is complete.
4. Repeat this process for all your tissue paper colors.
Step Three: Applying Your Designs to Your Pumpkins
1. Paint a thin coat of Mod Podge onto your pumpkin, just larger than the design you’re about to apply.
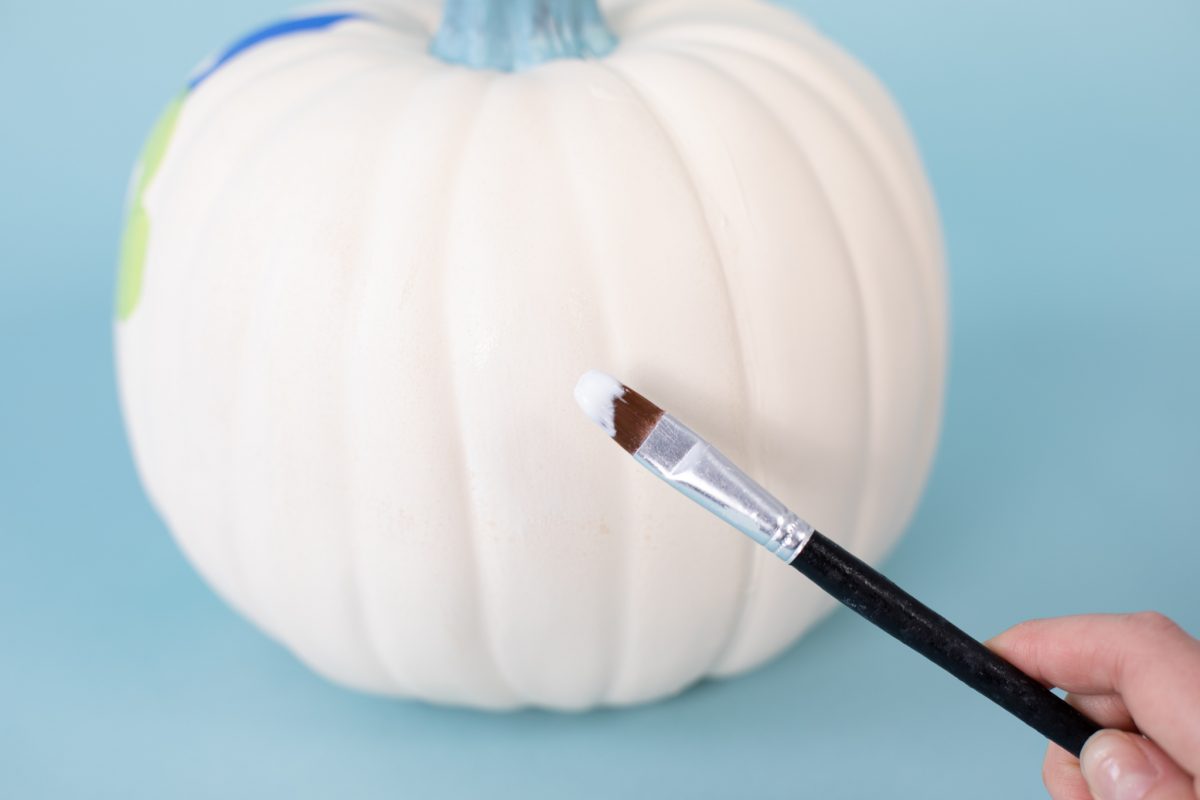
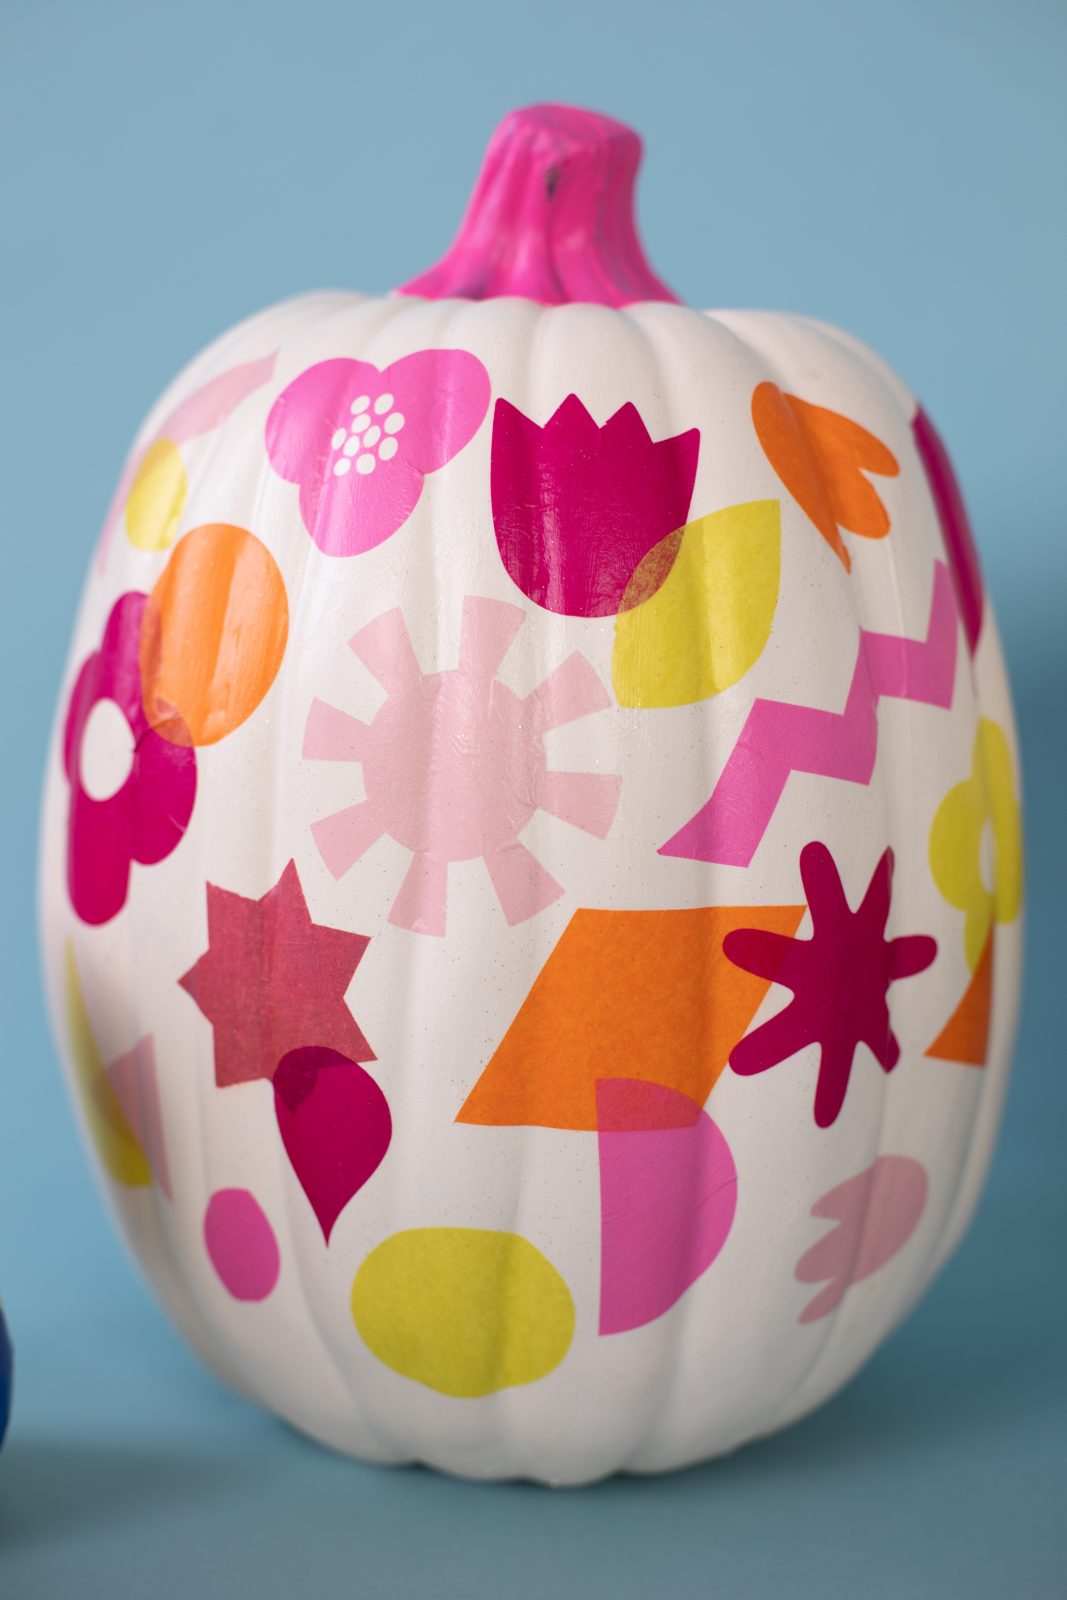
2. Place your tissue paper design onto the pumpkin and smooth out to eliminate bubbles. Top with another thin coat of Mod Podge.

3. Repeat with more shapes and colors, overlapping some slightly for a layered look.
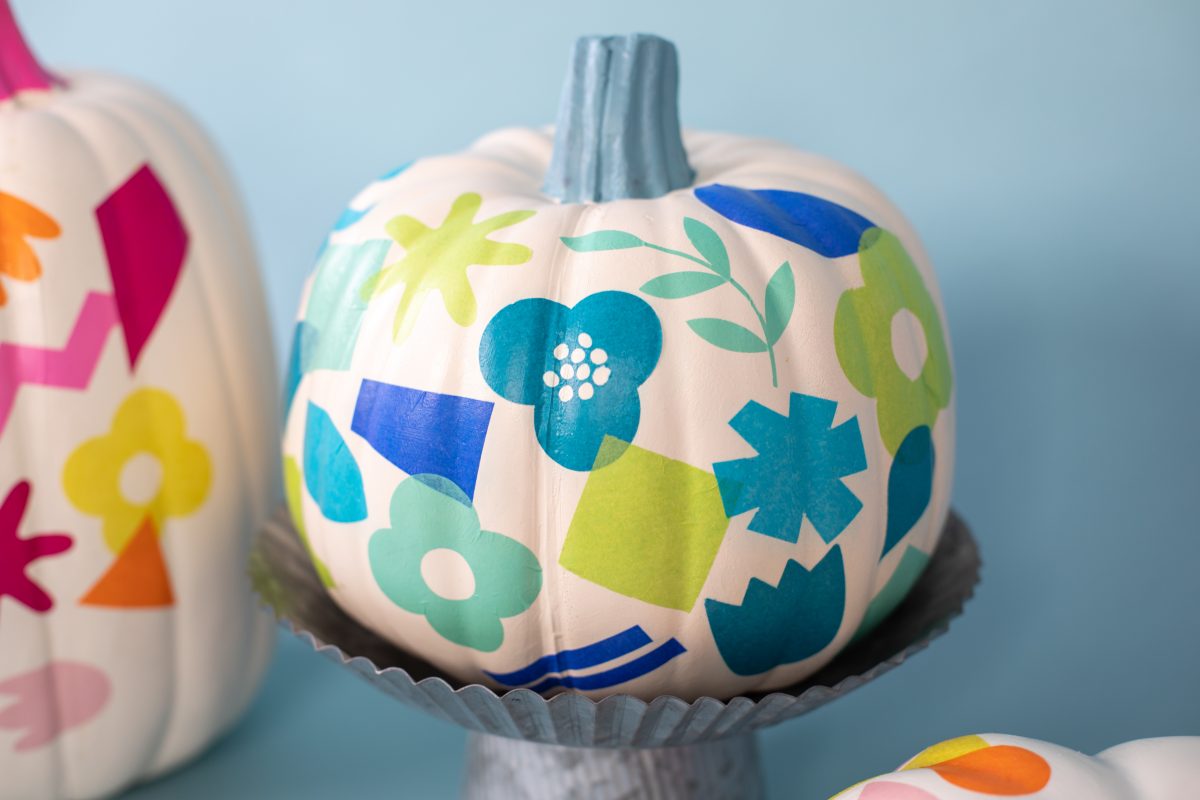
4. Let dry. Paint stems if desired.
5. Decorate your porch with your punchy pumpkins and celebrate the season!

 Free Class - Father's Day Apron Set
  Free Class - Custom Graduation Tumbler
Nasze Naturalne
September 3, 2025
Your authentic voice really shines through in everything you create and share
Naszenaturalne
September 2, 2025
Really love your style
Kelly Wayment
June 28, 2024
You can use it with vinyl as long as it is smooth and flat to allow the static charge to hold on to it. Rolled vinyl that wants to go back to its rolled shape will not necessarily work well, and it would need to be trimmed to fit the ES mat cutting area.
Kelly Wayment
June 28, 2024
Yes, you can use the heat pen while using the ES mat. 🙂
Yurii
March 2, 2024
Hello. May it be used with heat pen?
Thanks
Jerome
February 24, 2024
Hi, works this with the normal vinyl foils or only with printer papter etc?