Have you ever wanted to create treat bags for your kid’s sports team, but just didn’t have the time to put everything together? We’ve got a solution for you. You can make these super simple treat bags, and you hardly have to do anything because your printer and your Silhouette machine will do most of the work for you! Follow along to see how it’s done.
Supplies Needed:
- Silhouette CAMEO® or Silhouette Portrait®
- Silhouette Cutting Mat
- Silhouette Cutting Blade
- Silhouette Studio®
- Cardstock – white and dark blue
- Double-sided tape
- Adhesive foam dots
- Printer
- Design ID #271652
- Design ID #194470
Step One: Prepare the Designs
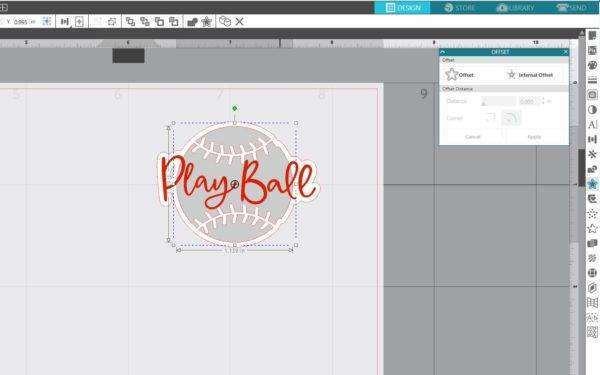
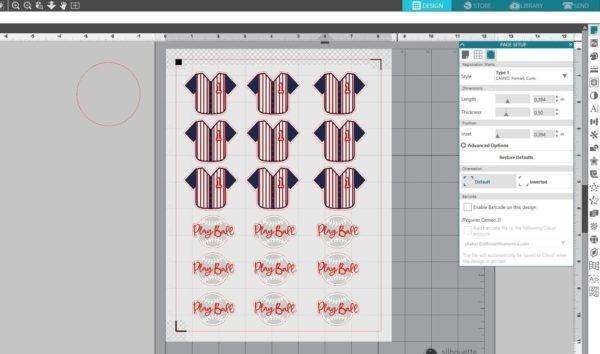
1. Open Silhouette Studio®. Download and open the Play Ball design (Design ID #271652) in Silhouette Studio® by locating it in your library. Place the Play Ball phrase in the middle of the ball. Select a whole design, resize it, and group it. Also, add an offset line to your design.
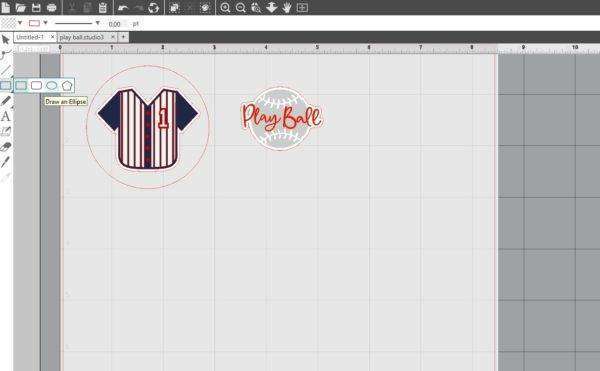
2. Repeat the same steps for the Home Run Jersey design (Design ID #194470).

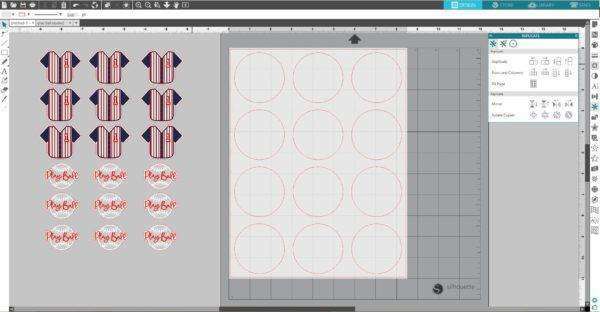
3. Draw a circle a little bit bigger than the jersey design using Draw a ellipse tool. Hold the Shift key to draw an even circle. We will cut the circle from dark blue cardstock to create a backing for the jersey design.
4. Make as many copies of your designs as needed. You can use Replicate tools from the Replicate panel, which is located on the right side of the screen.
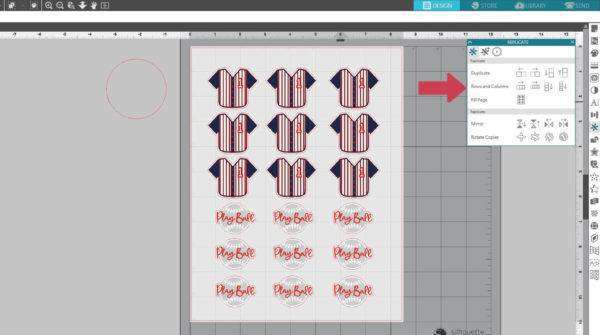
5. Add registration marks. To do so, click on the Page Setup icon located along the right-hand toolbar and select the style of registration marks. Type 1 registration marks are standard (and what you will most likely use), and Type 2 registration marks are for older machine models. Arrange your designs, which you are going to Print & Cut within the registration marks borders.
Step Two: Print & Cut Your Designs
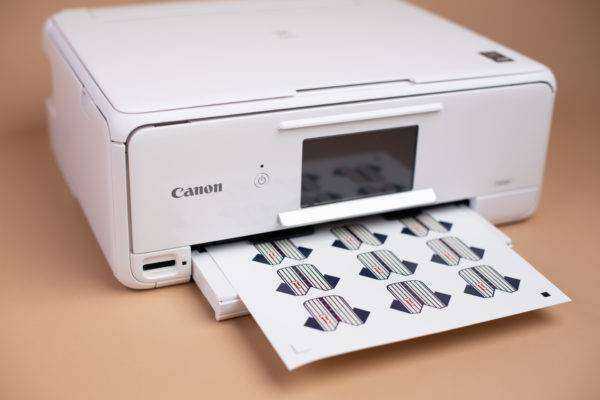
1. On white cardstock, print as many label copies as you need.
2. Place your printed sheet on the cutting mat and feed it into your Silhouette machine.
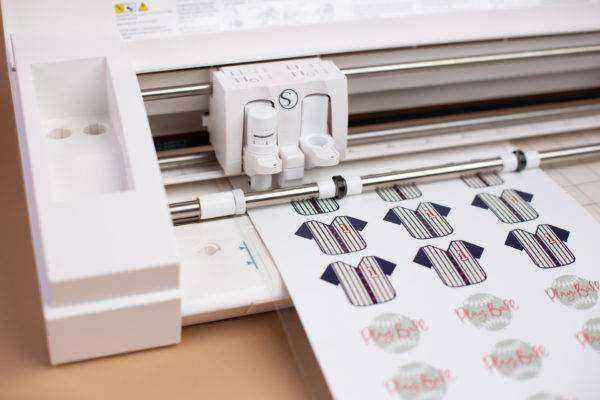
3. Select “Cardstock, Plain” as the material from the media list in the Send tab, select the designs, and select the Cut Edge option (for this, you just want to cut the outline of the labels), adjust your blade accordingly (unless you use a machine with an AutoBlade), and click Send.

4. After the cutting process is over, remove the cut project from the cutting mat.
5. Turn off registration marks in the Page Setup panel (under the registration marks tab). Place a background circle on the working space and replicate as many copies as you need.
6. Place the dark blue cardstock on the cutting mat and feed it into your Silhouette machine. Select “Cardstock, Plain” as the material from the media list in the Send tab, select the designs, and select the Cut Edge option (for this, you just want to cut the outline of the labels), adjust your blade accordingly (unless you use a machine with an AutoBlade), and click Send. After the cutting process is over, remove the cut project from the cutting mat.
Step Three: Arrange the Bags
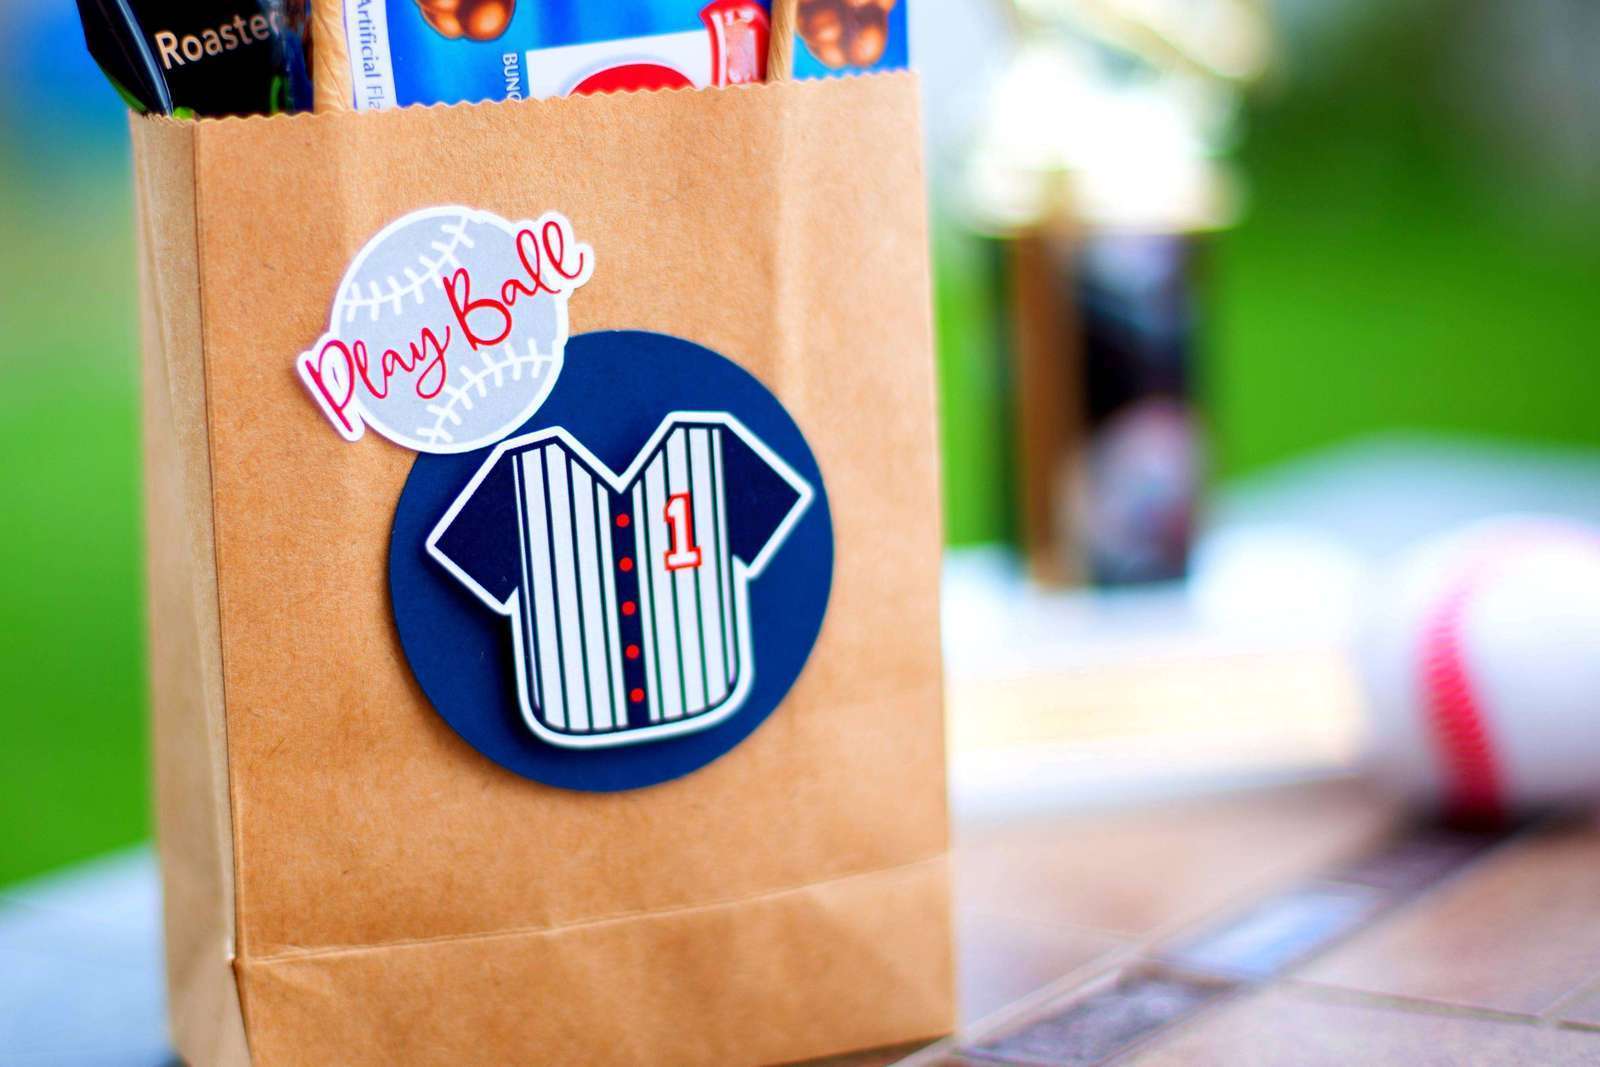
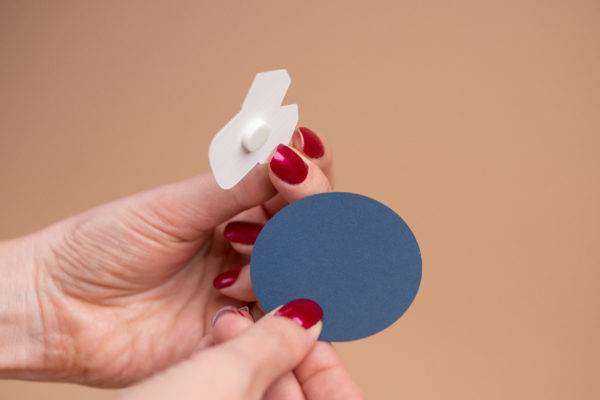
1. When we have all our pieces cut out, we can start to adhere them. You can use adhesive foam dots to adhere jersey design to the backing circle to add more of a pop-out effect.
2. Then arrange the pieces on the treat bag.
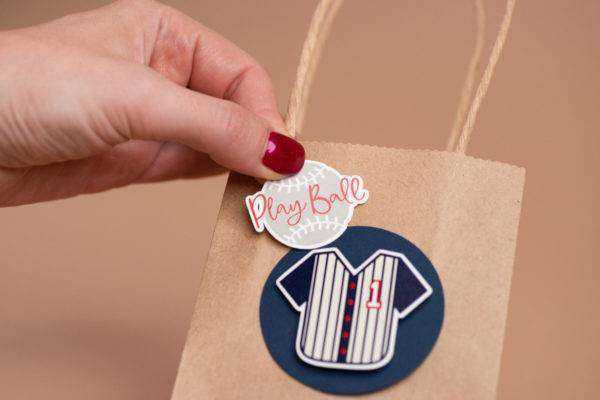
Now our treat bag is ready!

Wasn’t that easy? You can also Print & Cut the designs from sticker paper and put the stickers on cellophane bags if you want to make it really easy!
What kind of treat bags are you going to make with this design?