
No matter the holiday, we always find that we’ve got gifts to give. This is why we love having a cutting machine because it cuts down on all the time it takes to make personalized gifts. Today, we wanted to share with you a simple way to personalize a treat that you can give out this Easter. All you need is a pen holder or a sketch pen, and you’re all set!
Supplies Needed:
- Silhouette CAMEO®, Silhouette Portrait®, or Silhouette Curio™
- Silhouette Cutting Mat
- Silhouette Cutting Blade
- Silhouette Studio®
- Silhouette Pen Holder
- Silhouette Sketch Pen
- Cardstock
- Candy
- Design ID #257801
Step One: Open the Design
- Open Design ID#257801 in Silhouette Studio® by locating the design in your library. Double-click the design to open it.
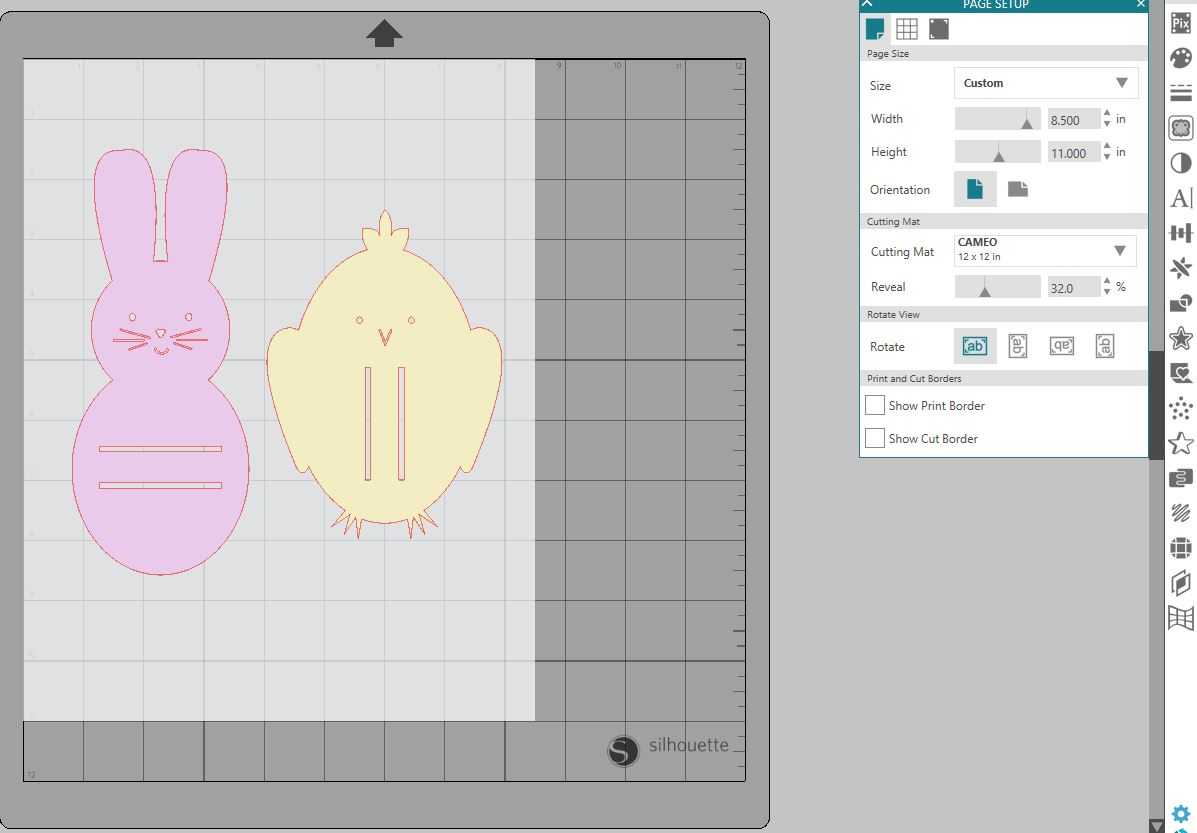
- Adjust your page settings (in the Page Setup panel) according to the size of your paper and your cutting mat. In this case, we are cutting our paper that is 8.5 x 11 inches. We will need to adjust our page to reflect that.
- With our page now adjusted, we can lay out both designs within those dimensions. You can choose to make your design larger or smaller by clicking the design and resizing it using the arrows in the corners. We decided to keep the design the same size so that the personalization would be more legible.
Step Two: Add a Name to the Design
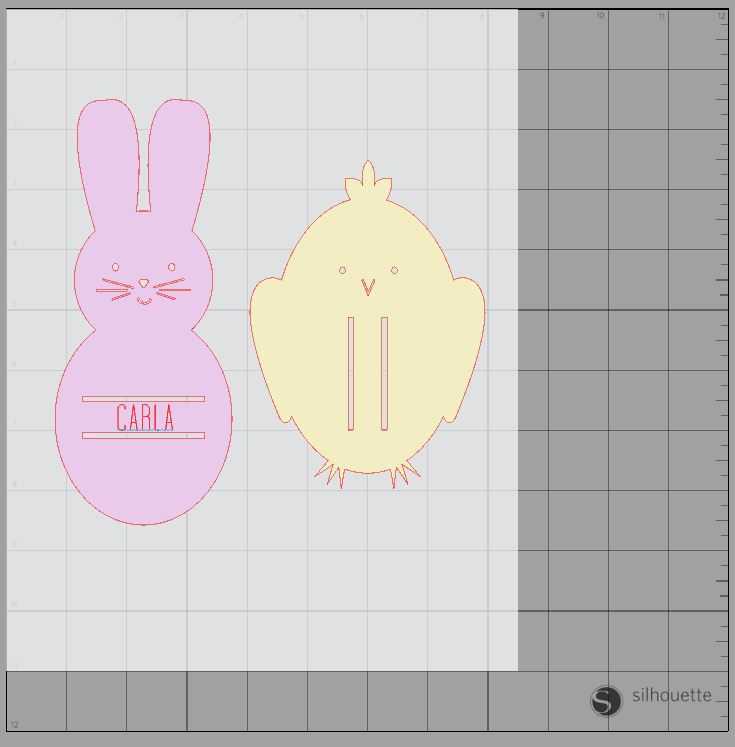
- For this project, we imagined kids handing out these favors to their classmates at school or church, so we wanted to add names to make favors a little more special. Sketching a name right onto the favor cuts down time even more when using the dual carriage. The dual carriage allows you to cut and sketch all in one job so that your project is completed with ease.
- To add a name to the favor first, locate a sketch font in the Silhouette Design Store. We love using LW Tall Sketch for projects like this!
- Write out the name you’d like to place on your favor. Next, resize the name to fit within the belly band of each character. You want to give your machine enough room to work with. Remeber, the smaller the font the thinner your pen or sketch pen needs to be. This keeps the font looking clean and legible.
- With your names added to your favors, it is now time to have it cut and sketched!
Step Three: Cut and Sketch
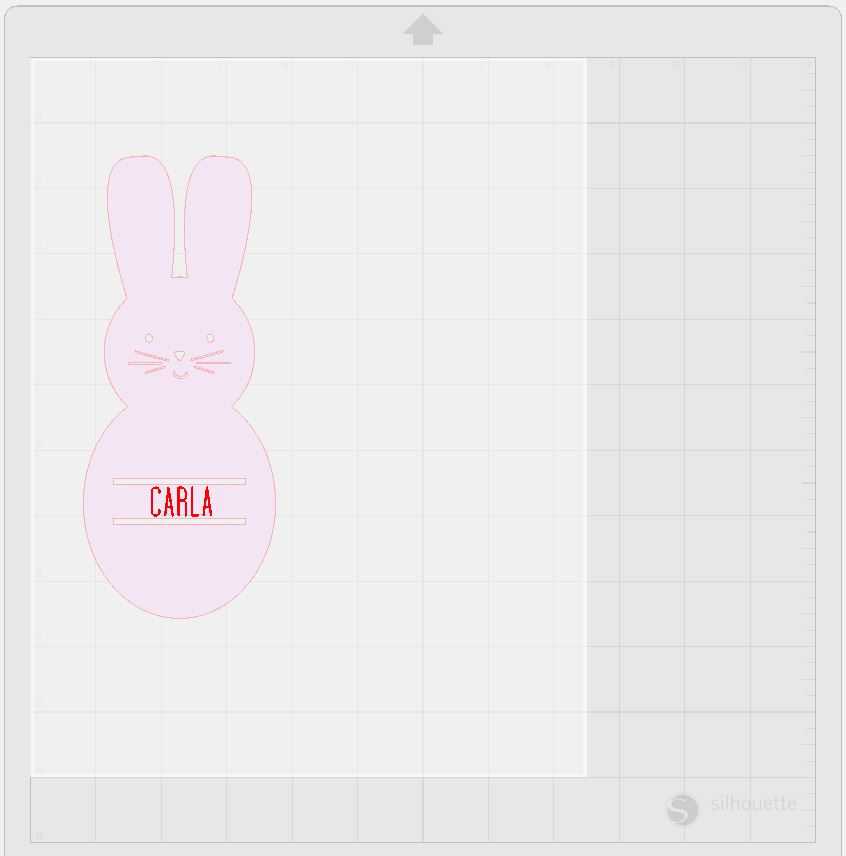
- Head over to the Send window (located in the top right-hand corner). Here is where you will want to set up your machine to sketch and cut. If you are using a machine without a dual carriage, this process will look different.
- First, make sure that you have set the correct settings for Tool 1 and Tool 2. Tool 1 is where we have our blade, so we want to set up our design to cut everything but the name. We are cutting using Cardstock, so we will select that as our material.
- For Tool 2, you will want to change the action to Sketch. You will notice that the Sketch Pen tool will auto-fill as your tool. Make sure that the name is the only thing highlighted. This lets your machine know that you will only want the name to be sketched out.
- Also, you may want to click “Pause Between Tools.” This will just give you some time between cutting and sketching to make sure that everything is working as it should.
- Load your material (which is on your cutting mat) into your machine.
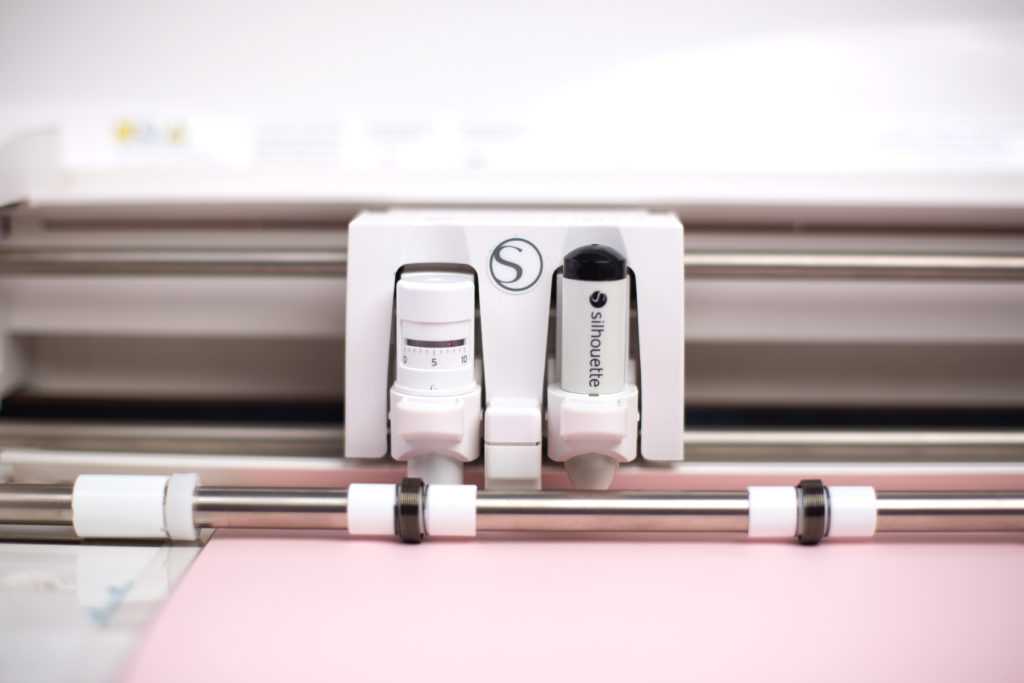
Step Four: Insert the Sketch Pen or Pen Holder
- Remember how we set Tool 2 to be our Sketch Pen in the software? Well, we need to set that up in our machine.
- Open the carriage by pulling out the tab. Next place a sketch pen or pen in the pen holder tool in the slot. A Silhouette Sketch Pen will fit perfectly within that carriage. However, if you are wanting to use a non-Silhouette tool, the pen holder is a great tool.
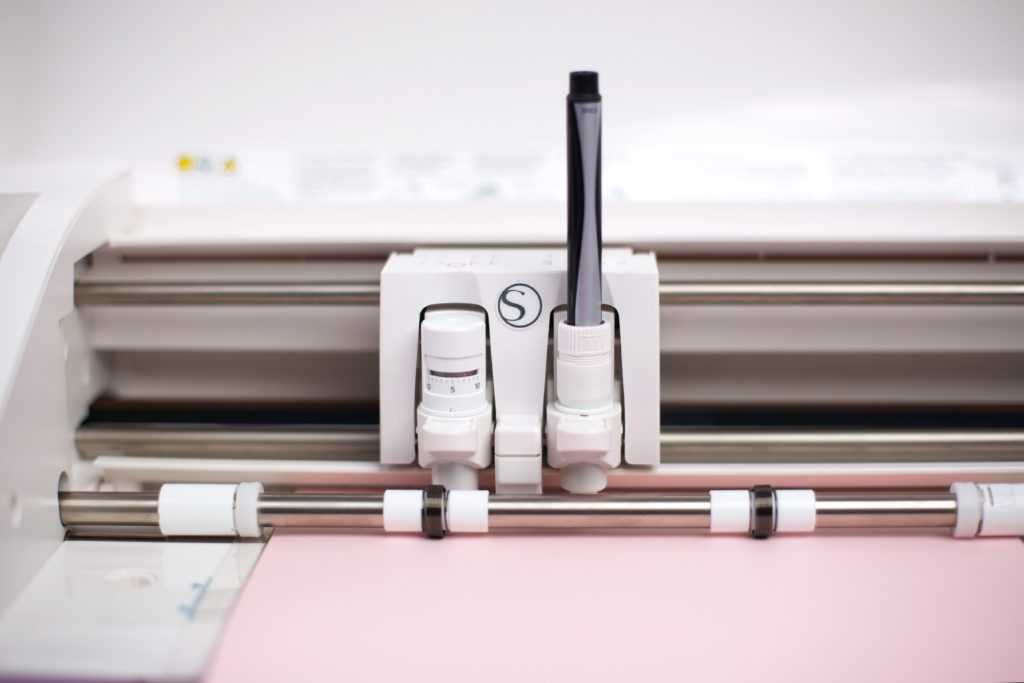
- To use the pen holder: first, you’ll notice four pieces. The larger white piece will be used every time you use this tool. However, the other colored pieces will not. The colored pieces are labeled S, M, and L. This indicated the small, medium, and large pens that can be used with this tool. Place the pen you’d like to use into the middle of a S, M, or L adapter. You want the grip to be facing the tip of your pen. This grip should also fit snug into the pen, if it is too loose, the pen holder may not function properly.
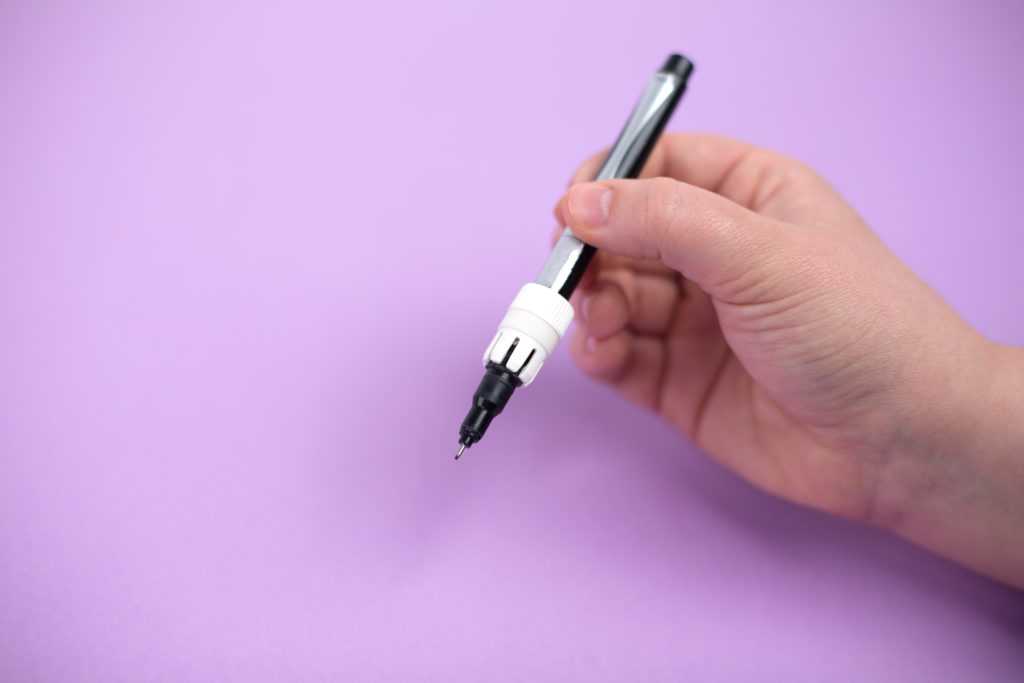 With the correct adapter wrapped around your pen, you will now screw the adapter and pen into the larger white piece. This secures the tool and allows your pen to not slip while writing.
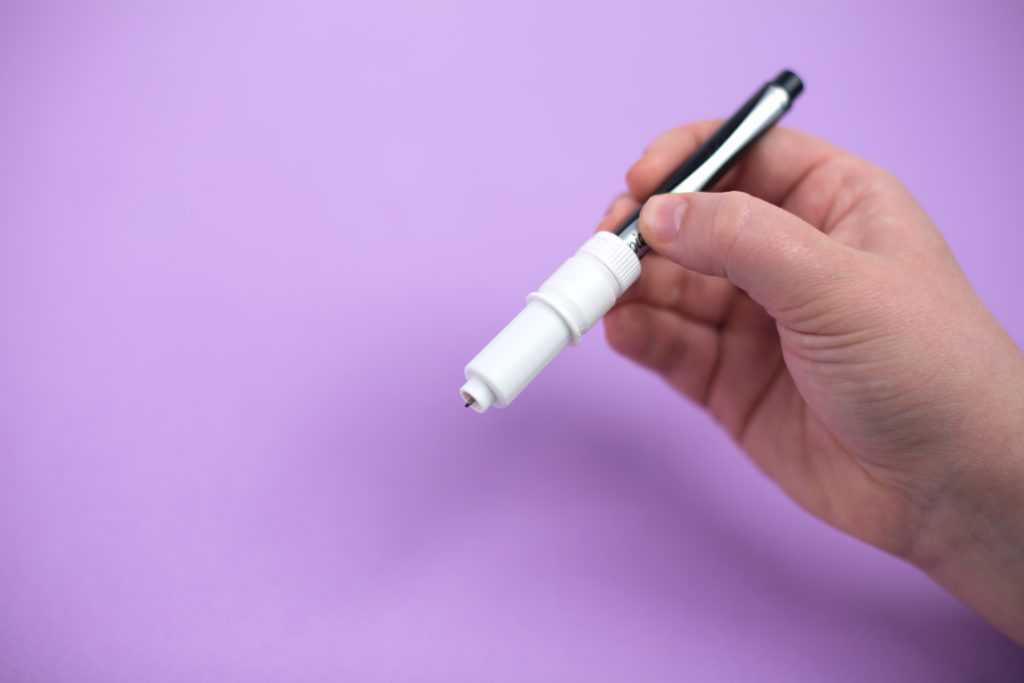 Now place your pen into the carriage.
 - With your sketch pen or pen holder in the carriage, push the tab on the carriage inward to lock the tool in place.
- Press Send in Silhouette Studio® and have your machine cut and sketch out the design.
-
When your machine has stopped, unload your machine and remove your cardstock from the cutting mat.

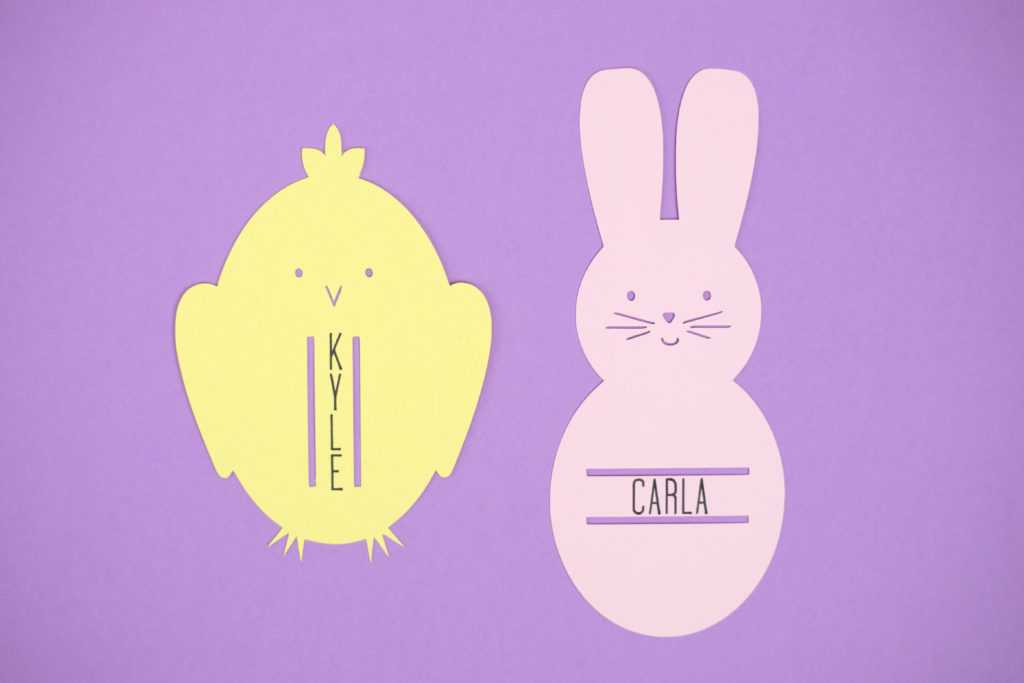 You have now created a cute treat to pass out to friends and family!