The layers pane is a great tool for intermediate to advanced Silhouette users who own the Designer and Business editions of Silhouette Studio®. If you have any interest in designing your own files, the layers panel will be an invaluable tool for you. The layers pane is also wonderful for those who like to customize purchased designs.
What are layers and why do they matter?
Layers are simply design elements built on individual, editable planes.
Think of pizza. There are lots of layers on a pizza that all work together to create a delicious food. Each element of the pizza; the dough, sauce, cheese, pepperoni, sausage, onion, and peppers is its own “layer”.
You can think of layers in Silhouette Studio® like the layers of a pizza. Each design element; the background image, cut lines, score lines, text, embellishments and so on each have their own layer.
Each layer can be edited and moved independently of the other layers, giving you a ton of freedom as you design and/or edit designs.
You will find the layering tool in the Designer and Business Editions of Silhouette Studio®.
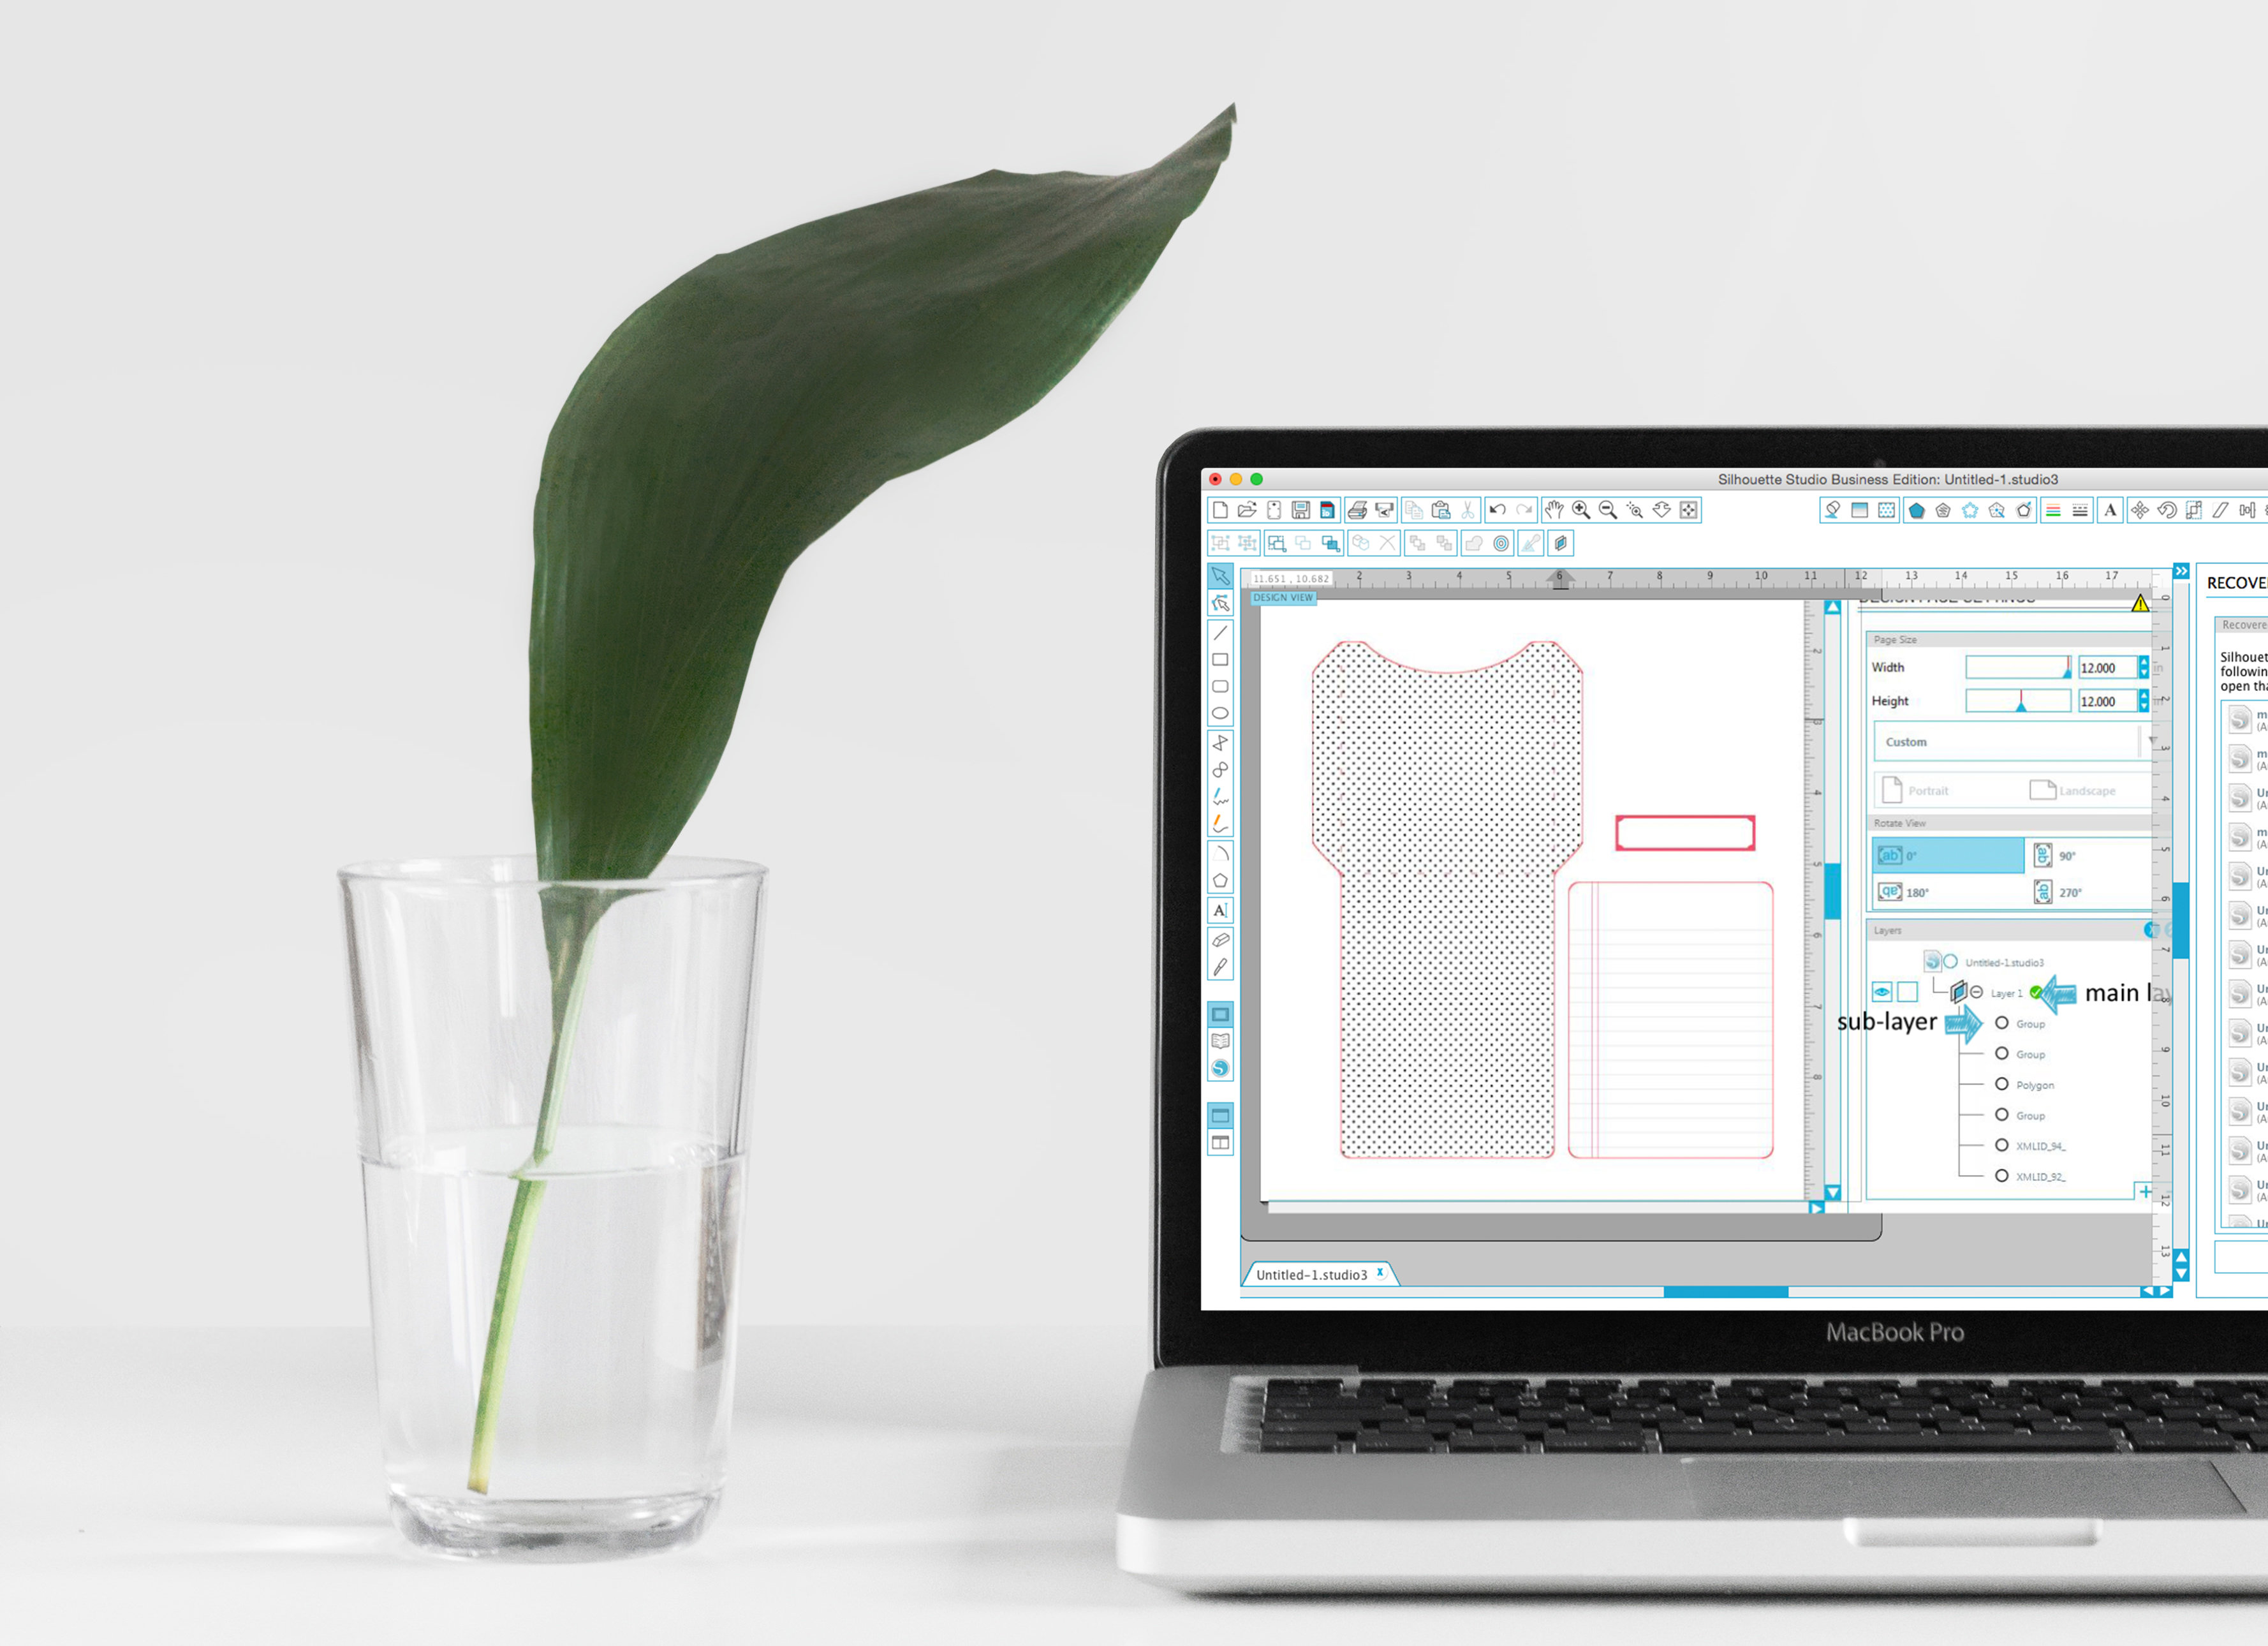
An easy way to understand the layers pane is to open a design that you have purchased and experiment. I’ll walk you through the first time. In my sample, I’m using Design ID #120815, Library Pocket & Card by Felicity Jane. You’ll find it in the Silhouette Design Store.
STEP ONE: OPENING THE LAYERS PANE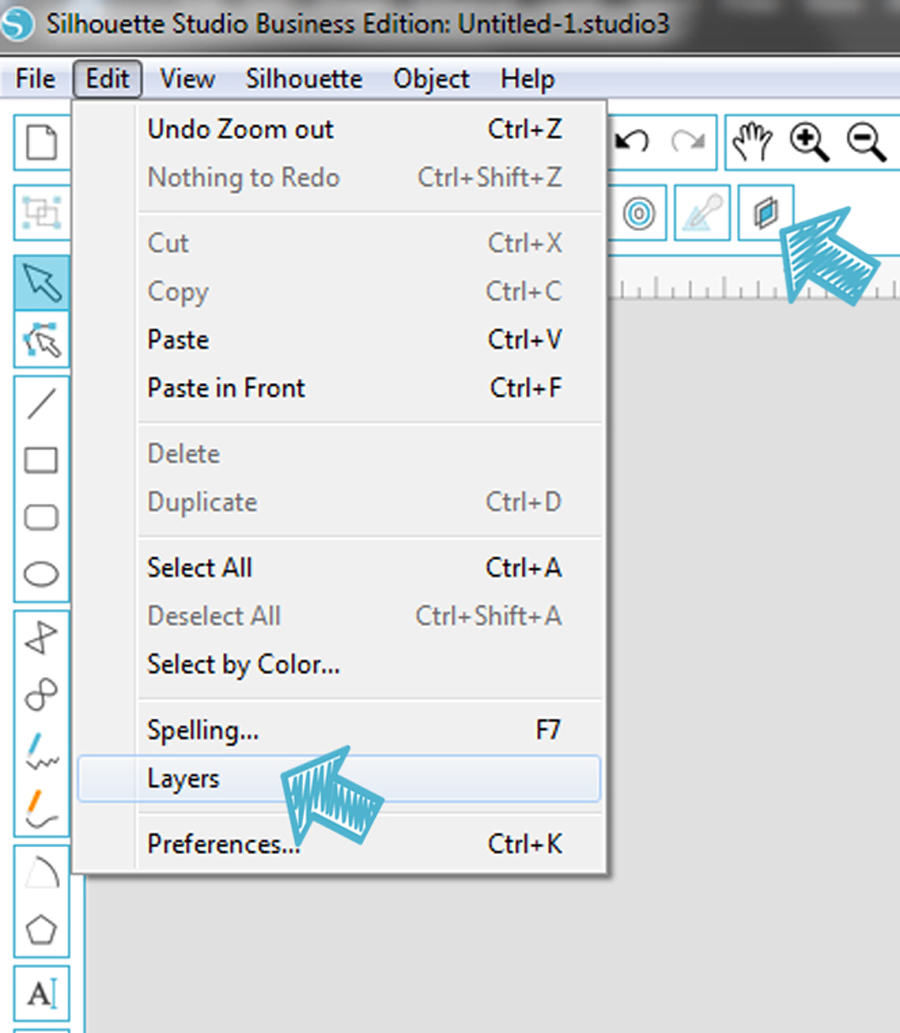
Open your layers pane. You can do this one of two ways.
- Open Edit at the top of the tool bar then select Layers
- Click the layers icon on your toolbar. The toolbar location varies according to which version of Silhouette Studio® you own.
- Designer Edition– bottom right toolbar
- Business Edition– top right toolbar
STEP TWO: IDENTIFYING & SELECTING LAYERS
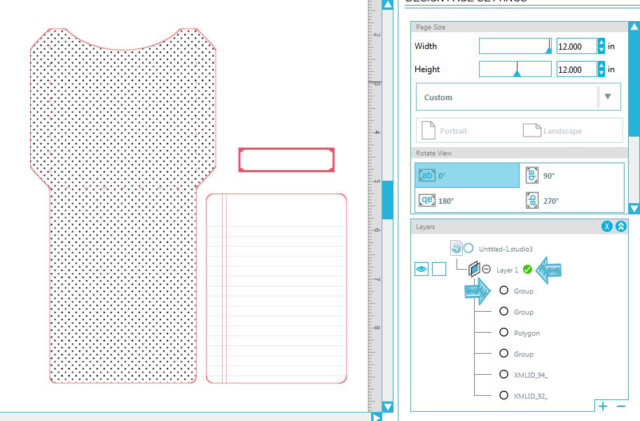
In the Library Pocket & Card design, each element was created as a separate layer. See the bullet points under Layer 1? Each bullet point designates a separate layer. As I click on an element in the design, the layer for that element is highlighted in the layer pane as well as on my design page. This helps me to know which object I’m working with. Whichever layer is highlighted in the layers pane is the layer you are currently working with.
STEP THREE: NAMING LAYERS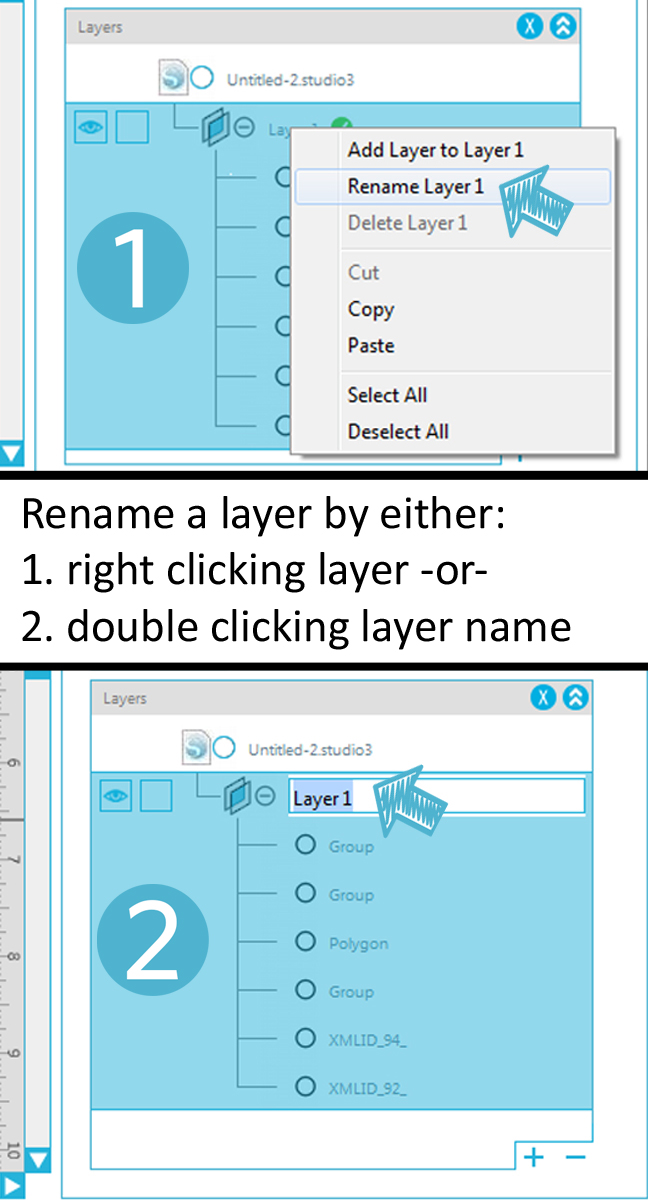
To make things easier on myself, the first thing I’m going to do with my shape is to rename each layer so I know which specific layer I’m working with. This can be done one of two ways:
- Double click the layer you want to name.
- Right click on the layer you want to name.
Type the new name of your layer and click Enter to save.
*Fun fact: “Polygon” is the default layer name for objects. Renaming your layers will make it easy to know which layer goes with the corresponding shape or object.
STEP THREE: HOW TO ADD & DELETE LAYERS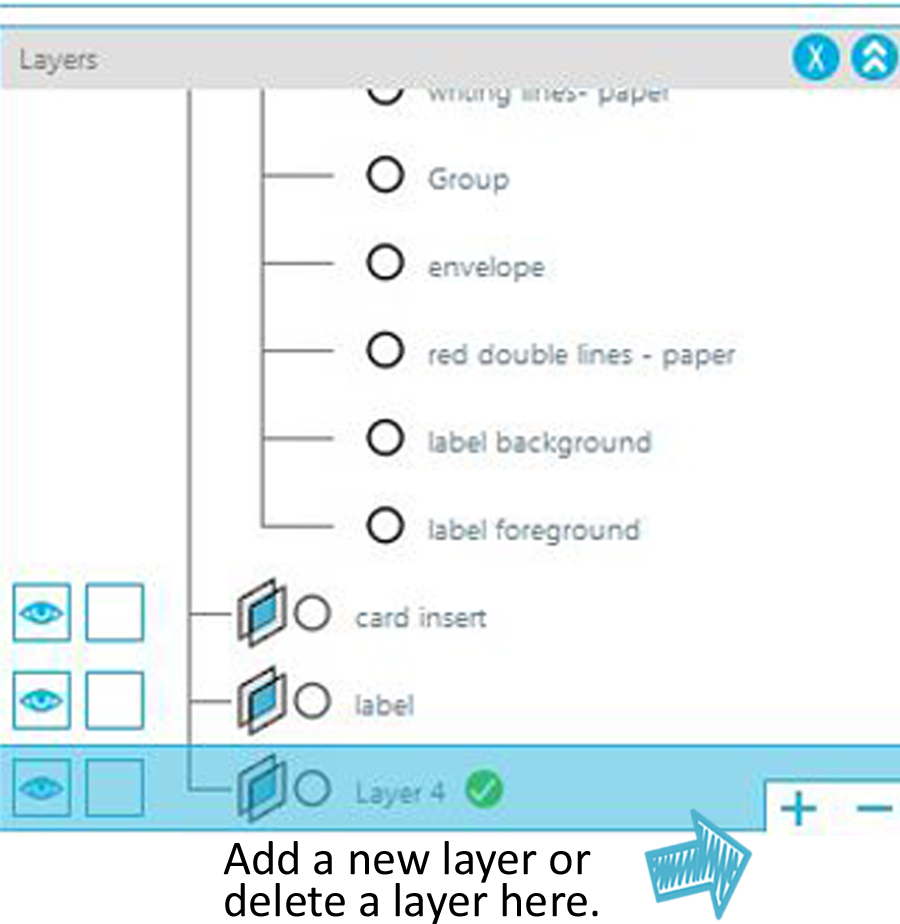
The next thing I’m going to do is organize each design element into its own layer. I want a separate layer for the pocket, the insert card and the label. To do this I’ll need to create a couple of new layers. Creating a new layer is super simple.
Click the plus button at the bottom right of the layers panel.
Deleting a layer is just as simple as adding a layer. You simply click the minus button on the bottom right of the layers panel.
If you accidentally delete a layer, remember you can always click undo! How would we ever survive without that little undo button? I use undo ALL the time!
Rename your layers as you go. I find this helpful so I know which layer I’m working with when I move and edit them. As you can see, I’m renaming my main layers: pocket, card insert, and label.
Keep in mind that you will want to add a new layer each time you add a new element to your design.
STEP FOUR: ORGANIZING LAYERS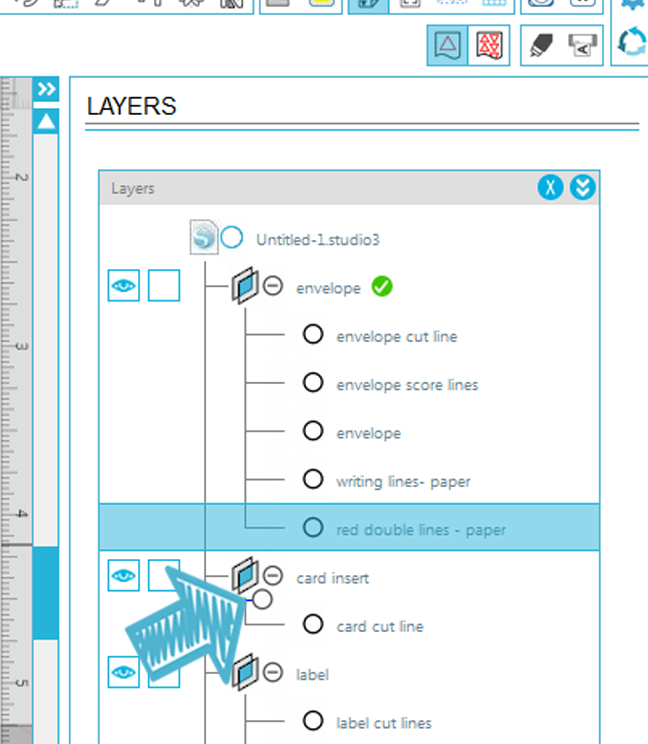
Now that I have created a separate layer for each the pocket, the card and the label, I can place the elements from the design in each layer. Remember our little bullet point layers? I’m going to call those sub-layers as each of those elements goes under a main layer category. Moving a sub-layer into a main layer is simple. Select and drag the sub-layer to the main layer category and drop it in place. You will see the bullet move as you drag it.
STEP FIVE: LAYER ORDER MATTERS
Layer order is important. The layers at the top of the layers pane are in the background. The layers at the bottom of the layers pane are in the foreground. When your layers are directly on top of each other and you’re having a hard time seeing one of them, check your layer order. Chances are it may be hiding behind another layer. Just click and drag that layer towards the bottom of the layers pane.You can easily bring a layer to the front or move it to the back simply by selecting the layer and dragging and dropping it in the order you want on the layers pane.
STEP SIX: SPECIAL FEATURES
By now I’m sure you’ve noticed the little eye and lock icons in the layers pane. You might be wondering what they do. Not to worry, each has some great little magic tricks that I’ll explain.
Lock Icon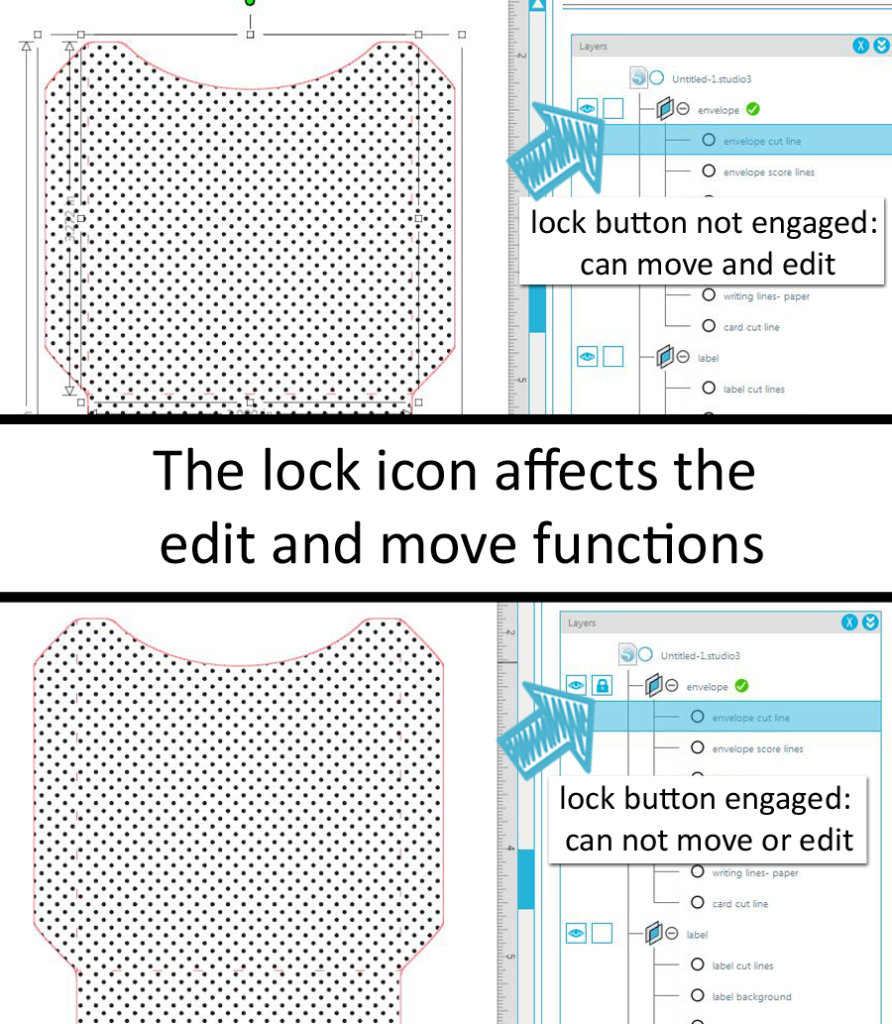
Have you ever tried to move or edit an object only to be frustrated when you realized you are moving the wrong object? I know I have. You don’t have to be frustrated anymore! The layers panel has an awesome feature called lock that actually locks a layer into place so no changes to the size or placement can be made to that layer.
Click the lock icon to lock a layer. Locking a layer is extremely helpful with background layers because you can lock your background layer in place while moving other objects and placing them where you would like them to go without fear of having your background changing size or moving. Any time you would like to make edits to a locked layer, simply deselect the lock to release the layer.
Eye Icon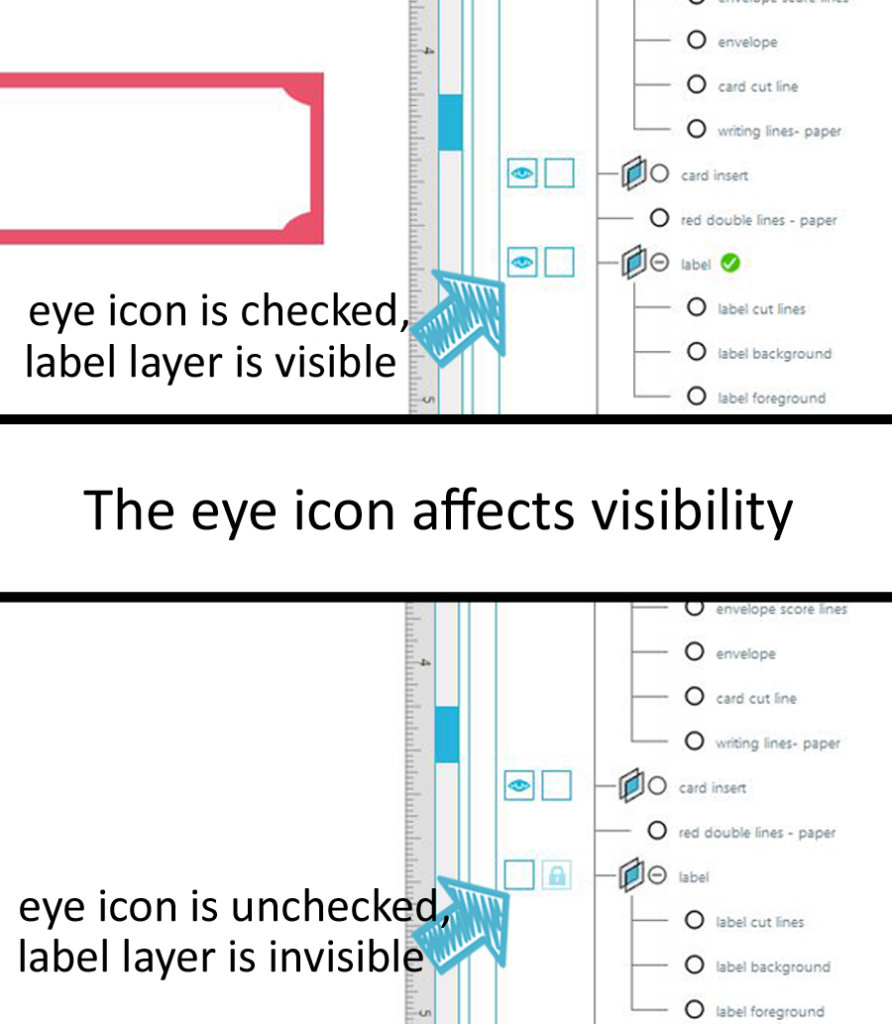
The eye icon affects visibility. It gives you the ability to have a design element (layer) on the page, where you want it while visible it or not. You may be asking yourself “Why would I want to be able to hide a layer?” Hiding a layer allows you to edit the elements that surround it without affecting the hidden layer. I love this option because now I don’t have to drag an element off of the page, so I don’t see it. I can set it exactly where I want, the size I want, and have it magically disappear while I edit other parts of the design. When I’m ready to see it again, I simply click the eye icon again.
Once you have experimented and figured out how to use the layers pane, it will probably become your best friend for creating designs. You will love the versatility and edit options available to you. You will also be able to set cut settings and materials with the layers pane similar to cutting by line type or color.
Now that you have a better understanding of the layers panel editing and customizing designs will be a cinch. Play around with layers to understand them better. Remember, nothing is permanent until you save it, you can always undo mistakes.
Kelly Wayment
June 28, 2024
You can use it with vinyl as long as it is smooth and flat to allow the static charge to hold on to it. Rolled vinyl that wants to go back to its rolled shape will not necessarily work well, and it would need to be trimmed to fit the ES mat cutting area.
Kelly Wayment
June 28, 2024
Yes, you can use the heat pen while using the ES mat. 🙂
Yurii
March 2, 2024
Hello. May it be used with heat pen?
Thanks
Jerome
February 24, 2024
Hi, works this with the normal vinyl foils or only with printer papter etc?
Kelly Wayment
February 16, 2024
Once you’ve pushed the mat up against the rollers, just press the “Load” arrow button (bottom right on the display). Does a regular sticky mat load into the machine for you?
Michelle a goodall
January 24, 2024
Hello! I just got my new electrostatic mat and have watched every video i can find on it. However, what i can t find is why it wont feed into my cameo 5/ it slides right up the rollers but wont go any further. and yes- iam pushing the into button. help!