
The Print & Cut feature of the Silhouette machines is probably one of the most powerful features that the Silhouette machines offer. Although it seems intimidating to do, once you have mastered it your crafting and scrapbooking life will be way easier. When done correctly, you will produce perfect cut-outs that you can use for various projects—I have done boxes, labels, scrapbooking elements, vinyl and fabric cutouts, iron-on printables . . . the possibilities are literally endless.
So, don’t hesitate to read on about using the Print & Cut feature successfully—beginner or seasoned pro, you might pick up a thing or two!
Of course, with every feature, there are guidelines that you have to follow to ensure your cuts are perfect. Let’s break it down, shall we?
- Setting up Your Design and Adding Registration Marks
- Printing and Cutting Your File
Setting Up Your Design And Adding Registration Marks In Silhouette Studio®
1. Make sure to set your paper size to “Current printer.”
Most printers have a default size of 8.5″ in. x 11″ in. You can also use a wide format printer, but bear in mind the width of the Silhouette Cameo® is 12 inches maximum, so make sure to design your graphics only as wide as 12 inches.
Whatever paper type you are using, you must always ensure that the actual paper size you will be using matches the page size on screen so your cut lines will line up perfectly with the printed portion of your Print & Cut.

Don’t forget to check “Show Print Border” so you can see where your printer will actually print—again, printers cannot print past this print border.
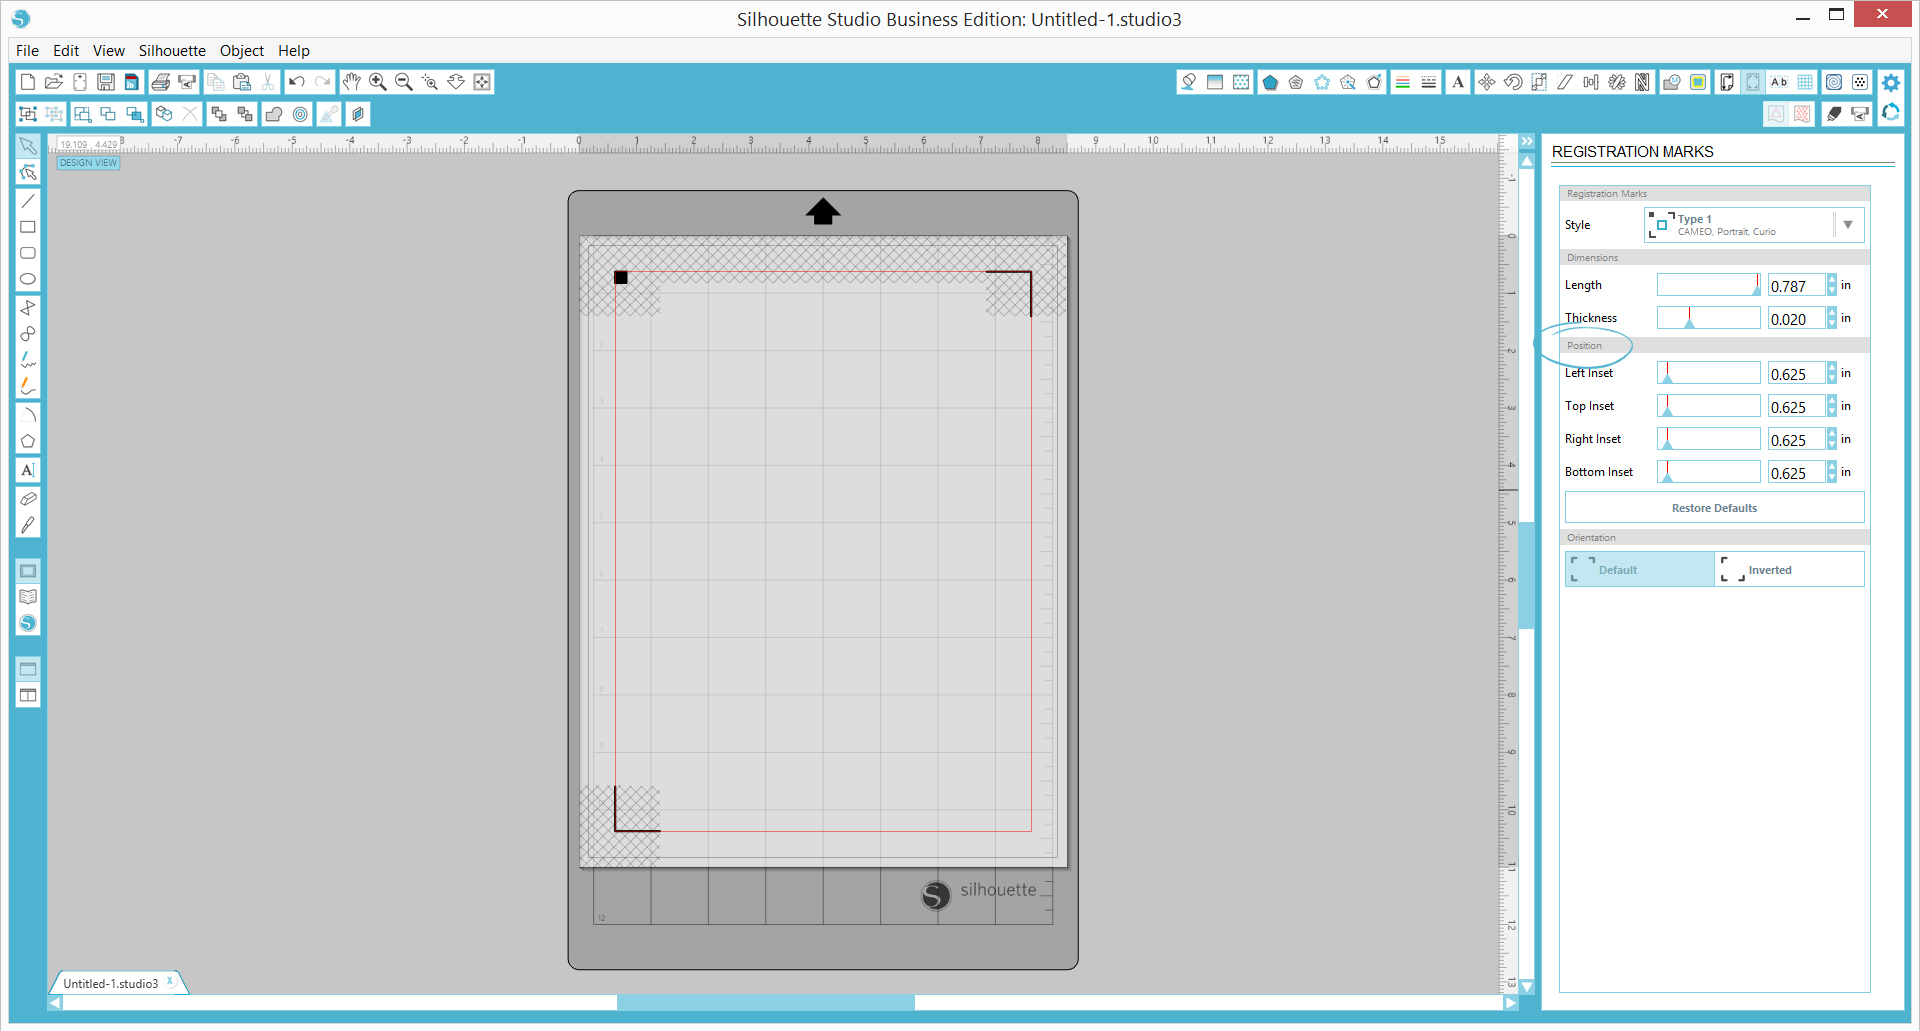
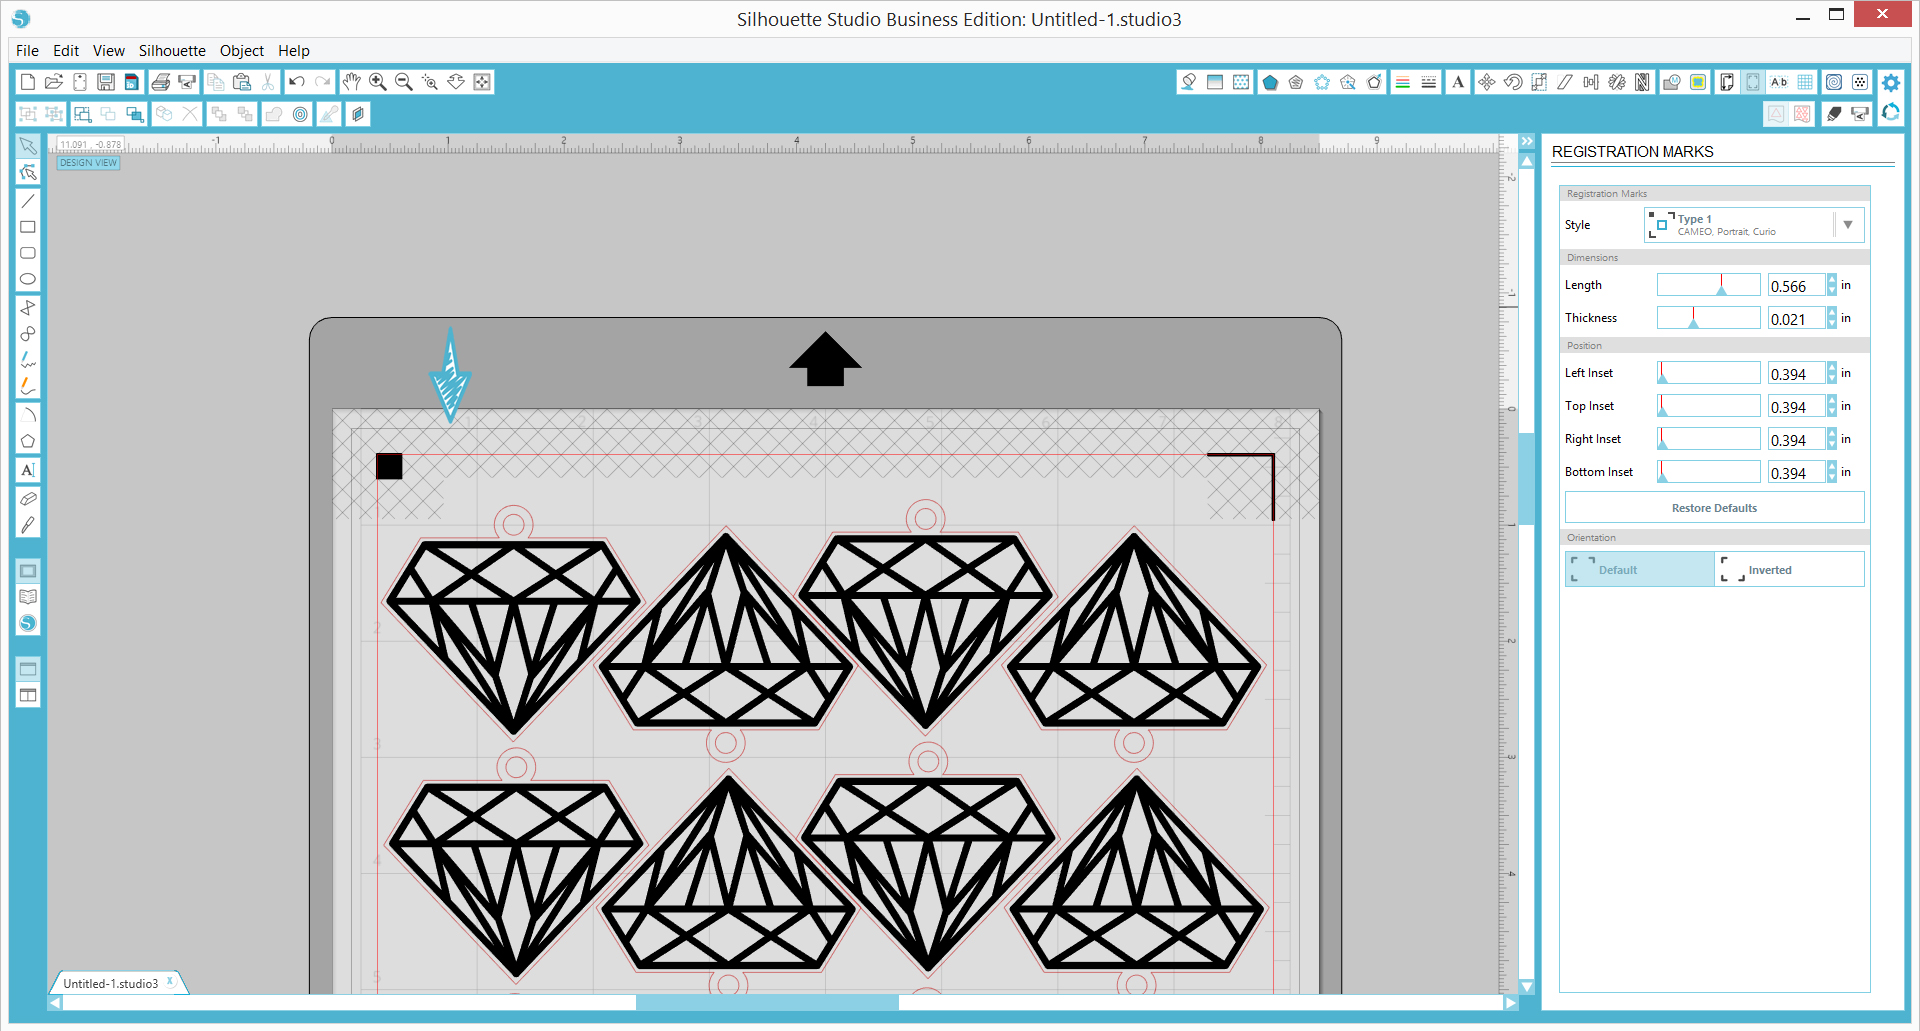
2. Add your registration marks.
The default sizes will give you a smaller area than the print paper to work with—you can adjust this by lowering the number on the Position options on the Registration Marks panel.
3. Add your images in.
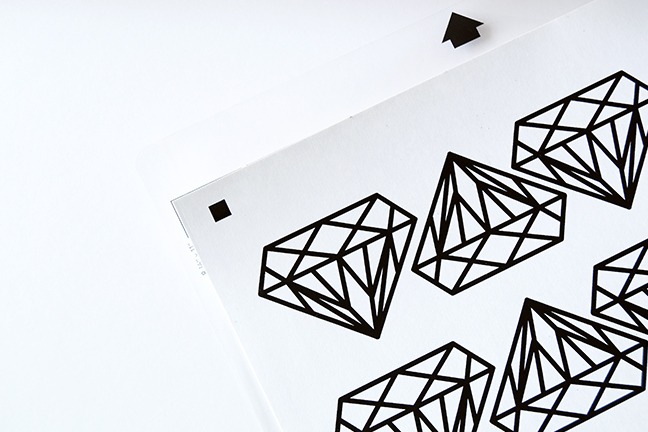
I used the Diamond cut file from designer Loni Harris (Design ID #16190) and converted the design into a tag I can use later on. Position them inside the area without the hash marks for it to be cut.
To have all your registration marks printed, be mindful of where they are when setting them up. You want them contained in the print border for them to all be printed! Partial or incomplete registration marks will not be detected by Silhouette Studio®. Again, if they are outside the print border, you may adjust them by increasing or decreasing the position of the insets on the Position option on the Registration Marks panel.
PRINTING AND CUTTING YOUR FILE
1. Print your document.
Again, making sure all your registration marks have been fully printed. Marks that go off the page will unfortunately not be read by the Silhouette Cameo®.
2. Load your document.
You must use a cutting mat when doing a Print & Cut project. Make sure your paper lines up with the marks on the cutting mat.
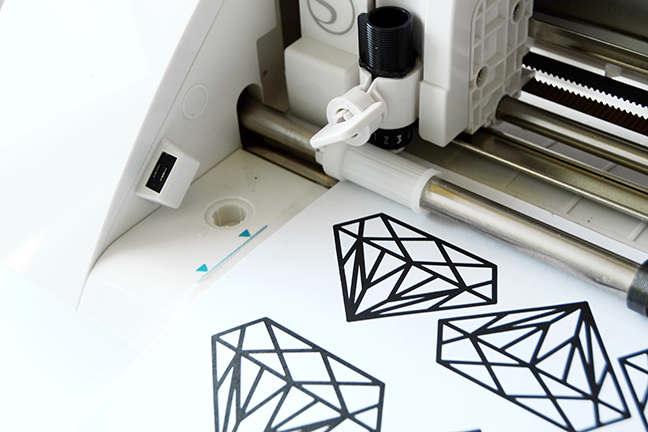
Line up your cutting mat with the last guideline on the left of your Silhouette Cameo® and hit “Load cutting mat” on your CAMEO. Don’t forget to select this option so the machine feeds it just right under the registration marks detector.
If your registration marks aren’t being detected—do not worry! You can easily fix that by manually adjusting your carrier to read the marks.
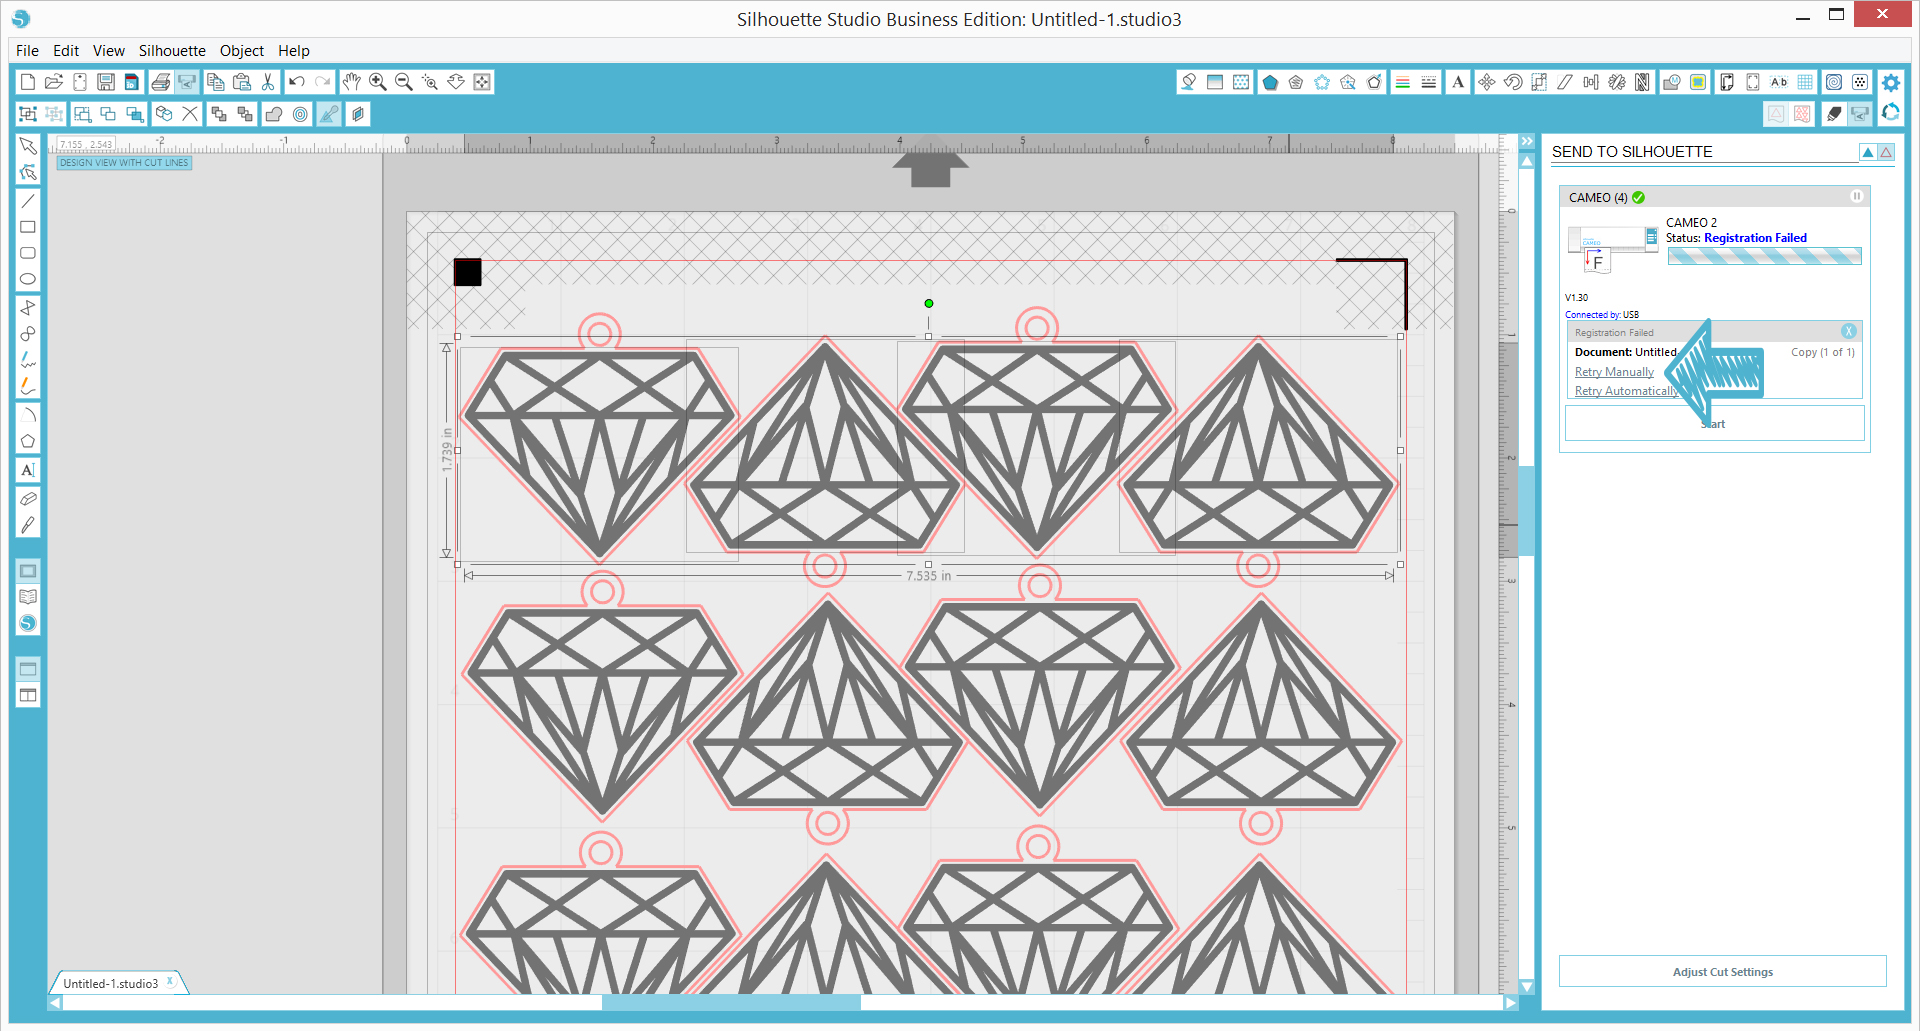
Registration Marks Not Being Detected? Here’s How To Fix!
- Select “Retry Manually.”

- Use the arrow keys to move the box right under the laser.
As a reference, I move the box to right about where the blade carriage is, as that is where the laser is located.
- After positioning, click “Register,” and watch it register and cut flawlessly!
If this didn’t fix your registration problems or you need more help, contact the Silhouette Support Team here.

And you are done! Spruce up your tags with some foiling—or keep them as-is and use them for your wrapped gifts.
Kelly Wayment
June 28, 2024
You can use it with vinyl as long as it is smooth and flat to allow the static charge to hold on to it. Rolled vinyl that wants to go back to its rolled shape will not necessarily work well, and it would need to be trimmed to fit the ES mat cutting area.
Kelly Wayment
June 28, 2024
Yes, you can use the heat pen while using the ES mat.
Yurii
March 2, 2024
Hello. May it be used with heat pen?
Thanks
Jerome
February 24, 2024
Hi, works this with the normal vinyl foils or only with printer papter etc?
Kelly Wayment
February 16, 2024
Once you’ve pushed the mat up against the rollers, just press the “Load” arrow button (bottom right on the display). Does a regular sticky mat load into the machine for you?
Michelle a goodall
January 24, 2024
Hello! I just got my new electrostatic mat and have watched every video i can find on it. However, what i can t find is why it wont feed into my cameo 5/ it slides right up the rollers but wont go any further. and yes- iam pushing the into button. help!