
Can’t decide between glitter or metallic heat transfer for your project? Try combining the two for a beautiful look! Valentine’s Day is coming soon, and there’s nothing as cute as seeing my little valentine all dressed for the occasion. This shirt was simple to do, and the design would work just as well on a onesie or a bigger T-shirt. My daughter was in LOVE with the result!
Supplies Needed:
- Silhouette CAMEO® or Silhouette Portrait®
- Silhouette Studio®
- Silhouette Cutting Mat
- Silhouette Cutting Blade
- Silhouette Hook Tool
- Silhouette Glitter Heat Transfer – Hot Pink
- Silhouette Metallic Heat Transfer – Pink
- Iron
- Piece of cloth or parchment paper
- T-shirt
- Design ID #283040
Step One: Preparing the Design
1. Open the XOXO design (Design ID #283040) in Silhouette Studio®. Group and resize your design to fit the shirt you will use. Select the appropriate cutting mat or select “None” if you are using the roll feeder.
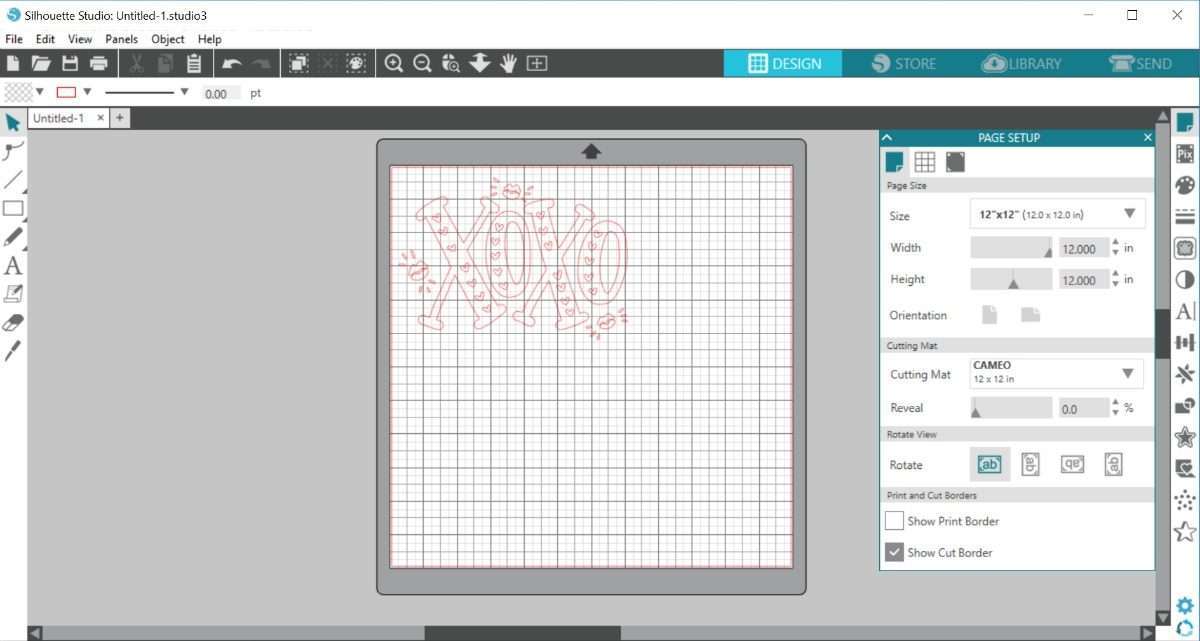
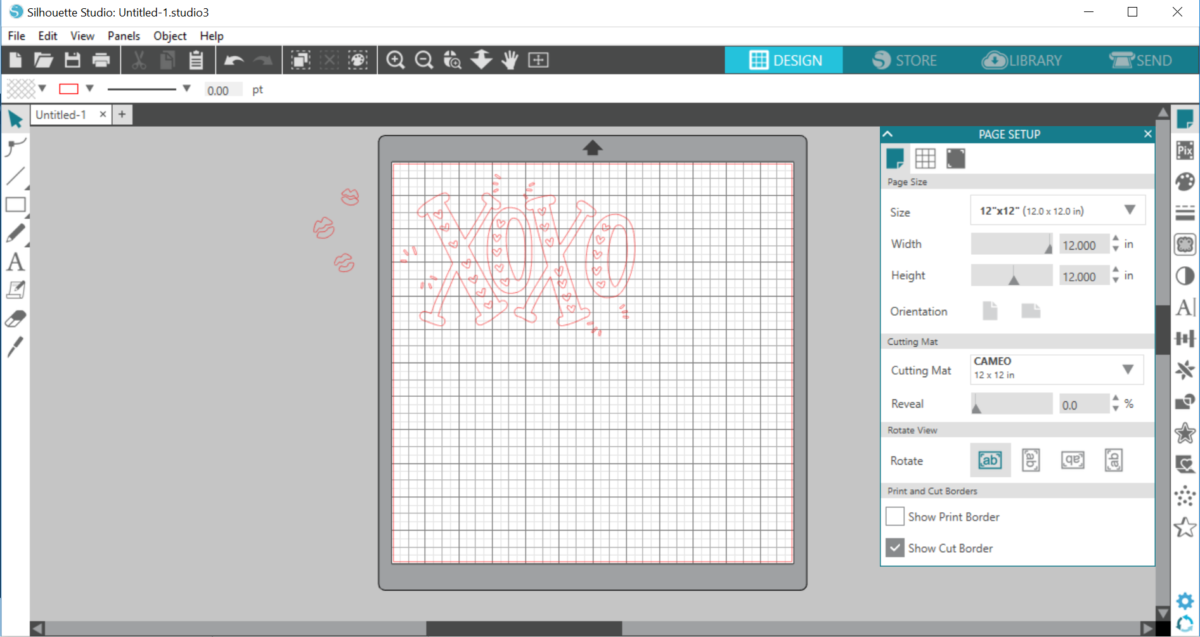
2. Ungroup the design. This will allow you to remove the lips from the cutting area, which we are going to cut later. Select and group each set of lips to move the top and bottom lips together.
3. We need to mirror the design before we send it to the machine. Select the design and choose “flip horizontally.”

4. Load the Heat Transfer Material. I used the 12×12 cutting mat. Place the plastic liner side down on your mat and load it into the machine. You can also load your material using the Roll Feeder.

Step Two: Cutting the Design
1. Under the Send panel, select “Heat Transfer, Metallic” as your material type. Adjust the blade if needed, and click Send. Silhouette Studio® will ask you if you need to mirror your design. We already mirrored our design, so click “Send As Is.”
2. Remove the cut heat transfer material from the machine and weed your design using the Silhouette Hook Tool. You want to remove the heat transfer that is not a part of your design, including the hearts inside the XOXO letters. I found that the metallic heat transfer was extremely easy to weed.
3. Now we need to cut out our kisses using the glitter Heat Transfer Material. Select and remove the XOXO design in Silhouette Studio® and then drag the kisses onto the cutting area.
4. Don’t forget to mirror the kisses before cutting! Be sure to select “Heat Transfer, Glitter” in Silhouette Studio®. Only a small amount of material is needed for this, so if you have a smaller piece of heat transfer lying around, this is a great time to use it.
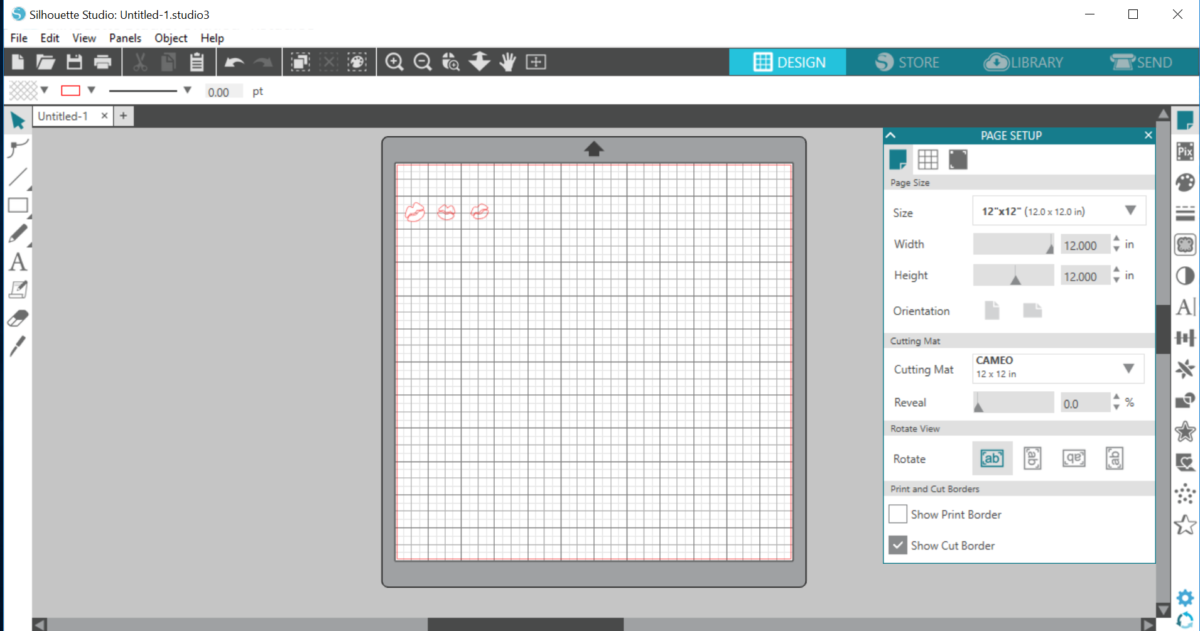
5. Remove the excess vinyl around the kisses. Cut the design apart into three separate pieces so that you can place them in the correct spots on the shirt when it’s time.
Step Three: Applying the Heat Transfer
1. Place the XOXO design on your shirt (plastic side up).
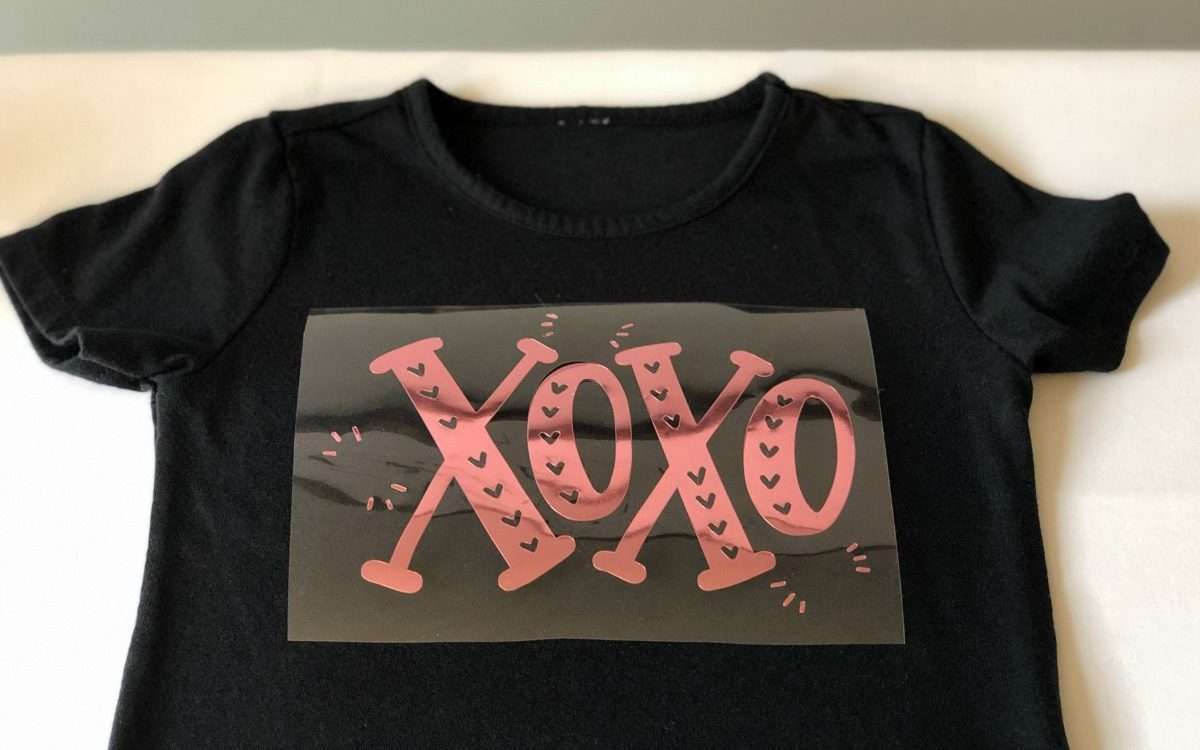
2. Place a cloth or piece of parchment paper between the design and your iron. Make sure that the steam of your iron is turned OFF. Use the heat of your iron to adhere the design for about 60 seconds, and peel off the plastic sheet.
3. Now it’s time to apply the kisses! Place a kiss between the metallic specs on the shirt, as shown. Apply the glitter material the same way you applied the metallic material.

4. Once you peel off the plastic from the kisses, your shirt is complete! Your little one (or YOU) will be the cutest Valentine around! I hope you have a great time making this shirt!
Nasze Naturalne
September 3, 2025
Your authentic voice really shines through in everything you create and share
Naszenaturalne
September 2, 2025
Really love your style
Kelly Wayment
June 28, 2024
You can use it with vinyl as long as it is smooth and flat to allow the static charge to hold on to it. Rolled vinyl that wants to go back to its rolled shape will not necessarily work well, and it would need to be trimmed to fit the ES mat cutting area.
Kelly Wayment
June 28, 2024
Yes, you can use the heat pen while using the ES mat. 🙂
Yurii
March 2, 2024
Hello. May it be used with heat pen?
Thanks
Jerome
February 24, 2024
Hi, works this with the normal vinyl foils or only with printer papter etc?