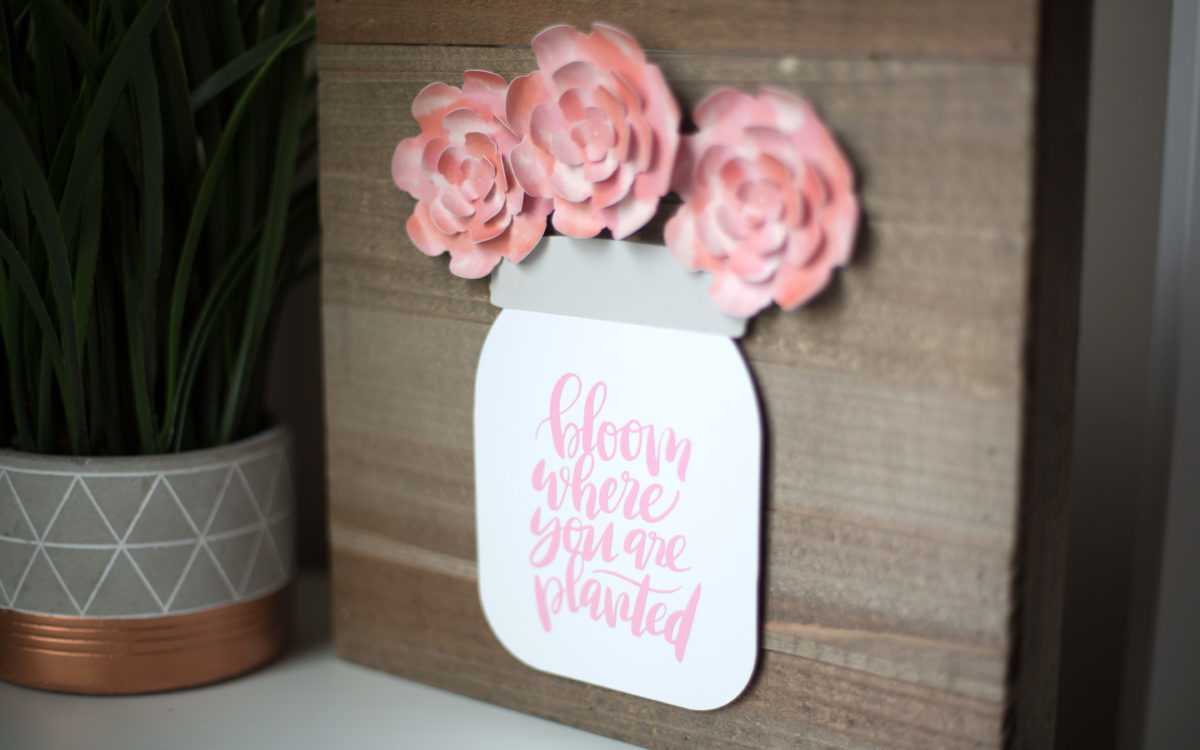
You’ve seen paper flowers before but not like this! Today we are using this brand new design in the Silhouette Design Store, Watercolor Layered 3D Flower. We are so ready for spring to come around, so this design was absolutely perfect. Follow along with us to see how we made this.
Supplies Needed:
- Silhouette CAMEO® or Silhouette Portrait® or Silhouette Curio™
- Silhouette Cutting Mat
- Silhouette Cutting Blade
- Silhouette Studio®
- Silhouette Glossy Vinyl – Pink
- Cardstock – White and Grey
- Chipboard
- Glue
- Silhouette Tool Kit
- Printer
- Design ID #249118
- Design ID #93675
- Design ID #203014
Step One: Prepare the Design
- In Silhouette Studio®, open Design ID #203014.
- You will want to delete the “wishes” text, the rounded rectangle, and the dandelions from the design.
- Next, fill in the design to mimic the cardstock you will use later. You can fill in the shapes using the Fill tool located on the toolbar on the right-hand side of the page.
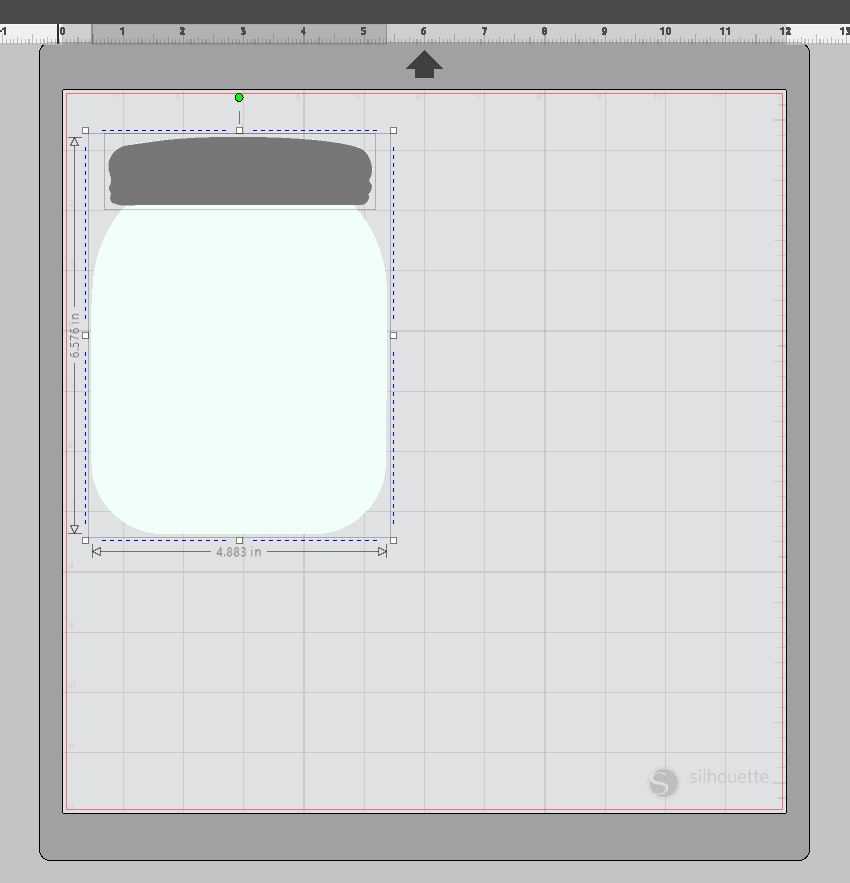
- With both pieces now layered over one another, increase the size of the jar. We liked ours to measure 6.576 in. x 4.883 in.
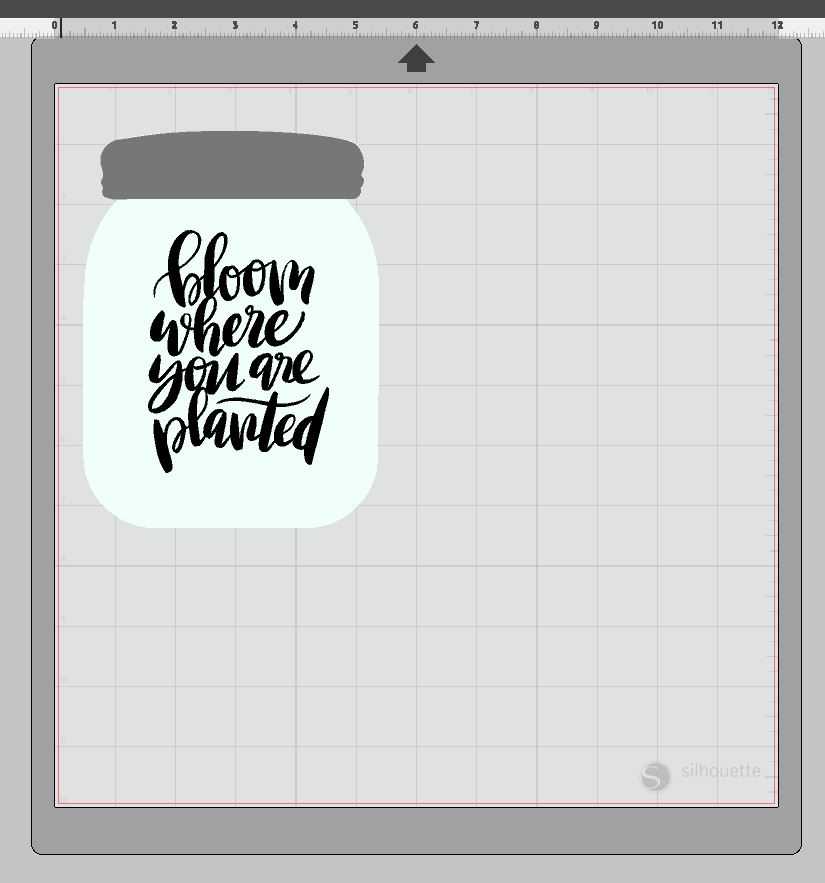
- Now open Design ID #93675. You will want to resize the phrase so that it fits within the shape of the jar. We liked our phrase to measure 4.023 inches x 2.997 inches.
- Now that the jar design is exactly what we’d like. Let’s move on to the watercolor flowers. Open Design ID #203014 and duplicate the whole design several times. To do so select the whole flower design, right-click, and select duplicate. Do this until you have 3 sets of flower shapes.
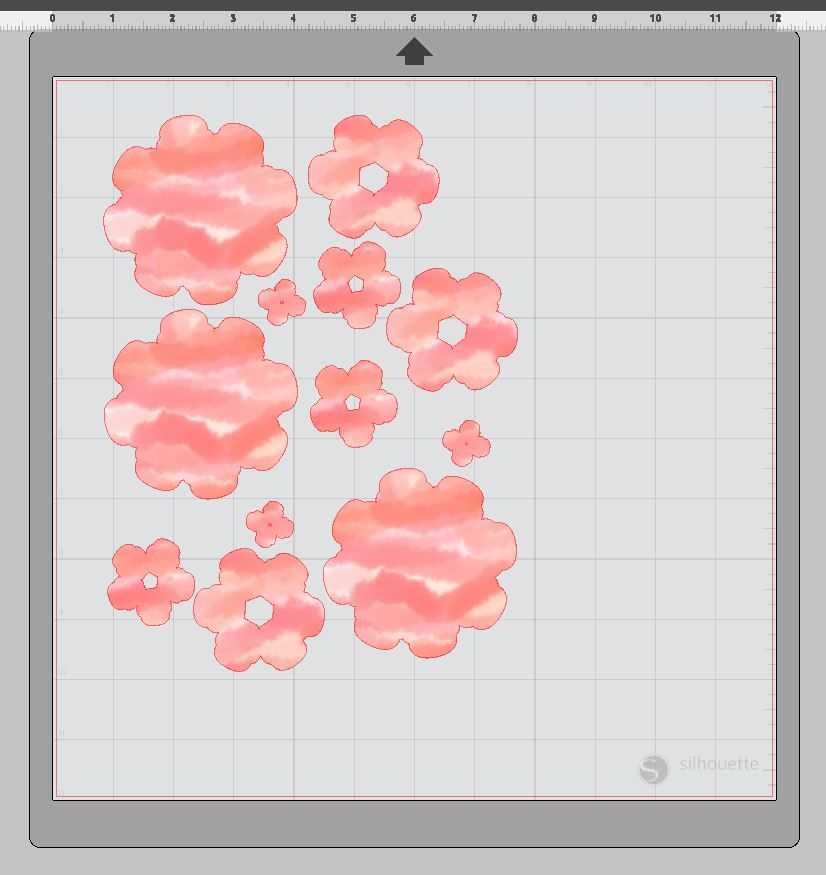
- Now that we have all of our shapes. We are ready to cut them out!
Step Two: Cut the Shapes
Watercolor Flowers:
- Let’s start cutting the flowers first. Now we will want to adjust our page size to 8.5 in x 11 in since that is the size that will fit in the printer. To adjust the page size go to the Page Setup tool in the top right-hand corner of the toolbar.
- Next, we will want to turn on registration marks since we want to tell out machine exactly where to cut the flowers out. You can turn these registration marks using the Page Setup tool. Just click the third icon within the tool. Turn your registration marks to Type 1.
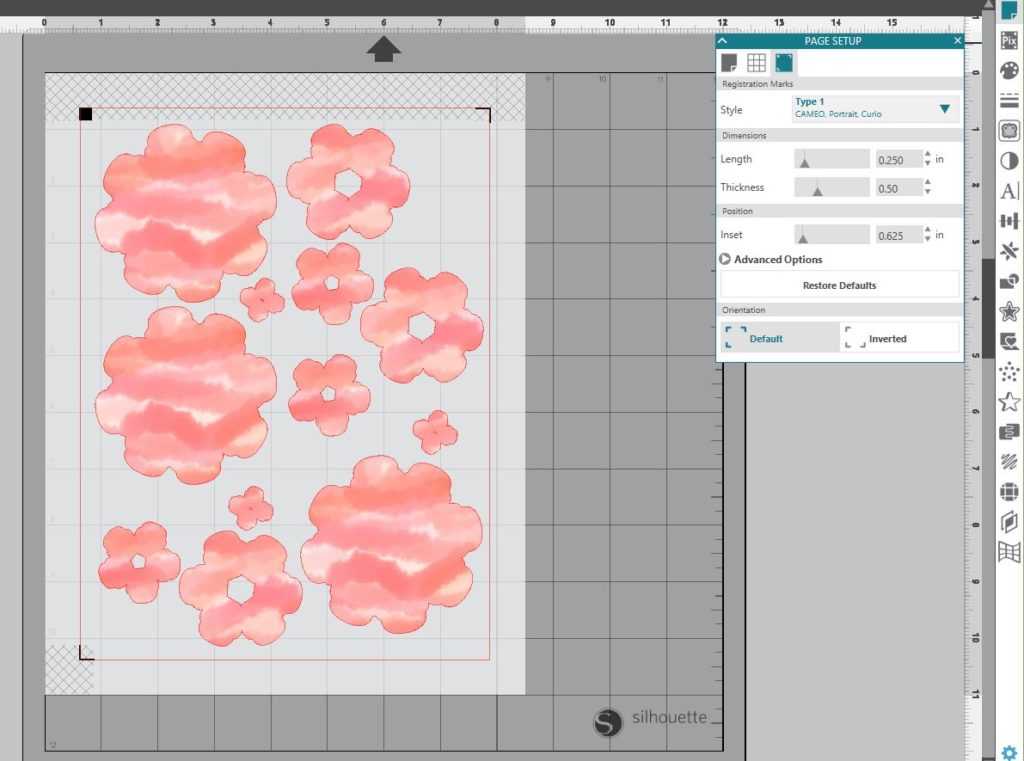
- Now, send your page to Print.
- Place your printed cardstock on your cutting mat and load your cutting mat into your machine.
- In Silhouette Studio®, select the Send window in the top right-hand corner. Select the card stock cut setting and select Send. (Remember that if you don’t have an AutoBlade, you will need to adjust your blade settings.)
- Your machine will read the registration marks and then cut out your design. (Tip: If your machine is having trouble reading your registration marks, try manually moving the blade directly over the square registration mark. You can do this by moving the blue arrows in the Send window in Silhouette Studio®.)
- Once your machine has cut out your design, remove the flower petals from the cutting mat carefully and set aside.
Mason Jar:
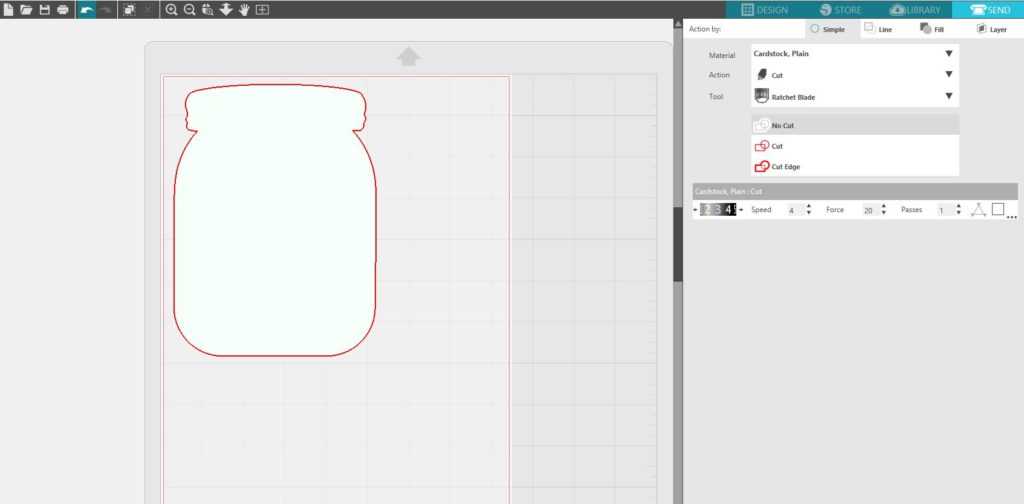
- Now you will want to cut the pieces of your mason jar. Use different colored cardstock to cut out the pieces. We used grey for the rim of the jar and a pearly white for the jar. Remember you will want to turn off the registration marks since these will not be printed (Tip: If you want your jar to be a little stiffer, cut the jar shape out of chipboard. Then glue the white cardstock to the top).
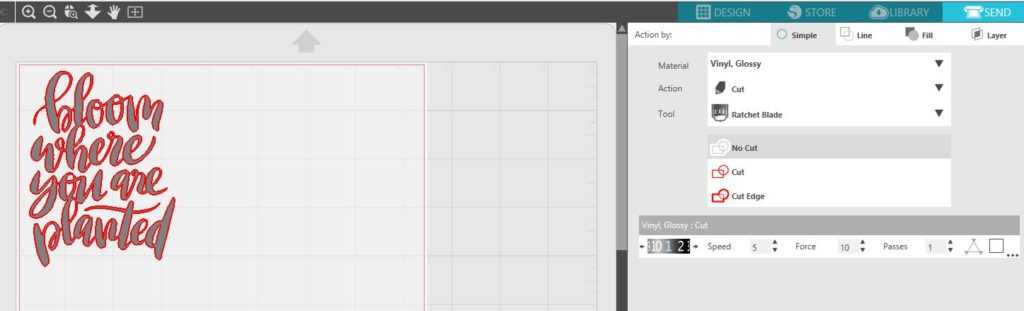
- Once both pieces of the jar are cut, it’ll be time to cut the phrase. Now because we chose to cut this out of vinyl the only thing you will want to do differently is to change the cut settings in the send window. You will want it to look like this:
Step Three: Assemble the Pieces
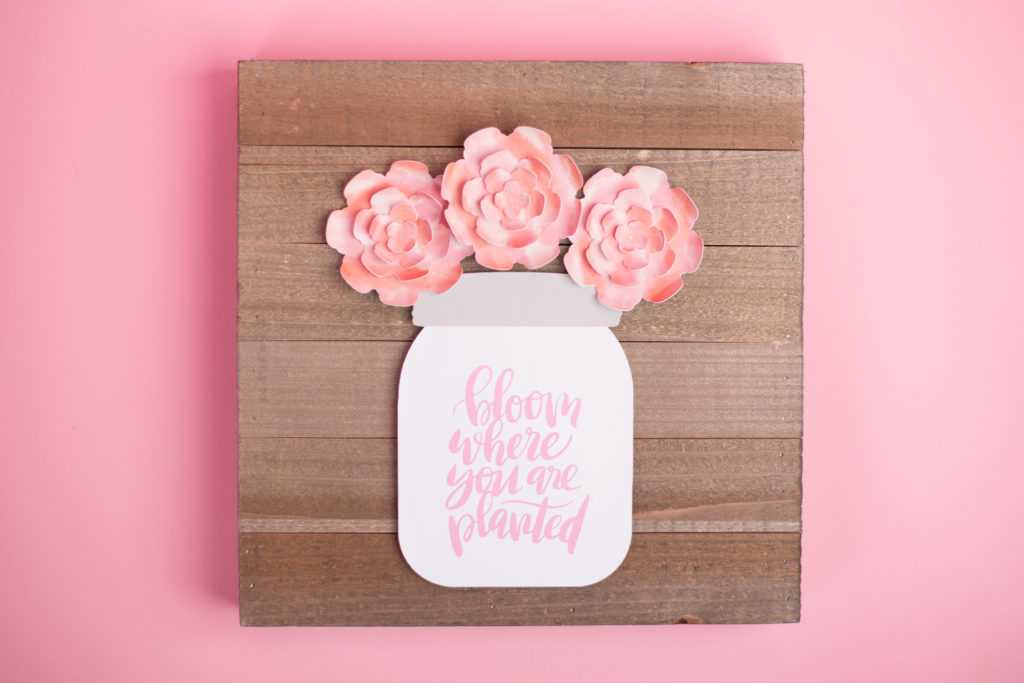
- Now that all the pieces have been cut out, it is time to put it all together. Let’s assemble the jar first. Take the grey rim and glue that on top of the white jar shape.
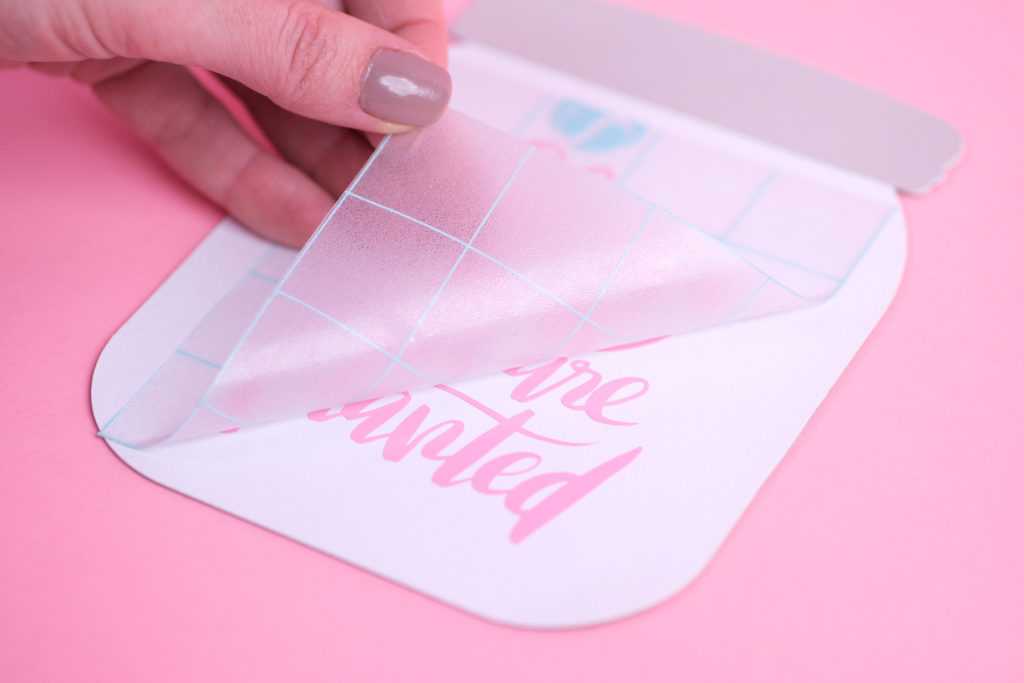
- Then take your vinyl phrase and place that in the center of the jar shape.
 Set this aside to dry while you assemble the watercolor flowers.
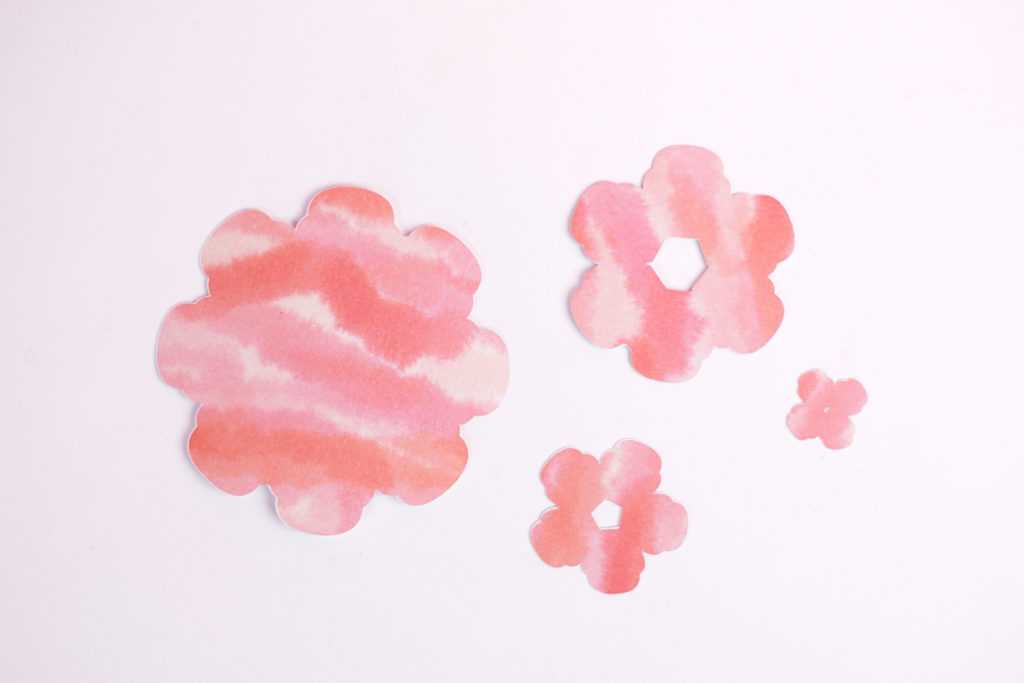
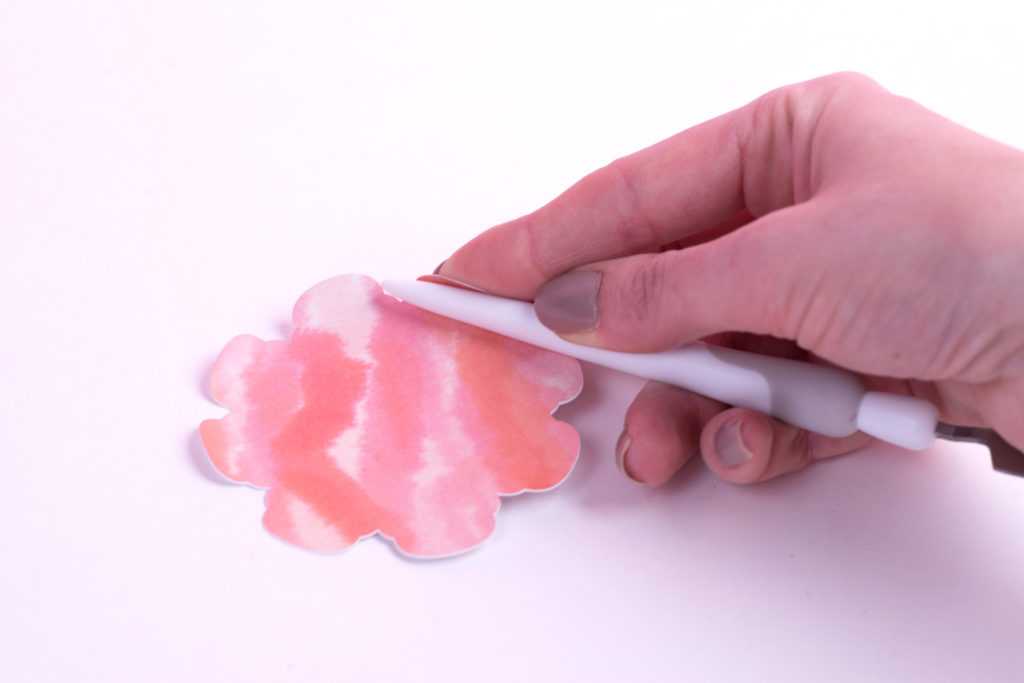
- For the flowers, you will want to shape each flower petal to give it more dimension. To do so, grab your hook tool (even a pencil will do). Place the rounded part of the tool or pencil at the edge of each flower. Fold the paper over the curve of your tool to make the petal curl upward. Repeat this on all four pieces of the flower.
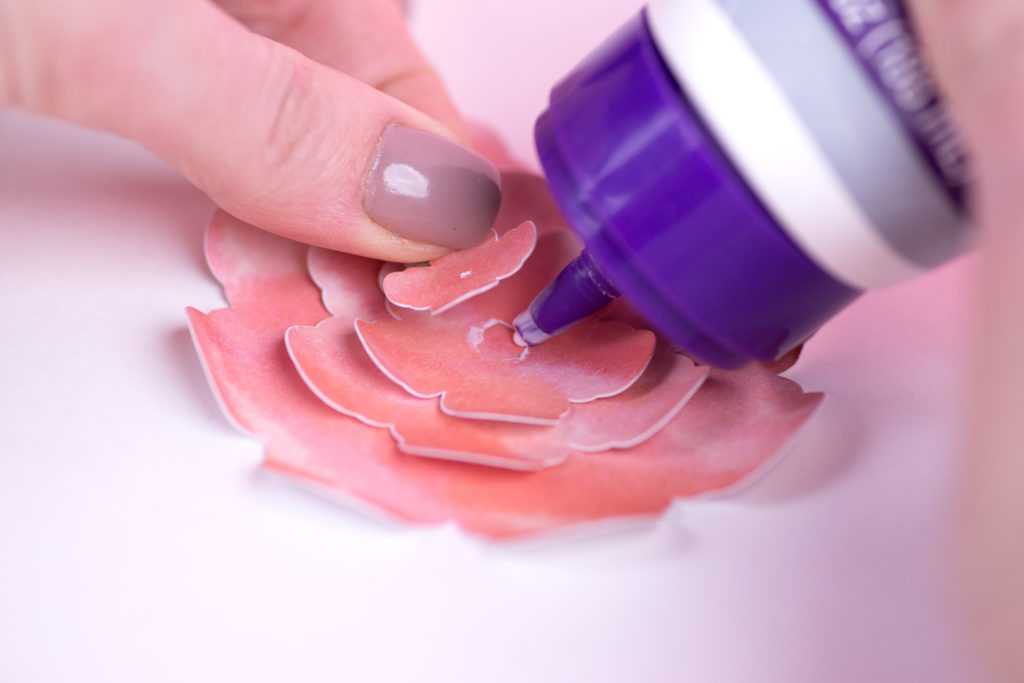
- Take your glue and glue each piece of the petals to each other. Repeat this process until you’ve completed all of your flowers.
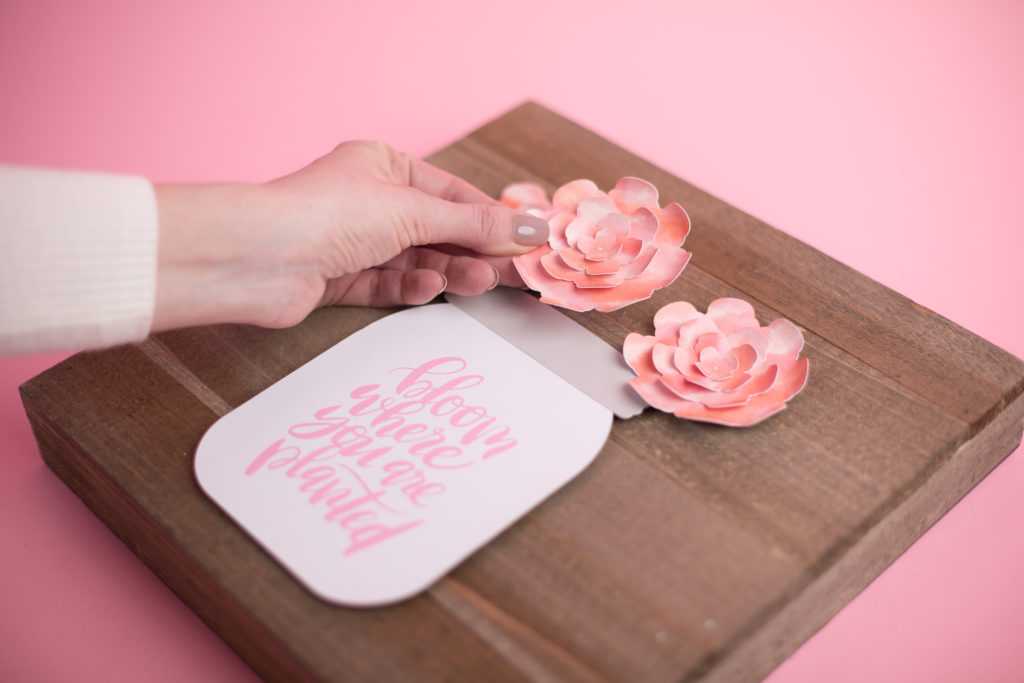
- Lastly, take your jar shape and flowers and place them onto your wood slab. Glue each component in place.
Nasze Naturalne
September 3, 2025
Your authentic voice really shines through in everything you create and share
Naszenaturalne
September 2, 2025
Really love your style
Kelly Wayment
June 28, 2024
You can use it with vinyl as long as it is smooth and flat to allow the static charge to hold on to it. Rolled vinyl that wants to go back to its rolled shape will not necessarily work well, and it would need to be trimmed to fit the ES mat cutting area.
Kelly Wayment
June 28, 2024
Yes, you can use the heat pen while using the ES mat. 🙂
Yurii
March 2, 2024
Hello. May it be used with heat pen?
Thanks
Jerome
February 24, 2024
Hi, works this with the normal vinyl foils or only with printer papter etc?