
Have you ever wanted to create something of your own in Silhouette Studio®? Maybe you want to curve text, or draw your own design? Maybe you want to tweak something from the Silhouette Design Store? There are so many tools to help you do just that.
They’re intimidating, those funky little icons over there on the sidebar. They make weird lines and shapes, twist and turn, flip and rotate.
Don’t be scared. Let me introduce you to one and by the end of this tutorial you will be cranking out curvaceous designs all over the place. So let’s get going and learn how to curve text!
For the purposes of this tutorial you only need Silhouette Studio®. You can choose what you want to do with your design when we’re finished.
STEP ONE: DRAW AN ARC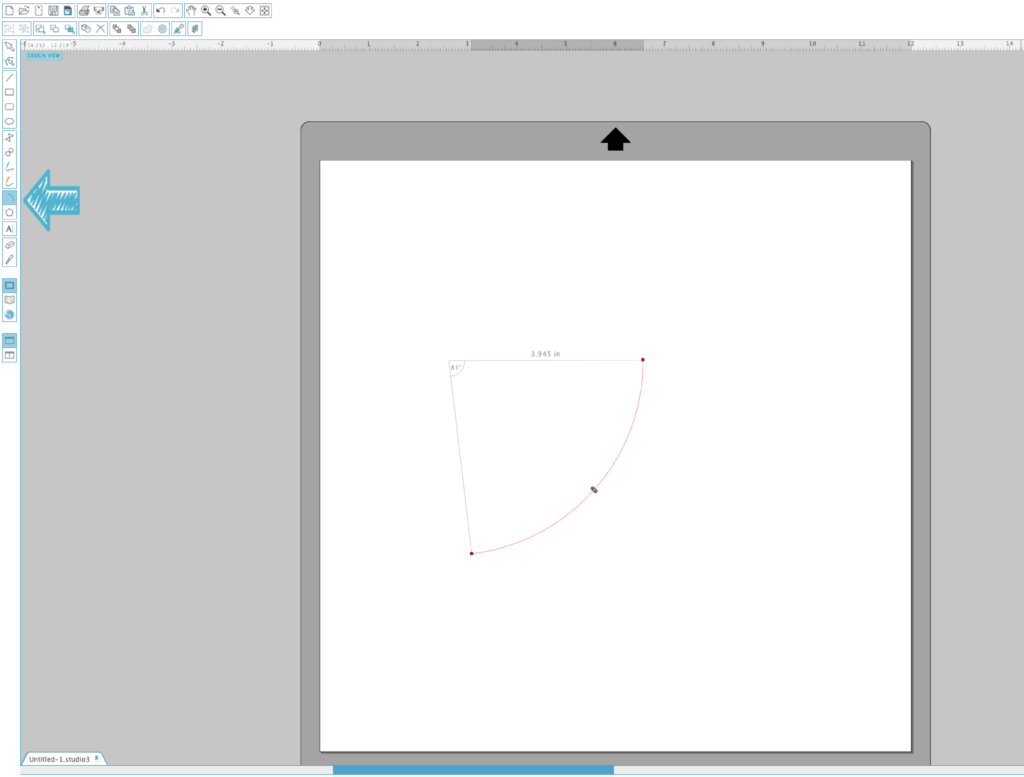
In Silhouette Studio select the “Draw an Arc” tool. It will turn the cursor into crosshairs.
When you click and release once in the Design Space, it will leave a red dot that begins at O°. Slide the mouse across the page. Where you stop will depend on how big you want your arc to be. Don’t stress about the size for now. You can make changes later.
Click and release again to create the stopping point.
Now move your mouse up or down (or side to side, depending on which way you drew your first line) and stop when your angle is where you want it. Clicking again will end the arc.
If you’re not planning to immediately draw another arc, now would be the best time to deselect the Draw an Arc tool by clicking on the Select arrow at the top of the side bar. Otherwise, everywhere you click will start a new arc.
Okay, stop here and try your hand at it a few times, then meet me back here for more!
STEP TWO: ADJUST YOUR ARC
Ready to move on? Great!
Unless you’re a complete genius, your arc is probably not even from one end to the other and not the exact size you need. You can lengthen or shorten the arc by grabbing and pulling the red dots on each end. You can adjust the overall size by grabbing the tiny little arrow thing in the middle of the arc and pulling it away or towards the angle.
Now, double click on the arc to locate that nifty little green dot to grab it and rotate it until it’s where you want it.

To get it perfectly even, I like to turn the grid lines on, so I can line everything up just right.
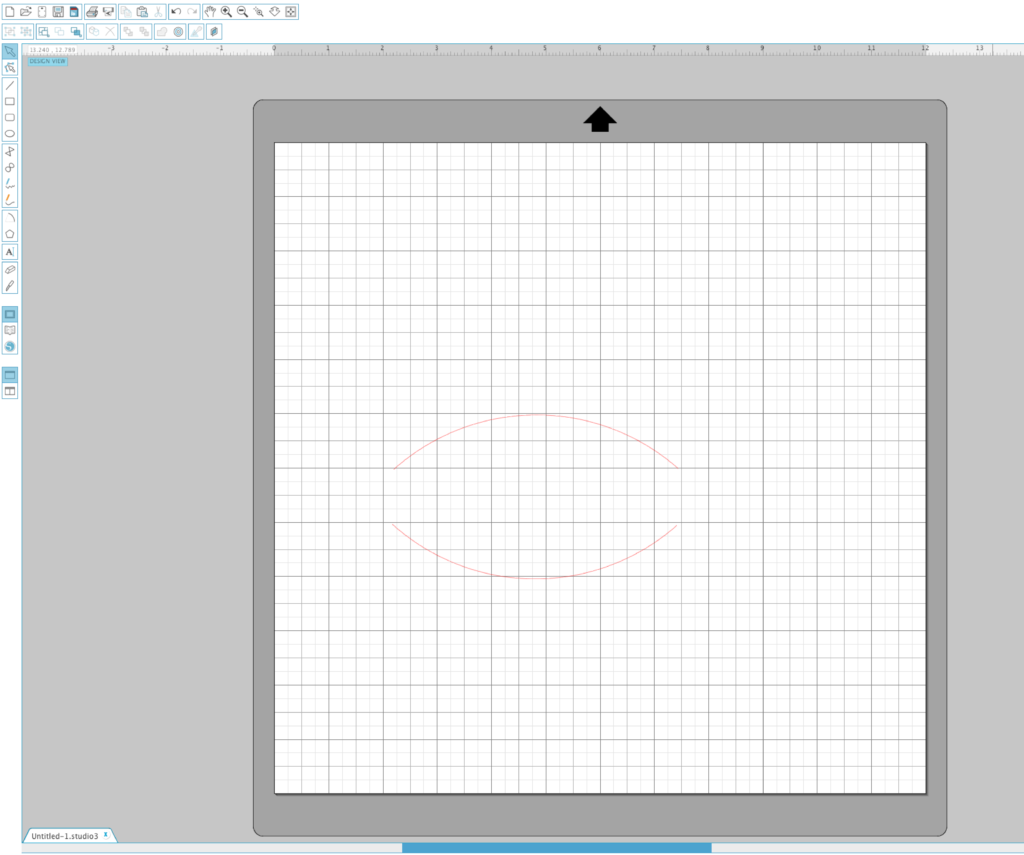
Don’t worry, you’re not out of opportunities to adjust it. Chances are you will need to play around with it a little more before it’s all said and done.
Before moving on, I decided I wanted to make a wavy line for my text. So I duplicated the arc and mirrored it by flipping it vertically. Then I can simply lined up the two arcs side by side to create the wavy line.
STEP THREE: TYPE AND CURVE TEXT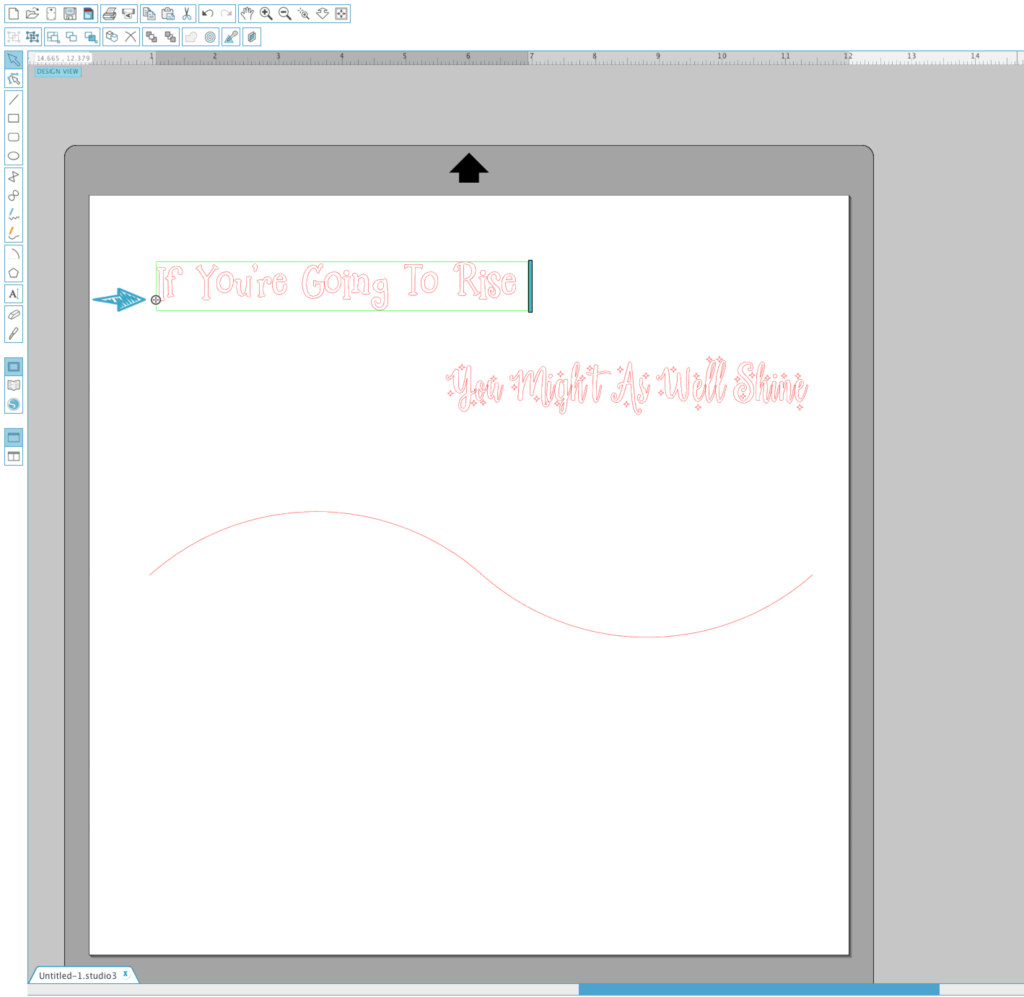
Select the Text tool and type something. I decided to do my new favorite quote and family motto for 2017.
After you’ve typed your text, you will notice the green box around it and a little circle with cross hairs in it. Grab that circle and bring it down to meet the arc and the text will magically curve around it.
As you keep moving it around, the text will also move around, side to side, or above and below the arc. Unless you want the text upside down under the arc, find a good spot above it.
To keep it upright but also under the arc, use the slider that appeared to the left of the text when it met up with the arc. Slide it up to move it further away from the arc, and slide it down to move the text under it.
Now is a good time to adjust the size of the arc as well as the size of the text so they fit together.
Confused? The only way to really know what I’m talking about is to try it. So go try it!
STEP FOUR: CONVERT TO PATH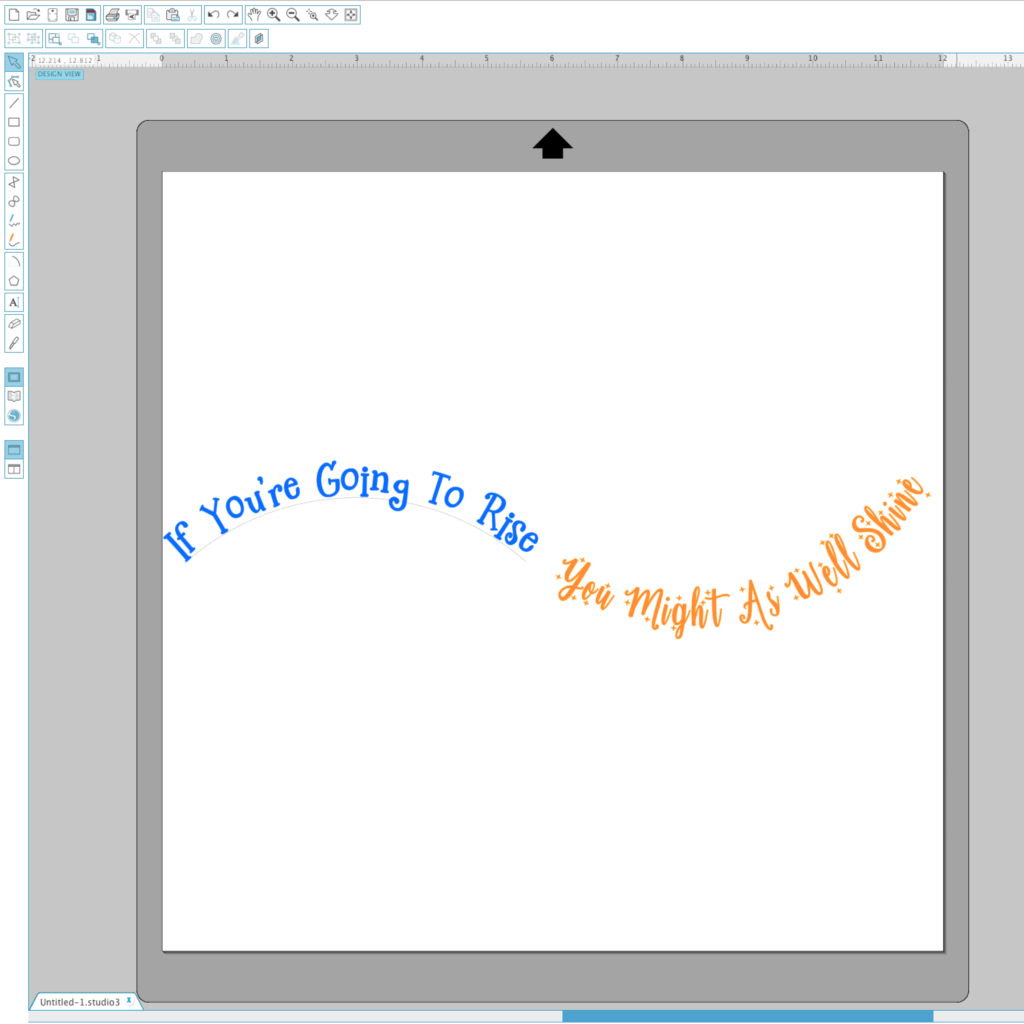
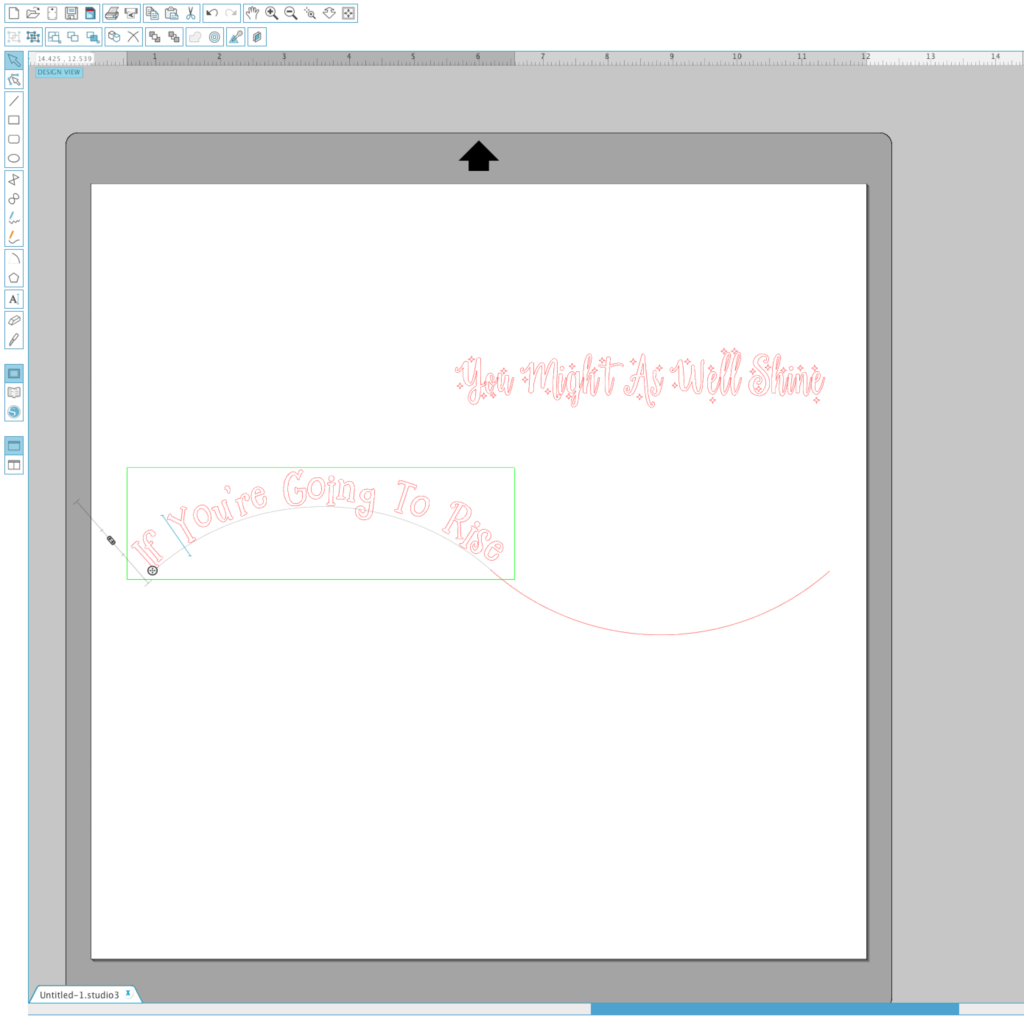
If you plan to cut or print your text right where it is on the Design Space, you are good to go from here, but more than likely you want to move it. If you move it away from the arc now, it will return to normal and lose the curve.
In this order, select only the text>right click>convert to path. Now you can move it freely around the Design Page. You can also delete the arc at this point. You don’t need it anymore.
If you’re doing a wavy text like I did, repeat the steps for the next set of text and the flipped arc.
STEP FIVE: FINALIZE YOUR DESIGN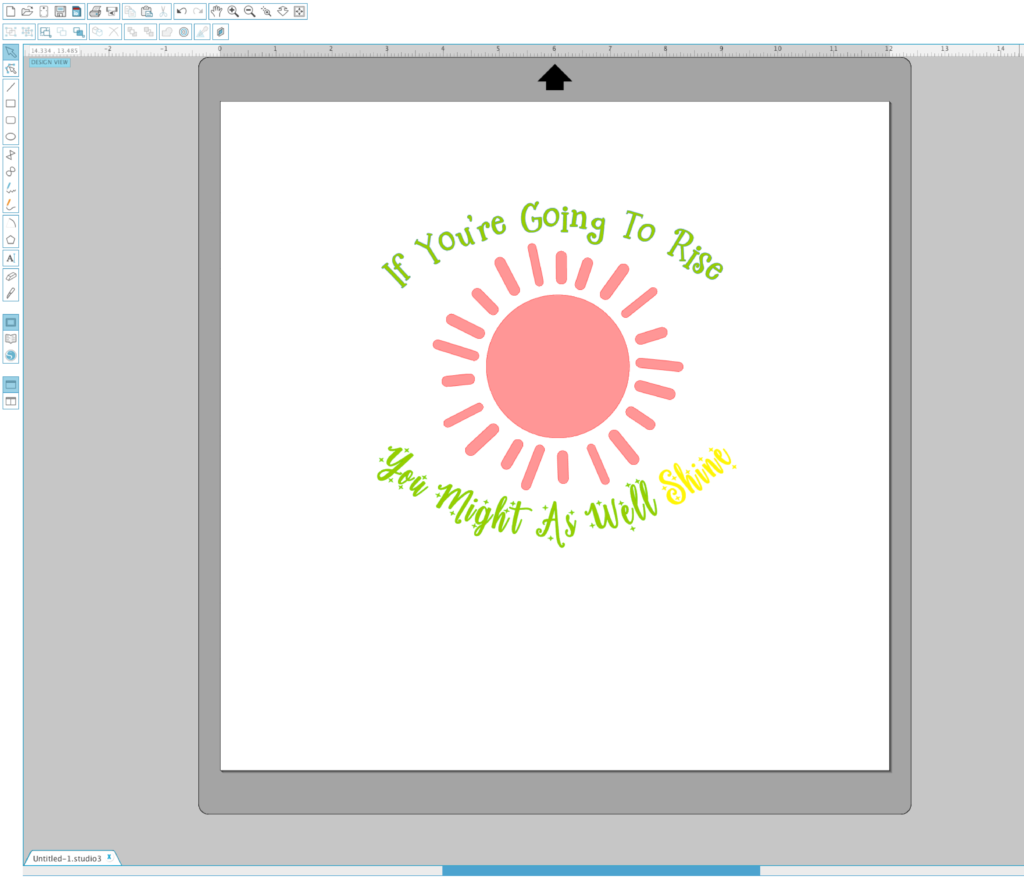
Move things around, add a design, and experiment with colors. I added this sun from the Design Store. Don’t you love the flexibility of Silhouette Studio®?

Now, print, cut, vinylize, or whatever your jam is. I grabbed a screenshot of mine and made it the wallpaper on my computer.

Oh, and I made a mug!
Bonus Tip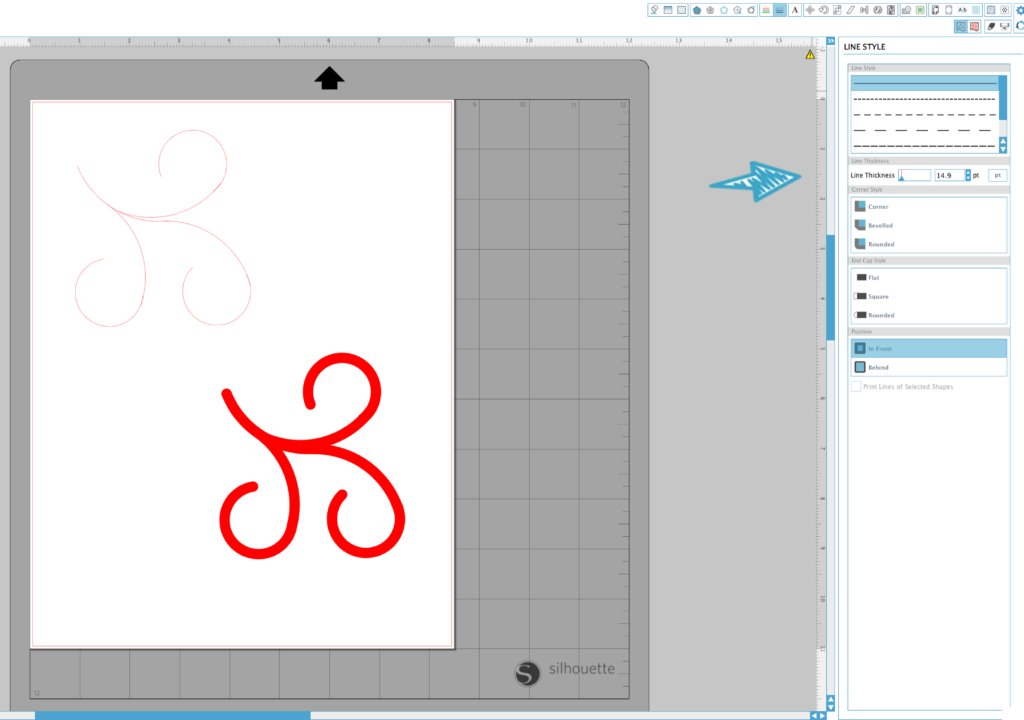
One more thing before we go. Remember how I mirrored, flipped, and rotated my arc? Using those techniques, try creating your own flourish design. After you’ve pieced your arcs together where you want them, beef up your lines by clicking on the Line Style menu and increasing the Line Thickness. Pretty cool, huh?
Guess what? You just graduated from Draw an Arc Class, and hopefully Curving Text Class as well! Congratulations!
What will you create with your newfound knowledge?
![]()
Kelly Wayment
June 28, 2024
You can use it with vinyl as long as it is smooth and flat to allow the static charge to hold on to it. Rolled vinyl that wants to go back to its rolled shape will not necessarily work well, and it would need to be trimmed to fit the ES mat cutting area.
Kelly Wayment
June 28, 2024
Yes, you can use the heat pen while using the ES mat. 🙂
Yurii
March 2, 2024
Hello. May it be used with heat pen?
Thanks
Jerome
February 24, 2024
Hi, works this with the normal vinyl foils or only with printer papter etc?
Kelly Wayment
February 16, 2024
Once you’ve pushed the mat up against the rollers, just press the “Load” arrow button (bottom right on the display). Does a regular sticky mat load into the machine for you?
Michelle a goodall
January 24, 2024
Hello! I just got my new electrostatic mat and have watched every video i can find on it. However, what i can t find is why it wont feed into my cameo 5/ it slides right up the rollers but wont go any further. and yes- iam pushing the into button. help!