Last year I shared a fairly elaborate paper poinsettia centerpiece. I want to share a holiday papercraft project again this year, but this winter branch is simpler. The artists have their own tutorials you can follow after purchasing the designs, but I only use portions of their projects and will show you my own method of assembly.
I’ll also share some tips on adjusting your cut settings to get better cuts on cardstock. Are you ready? Let’s make this winter branch!
Supplies:
- Silhouette Cameo® or Portrait®
- Sharp Blade
- Sticky Cutting Mat
- 65 lb. cardstock in dark green, dark red, and medium yellow
- Brown floral tape
- 20-gauge dark green floral wire
- Rustic vine wire
- White craft glue (two good choices are Aleene’s® Quick-Dry Tacky Glue or Art Glitter® Glue)
- Hot glue
- PanPastel® chalk or any stamping ink in dark purple or red (optional)
- Silhouette scraper tool
- Design ID #338784 by Maison Gregoria
- Design ID #395057 by Lucilla Paper
Step One: Prepare Hellebore Flower Design
In Silhouette Studio®, set your Page Setup as follows:
- Machine = Auto (or you can select your specific machine)
- Feed Type = Auto (or manual, if given an option)
- Cutting Mat = Cameo 12 x 12 in. (or choose your specific mat)
- Media Size = Letter (or set to the size you are using)
- Check the box to Show Cut Border
Open the hellebore flower design. We will make single-layer hellebore flowers, which is different from the artist’s original design.
Select and drag all the pieces off to the side of the virtual mat, into the holding area, until we’re ready to use them.
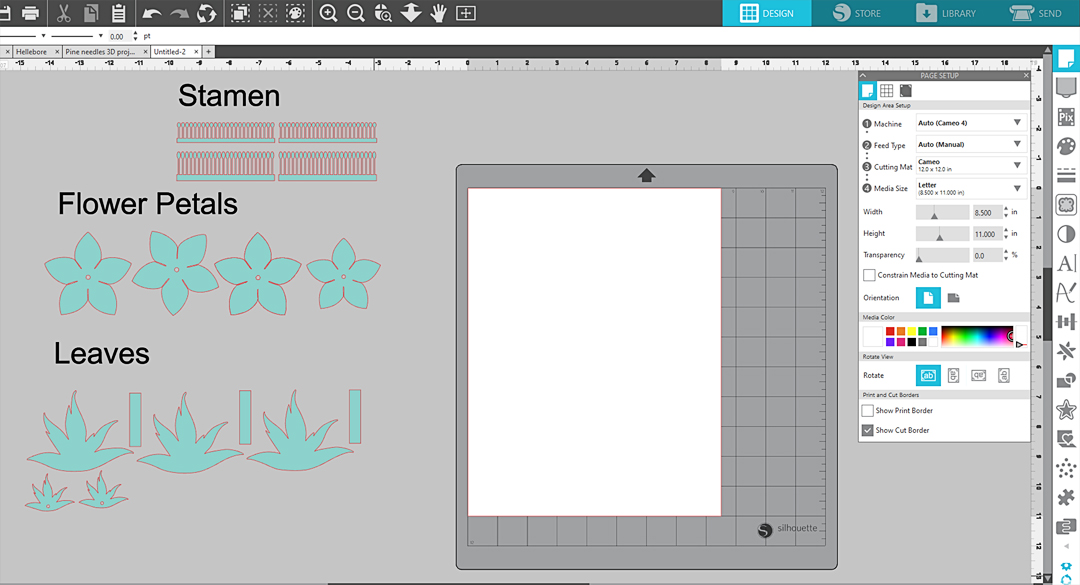
There are two sizes of flower petals. Drag over one larger flower petal set onto the virtual mat.
Make several copies of the flowers by clicking and dragging a flower while holding your Alt (or Option) key. You need at least five flowers, but you may want to cut extra in case you want to add more as you build your branch.
Note: You can fit more on the page if you rotate some of the flowers. Click and drag the green dot of a selected shape to rotate it.
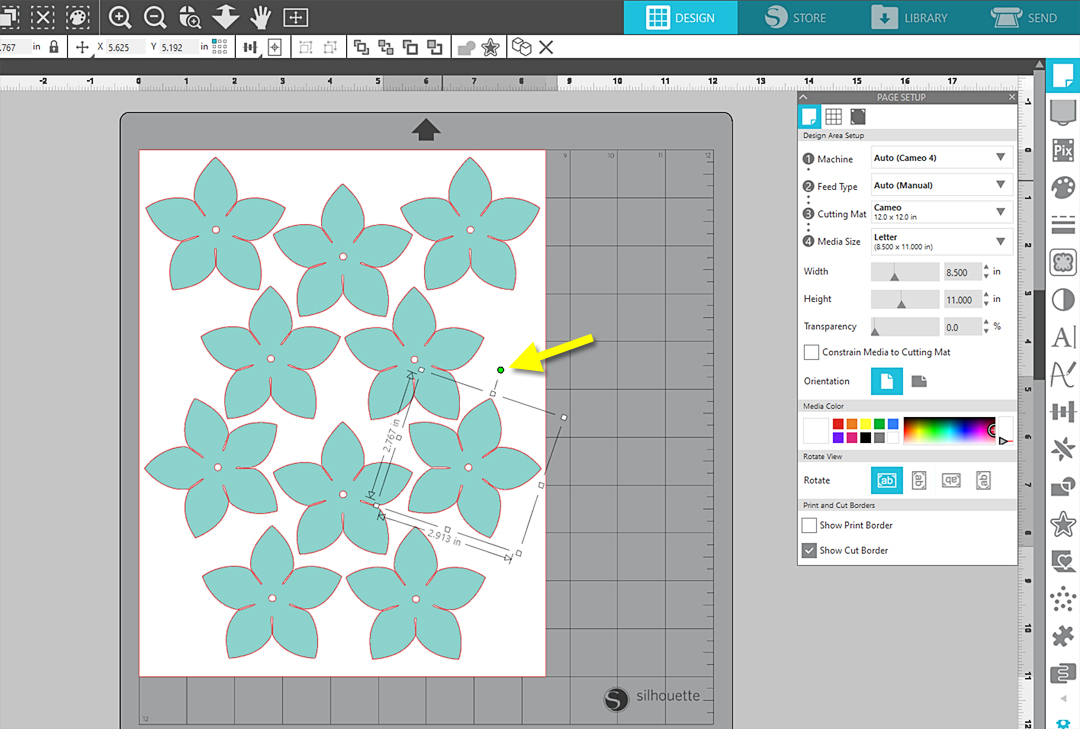
Select all the petals on the virtual page and Group them together. (Right Click > Group)
Fill with a red fill color (optional) just so you can easily find them to cut later.
Drag them off to the side of your virtual cutting mat.
Select and drag all the stamen pieces over to the virtual media.
While they are still selected, make copies below the originals by holding the Ctrl (or Cmd) key and pressing your keyboard down arrow four times. (That will make enough stamen centers if you’re making ten flowers. We’re going to use one small and one large stamen strip per simplified flower, which is different from the artist’s instructions.)
Click and drag a selection box across one column of stamen strips to select them, then choose Align > Space Vertical from the Quick Access Toolbar. Do the same with the second column.
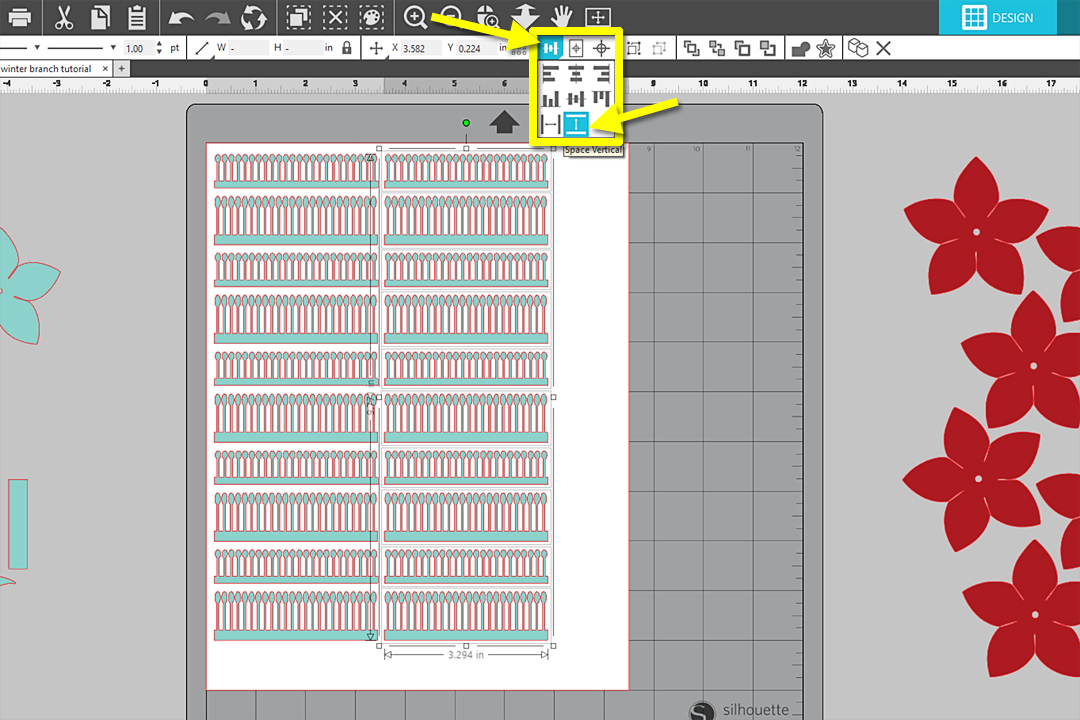
Select all the stamen, Group them, and choose a yellow fill color.
Step Two: Cut Hellebore Flower Pieces
With the yellow stamen pieces on the virtual page, go to the Send Tab.
To cut delicate pieces from 65 lb. cardstock, I highly recommend a very sticky mat and a sharp blade. (A new or lightly-used standard mat is usually sticky enough.) Assuming you are working with a sharp blade and sticky mat, set your material settings as follows:
- Material = Patterned Paper, Medium (65 lb)
- Action = Cut
- Tool = Autoblade or 1mm Manual Blade
- Blade Depth = 3
- Force = 30
- Speed = 5
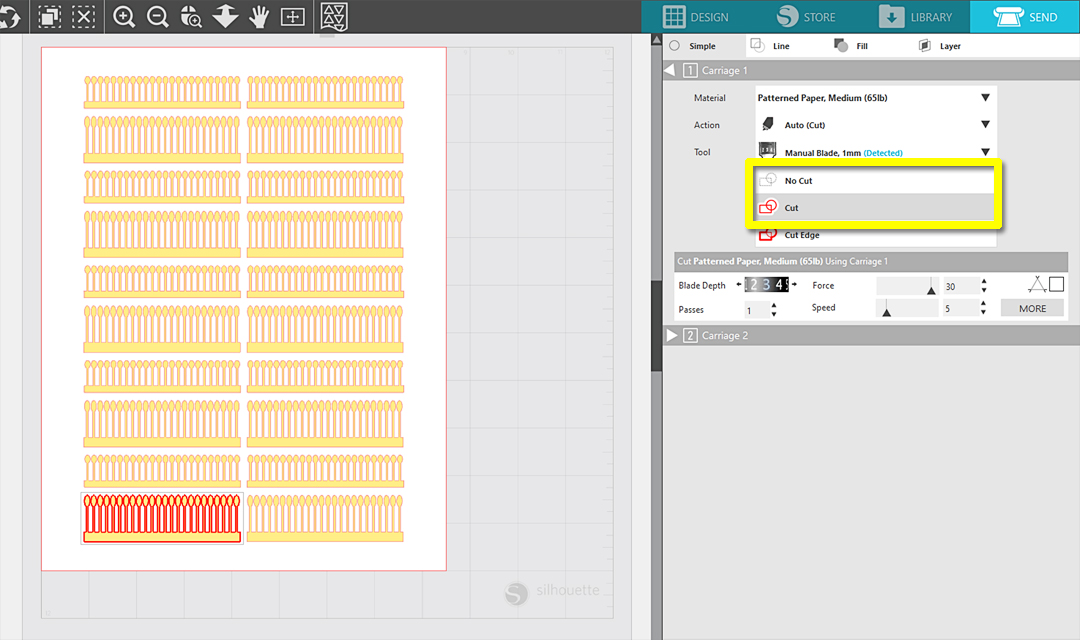
Perform a practice cut with only one of the stamen pieces, which will be a better gauge of your settings for this delicate piece than the built-in test cut. To do this:
- Ungroup the stamen pieces (Right click > Ungroup)
- Select all of the stamen strips and choose “No Cut” in the cut settings area
- Select just the lower left stamen strip and choose “Cut” in the cut settings area
- Place your yellow cardstock on the mat and load it into your Silhouette machine
- Click “Send” to cut just the one stamen strip
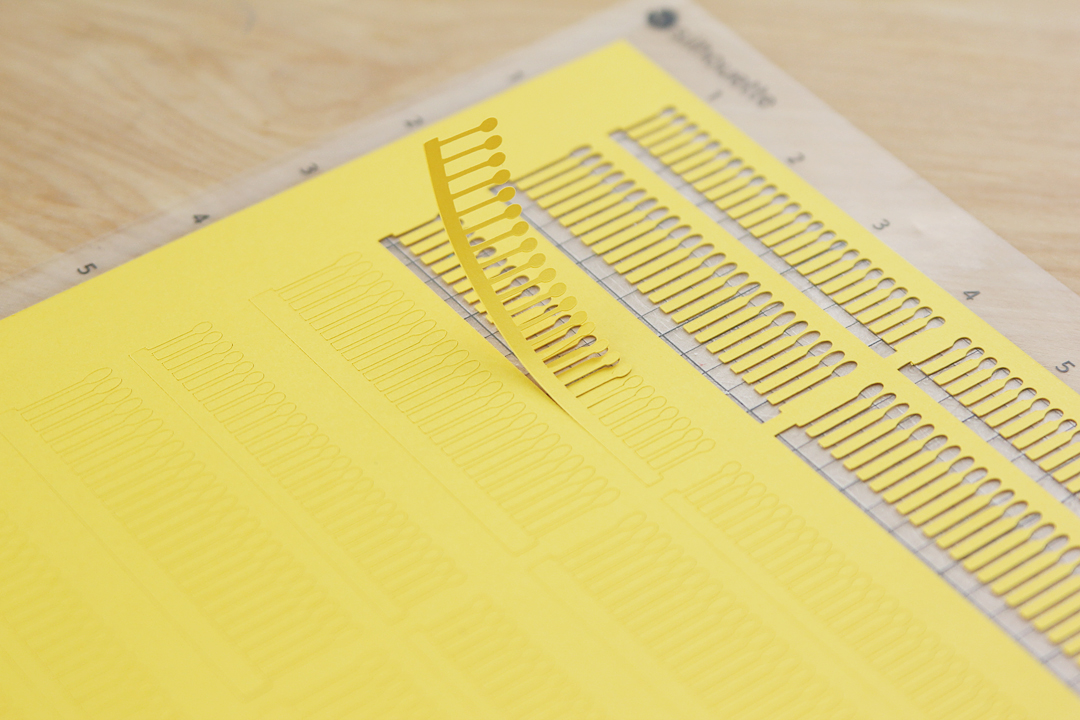
When the single stamen strip has finished cutting, leave the paper and mat loaded into your machine. If you can pull away that single strip from the mat easily, your cut settings are good.
Pro tip: If your machine is not cutting those pieces very well, you have several options to improve the cut. These are the things I’ll try, one at a time, with further practice cuts. You can select individual shapes on your page and set them to “Cut” or “No Cut” as you work through the following options:
- Use a sticky mat and a new, sharp blade
- Turn on Line Segment Overcut (check the box next to the triangular overcut icon in the cut settings)
- Increase the blade depth to 4 (I do this for cardstock, but on thinner materials like vinyl I suggest increasing the force before jumping up in blade depth)
- Increase the passes
- Decrease the speed
Once your settings are dialed in, set any previously-cut shapes to “No Cut” and set the remaining shapes you do wish to cut as “Cut.”
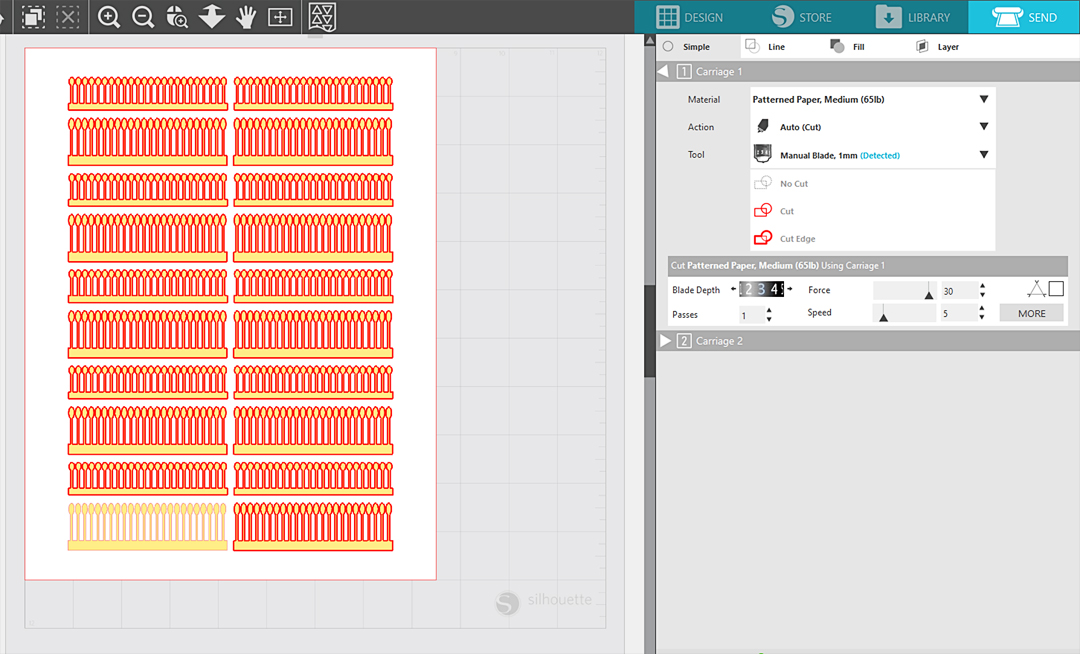
Click “Send” to cut the rest.
Unload and remove all the stamen pieces, then use the same successful cut settings to cut the flowers out of dark red 65 lb. cardstock. (Remember to move the virtual pieces on or off the virtual media so the pieces you wish to cut show bold red.)
We don’t need to cut the hellebore leaves for this winter branch project.
Step Three: Prepare and Cut Pine Needles
Go back to the Design Tab and open a new document.
Open the Christmas Wreath design from your Library.
Select everything on the page and move it all off to the side of the virtual mat, into the holding area.
Your Page Setup should be the same as the previous document, and if you are using Letter size as the media size, then switch it to “landscape” orientation.
Drag over the group of pine needles from the design, make three copies, and distribute them across the virtual media. These are the only part of this design we will use, but we’ll cut a lot of them.
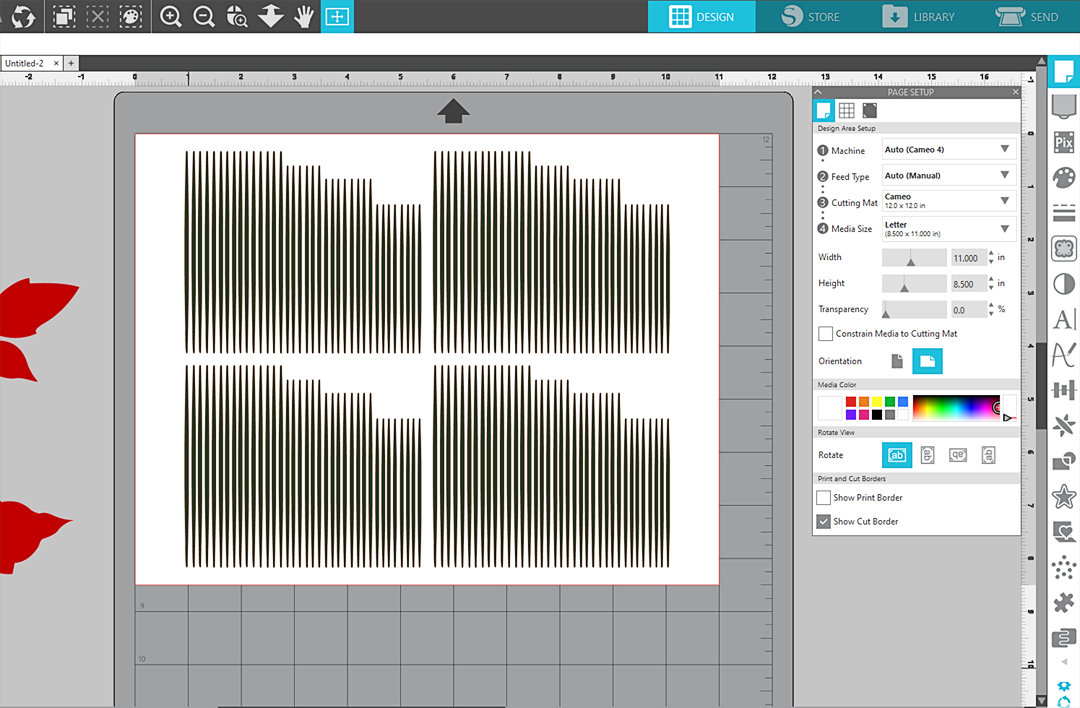
Go to the Send Tab and use the same successful cardstock cut settings as before to cut several pages of these needles from dark green cardstock.
Note: Each grouping makes 1 tuft of pine needles, so this page will produce 4 tufts of pine needles. My complete branch has 16 tufts, which equates to cutting 4 letter-size pages.
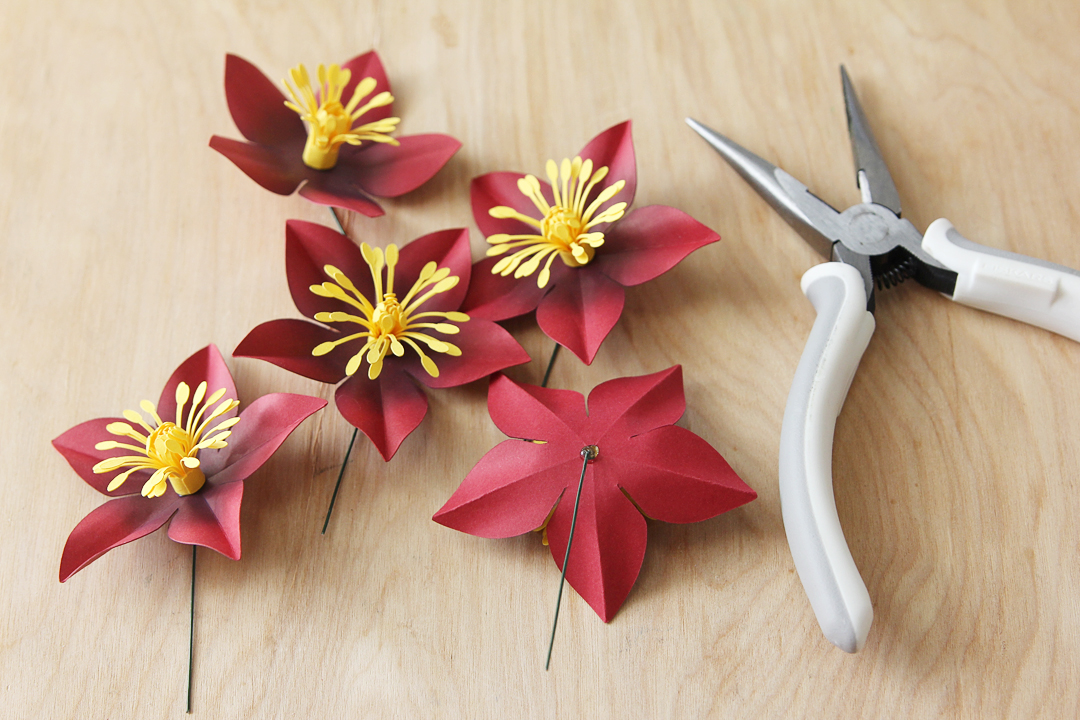
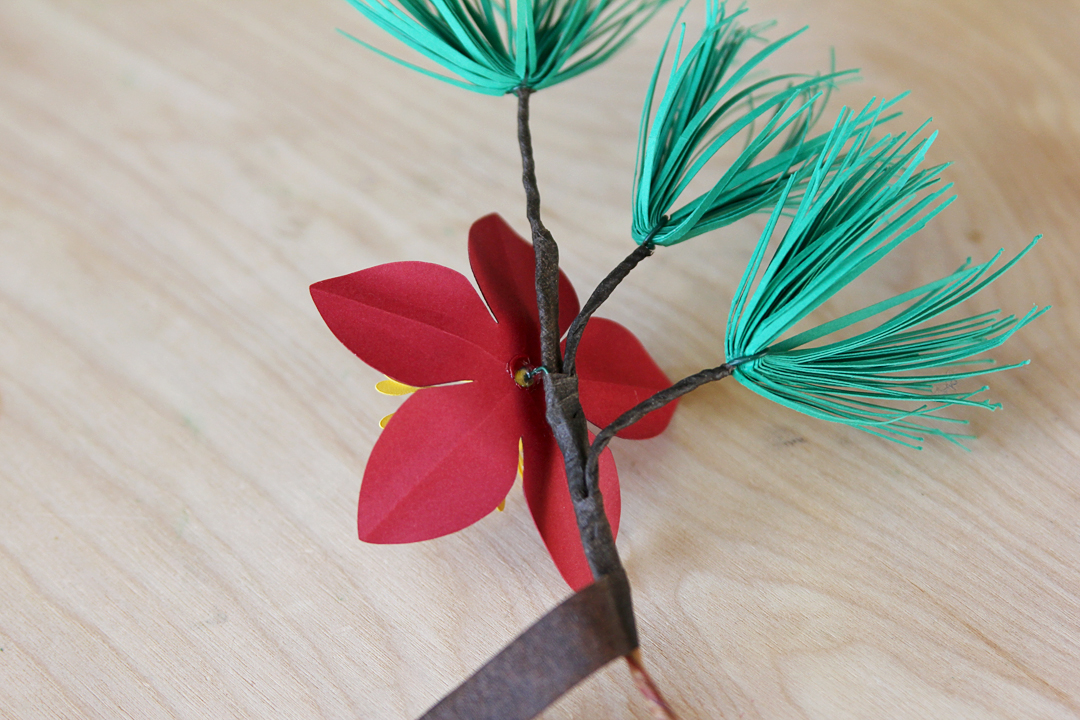
Step Four: Assemble Flowers
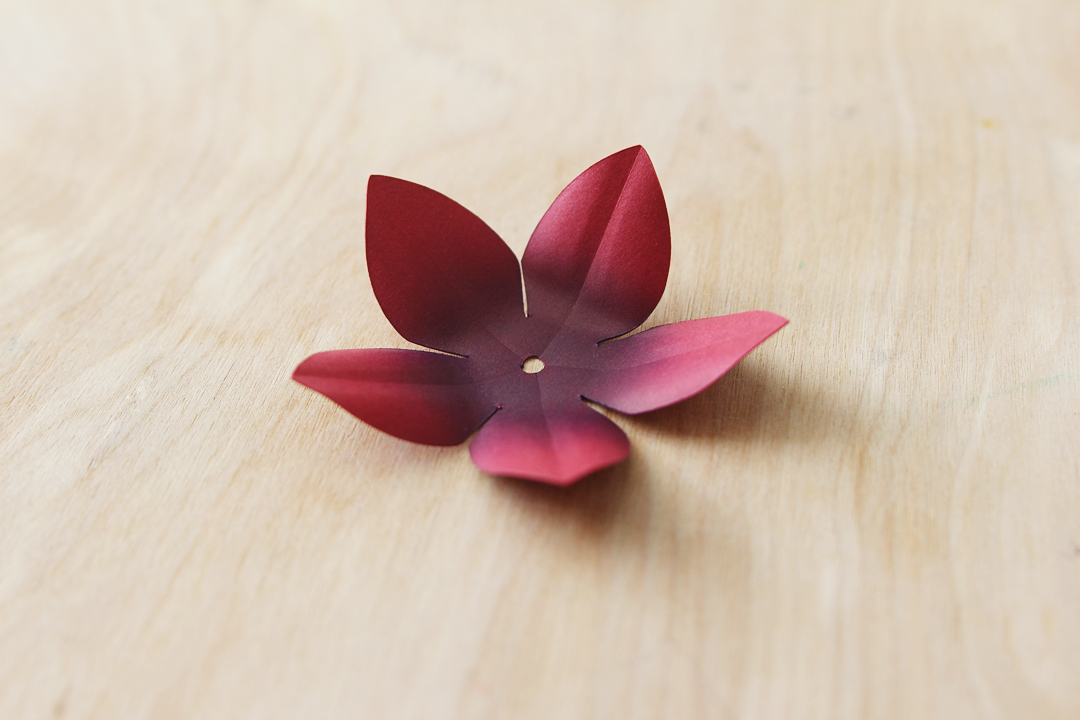
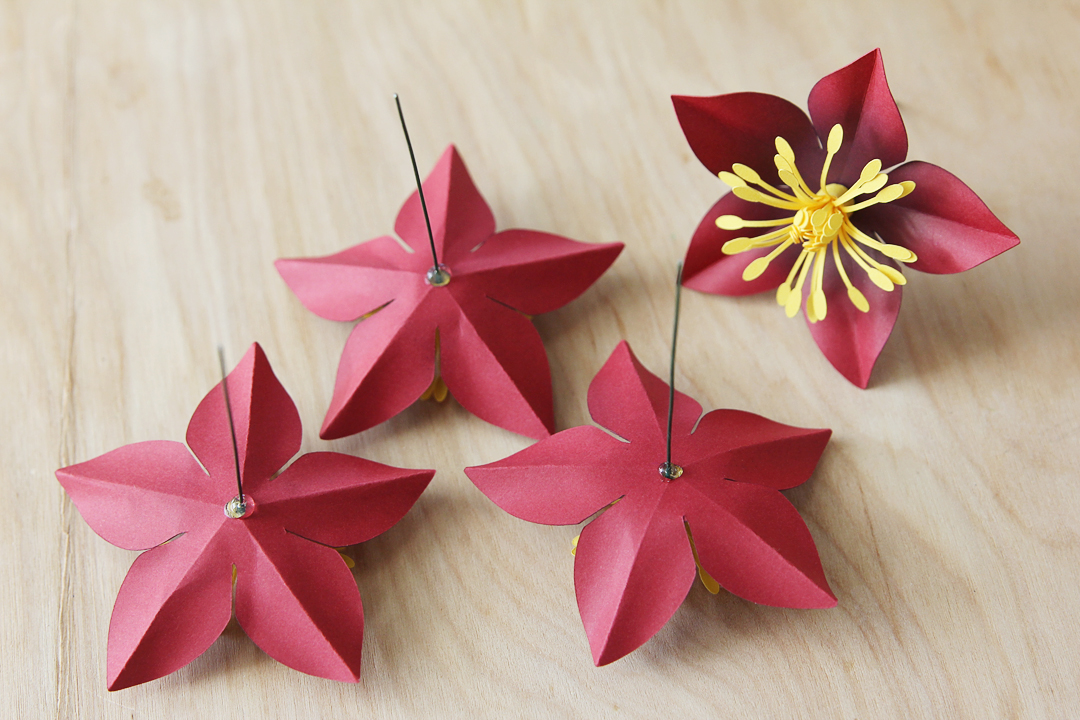
For each red flower, add (optional) color to the center. You can use stamping ink, watercolor paint, PanPastel soft chalk, etc. I recommend a dark purple or darker red than the cardstock.

Use a Silhouette scraper tool to press a crease along the center of each petal. Place a soft surface under the flower while you do this, such as a piece of craft foam or a mouse pad.
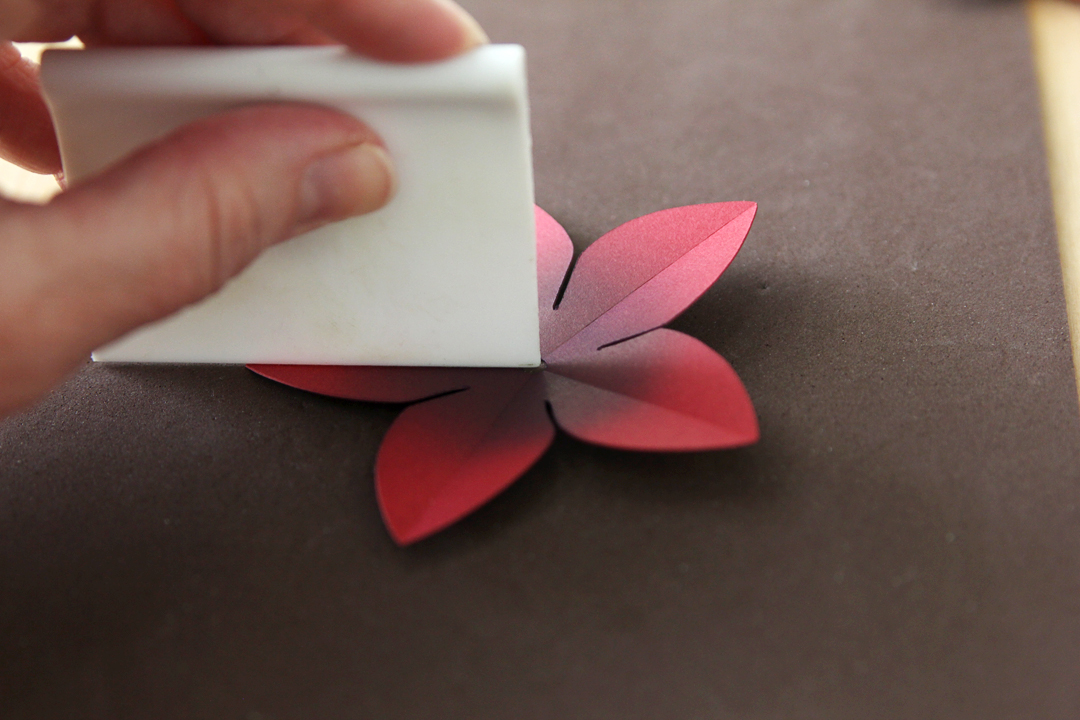
Use the scraper tool to curl each half of each petal away from the center crease.
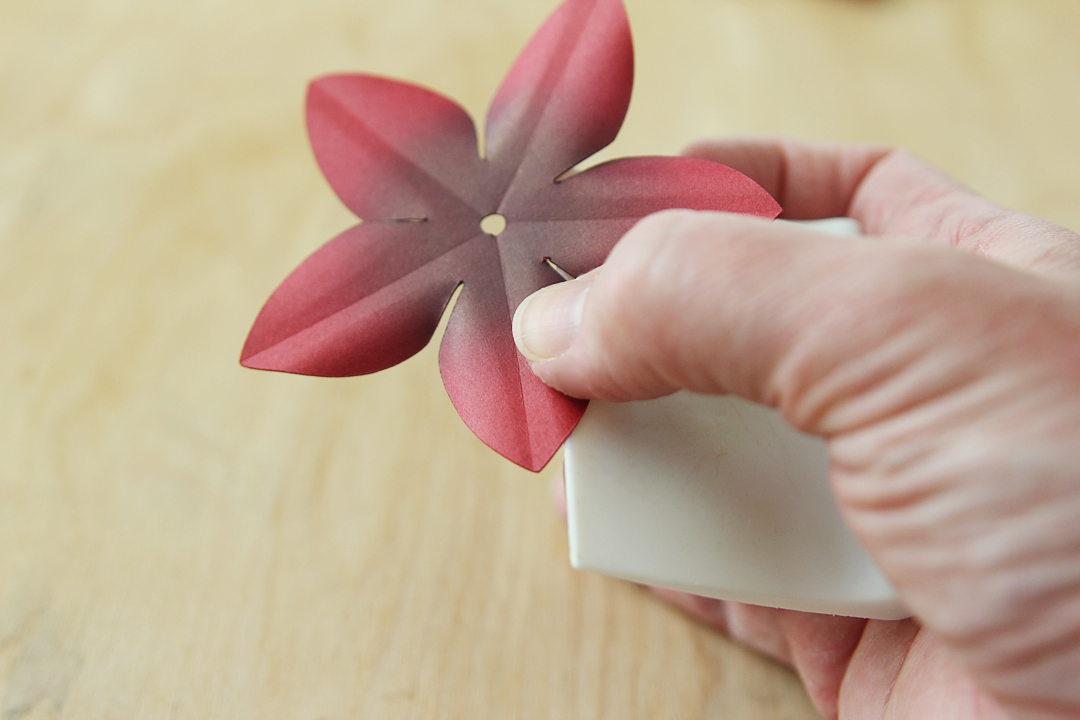
Gently curl the petals at their base inward toward the center, so the whole flower cups upward.
For each stamen center, use a 2.5-in. piece of 20-gauge floral wire and tightly wrap the shorter stamen strip around it with white glue to secure it.
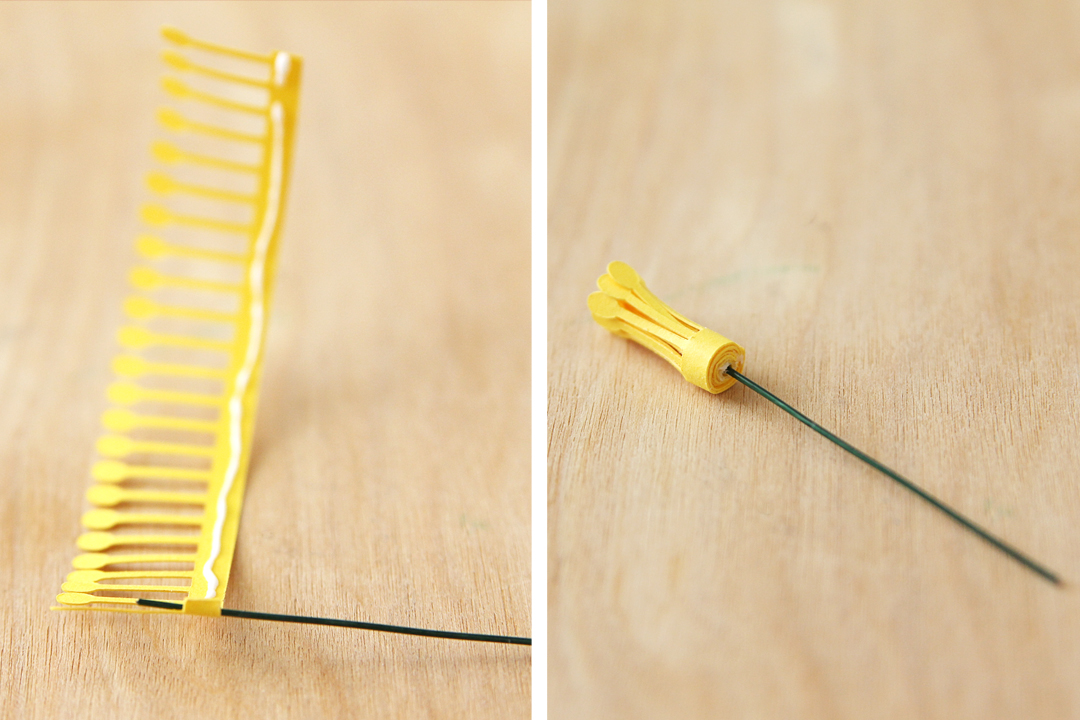
Gently curl the tips of the taller stamen strip outward and give a gentle curl to the base of the strip. When you use white glue to wrap this taller strip around the first, the tips should bend away from the center.
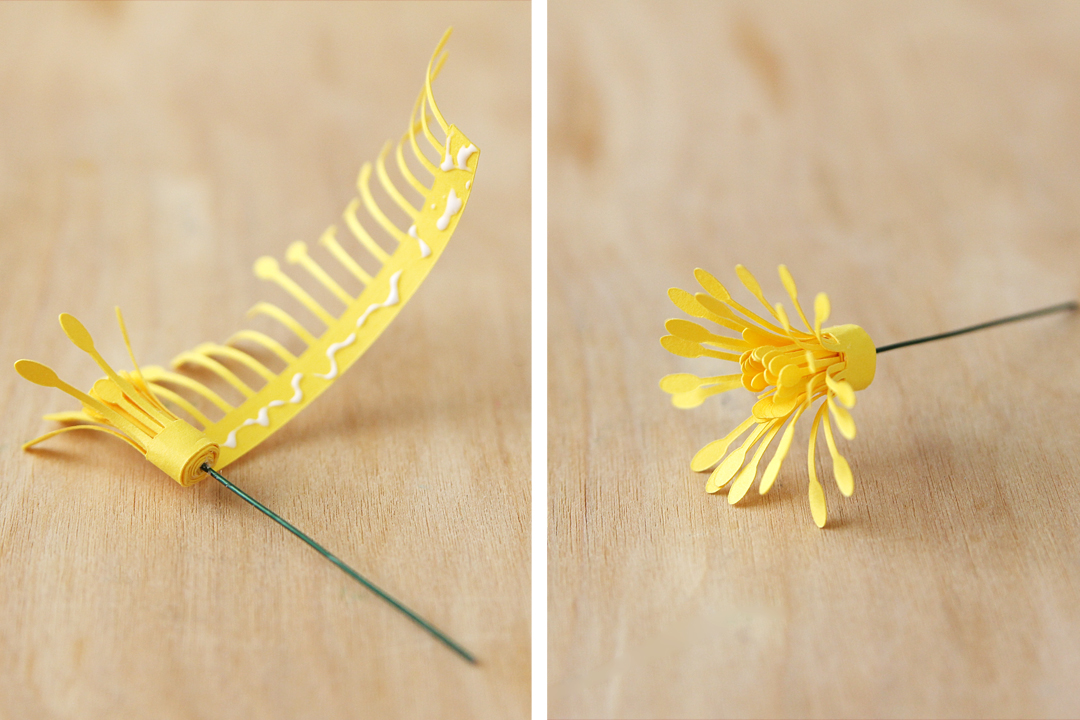
Tip: You may use hot glue at any point in the flower assembly for a more secure hold, but keep in mind that it will add bulk.
Poke the stamen wire down through the hole in the flower center and secure it with hot glue where the base of the stamen meets the center of the flower. I like to add a bead of hot glue on the back side, as well.
Bend the wire at the base of each flower about 90 degrees.
Step Five: Assemble Pine Needles
Keep all the needles for each cluster together, but you do not need to separate out the sizes within a cluster.
Take a 6-in. segment of dark green 20-gauge floral wire, make an open loop and twist below the loop a couple times.
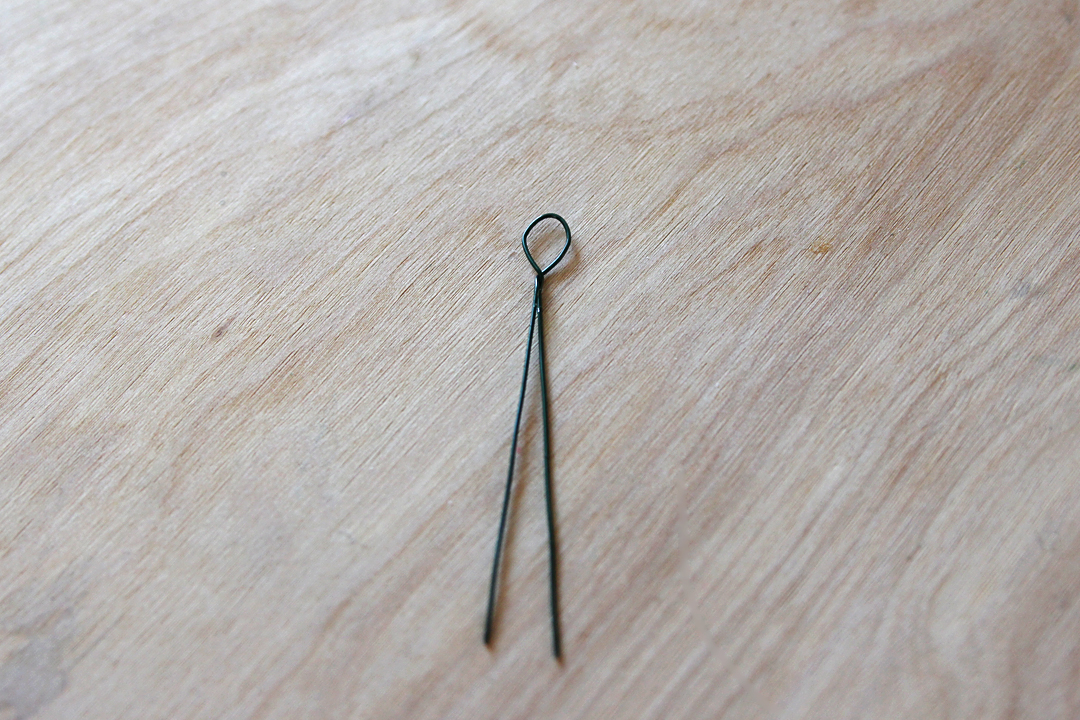
Poke in the needles for one cluster through the loop and fold in half, working with 1-3 needles at a time until all the needles are through the loop.
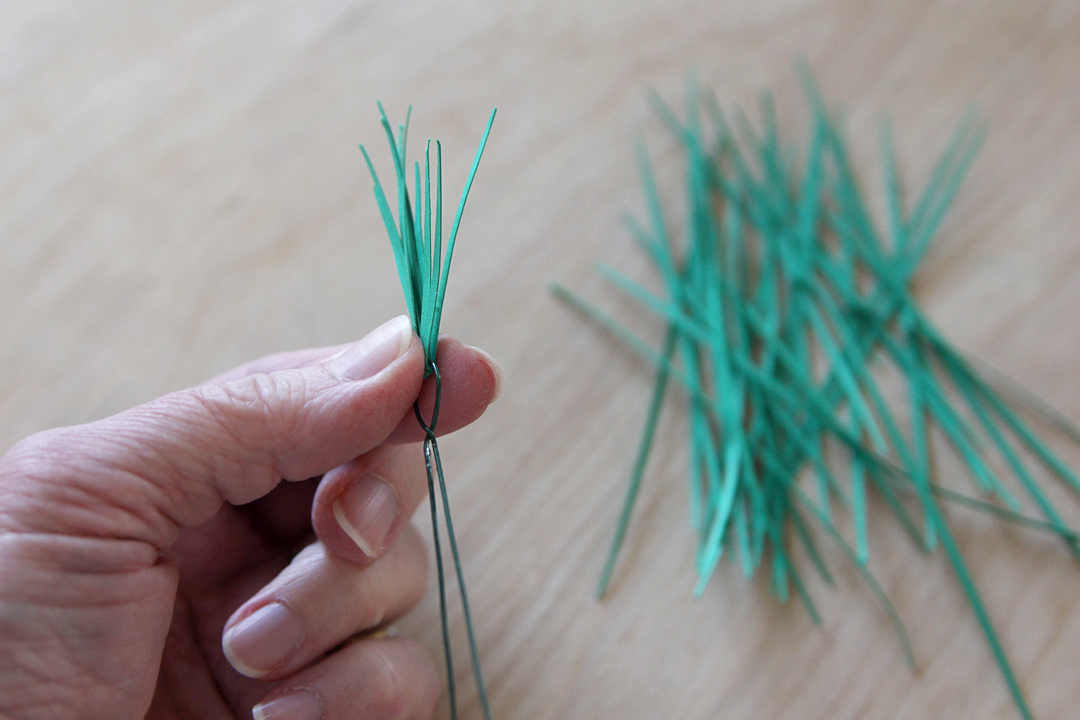
Use pliers to twist the ends of the wire into a single stem, tightening the loop to hold the needles in place.
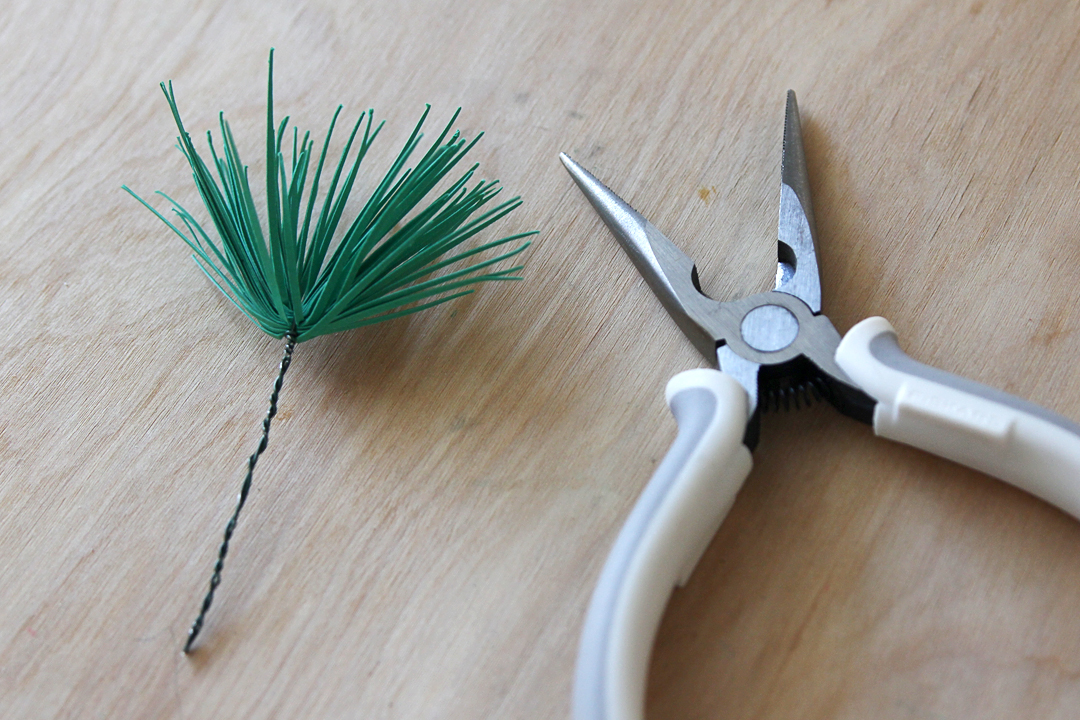
If your needles still feel loose, add some dabs of clear-drying glue to secure them at the base where they are connected.
Wrap the wire with stretched brown floral tape, starting at the base of the pine needles and working your way down to cover the wire completely.
Repeat with every cluster of pine needles you cut.
Step Six: Assemble Branch
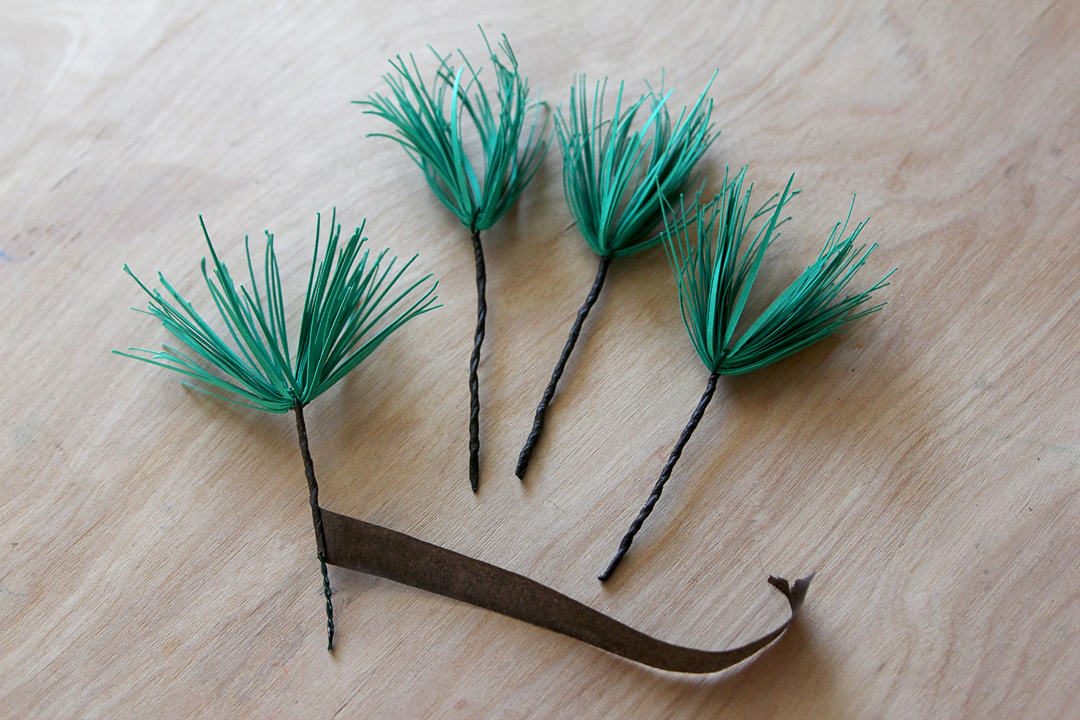
Cut a piece of rustic vine wire to approximately 30 inches for a short branch or wreath. You may wish to cut it longer if you want your branch to be longer than you see in my example.
Use brown floral tape (stretch as you wrap) to attach one pine tuft to the tip of the vine wire, then add another pine tuft and inch or so further down. Each pine tuft should have an inch or so of its own branch exposed.
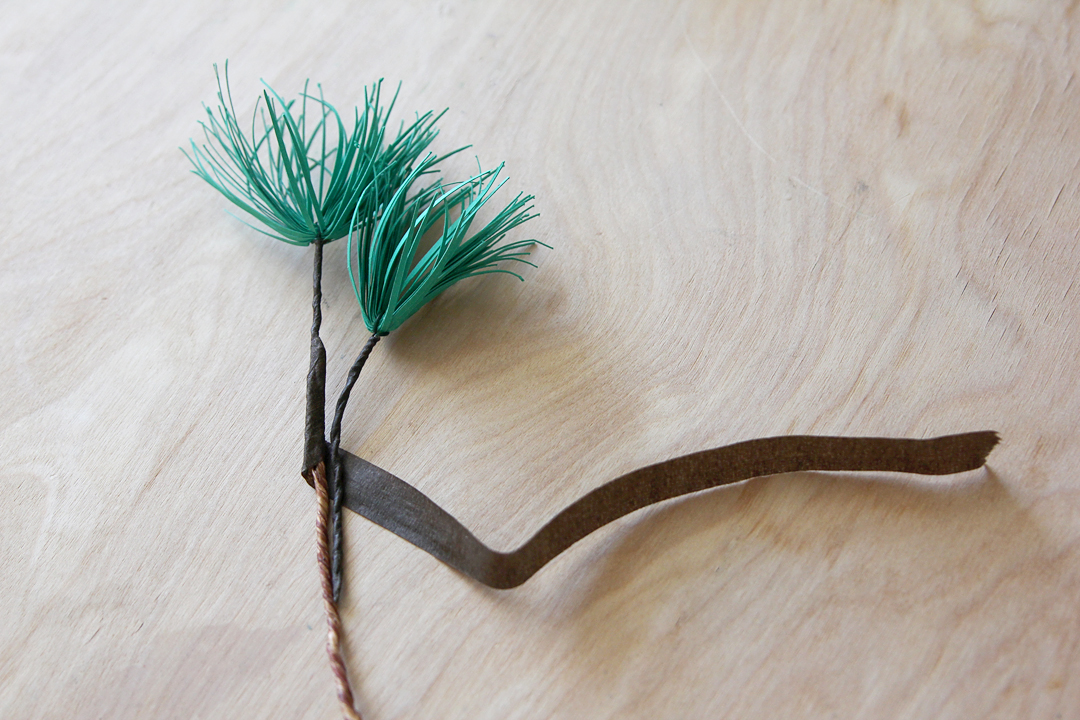
Add the wire for a flower as you continue to wrap down the vine wire with floral tape and add more pine tufts.
Continue to add more pine tufts and flowers as you work down the vine wire. I put one flower between every 2-3 pine tufts.
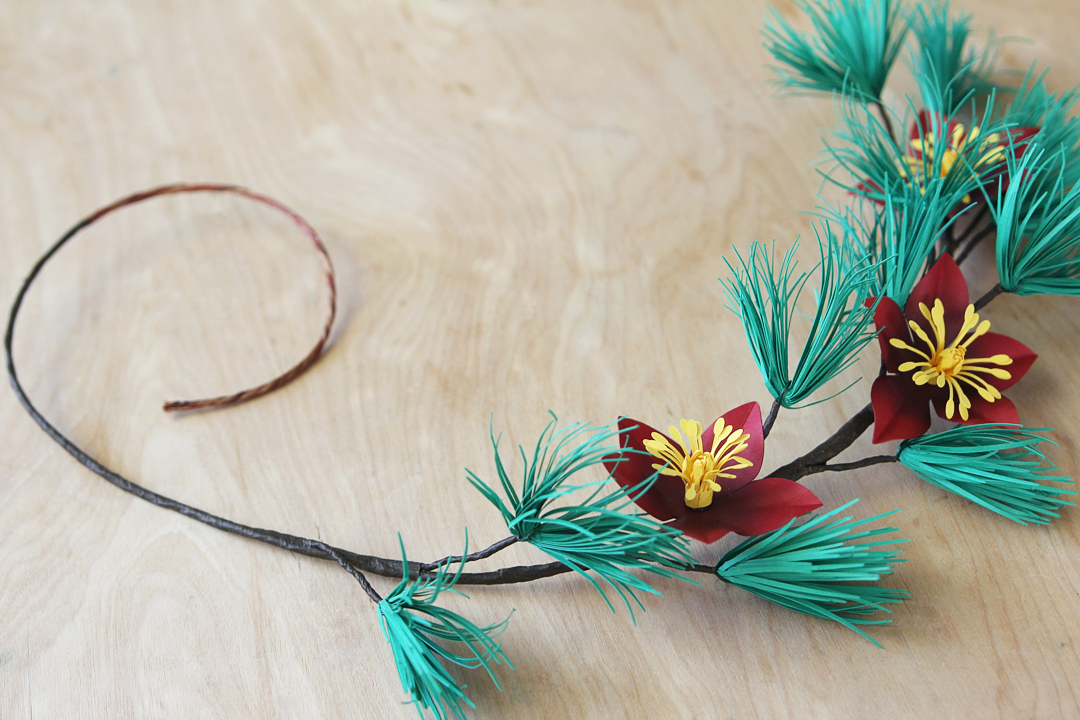
Add as many pine tufts and flowers as you want. If you run out of your length of vine wire and still have pine tufts and flowers to use, you can start a new branch. Finish the branch by wrapping brown floral tape to the end. (You could cut it shorter if you don’t want the bare branch to show and prefer to have the pine needles and flowers go to the end.)
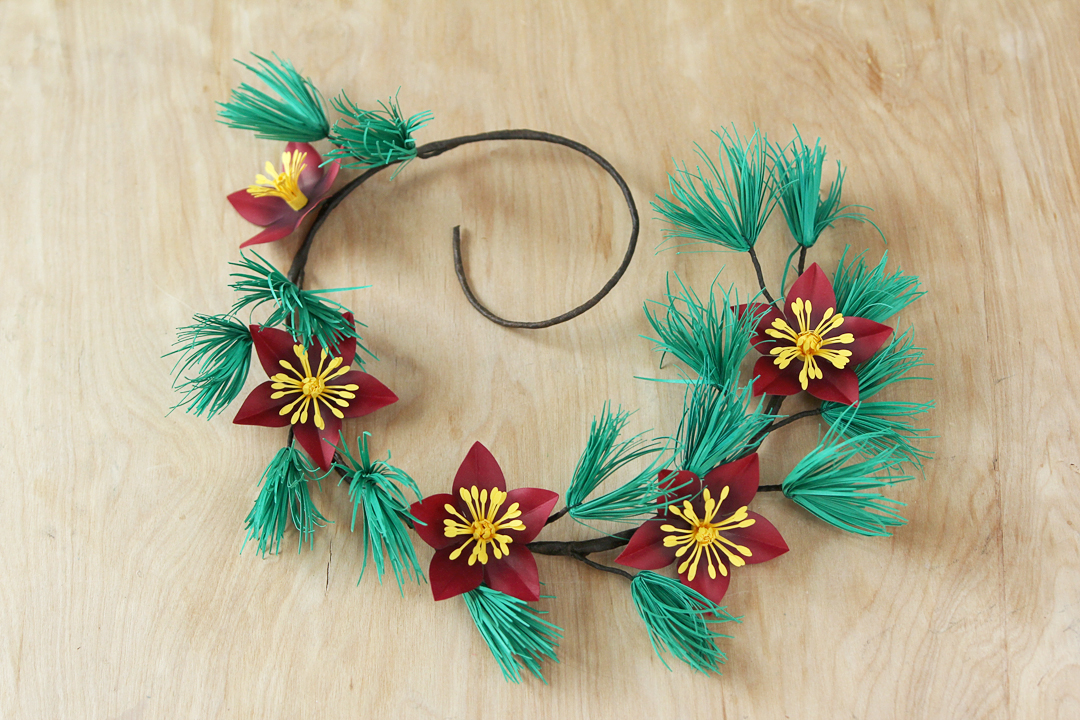
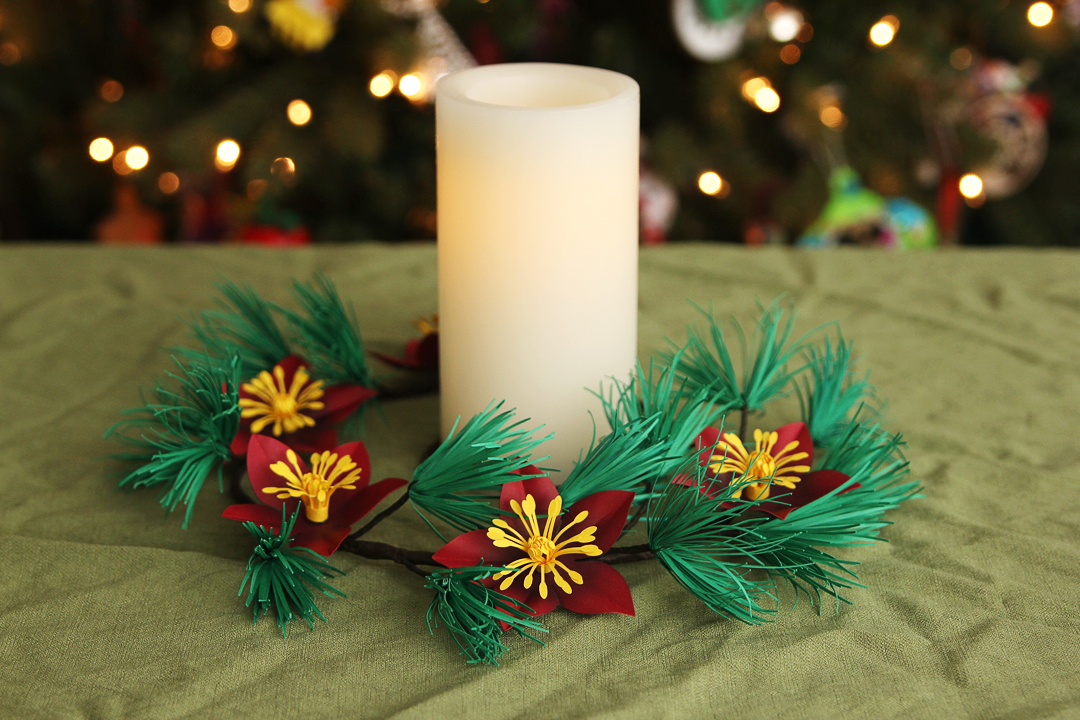
Because it’s all made with flexible wire, you can arrange this winter branch however you like, to go with your decor. I chose to wrap mine loosely at the base of a flameless candle.

How will you use your winter branch?
 Free Class - Father's Day Apron Set
  Free Class - Custom Graduation Tumbler