
If you’re looking to add a little personalized touch to your Father’s Day gift this weekend, this project is for you! We created these wooden postcards using a small wooden plaque and the Silhouette Temporary Tattoo Paper. The tattoo paper transfers images beautifully, and you will be amazed at the awesome projects you can create with it! This project was rather simple and only took us about 30 minutes to complete from start to finish. These are super fun and unique cards to receive, and they are perfect for displaying on an office desk or nightstand.
Let’s get started!
Supplies List:
- Silhouette Portrait 3
- Silhouette Studio Basic Edition (This is free!)
- Silhouette Temporary Tattoo Paper – Clear
- Small wooden plaque
- Wet rag
- Design ID #28987, #323845
Step 1: Setting Up Your Document
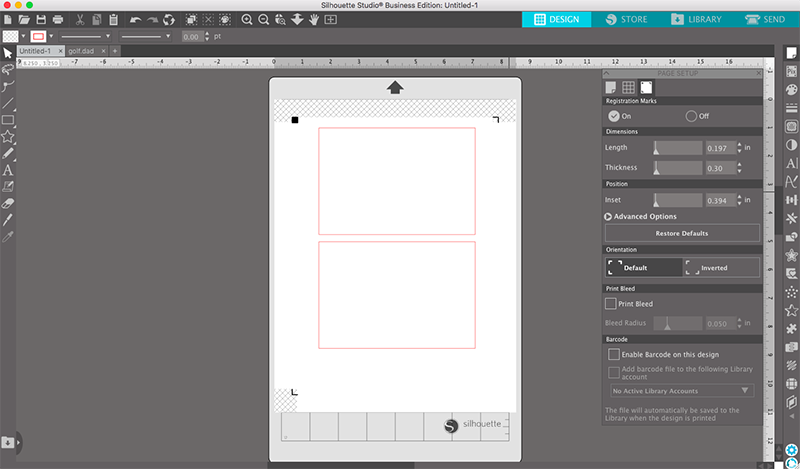
Once you have selected your mat and media size, you are ready to start creating your project! The first thing you need to do is turn on your registration marks. You can find the registration marks in the page setup panel on the far right. It is a little square that has mini tick marks in the corners. Once you click that button, you can select “on.” This will add registration marks to your page. In order to fit the front and the back of the postcard on the same piece, we decreased the length and thickness of the marks. We used the sliders in the menu and took them down as small as it would let us. This is a great way to maximize your printing and cutting space!
As soon as we had our registration marks on the page, we made two rectangles that were the same size as our wooden plaques. Your plaques may be a little bit different, but ours were 3.75 X 5.5 inches. These will serve as your outline for designing as well as your cut line!
Step 2: Adding the Postcard Design
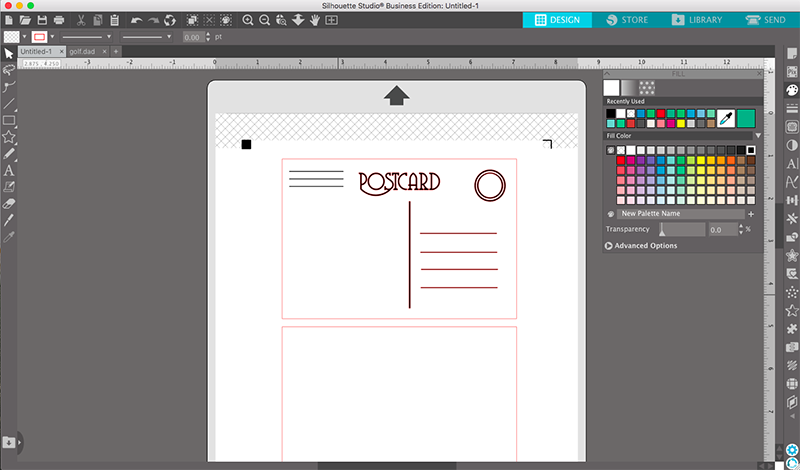
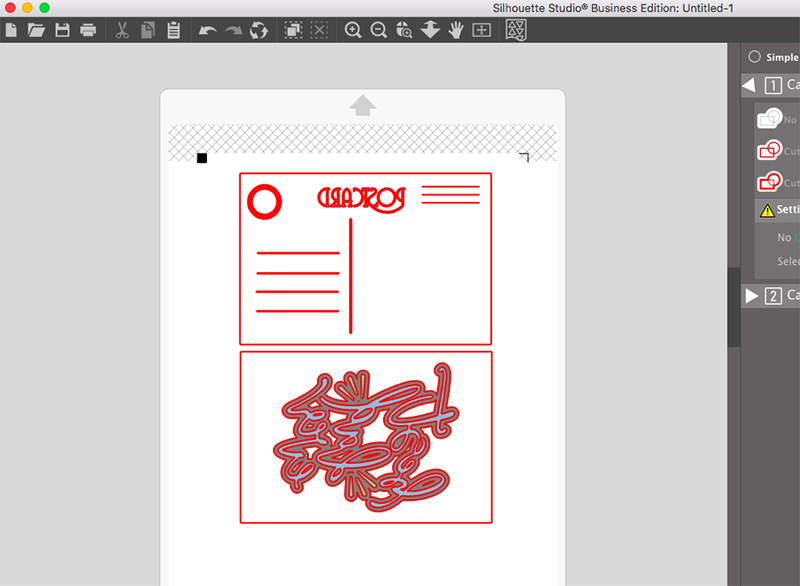
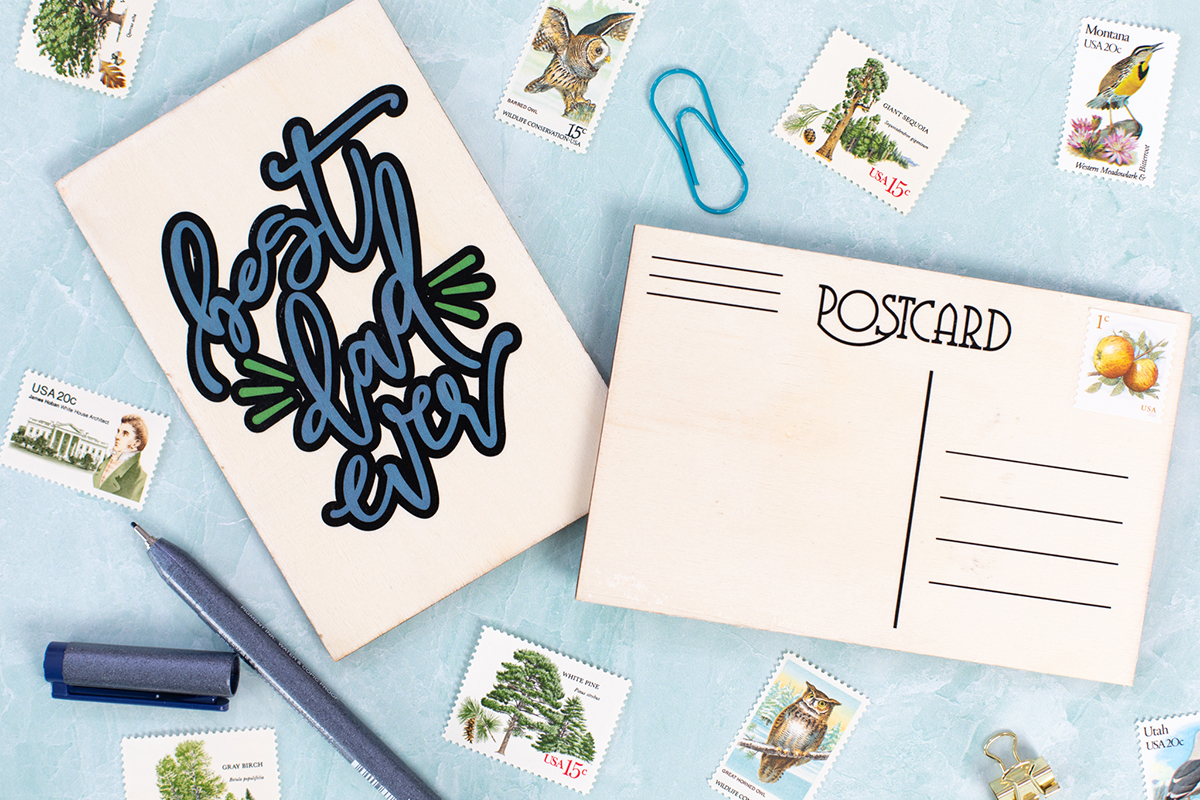
This entire project was inspired by this postcard design by Sarah Hurley! While you could create your own postcard template, this design makes the project so simple. After you have purchased the design, make sure to sync your library and double-click the design to import it into the project. The design opens up in a few different pieces. Since we are using this as a Print & Cut file, we need to arrange it exactly how we want it to print.
We began by ungrouping all of the objects. We then got rid of the rectangle in the design file. This left us with two circles, the lettering, a vertical line and four horizontal lines. You will need to center the two circles together. Once you’ve done that, go ahead and arrange them in the upper right hand corner where you would place a stamp. We then took care of the lettering. When we tried to apply a black fill, it also filled in the middle of the letters. We simply added a white fill to those letters which will not print! We grouped together all of those shapes and we centered them to the top of the postcard. We also added a black fill to the lines and moved them over. We did make everything slightly smaller to fit nicely. We also decided to add three lines in the upper left-hand corner for you to write your return address. These were not part of the original file.
Step 3: Add Your Dad Design of Choice
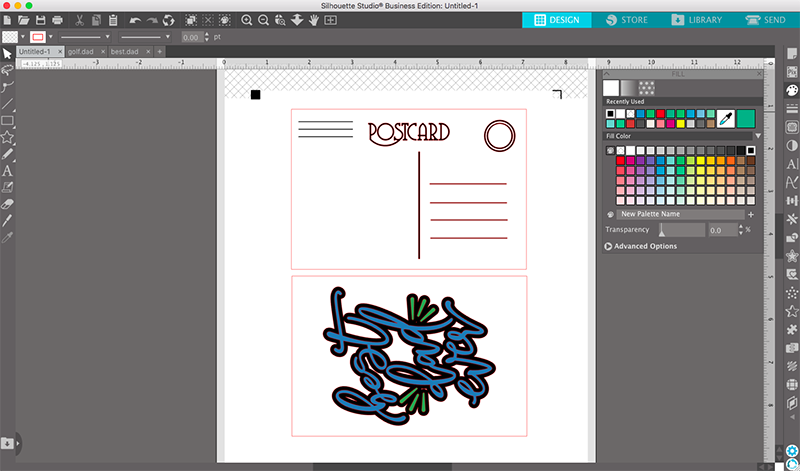
There are so many amazing father-themed designs in the Silhouette Design Store! We looked through lots of them and we picked this one by Jamie Lane Designs. We loved the lettering, but we wanted to add some more color and interest to the design. Once we opened the design in our postcard document, we ungrouped the elements and changed the colors in the color palette panel. When you are making these postcards, it is important to use very vibrant and saturated colors. Lighter colors, like pastels, do not show up on the wood as well. We chose the blue and green colors from the default palette.
After changing the colors, we regrouped the design. We wanted to fill a little more space so we decided to add a black offset behind the lettering. This is done by selecting the offset panel from the right -hand tool bar. It looks like a star with a smaller star inside of it. Once you have the panel open, go ahead and click “offset.” You can then change the size of your offset. We used the default size and then changed the color to black. This really gave us the pop of color that we were looking for! Make sure to center it in the second box you created.
Step 4: Mirror your designs
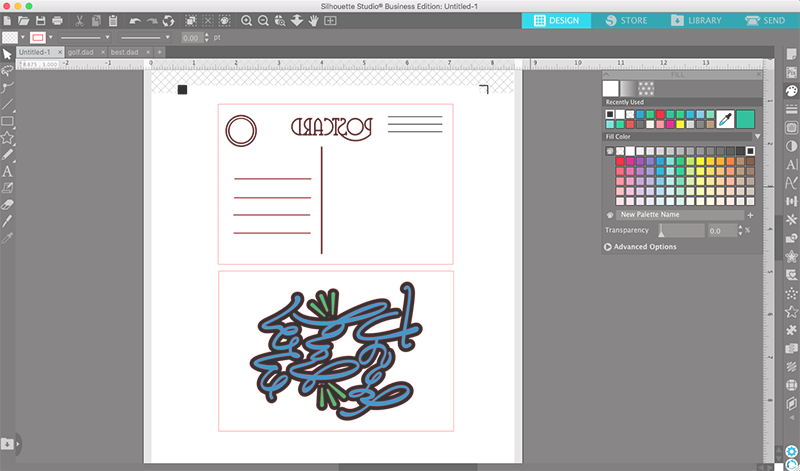
Since we are using tattoo paper, we will need to mirror the image. This will ensure that once we use the material to transfer the image, it won’t be backwards! This is done very easily. Right-click on each design and select “flip horizontally”. This will mirror the image in the opposite direction. This is really important, so make sure you do this before you send the file to print!
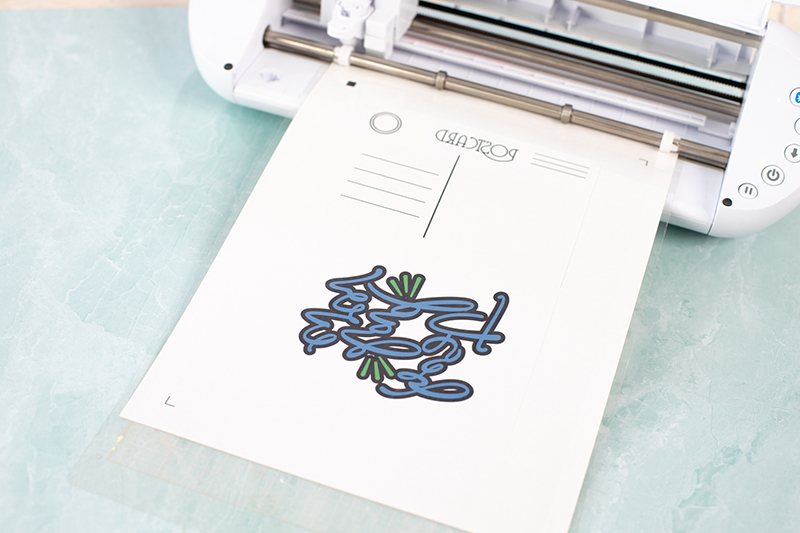
Step 5: Print the File
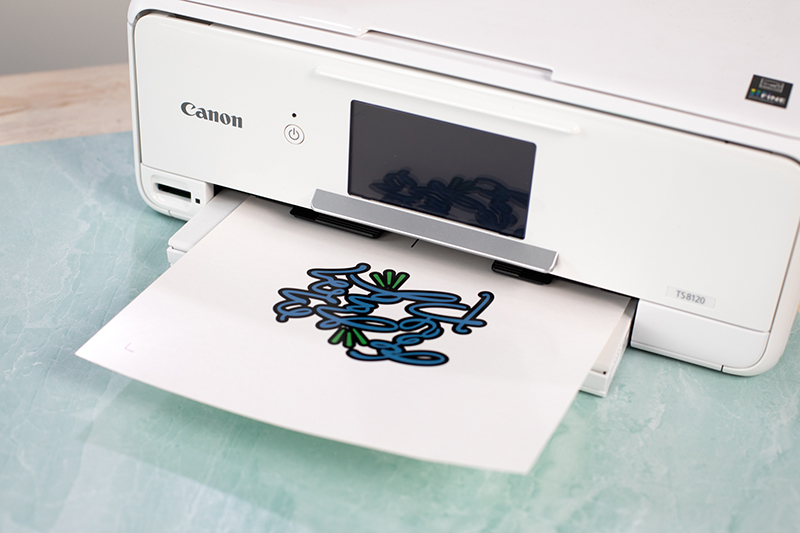
It is now time to print your design! Load the tattoo paper so that your design will print on the glossy side. We recommend using a printer that feeds from the back so that your media will not bend or crease. In Silhouette Studio, click “File” and then “Print” in the top toolbar. Make sure that your image prints at 100% scale! You want the page to print exactly as it is shown on the screen. Keep in mind that your rectangles will not print since these are cut lines, and not part of the design itself.
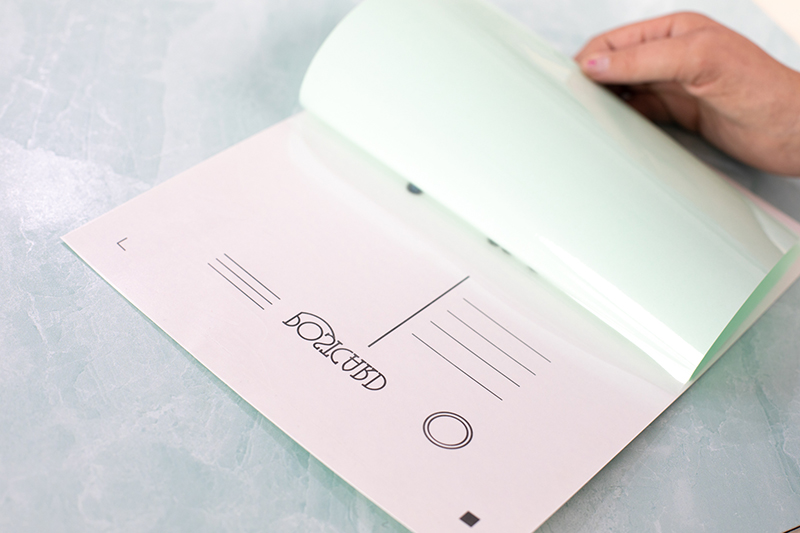
Step 6: Apply the Transfer Sheet to the Tattoo Paper
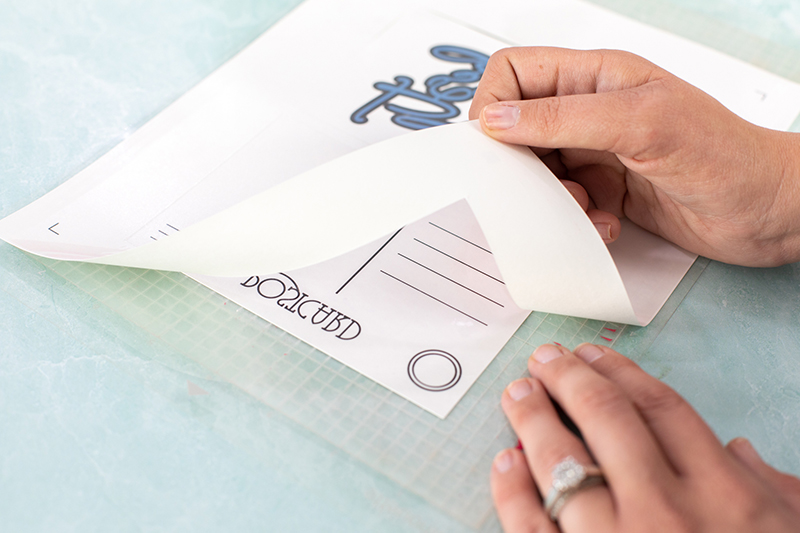
After you take the paper out of the printer, allow it to cool for 5-10 minutes so the ink doesn’t smear. Once it is dry, apply the green transfer sheet that comes with the paper. This applies a sticky layer to the image that makes it stick to whatever you are transferring the image to. Apply the sheet by peeling off the small top portion. Line up the top edge with the top of your sheet. Slowly peel the green sheet away from your sheet until only the clear plastic is attached to it. Then, we used our spatula tool to smooth out any bubbles we could see.
Step 7: Cut the File
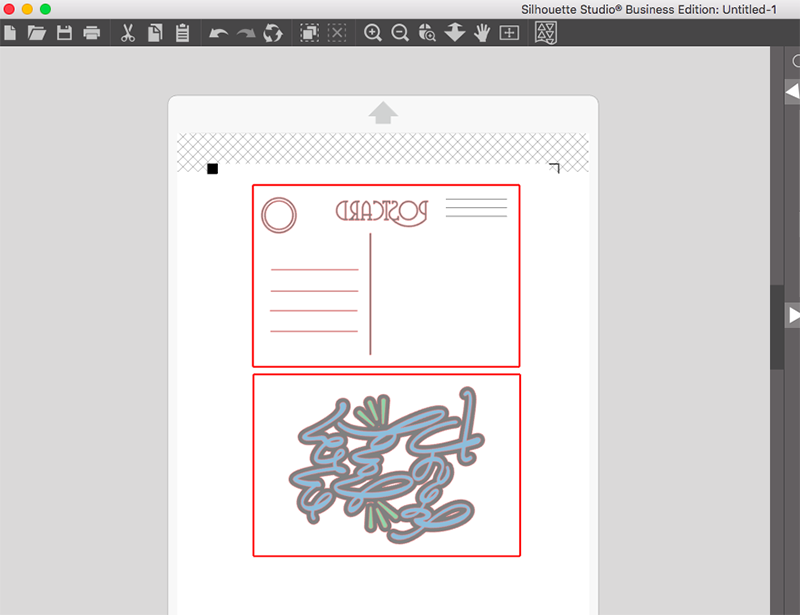
Now it’s time to cut. We will need to jump back into the software to dictate our cut lines. The first thing we will do is select both of our designs, but not their rectangle borders. Once you have both of those selected, go to the turquoise “send” panel in the top right hand corner. In this panel, click “no cut” for these designs. The red lines around the designs should disappear, and you will only see red lines around the rectangles.
When you have dictated your cut lines, it is now time to send it to the machine. We connected our Portrait 3 via Bluetooth and selected “Temporary Tattoo Paper, Printable” for the material settings. The default settings worked perfectly for us! Click “Send” at the bottom of the screen.
Step 8: Transferring the Images
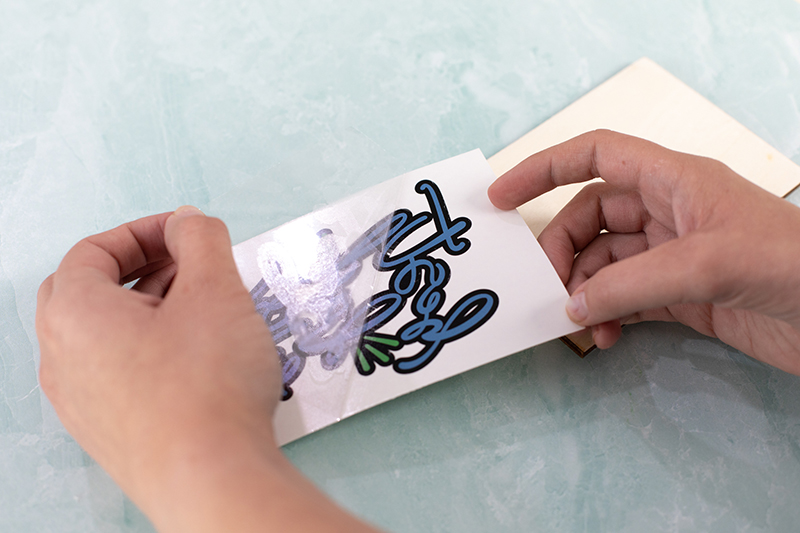
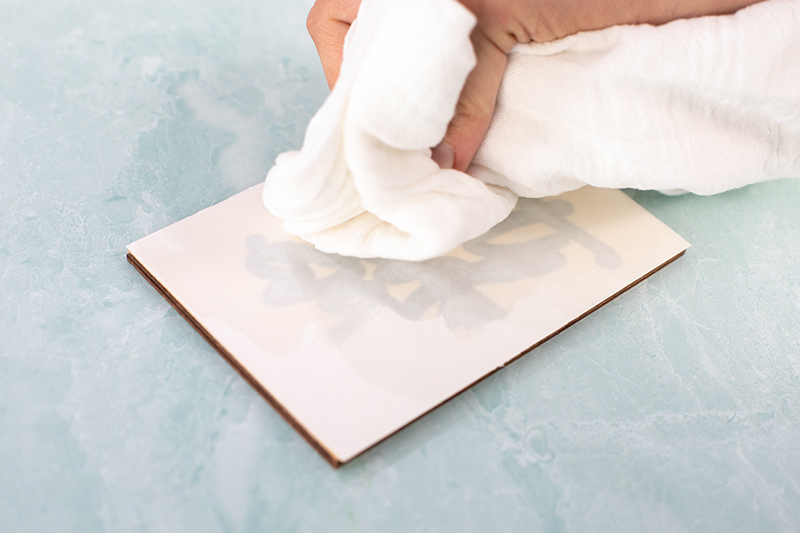
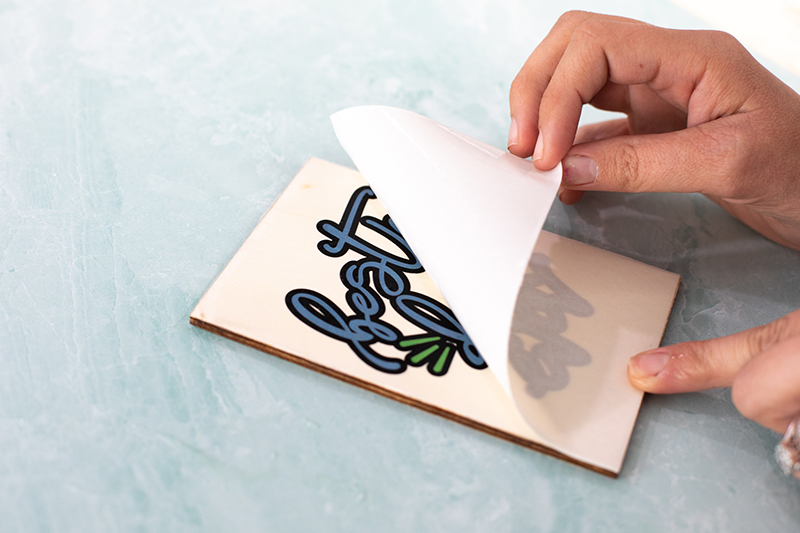
This is our favorite part! You will be amazed at how well this method works. Begin by peeling the plastic off the top of the design. This will make the design feel sticky to the touch, and you’ll begin to see a texture on the paper. This is what will stick and add grip to your material. Place your paper face down on the plaque. Make sure it is not going to be upside down! Take a damp rag and wet the backside of the paper. The design will start to show through the paper. We don’t want it dripping wet, but we do want the entire piece of paper to be damp. Let it sit for about 30 seconds. Start to slowly peel off the paper. If the designs are peeling up with the paper, put it back down and let it sit for a few more seconds. The paper should peel off very easily!
After peeling off the white paper on the first side, your image will most likely still feel a little sticky. That’s okay! After a few minutes, the design properly sets and is completely smooth. The paper also gives it a lovely glossy finish. Once your first side is completely dry, you can proceed to the backside. Be sure to wait before doing the second side. If the first side is still sticky, it may stick to the table. Repeat the same process and double-check that your card won’t be upside down! If you are worried about the designs fading, you can always cover it with a layer of Mod Podge before sending it off.
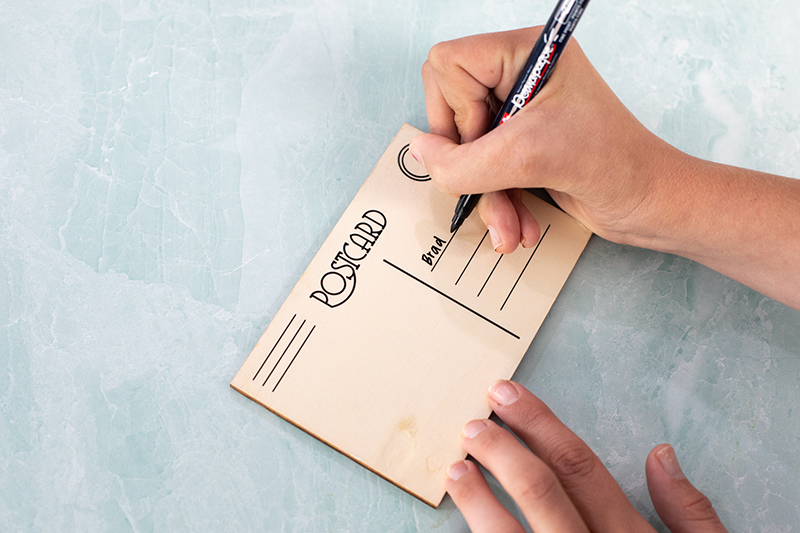
Step 9: Sending the Card
Allow the backside of your card to totally dry. Once you have done so, take a fine tip marker and write your message, address, and return address! We found that the shiny tattoo paper was the perfect surface to write on for the wood. The marker didn’t bleed into the wood at all! Write a heartfelt note to your father that he will absolutely love.
The amazing part about this project is that it can actually go in the mail as is! Isn’t that so cool? Keep in mind that you will need to pay extra postage due to the thickness of the wood. You can always hand deliver the card as well. We added a fake stamp for the photo because we thought they were so cute!
We hope you enjoyed this blog post. This project is such a fun and unique way to send your love to your father this weekend. It was rather simple to put together and looks very impressive! We are sending best wishes in your Father’s Day crafting endeavors! Make sure to tag us @silhouette.inc on Instagram for a chance to be featured on our page!
 May Online Classes
  November Zoom Classes