
Chances are you have seen these woven hearts around Christmastime! Danish hearts, as they’re commonly referred to, are traditional Christmas decor in Scandinavia. This rendition makes a small basket, perfect for stuffing with treats! They’re sweet and easy to make, come in a fresh color palette, and make adorable Valentine’s Day gifts. Let’s get started!

Supplies Needed:
- Silhouette CAMEO®
- Silhouette Studio®
- Silhouette Cutting Mat
- Silhouette Cutting Blade
- 12-by-12-inch cardstock in various shades (I used light coral, hot pink, light green, dusty blue, teal, and white)
- Adhesive
- Design ID #26875
Step One: Formatting the Basket
1. Open Silhouette Studio® and locate the heart design in the Silhouette Library. Open the design and size it as desired. (I kept the size exactly the same as when the design opened.) Your finished heart will be approximately 5.5 inches wide and 5 inches tall if you don’t change it.
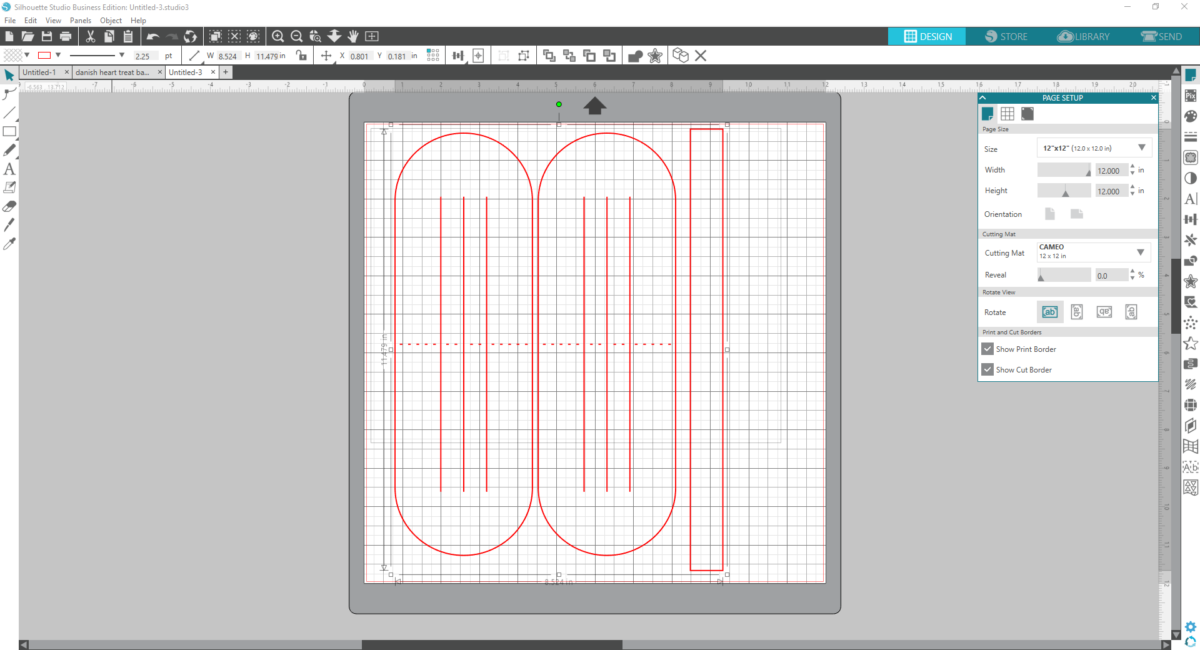
2. Click the Send tab to open the Send panel. Select “Cardstock, Plain” or “Cardstock, Textured-Heavy” as your material depending on your paper weight.
3. Place the piece of cardstock on your cutting mat and load the cutting mat into your machine. Then click SEND to cut the design.
4. Repeat this process for each color of cardstock.
Step Two: Weaving the Heart
1. Once you’ve cut out all your pieces, you’re ready to weave your heart. Each heart requires two oblong slotted pieces and one strip for the handle. Select two different colors for your heart so that the weaving stands out.
2. Fold each component in half along the perforated line.
3. With the folded ends facing each other, slip the first loop of pink inside the first loop of blue.
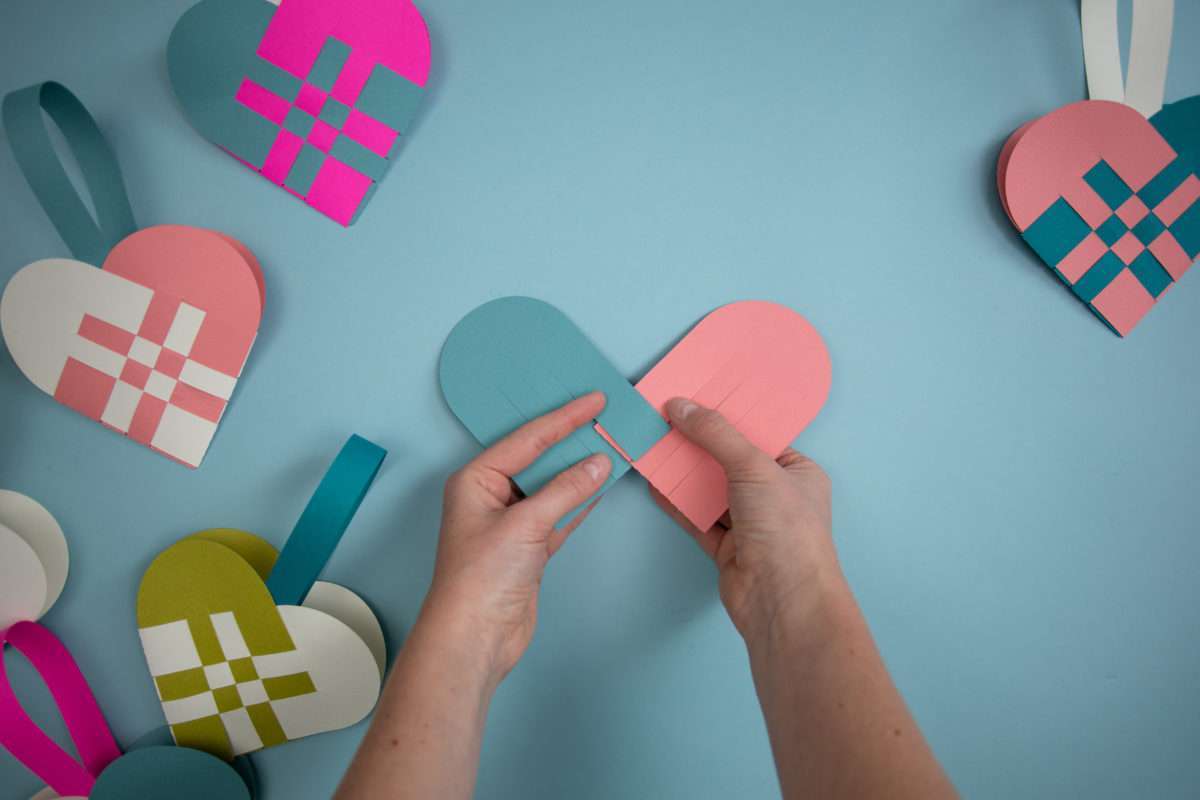
4. Next slip the first pink loop outside the second blue loop.

5. Now slip the first pink loop inside the third blue loop.

6. Then slip the first pink loop outside the fourth and last blue loop. This completes the first row! Push the first row up to the top so you’re ready to start weaving the second pink loop.


7. For the second row, you’ll do the same thing as you did with the first, only reversing the order: Slip the second pink loop outside the first blue loop to begin with. Then go inside, outside, and inside.


8. Repeat this process for the two remaining rows.

9. The weaving will get trickier as you go along and there is not as much room for the paper to move. Don’t be afraid to bend your paper a bit to get everything to fit snugly.
Step Three: Finishing the Heart
1. To finish your heart, glue the paper strip to the top front and back pieces of the heart on the inner sides of the heart.
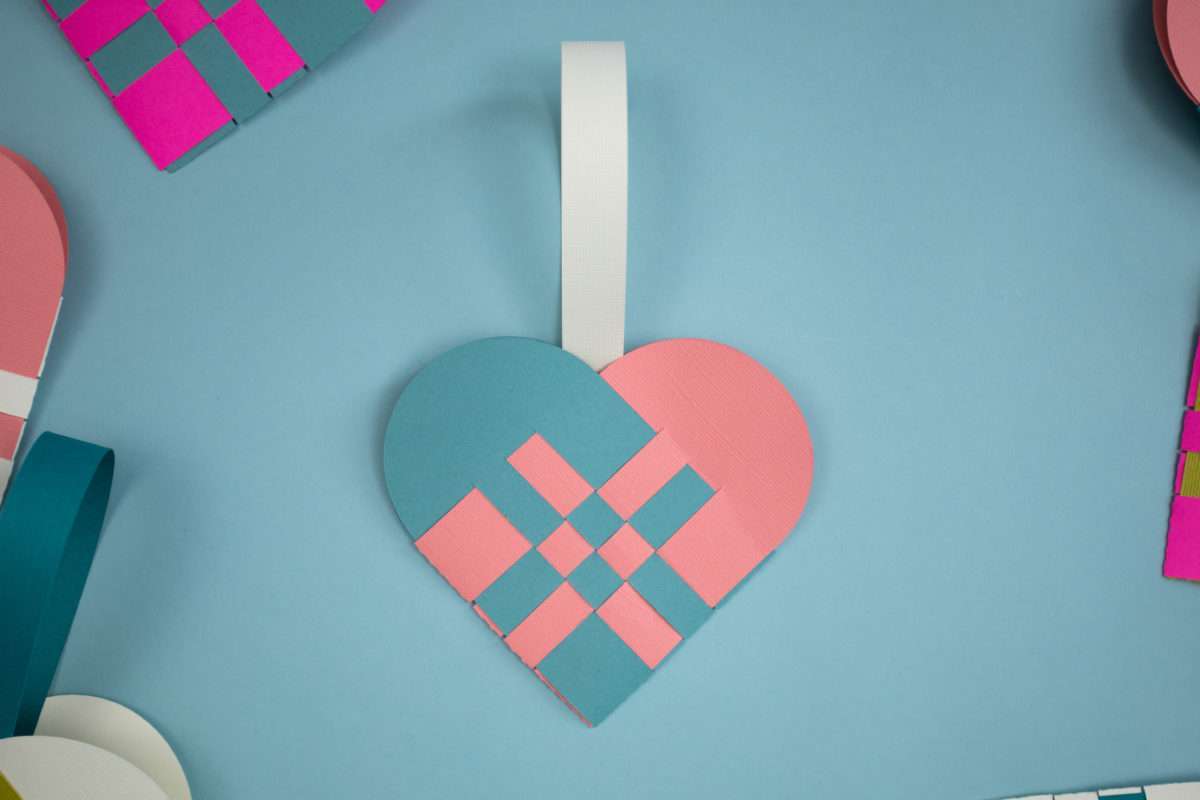
Now you have a sweet woven paper heart basket that you can fill with plenty of goodies for your valentines!


 Free Class - Shaker Card with the ES Mat
  Free Class - Foiled Gift Tags with the Heat Pen