Did you know that Silhouette Studio® has a Puzzle Generator? If you have Silhouette Studio® Design Edition Plus or higher and version 4.2 or above, you have access to a tool that turns any design into a puzzle! It is such a fun tool to create custom or personalized puzzles.
Supplies Needed:
- Silhouette Cameo® or Silhouette Portrait®
- Silhouette Studio®
- Silhouette Cutting Mat
- Silhouette AutoBlade or Silhouette AutoBlade for Cameo 4
- Chipboard
- Printable Vinyl or Printable Sticker Paper
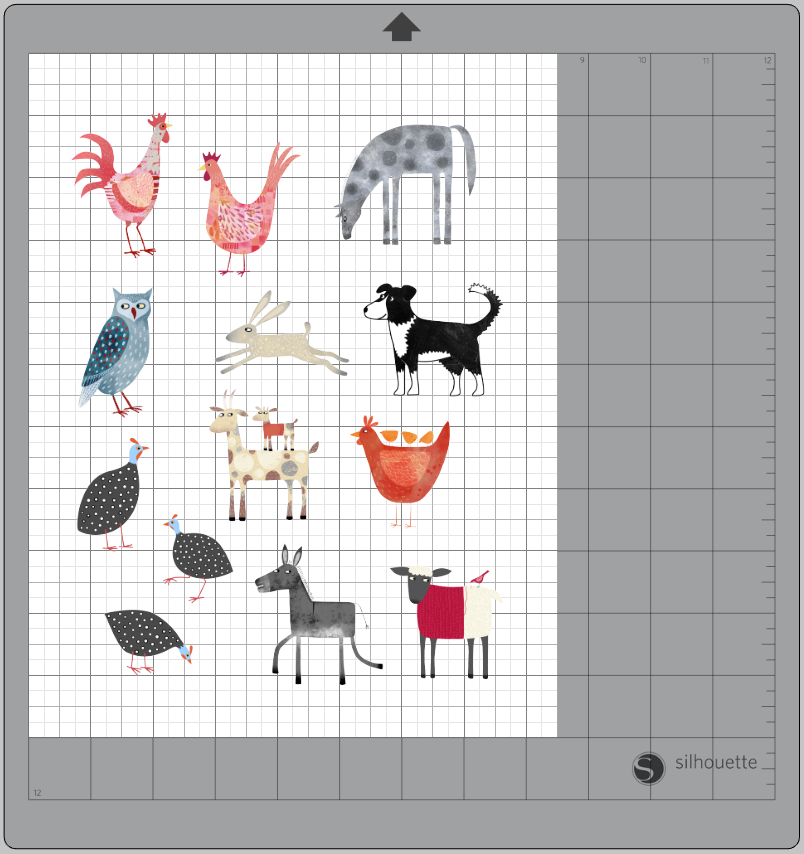
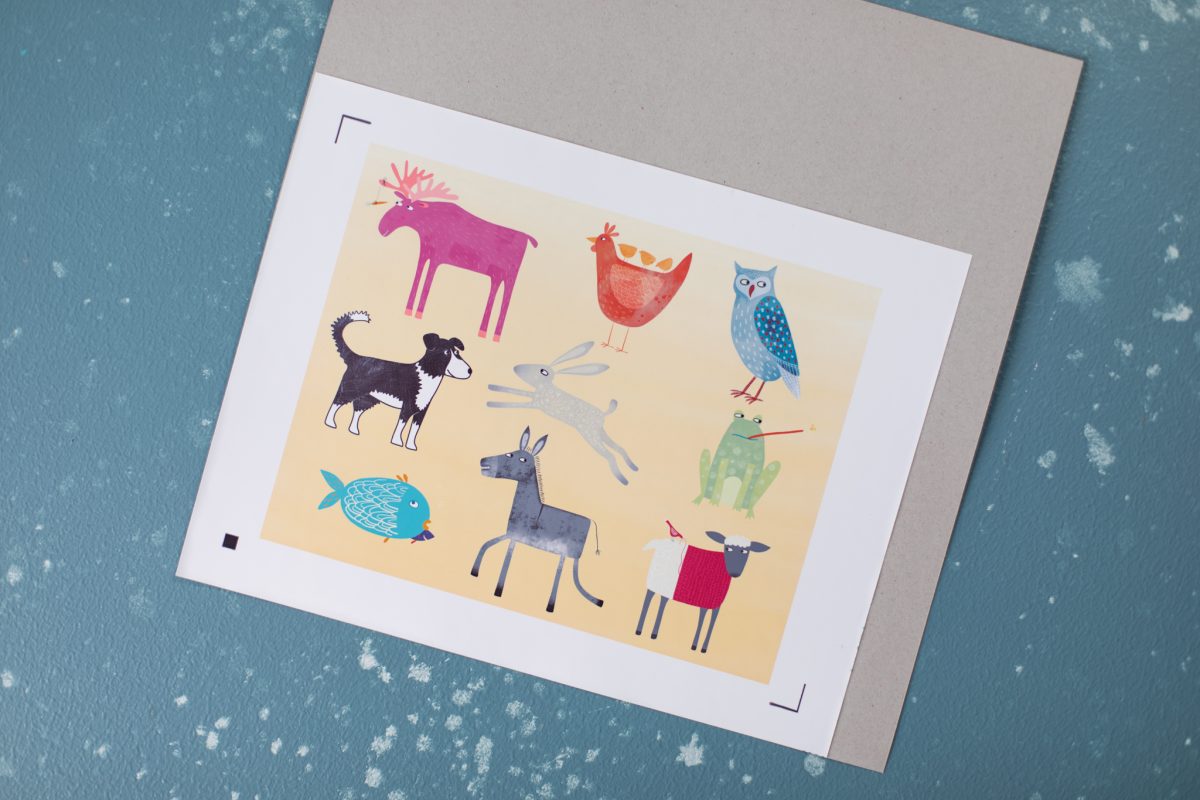
- Design ID #283980, #284485, #284481, #284490 — You could just use one of these animal design collections, but I wanted to create a custom group of animals for my puzzle!
Step One: Formatting the Puzzle
1. Insert your design (or designs) into Silhouette Studio. Begin my right-clicking on the image and ungrouping the illustrations from the cut lines. You can delete the red cut lines because we’re just going to be printing the illustrations, not cutting around them.
2. Now you can keep the illustration exactly as is, or if you want to combine illustrations from multiple design files, use the knife tool to cut around each individual animal. Select Knife Tool on the left hand side toolbar, and make sure it’s set to “Solid” cut and “Freehand.”
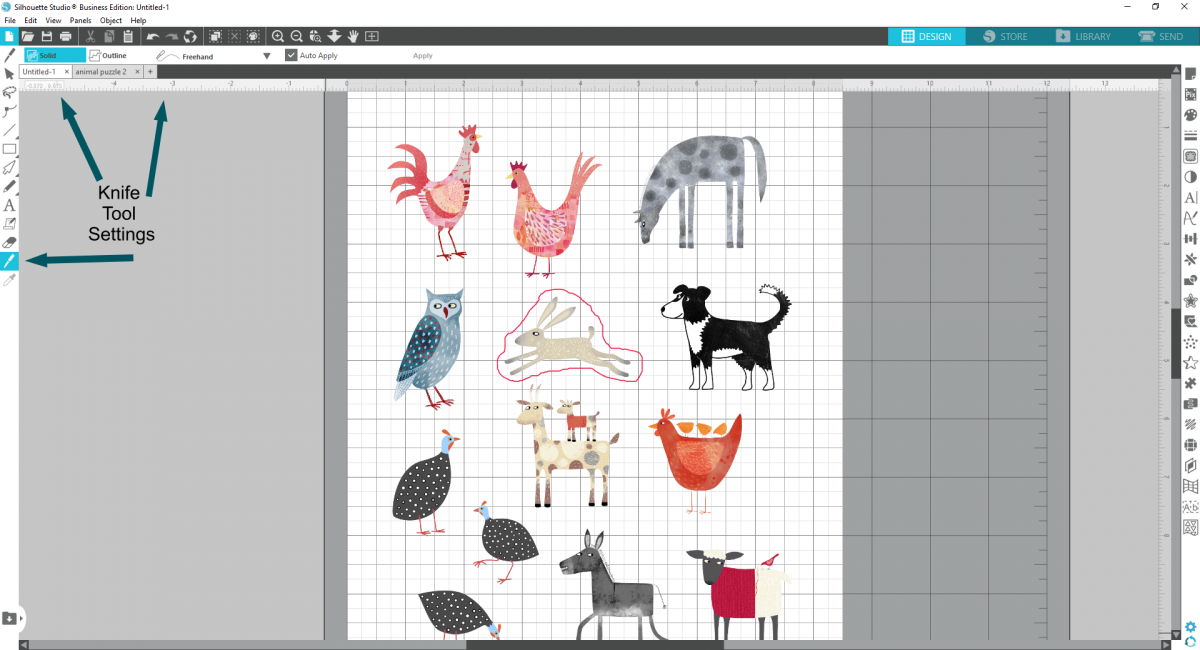
This will allow you to rearrange and size each animal to your liking! I used this to create a custom arrangement of animals for each puzzle.
3. Change the page orientation and turn on registration marks.
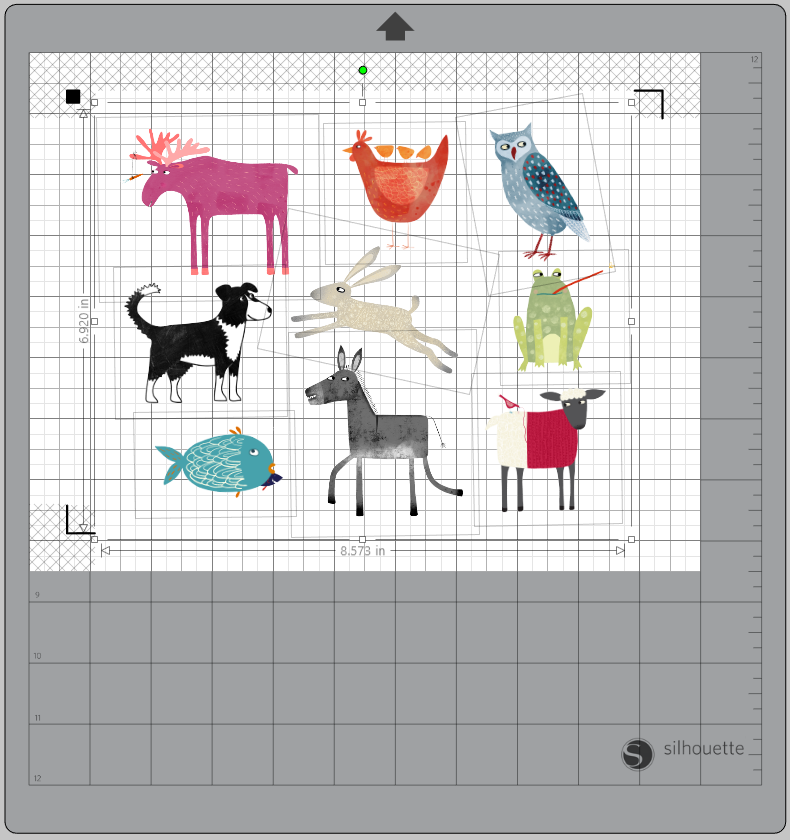
4. Next, use the shape tool to create a rectangle with the slightly smaller dimensions than the registration marks—mine is 8.668 inches wide by 6.766 inches tall. Center this around your animals.
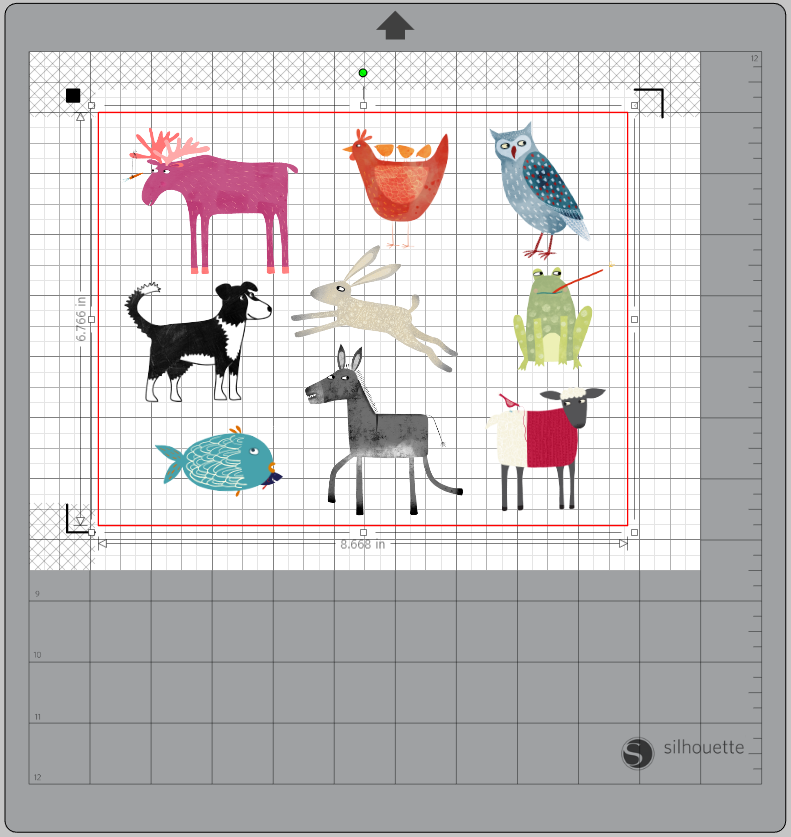
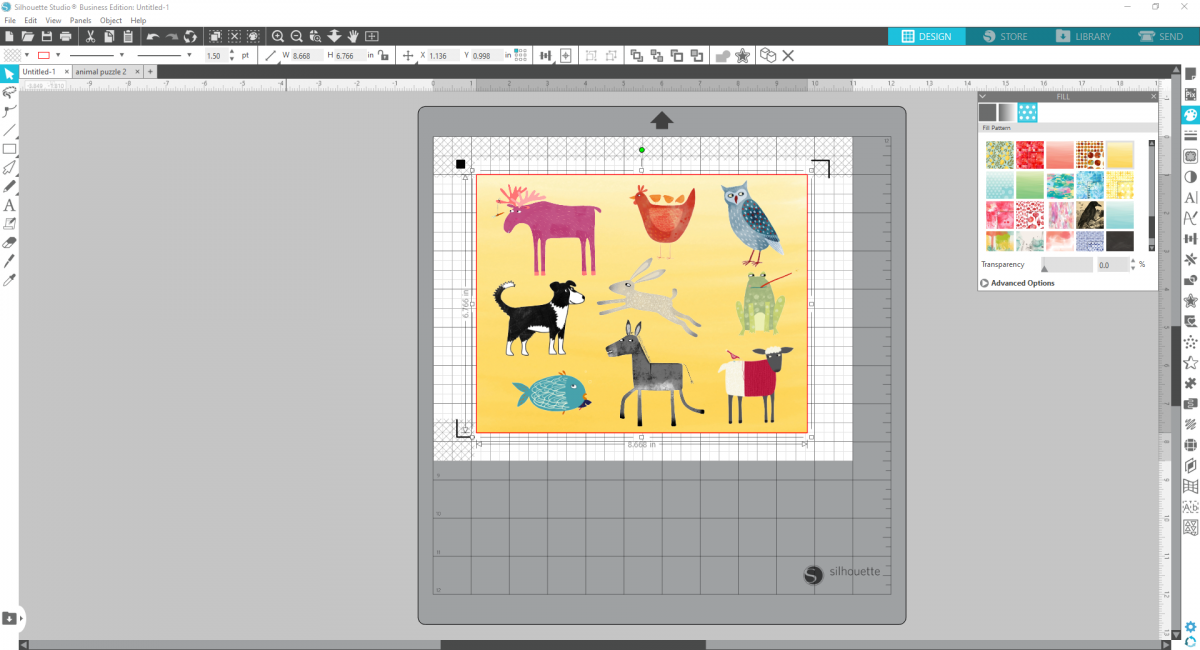
5. Use the fill panel to give the rectangle a background color. I used a yellow watercolor background. Make sure you send the rectangle to the back layer so it doesn’t cover up the animals.
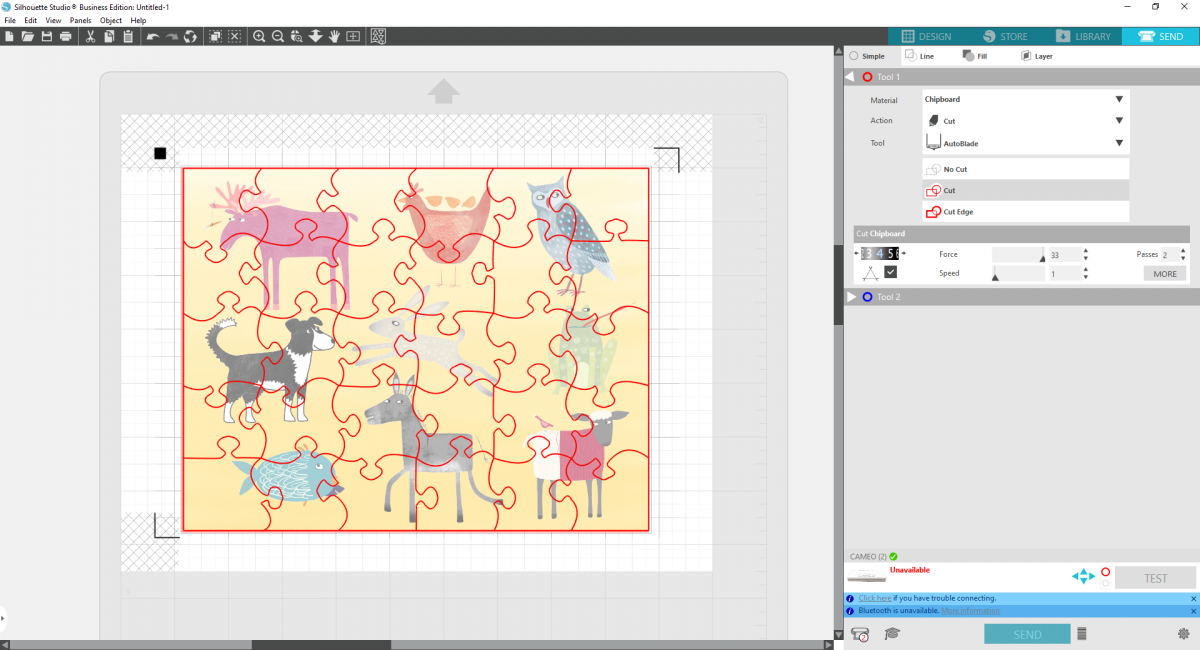
6. To turn your design into a puzzle, open the puzzle panel on the right-hand side. Click “Select Puzzle Area” and draw a box around your puzzle design, just slightly inside the boundaries of your border to make sure you don’t cut anything off.
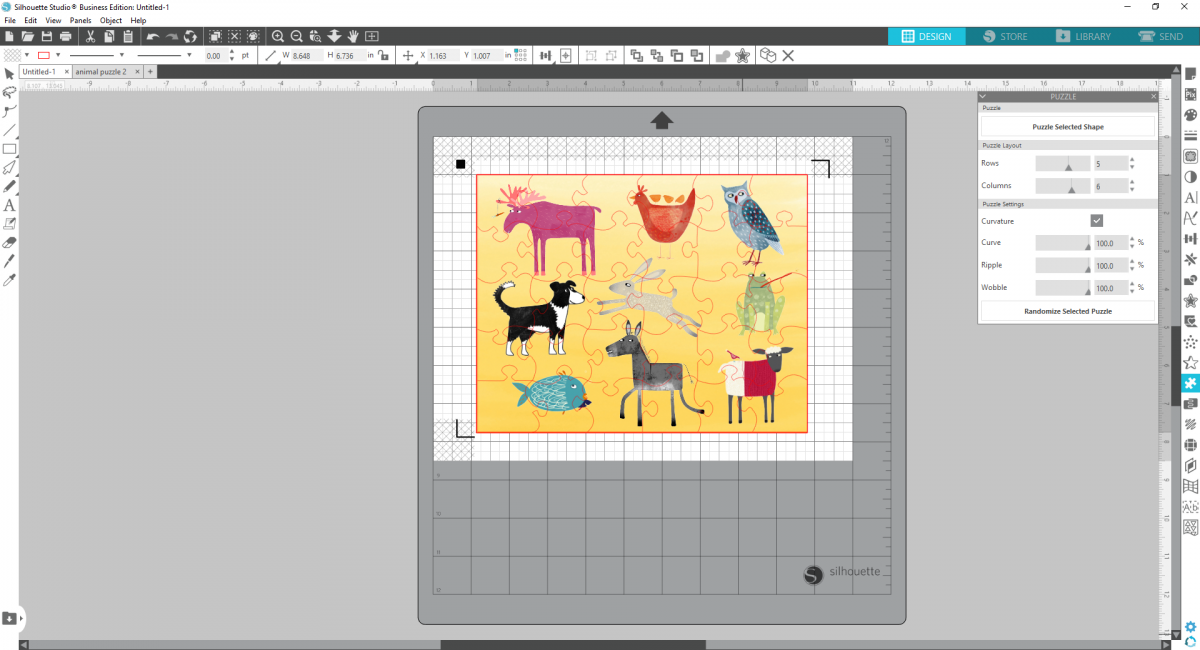
This will enable the Puzzle Layout and Settings options, where you can choose how many pieces your puzzle has and if you want your puzzle pieces to have curves or not. This basically determines how difficult or easy your puzzle is!
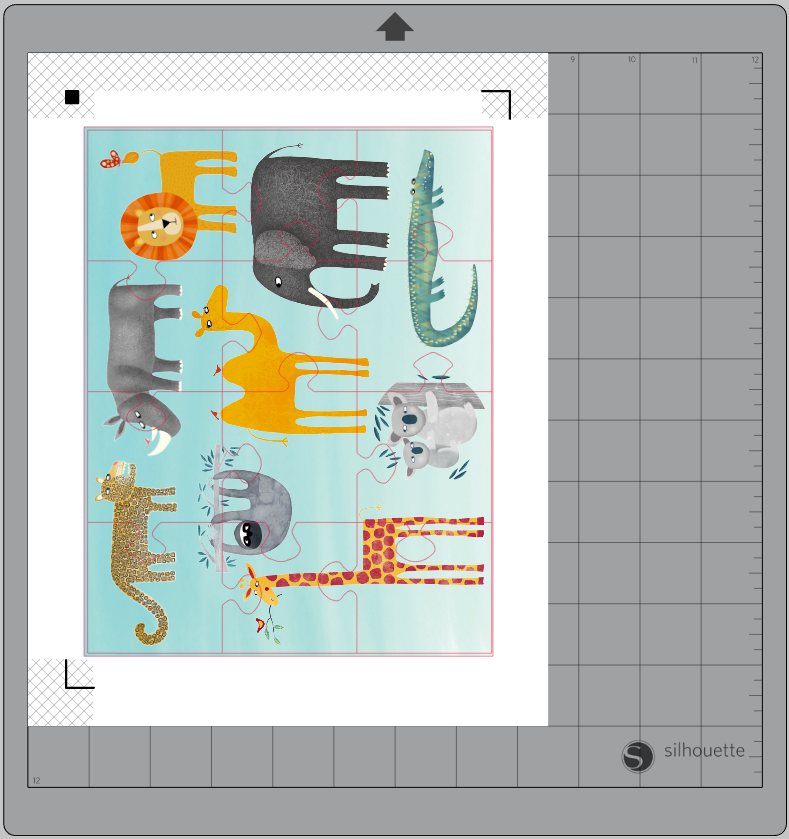
The yellow puzzle above has more pieces with a “curvature,” and the below puzzle has fewer pieces with no curves. Play around with what you want your design to be!
Step Two: Print & Cut Your Puzzle
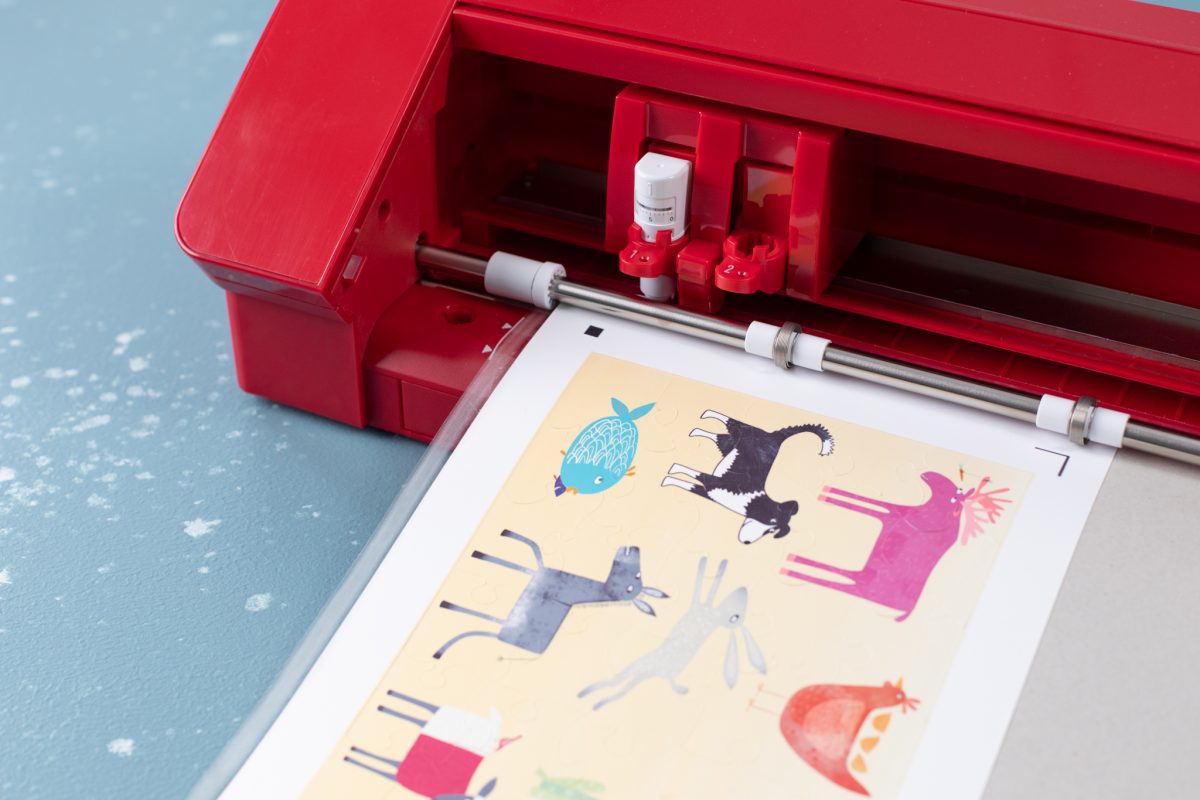
1. Now print your animal design (not the puzzle cut lines), on a sheet of printable vinyl. Again make sure your registration marks are on and your printing on the right side of the vinyl.
2. Once printed, peel off the liner of the vinyl and adhere to your piece of chipboard, aligning the page in a corner.
3. Load into the machine, with the registration marks in the upper left hand corner. Cut the puzzle pieces out using the chipboard cut settings. You may need to increase the blade depth by one to accommodate the vinyl, but do a test cut because the basic chipboard settings might work depending on the newness of your blade.
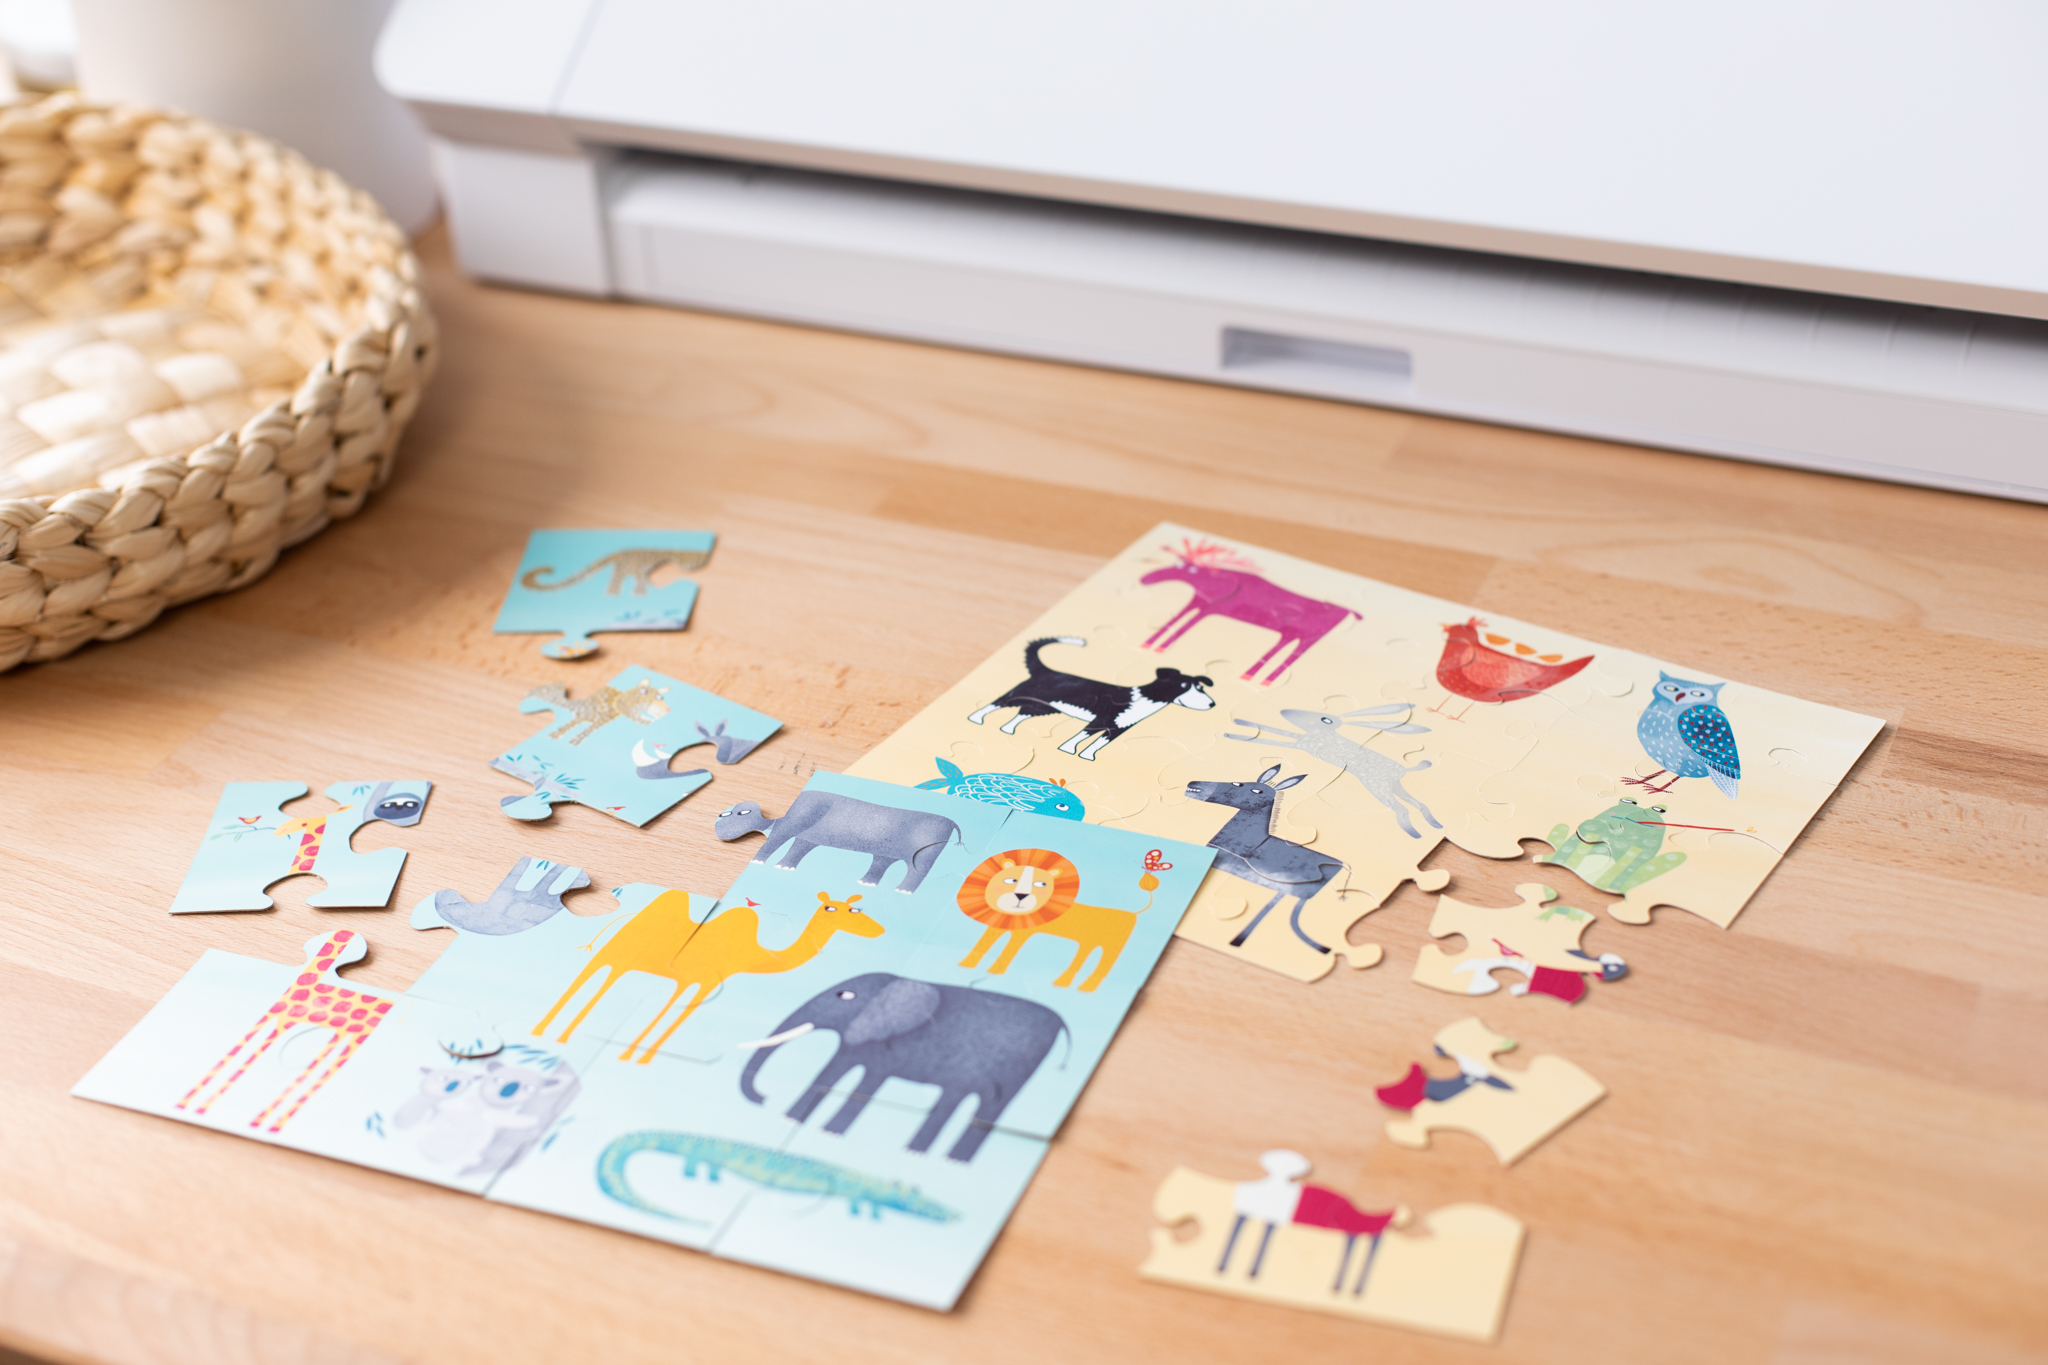
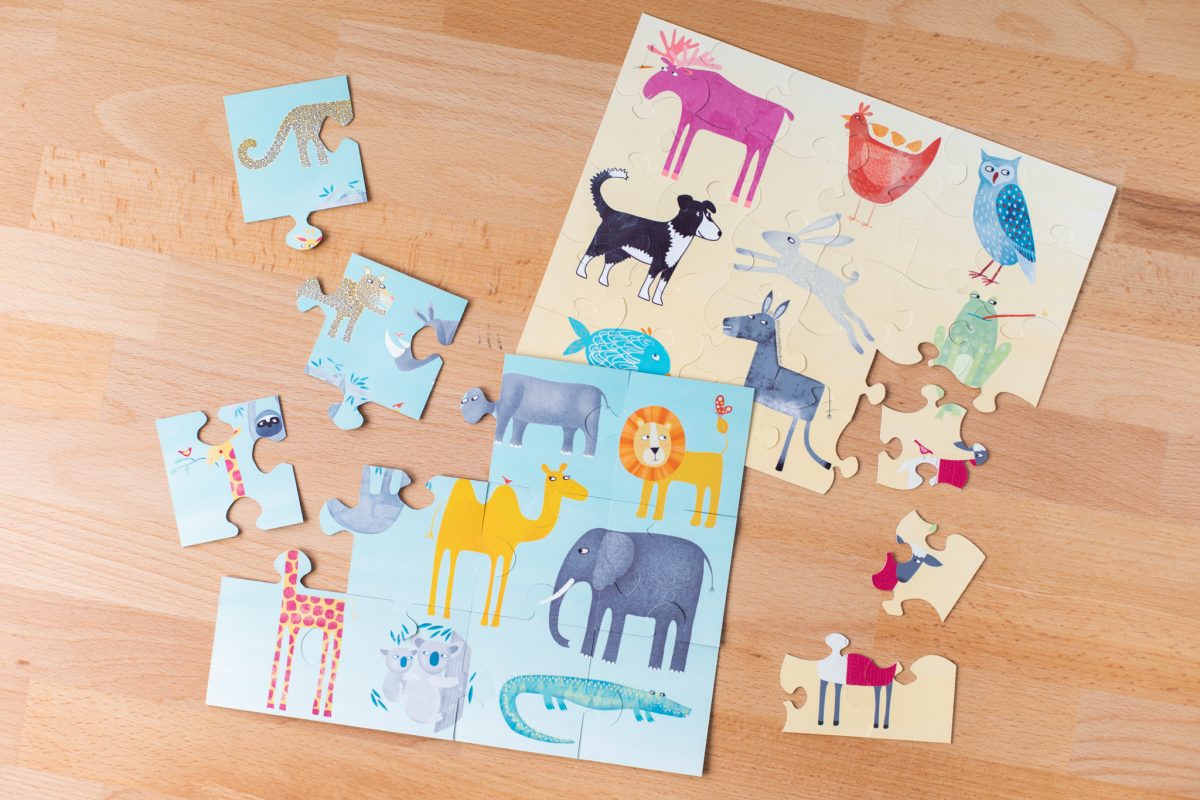
4. Remove the extra material, and your puzzle is ready for its maiden voyage!
 Design Store - Over 300,000 Designs to Bring Your Creative Vision to Life
 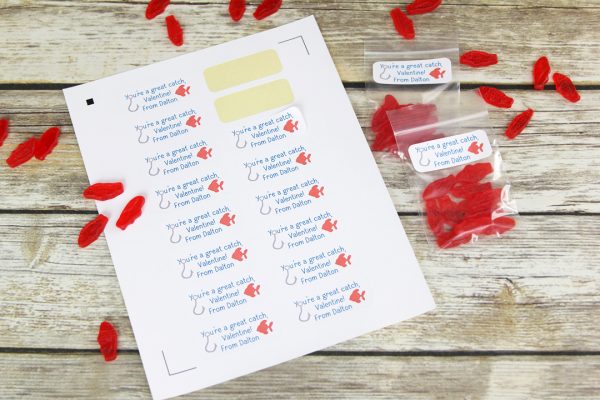 Fish Valentines to Share
Nasze Naturalne
September 3, 2025
Your authentic voice really shines through in everything you create and share
Naszenaturalne
September 2, 2025
Really love your style
Kelly Wayment
June 28, 2024
You can use it with vinyl as long as it is smooth and flat to allow the static charge to hold on to it. Rolled vinyl that wants to go back to its rolled shape will not necessarily work well, and it would need to be trimmed to fit the ES mat cutting area.
Kelly Wayment
June 28, 2024
Yes, you can use the heat pen while using the ES mat. 🙂
Yurii
March 2, 2024
Hello. May it be used with heat pen?
Thanks
Jerome
February 24, 2024
Hi, works this with the normal vinyl foils or only with printer papter etc?