
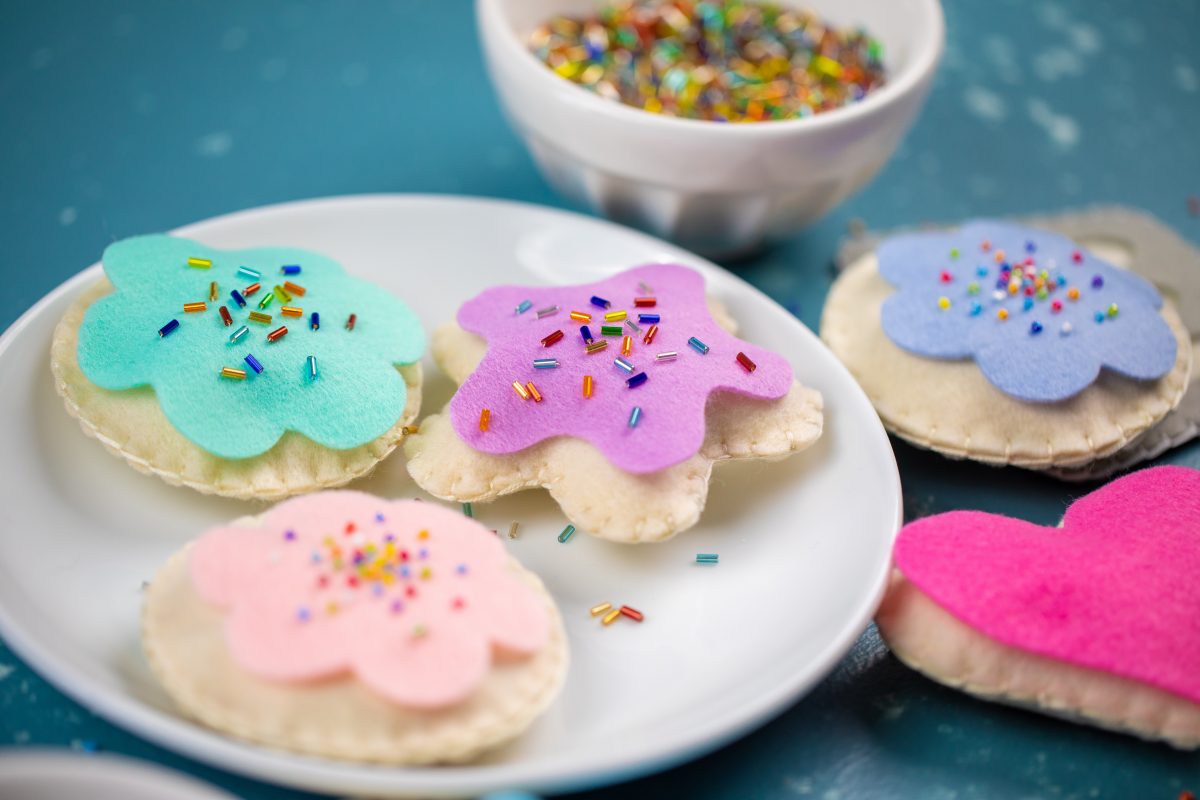
Kids always have the sweetest toys, and these felt cookies are no exception! Made with the Silhouette Cameo® 4 and the Rotary Blade for Cameo 4 (Coming in November!), these treats are simple to make and only require some simple hand-stitching for assembly. Now that we’ve made cookies, we can’t help but think of the endless possibilities for other felt goodies! What are you wanting to cut with felt?
Supplies Needed:
- Silhouette Cameo® 4
- Silhouette Studio®
- Silhouette Cutting Mat—Use a high-tack or extra sticky mat
- Silhouette Rotary Blade for Cameo 4 (Coming in November!)
- Acrylic Felt in various shades
- Embroidery floss in matching colors
- Hand sewing needle
- Small seed beads
- Poly-cotton filling
- Design ID #77480 for spatula, #1187 for flower shape, #75322 for heart shape
Step One: Format Your Designs
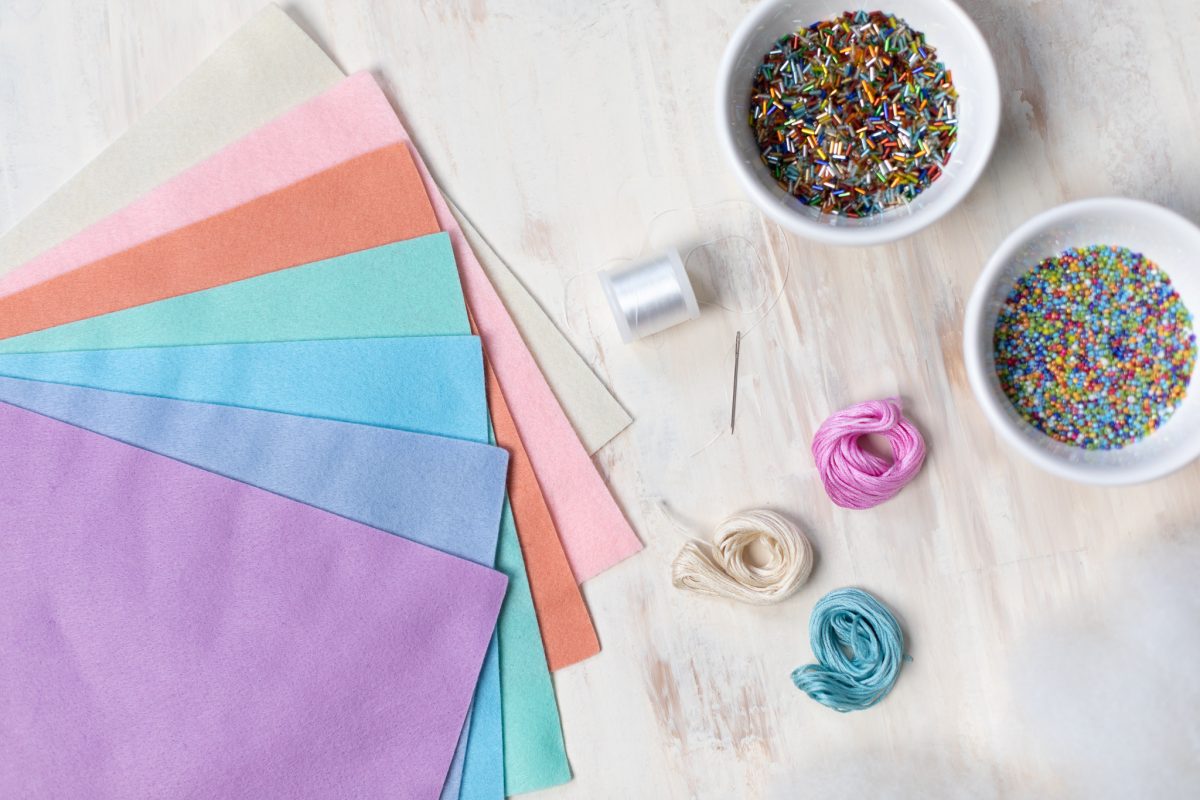
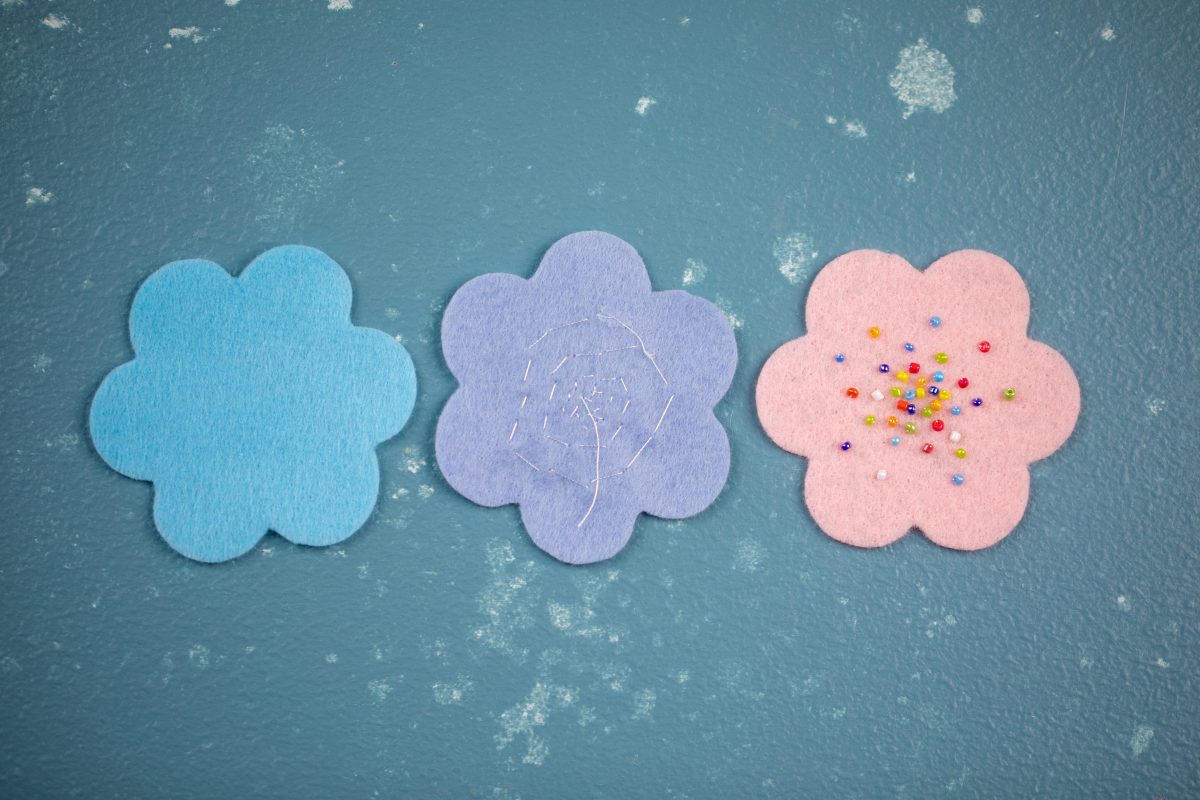
1. To make the basic shapes for your cookies, you’ll use the designs above and the shape and Flexishape tool within Silhouette Studio®. We made three shapes of cookies: circle, heart, and star. For frostings we used a flower, a heart, and a star. If you don’t have Design Edition Plus or access to the Flexishape tool, you can just find the shapes you want from the Silhouette Design Store.
2. To make the frostings, insert the flower and heart designs from Silhouette Studio®. For the star, use the Flexishape tool to create a rounded star shape with five points. Adjust the dimensions of the shapes to all be between 3.25–3.5 inches.
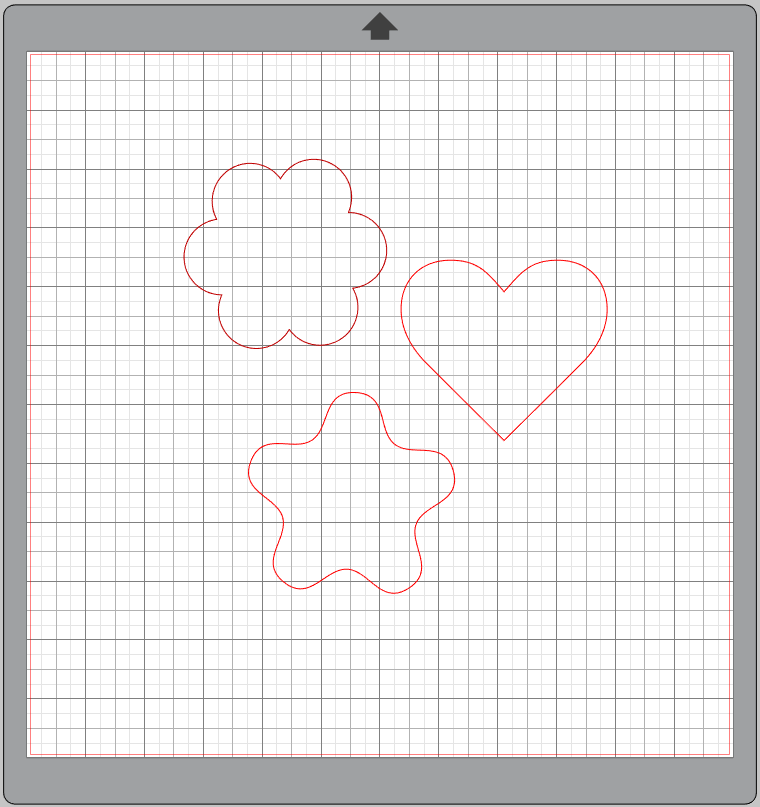
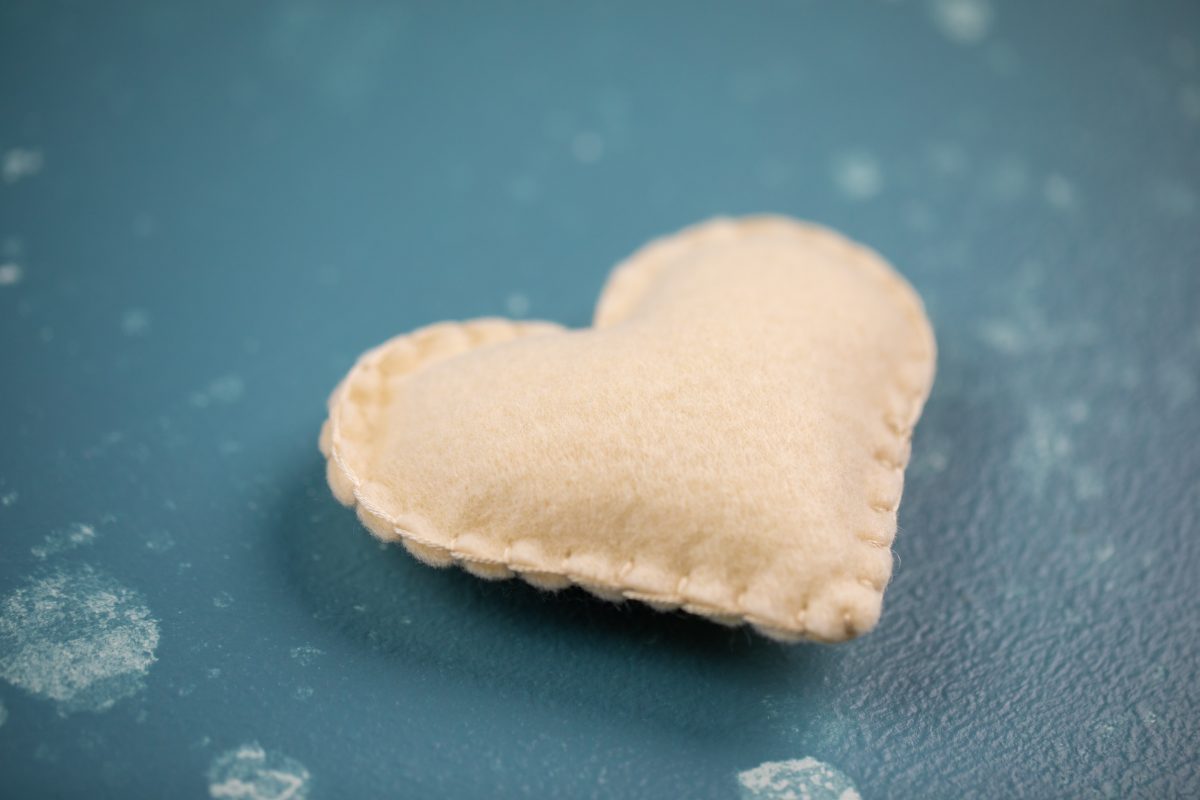
3. To make the cookie shapes for the heart and star, select those shapes and then use the Offset tool to create an outline around your frosting shapes. Increase the Offset Distance to .200 inches. For the flower circle, use the shape tool and while pressing shift, create a circle around your flower with a bit of space on the sides.
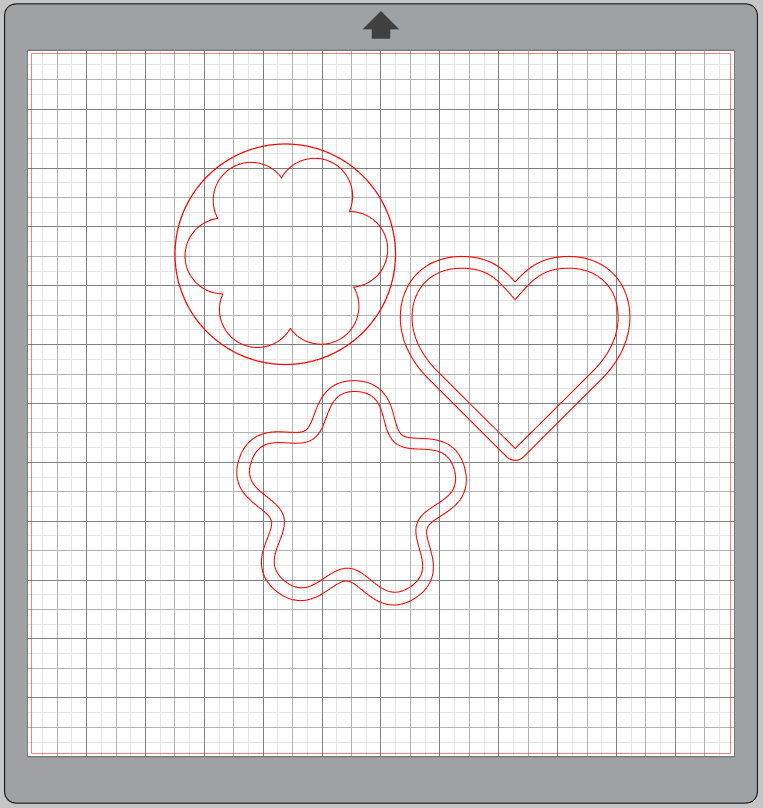
4. Then duplicate your cookies shapes–this will give you two pieces so you can stuff them with filling. Cut out your cookie shapes on cream felt and the frosting shapes on colors of your choosing.
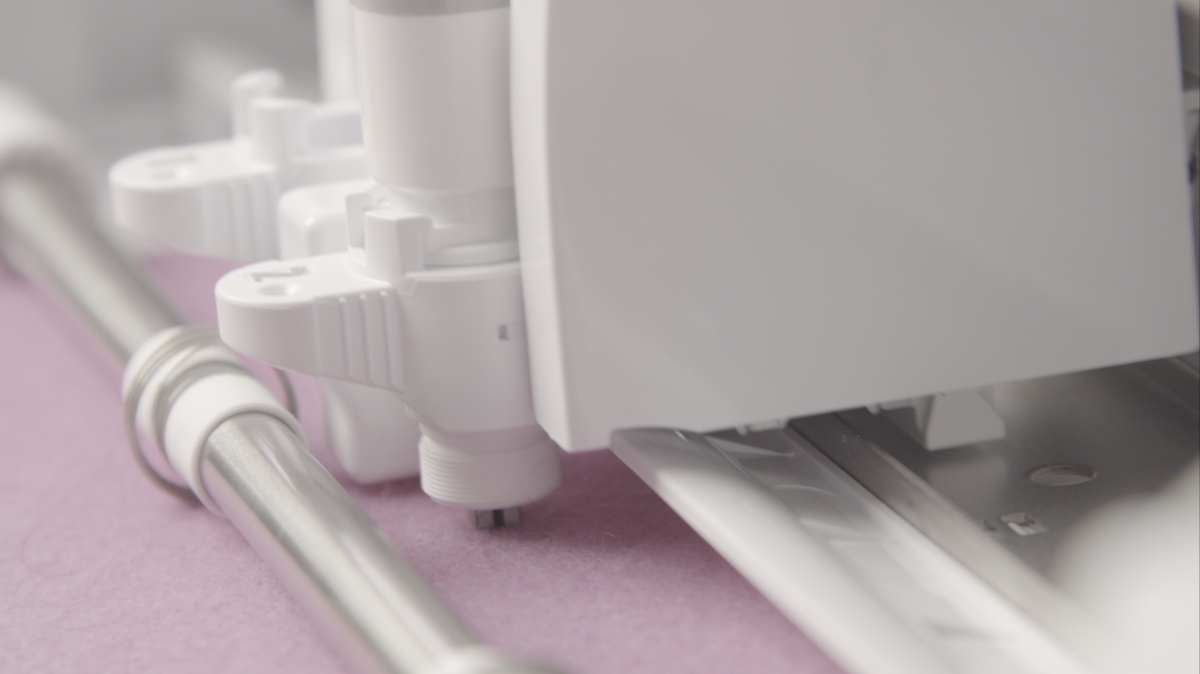
5. Use the Rotary Blade for Cameo 4 in carriage 2 to cut your pieces! Make sure to set your Tool 2 setting to the following; Material: Felt, Acrylic; Action: Rotary Cut; Tool: Rotary Blade. The design you want to cut needs to be selected and then select Rotary Cut to turn the image lines blue and enable the Smart-cut settings. This is necessary to cut felt appropriately.
** It’s also helpful to use a very sticky mat.
6. To make the spatula, insert utensils design file and delete additional designs aside from the spatula and handle. Size them so the spatula is just slightly bigger than your cookies.

7. Duplicate the spatula piece two times so you have three spatulas. Release the compound path on one of them and delete the inner slots. Then duplicate the handle so you have two pieces there. Cut out the spatula pieces in gray, the inner piece in cream or white, and the handle pieces in a color of your choice!

Step Two: Assemble the Cookies
Once you have all your pieces cut out, you’re ready to stuff and sew your cookies!
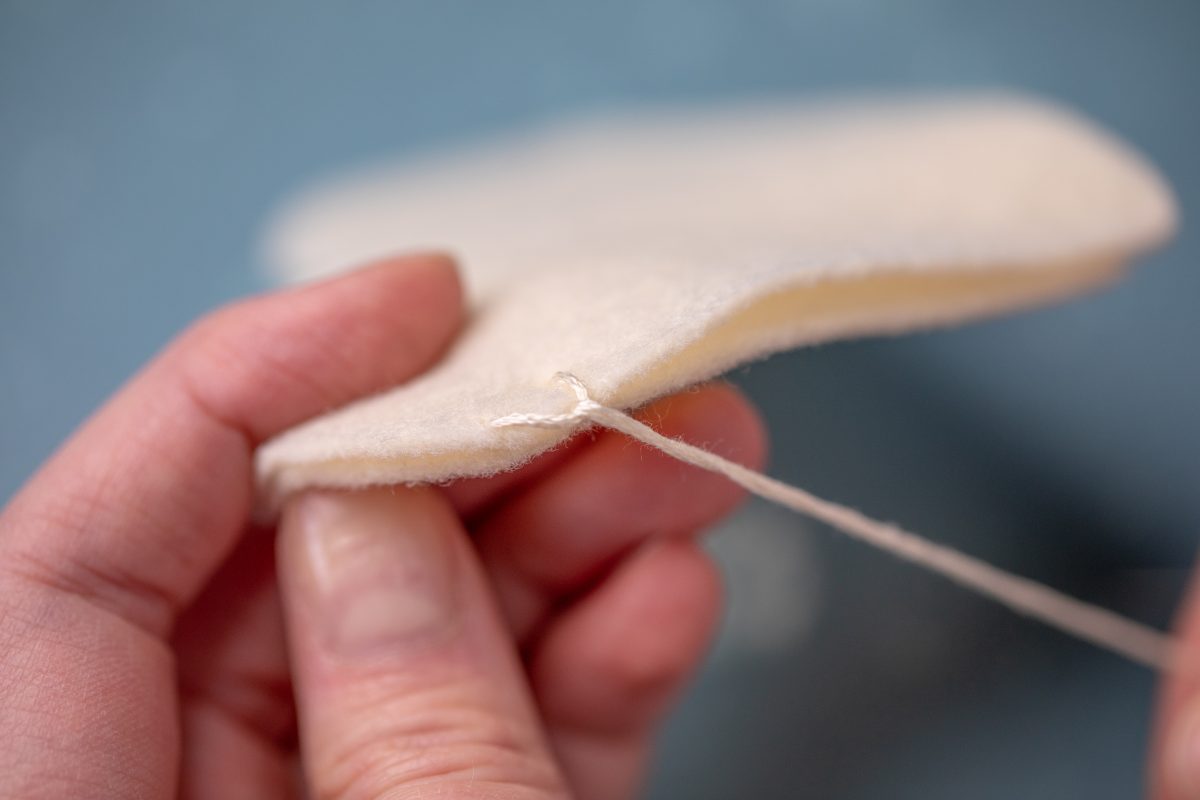
1. Layer two matching cookie pieces on top of one another. Thread a needle with embroidery floss and tie a knot at one end. Insert your needle through the bottom of the top layer so your knot will be sandwiched in between the layers.
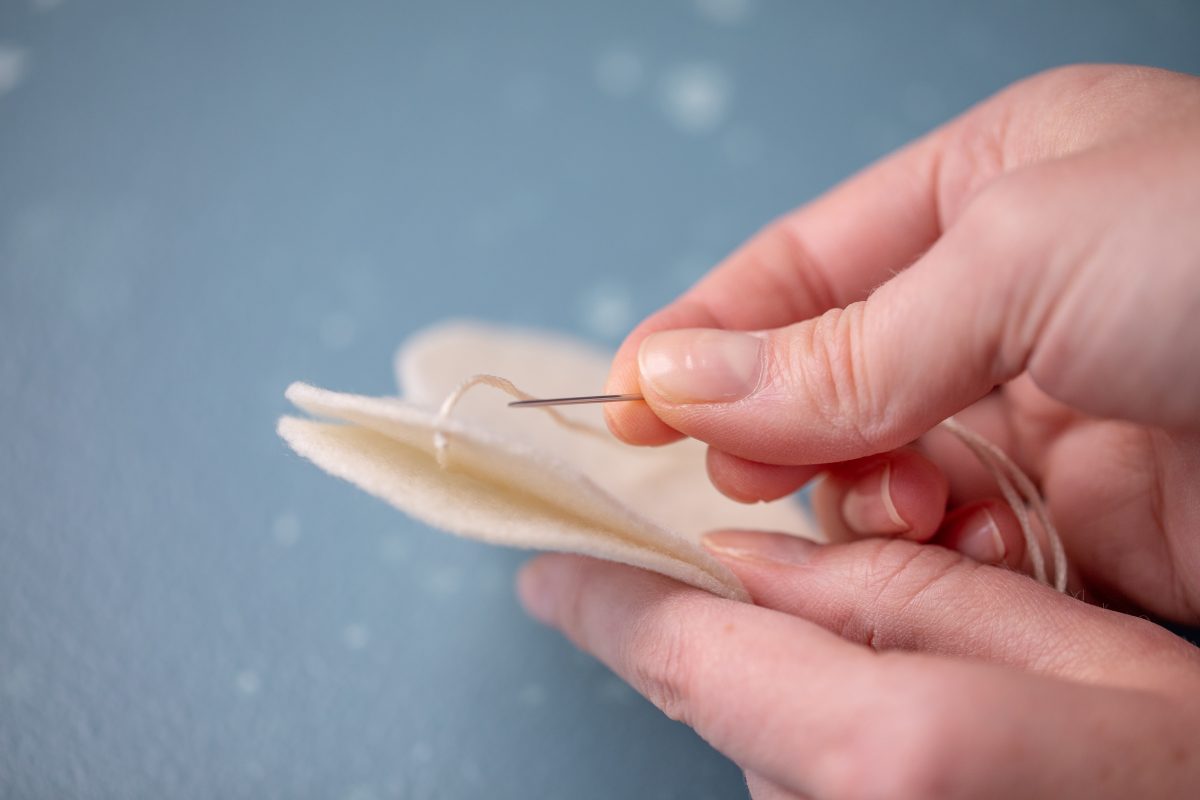
2. Then insert your needle through bother layers of felt about 1/4 inch to the right and a 1/4 inch from the edge of the felt.
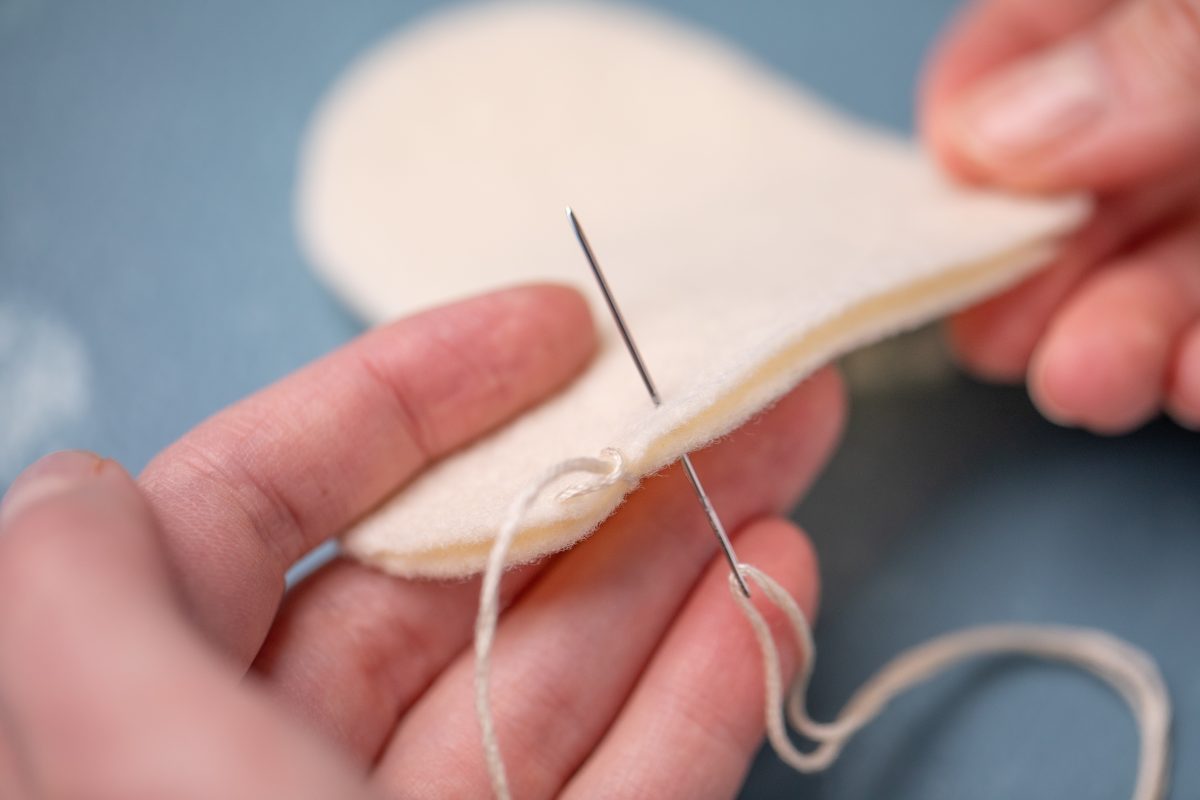
3. Before pulling the string all the way tight, insert your needle up through the loop
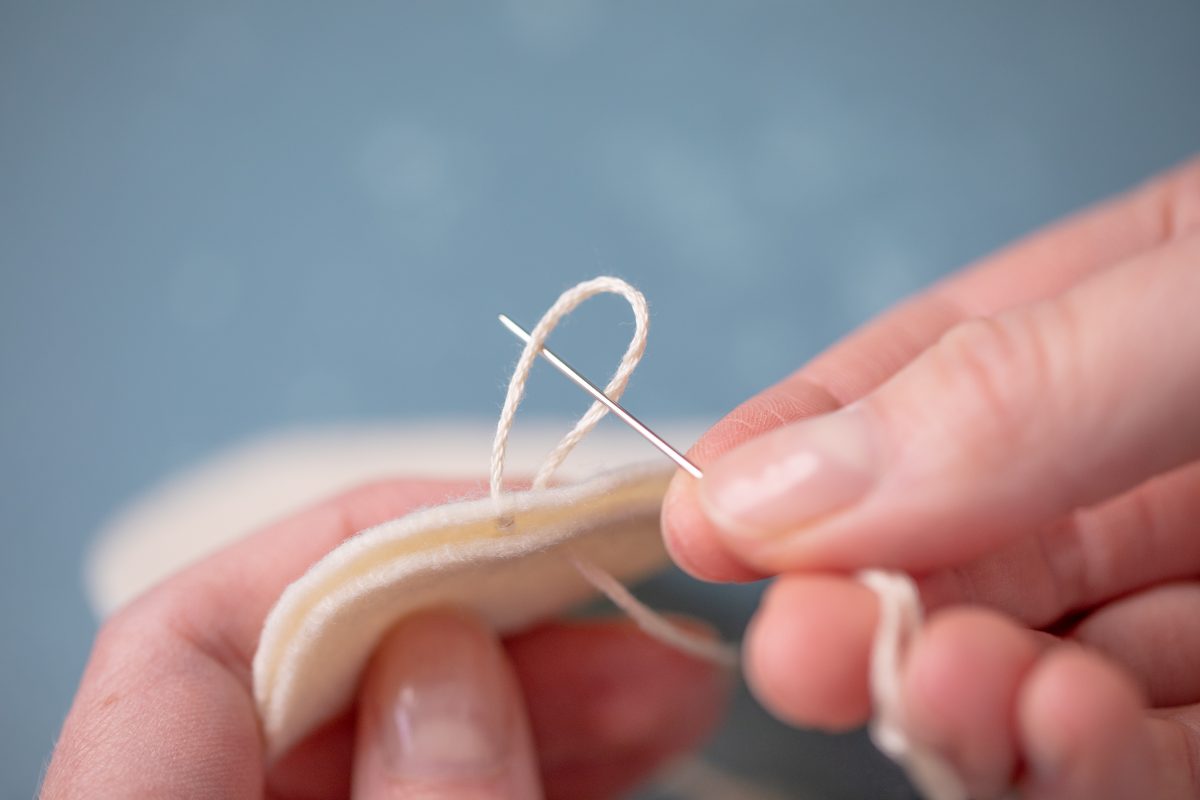
4. Then pull tight.
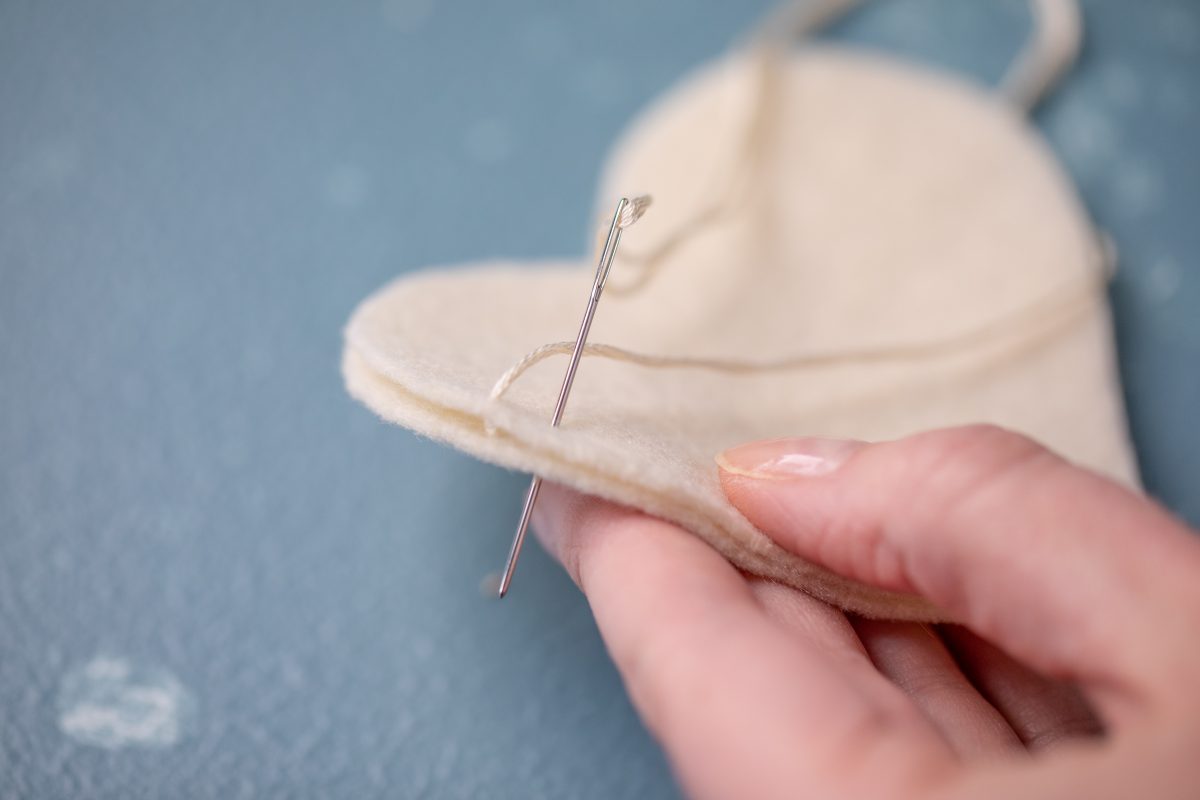
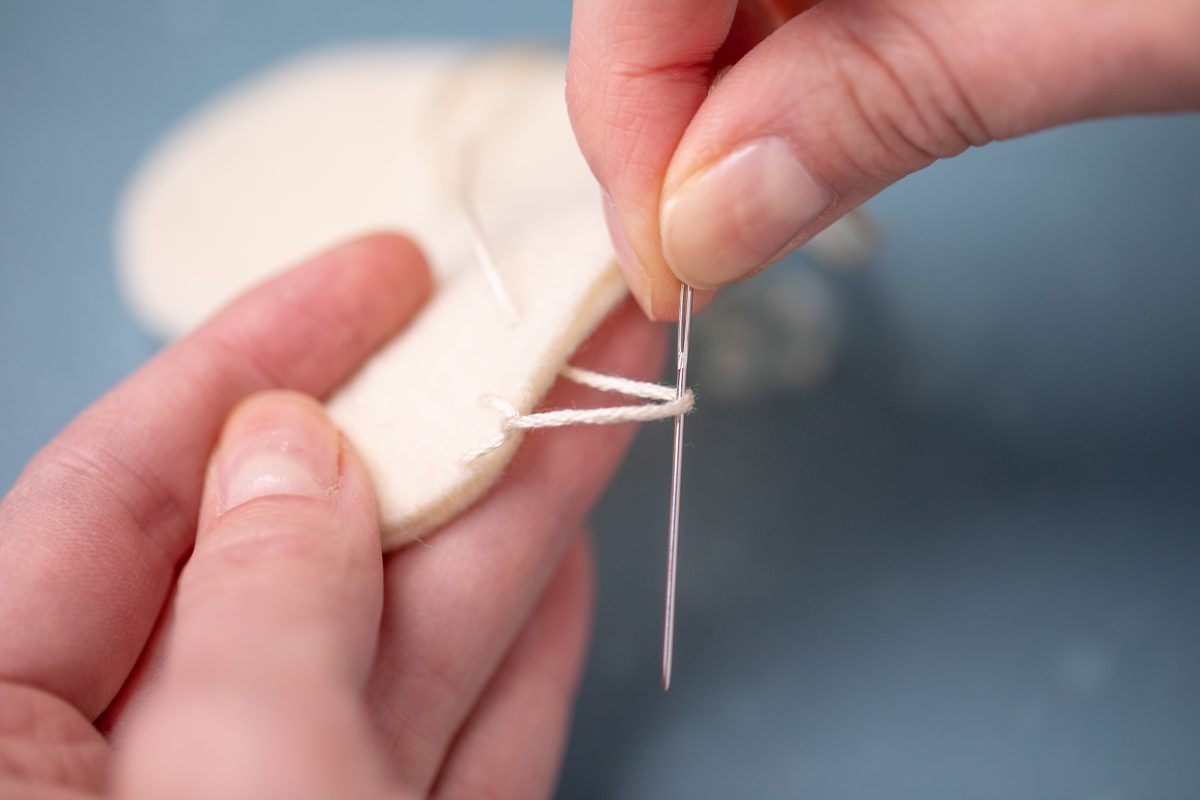
5. Move over to the right again, keeping the same distance from the previous stitch and the edge and come up through both layers of felt
6. Again, before pulling all the way tight, thread your needle down through the loop.
7. Pull tight.
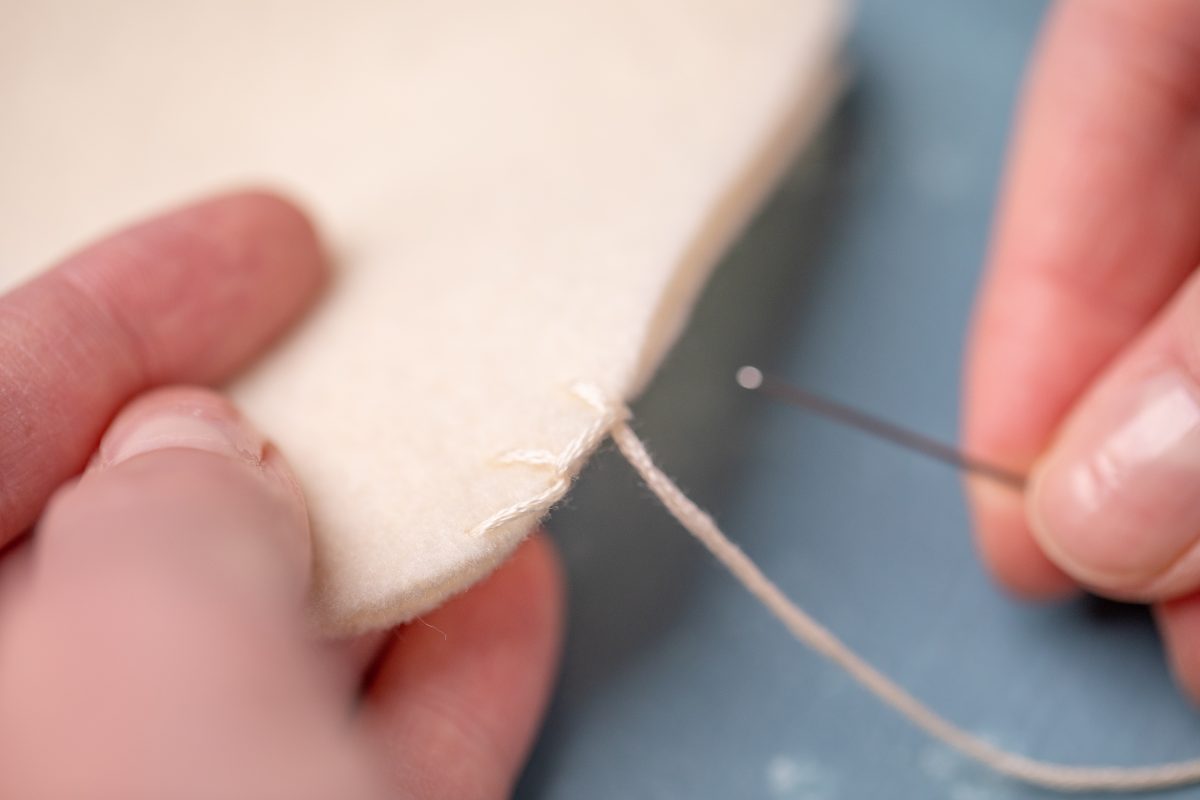
8. Repeat the last two steps to continue sewing along the perimeter of the cookie. Stop with a few inches left to go so you can stuff the cookie with filling.

9. Then finish sewing the edge and tie a knot to secure.
10. For the frosting piece, thread a needle with thin cotton thread. Sew on a cluster of small beads to look like sprinkles. Tie a knot in the beginning and end to secure.
11. For the spatula, sandwich the white part in between the two gray, slotted pieces and glue together with fabric glue. Then sandwich the handle in between the two thicker handle pieces. Sew around the perimeter with the blanket stitch and matching tread, leaving a small area to stuff the thicker handle before finishing the sewing.

12. Now let your kiddies “bake” and “frost” their cookies to their heart’s content! No mess or clean up!
 January Online Classes
  Felt and Heat Transfer Wreath with Benzie Design
Nasze Naturalne
September 3, 2025
Your authentic voice really shines through in everything you create and share
Naszenaturalne
September 2, 2025
Really love your style
Kelly Wayment
June 28, 2024
You can use it with vinyl as long as it is smooth and flat to allow the static charge to hold on to it. Rolled vinyl that wants to go back to its rolled shape will not necessarily work well, and it would need to be trimmed to fit the ES mat cutting area.
Kelly Wayment
June 28, 2024
Yes, you can use the heat pen while using the ES mat. 🙂
Yurii
March 2, 2024
Hello. May it be used with heat pen?
Thanks
Jerome
February 24, 2024
Hi, works this with the normal vinyl foils or only with printer papter etc?