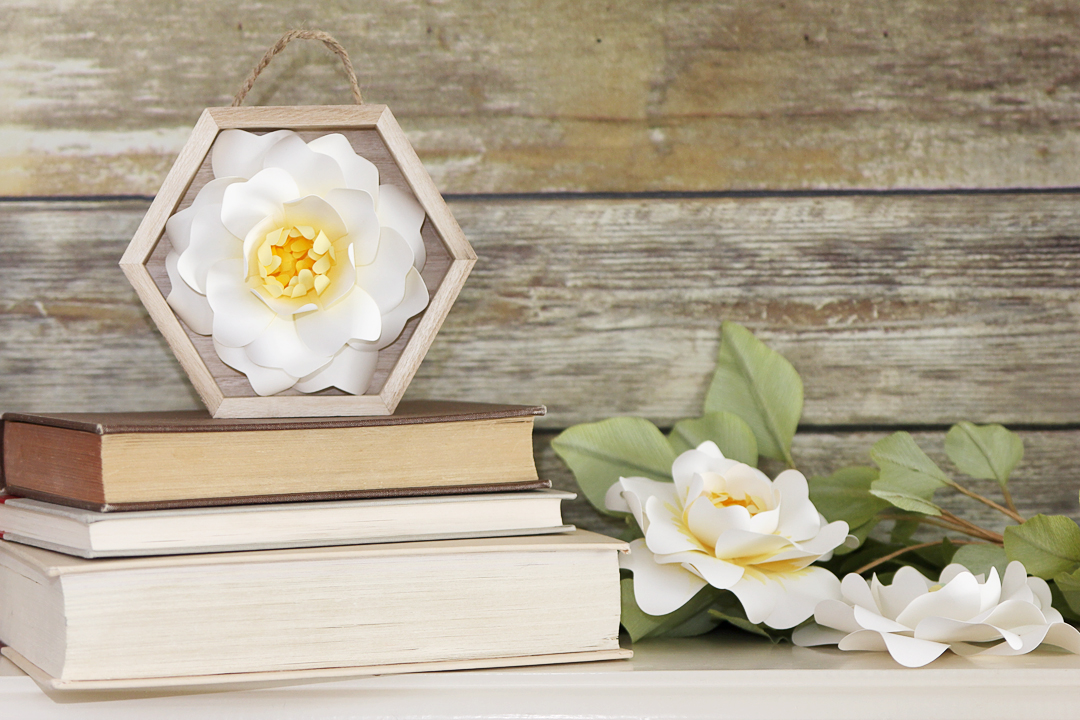
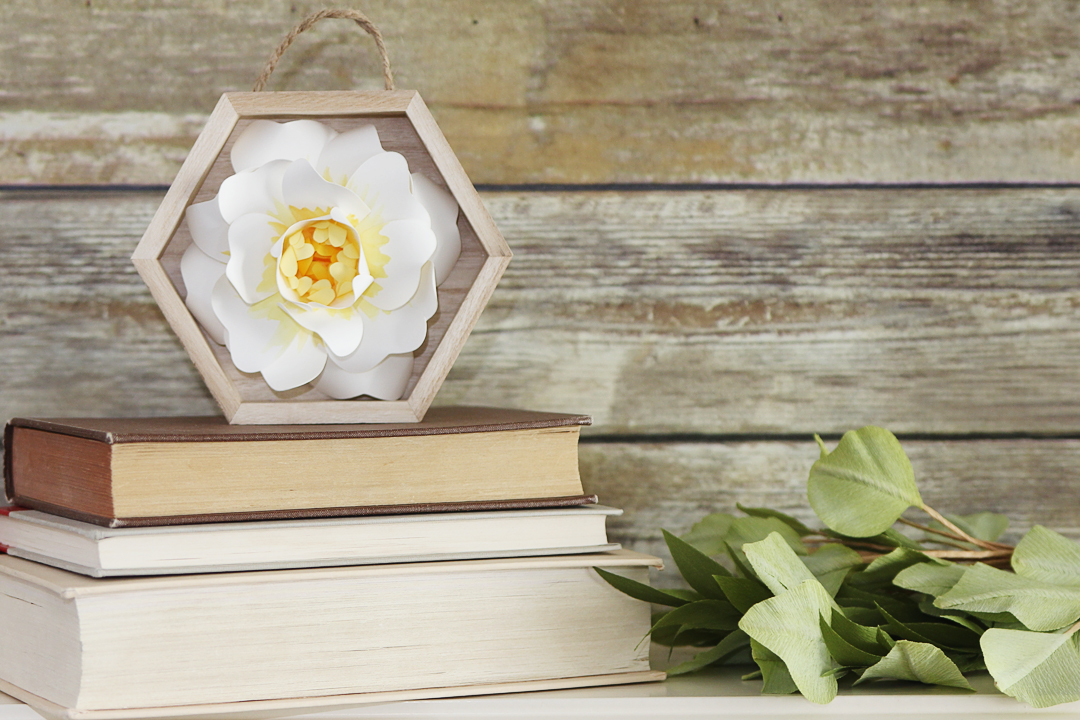
How about some easy spring décor for your home? Here’s a quick tutorial for this pretty paper floral shadow box display that you can make yourself with a Silhouette machine.
Supplies:
- Silhouette Cameo® or Portrait®
- Silhouette Studio® – Basic Edition or higher
- Cutting mat
- 1mm blade – I use the AutoBlade
- Spatula tool
- Scraper tool
- Wooden hexagon shadow box (6 in. x 5 in.)
- Cardstock – white, light yellow, and dark yellow
- Mini brad (optional)
- Hot glue gun
- Color and applicator – PanPastel chalks, watercolor paint, etc. (optional)
- Paper piercer or pin
- Design ID #289155 by Jamie Lane Designs
Step One: Cut Flower Pieces
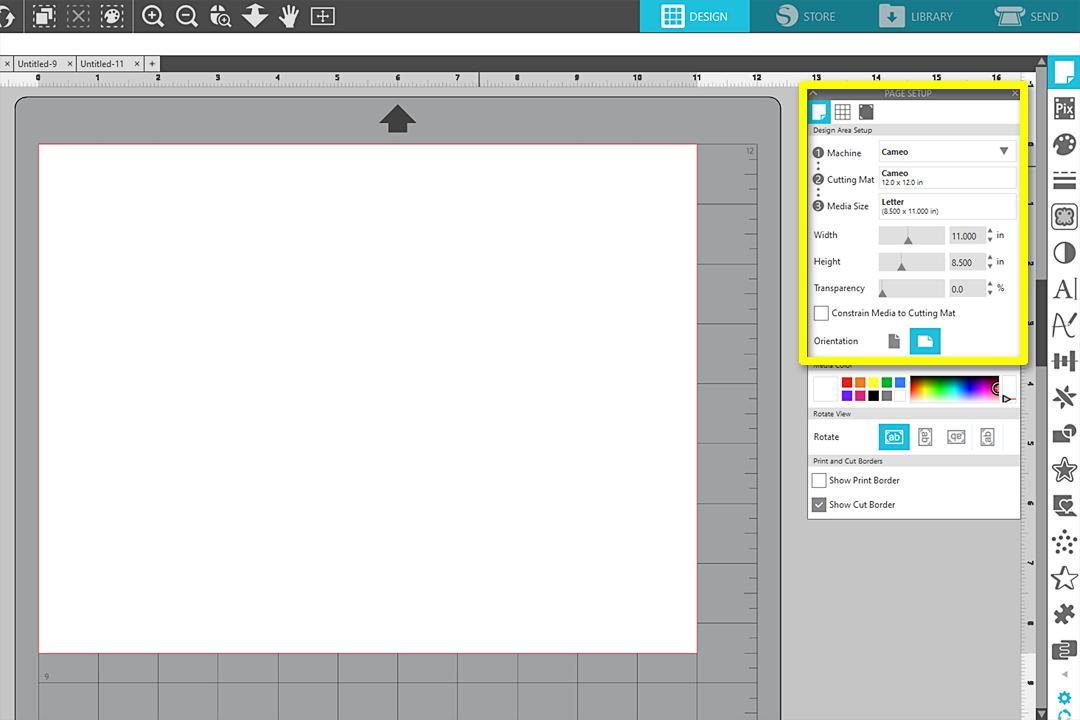
To get started, open Silhouette Studio® and adjust your Page Setup panel settings to match your machine and the cardstock you’re using. These are my settings:
- Machine = Cameo
- Cutting Mat = Cameo (12 x 12 in.)
- Media Size = Letter
I also set my orientation to horizontal because it will better fit the flower petals when we open the design file.
Next, open the 3D Spring Flower design. Ungroup and reposition the pieces so you can cut one color of cardstock at a time.
Tip: Placing designs off to the side of the virtual mat ensures that they will not cut until you move them back onto the virtual mat.

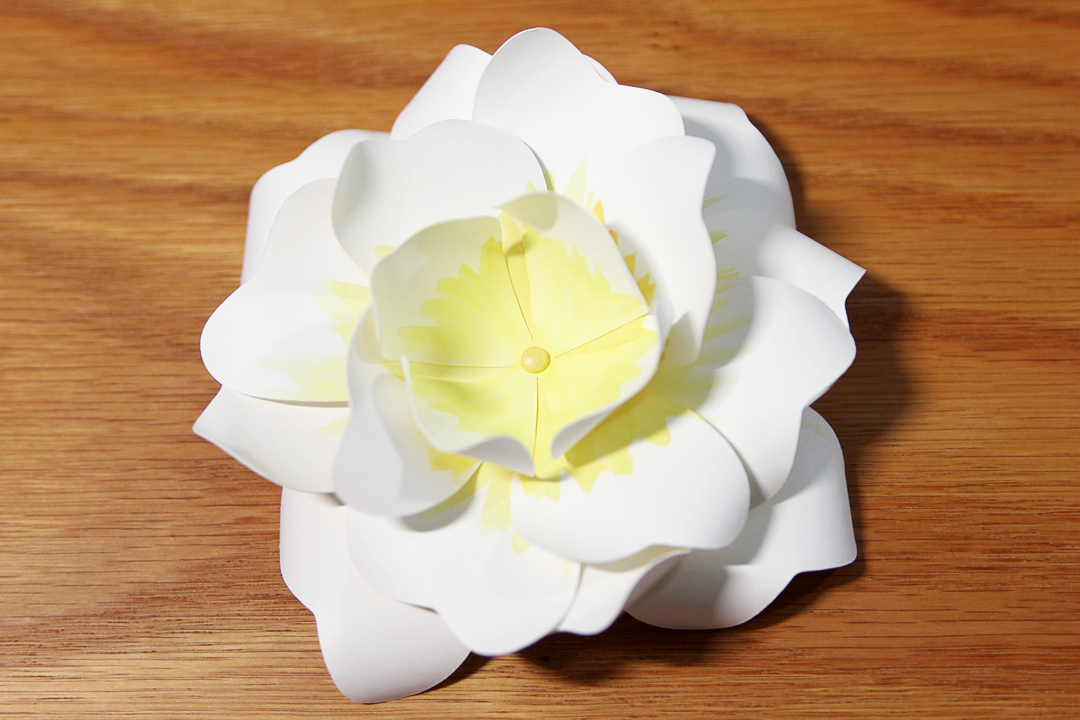
I cut my largest petals from white, my medium center petals from light yellow, and my small center petals from dark yellow.
When the designs are in place on your virtual media and not extending past the paper, go to the Send tab. For 65 lb. cardstock, I like to set my Material to “Patterned Paper, Medium (65 lb).” You should perform a test cut to ensure the settings you choose are appropriate for your particular paper.
Tip: A sharp blade will generally cut cardstock on Blade Depth 3, but if your blade is getting dull, you may want to increase your depth to 4.
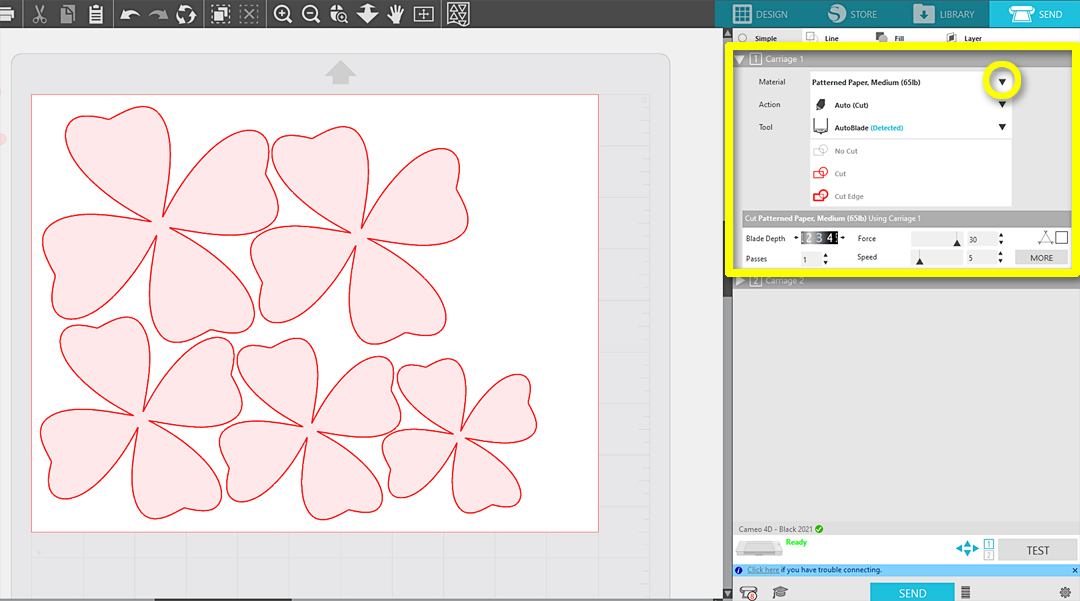
With the mat loaded into the machine with your paper, click Send to start cutting out the petals.
Reposition the flower pieces in the Design Tab and send to cut with each color. I chose not to use the leaves on this piece, but you can if you’d like.
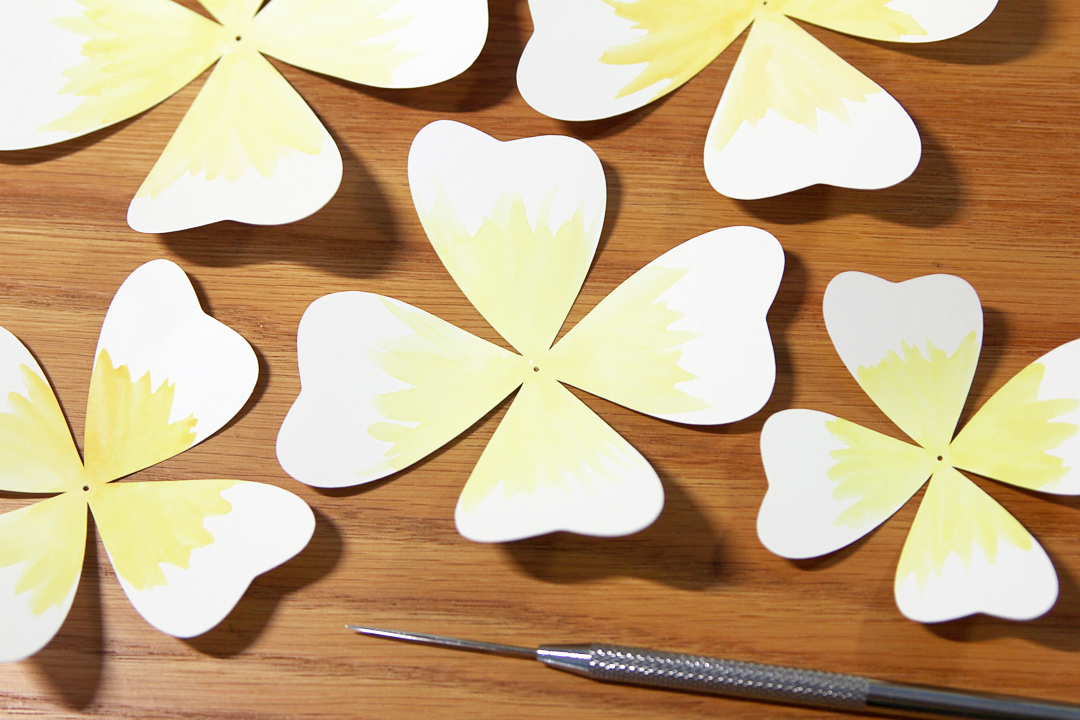
Step Two: Shape Petals
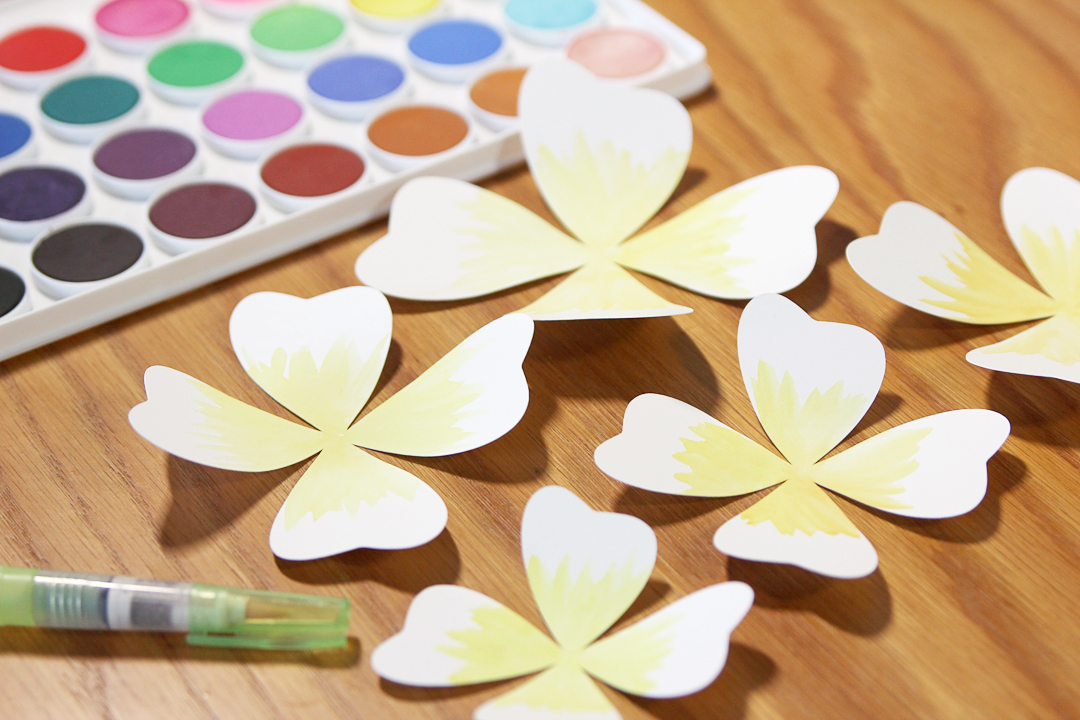
Lay out your petals in size order, and keep them in order until you are ready to assemble.
If you want to add color to the center of your large petals, you may do so. Some options for this would be to add PanPastel chalk with a brush, dye ink with a sponge, or watercolor paints with a paintbrush. Let the paper dry before moving onto the next step.

Poke a hole through the center of each large petal set.
Use your scraper tool to curl the large petals by gently dragging the paper between your thumb and the tool. Curl the base of each petal upwards.
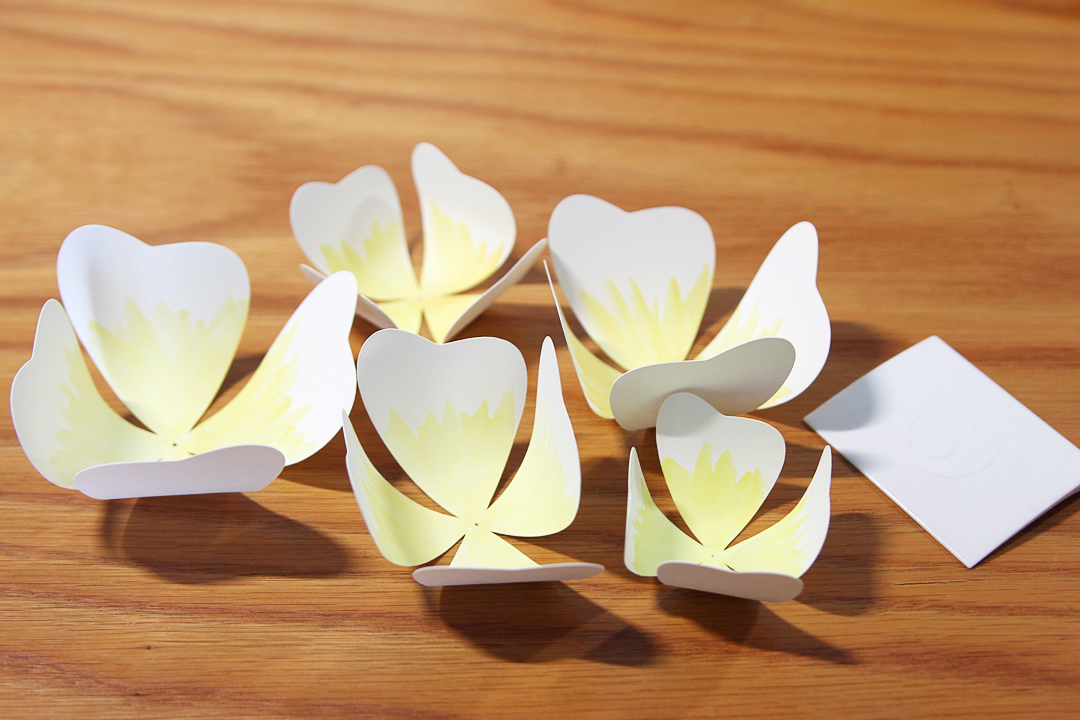
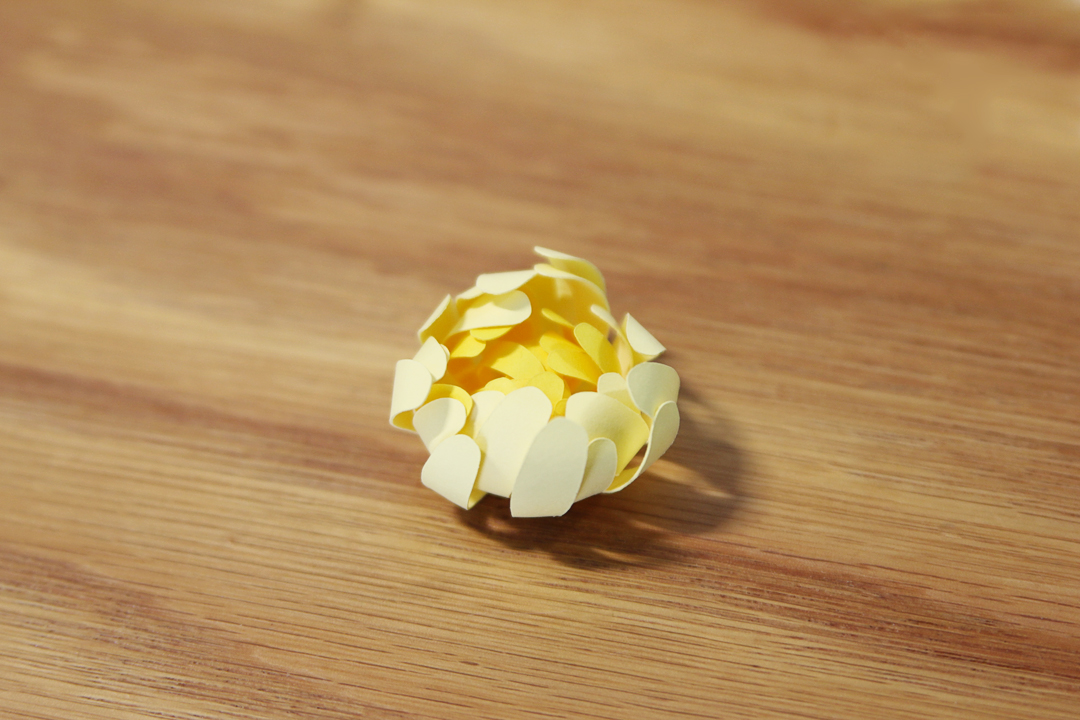
Alternate the tips and sides of each petal so some curl up and some curl down for variety. Curl the smallest set of white petals all upwards towards the center. You can add tighter curls by rolling the petal tips around the end of your spatula tool.
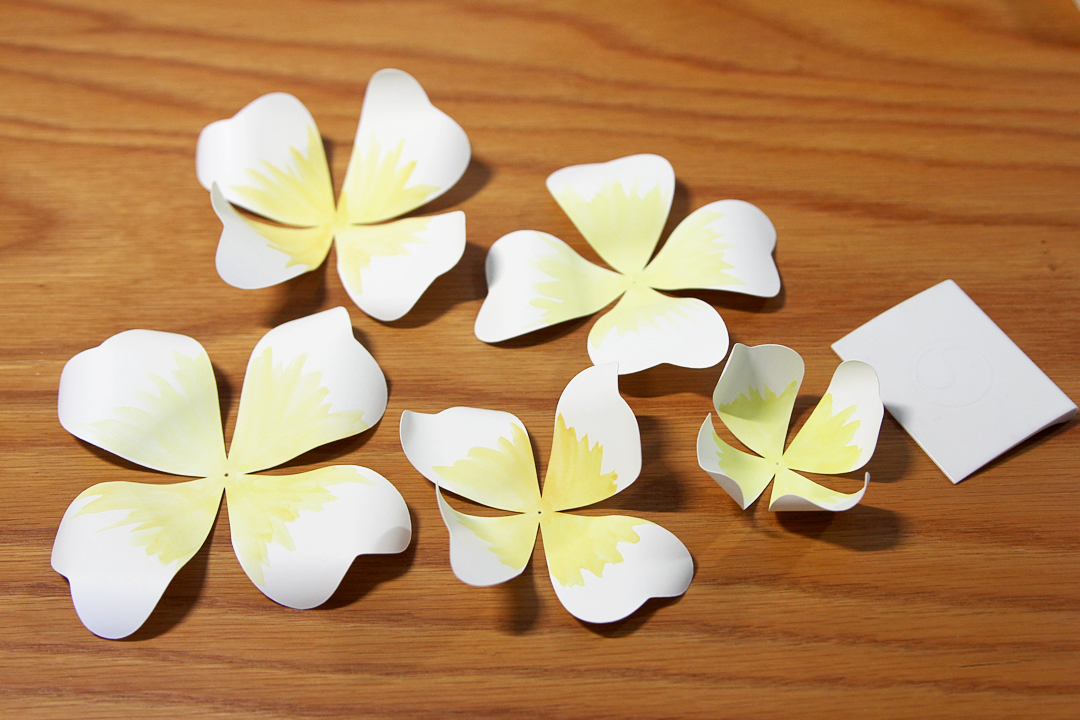
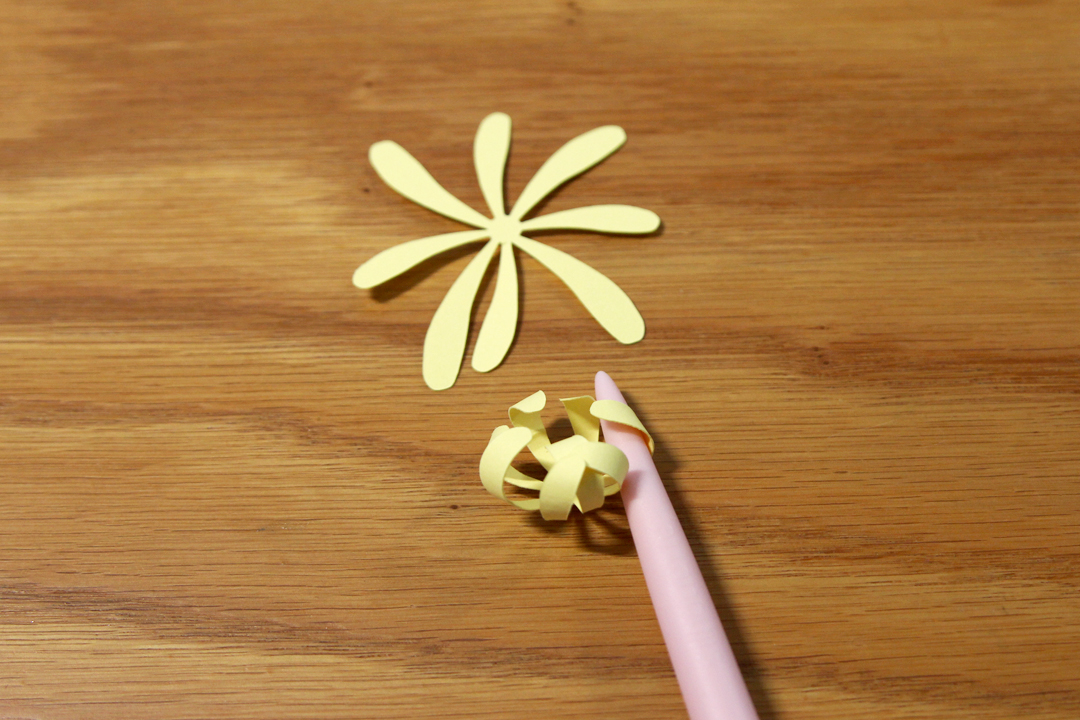
Use your spatula tool to curl each medium and small yellow petal so they all curve towards the center.
Step Three: Assemble Petals
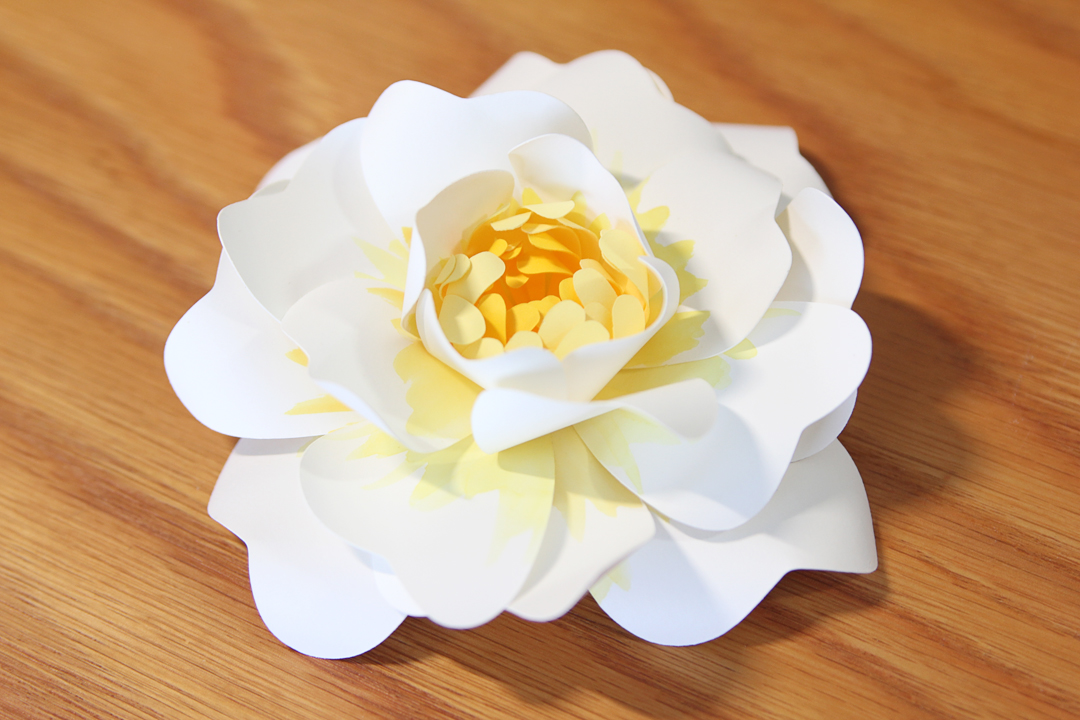
Poke a small brad through the pierced center of the large petals, working from the smallest petal set and adding the next larger set beneath it. If you’re not using a brad, use a small amount of hot glue to attach all of the petals.
Gently rotate the petals so no individual petals are exactly lined up with the petals below them in the next row.
Once you’re happy with the petals’ position, add a small dab of hot glue in one hidden spot at the base of each petal layer so they stay in place. Use hot glue to attach one layer at a time of the inner skinny petal sets, working from smallest in the center to the largest.
Once all the skinny center petal layers are glued to each other, attach the bundle to the center of the larger petals, hiding the brad.
Tip: For more coloring and shaping techniques with paper petals, watch this free class we did with Michael’s on a Framed 3D Paper Succulent.
Step Four: Attach Flower to Shadow Box
Hot glue the back of the finished flower to the center of the shadow box. You can see the slight difference in the version I painted with watercolors and the version I colored with PanPastel.
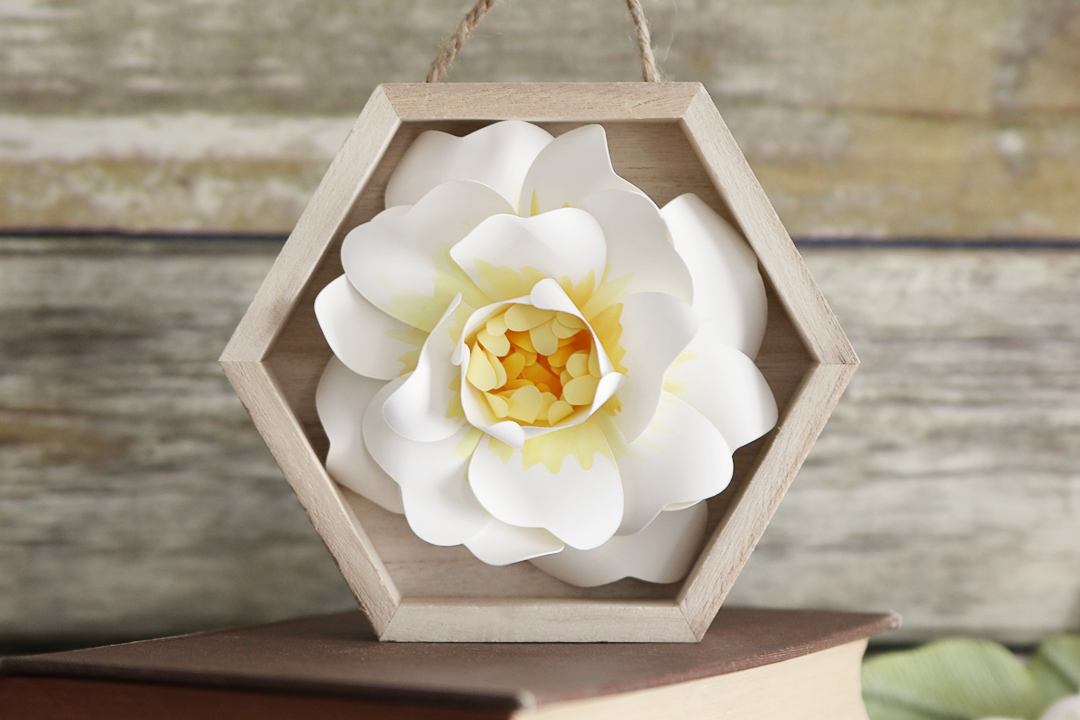
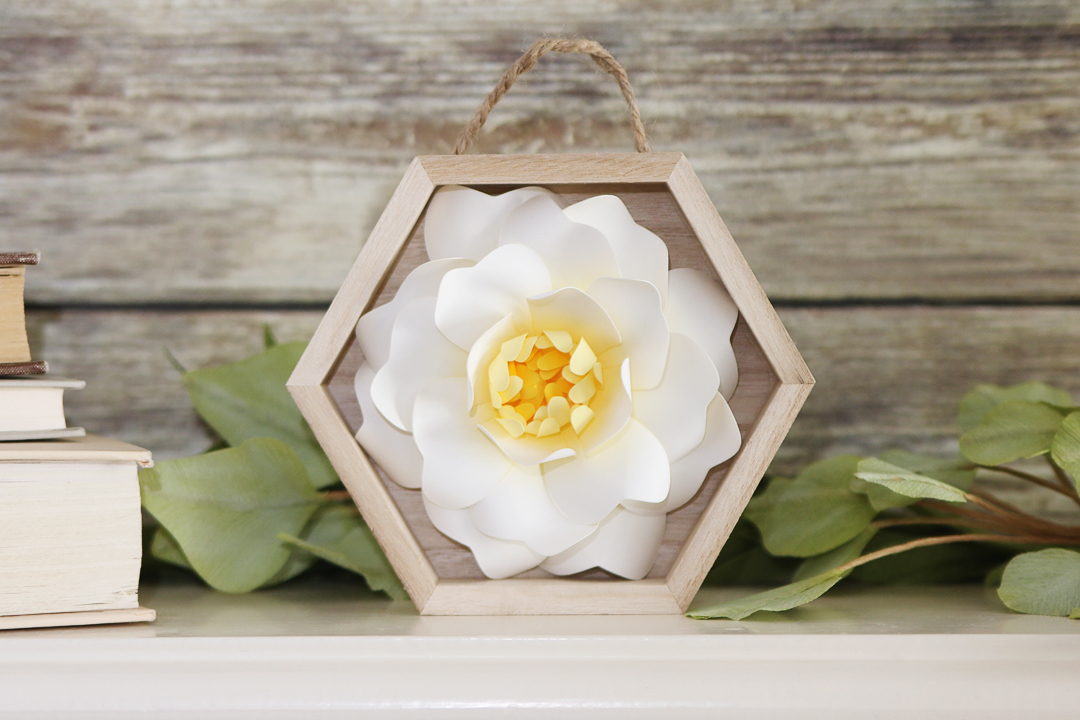
Feel free to change up the colors however you’d like. With that, your project is ready to be displayed and enjoyed!
 Free Class - Father's Day Apron Set
  Free Class - Custom Graduation Tumbler
Kelly Wayment
June 28, 2024
You can use it with vinyl as long as it is smooth and flat to allow the static charge to hold on to it. Rolled vinyl that wants to go back to its rolled shape will not necessarily work well, and it would need to be trimmed to fit the ES mat cutting area.
Kelly Wayment
June 28, 2024
Yes, you can use the heat pen while using the ES mat. 🙂
Yurii
March 2, 2024
Hello. May it be used with heat pen?
Thanks
Jerome
February 24, 2024
Hi, works this with the normal vinyl foils or only with printer papter etc?
Kelly Wayment
February 16, 2024
Once you’ve pushed the mat up against the rollers, just press the “Load” arrow button (bottom right on the display). Does a regular sticky mat load into the machine for you?
Michelle a goodall
January 24, 2024
Hello! I just got my new electrostatic mat and have watched every video i can find on it. However, what i can t find is why it wont feed into my cameo 5/ it slides right up the rollers but wont go any further. and yes- iam pushing the into button. help!