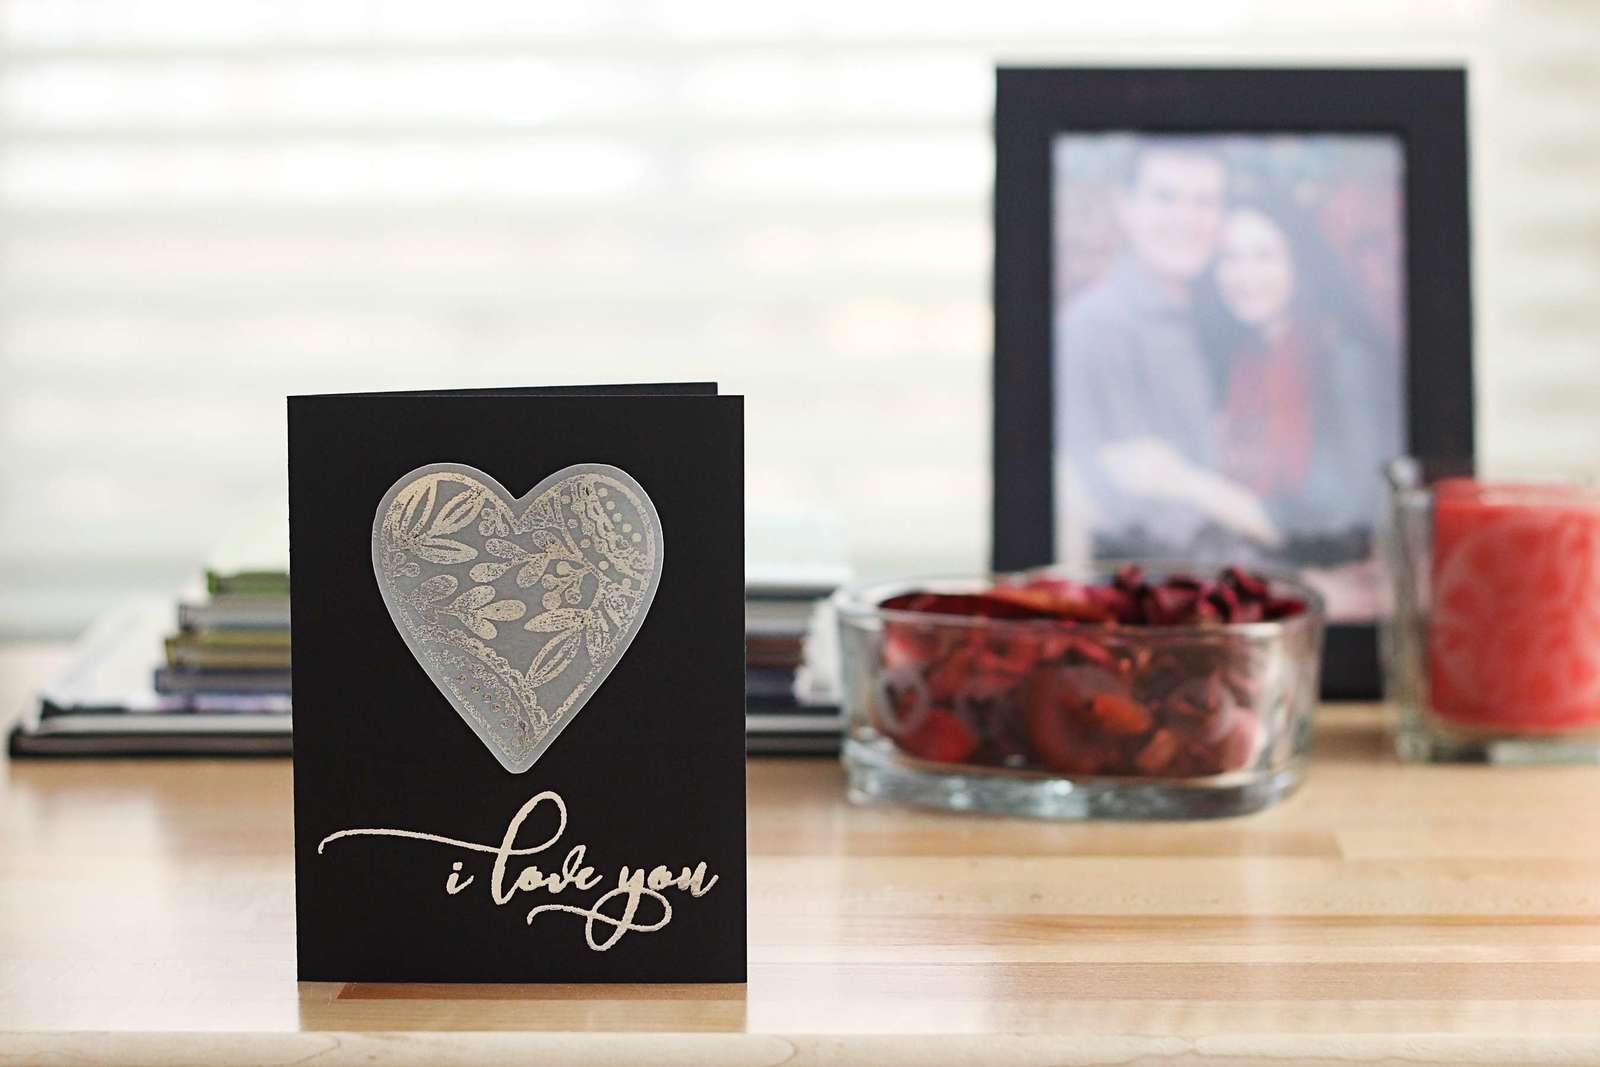
Hi, there! Kelly here to share a foiled card project with you. I love adding shiny foil to all kinds of surfaces, but today we’ll create a card with foil transfer sheets on cardstock and vellum.
Let’s get started!
Supplies Needed:
- Silhouette Curio™
- Silhouette Studio®
- Cutting Blade
- Foil Transfer Sheets
- Transfer Tape
- Vellum
- Fine Emboss Tool
- Cardstock
- Foam Adhesive
- Design ID #284429
- Design ID #148913
Step One: Setup
We’ll set this up with the assumption you’re using a half sheet of letter-sized cardstock as your card base. You can make adjustments based on your own project size.
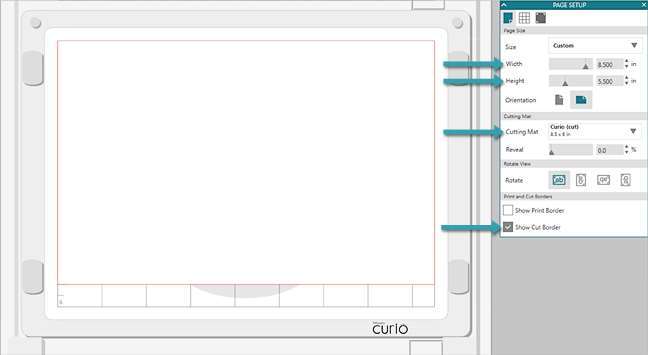
1. In the Page Setup panel:
- Set a custom page size as 8.5 inches as the width and 5.5 inches as the height
- Set the Cutting Mat choice to “Curio (cut) 8.5 x 6 in.”
- Check the box for “Show Cut Border”
2. With the standard Curio base, attach platforms [2+2+1+1] to total a value of 6. Your cutting mat with the grid should be the top platform.
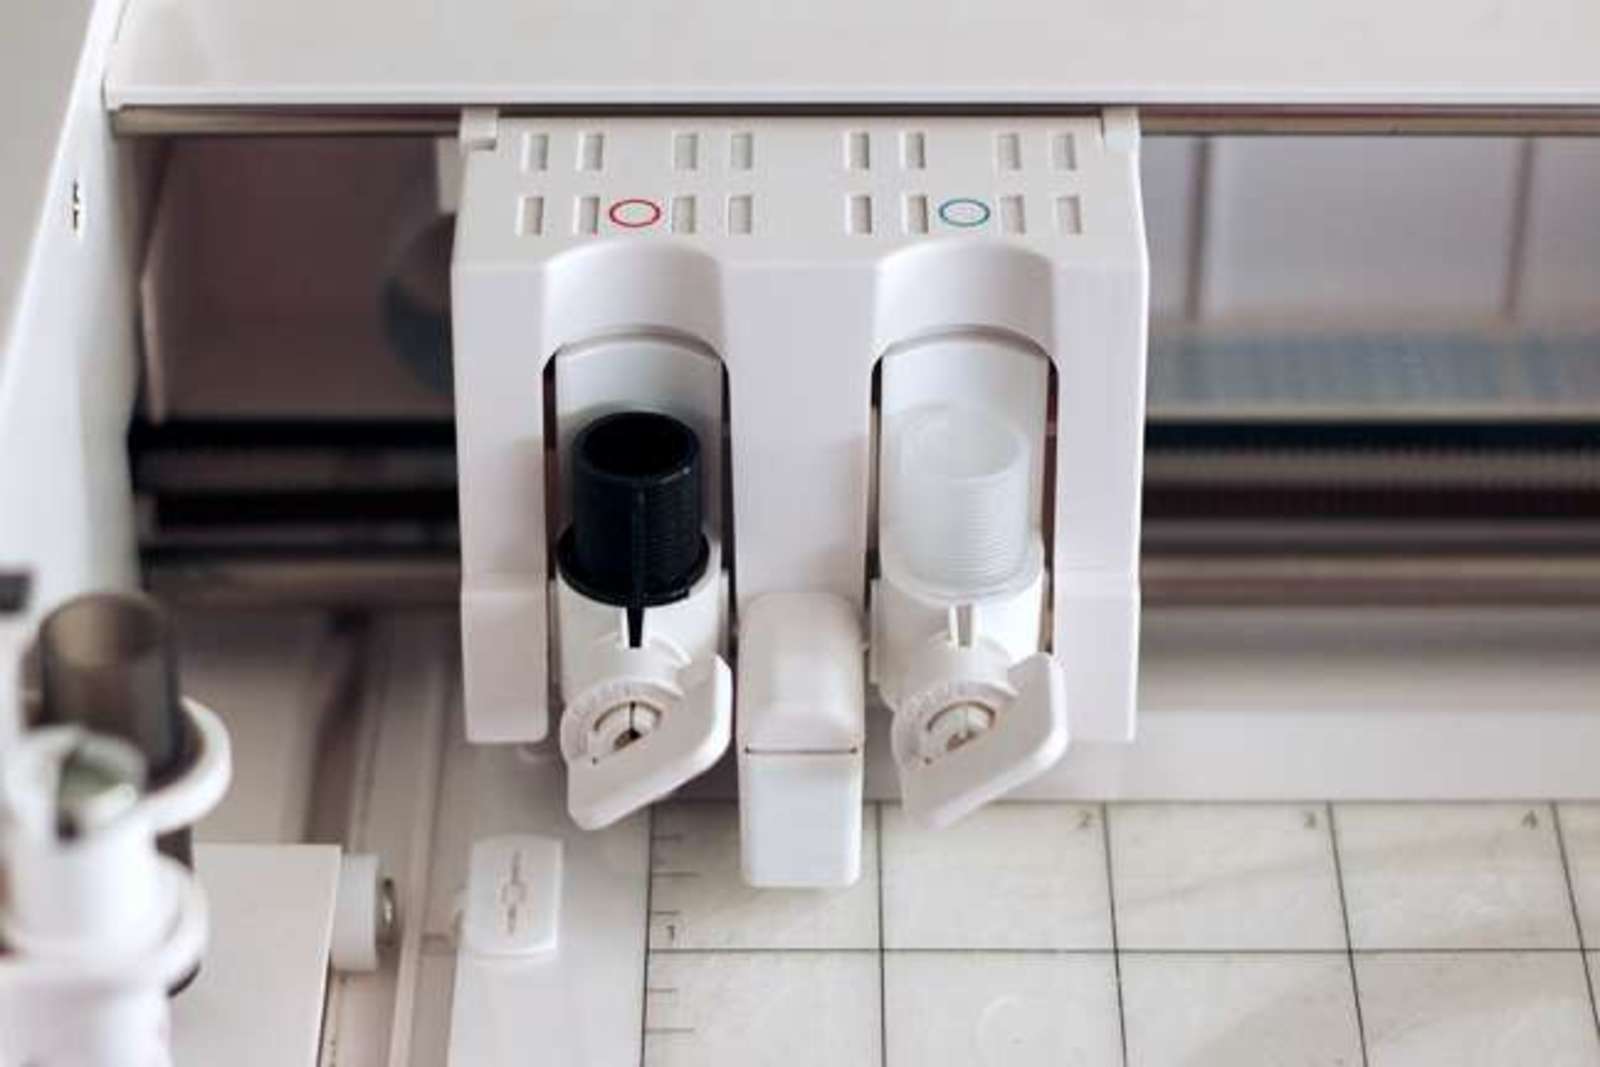
3. Set the ratchet blade to 3 and lock it into the left tool holder.
4. Lock the fine (white) embossing tool into the right tool holder.
Step Two: Create Designs
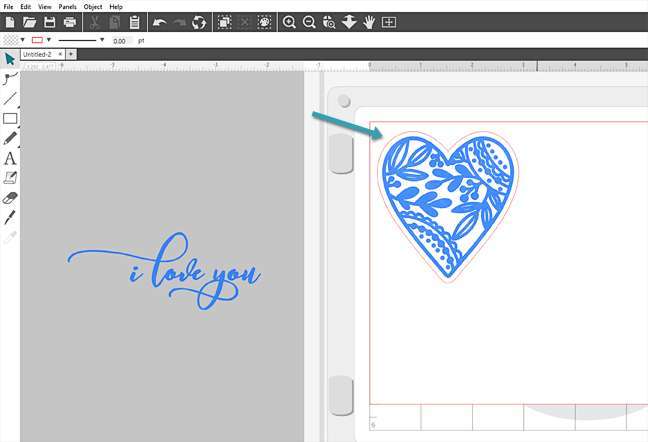
1. Open the “I Love You” design (Design ID #148913) and the Floral Heart Doodle (Design ID #284429) in Silhouette Studio®.
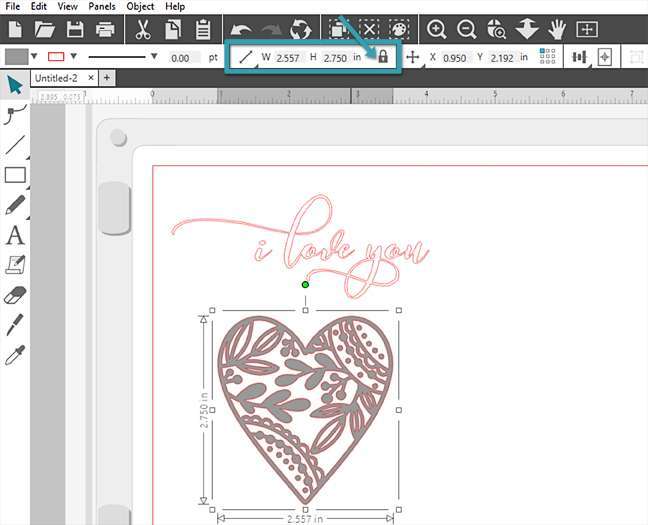
2. Resize “I Love You” to 3.75 inches wide (lock the ratio on the Scale tool in the Quick-access Toolbar).
3. Resize the Floral Heart Doodle to 2.75 inches high (lock the ratio on the Scale tool in the Quick-access Toolbar).
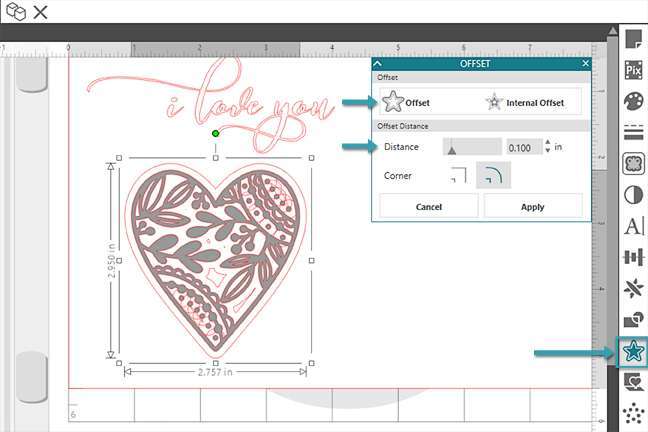
4. Select the heart and open the Offset Panel.
5. Choose Offset and adjust the Distance to 0.100 inches. Click Apply.
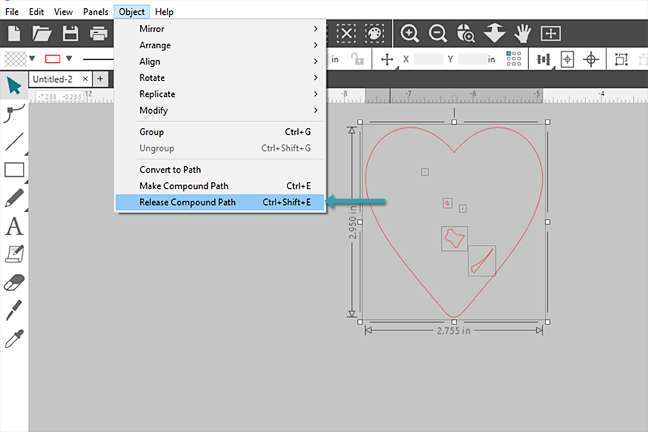
6. Drag the offset of the heart away from the original design and delete any stray pieces by releasing the compound path (Object > Release Compound Path) and then deleting the individual unwanted pieces.
7. Leave that offset to the side of the virtual mat for now.
8. Select the phrase and heart (not the offset) and open the Emboss Panel (available to Curio users).
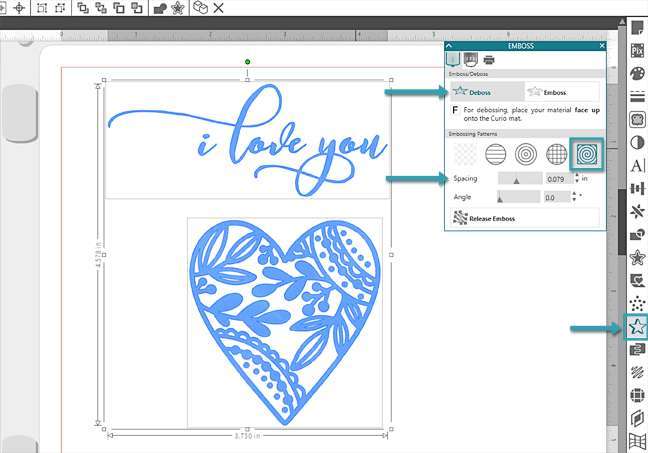
9. In the first tab of the Emboss Panel, choose:
- Deboss
- Spiral embossing pattern
- Adjust Spacing slider all the way to the left, or input 0.005 inches. This creates a very tight fill, which helps with the foil application.
Notice the designs have filled with blue, which is actually a series of blue lines. This will become important later when cutting by line color.
10. Move the filled heart over into its offset shape, select the heart and its offset, and choose Center from the Align options in the Quick-access Toolbar.
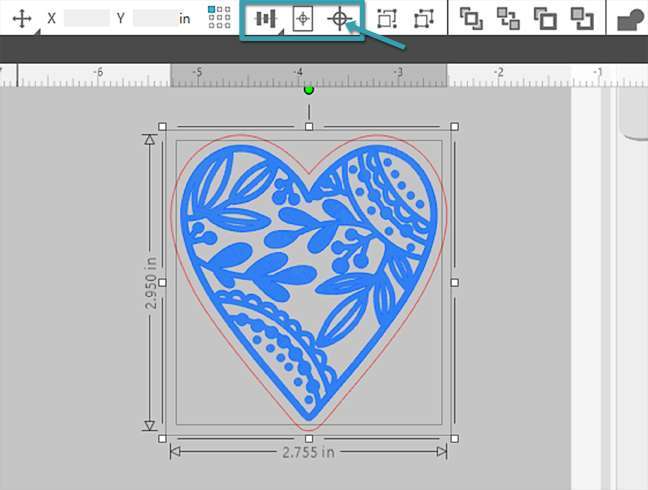
11. Group the heart and its offset together. The inner piece should be filled with blue lines and the offset line should be red.
Step Three: Add Foil to Card Base
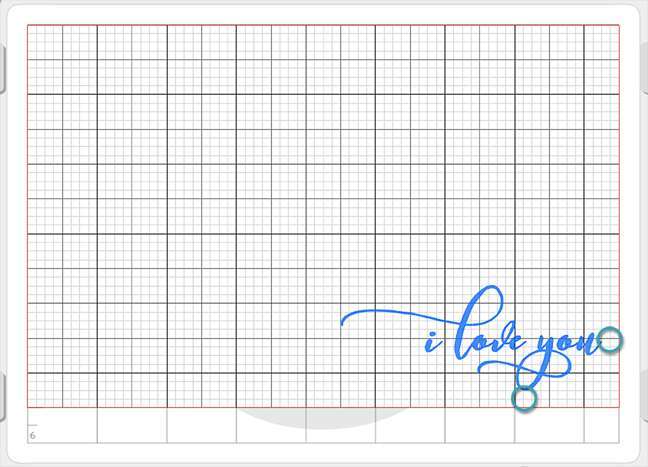
1. Position the “I Love You” phrase over toward the lower-right corner of the page. It should be about 0.25 inches from the right and bottom borders. This will make the design centered once we fold this paper to make the card base.
2. Turn on your Grid in the second tab of the Page Setup panel, if that helps.
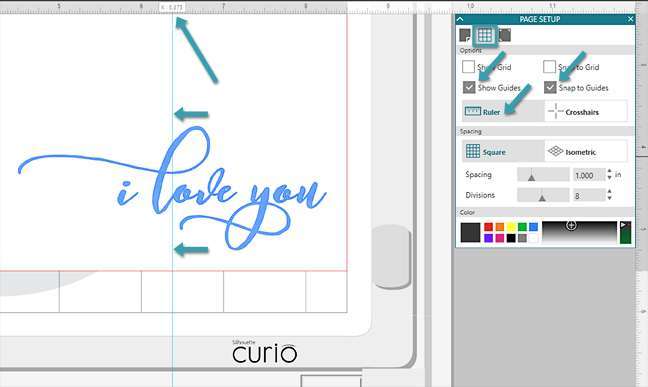
Pro Tip: Designer Edition (and higher) users can turn on the Rulers, Guides, and Snap to Guides features. If you have Designer Edition (or higher), make sure all of these features are checked and then click and drag a guideline from within the right-hand ruler over and position it at exactly X: 6.375 inches. This guideline gives you a snap point to horizontally center any object on the front side of a card base this size.
3. Go to the Send tab and choose Action by: Line.
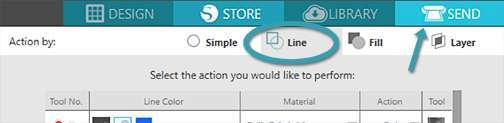
You should see a blue box and a red box, which represent line colors on your page.
4. Set the blue line as follows:
- Tool No. 2 (blue circle) because that’s where we’ve loaded the emboss tool for foiling.
- Check the box so it will cut/emboss
- Material = Foil Transfer Sheets
- Action = Emboss
- Tool = Fine Emboss Tool
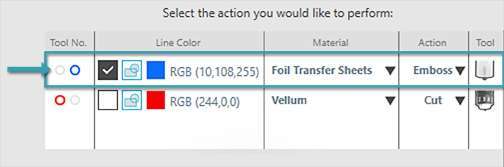
5. Uncheck the box for the red line. We are not cutting anything yet.
6. Place your half-sheet of cardstock on the cutting mat. Place a piece of foil large enough to cover the design on the lower right corner of the paper and press it down to temporarily stick it to the page. (Liner removed, tacky side against the paper, shiny side up.)
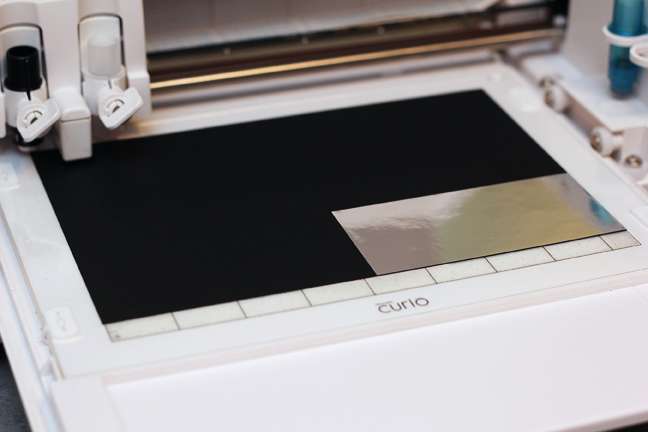
7. Load the base, then press Send in the software. The embossing tool will press the design against the foil to transfer it onto the cardstock.
8. When it’s finished, unload the base and pull the foil off the cardstock. Don’t worry if it doesn’t look clean and crisp yet.
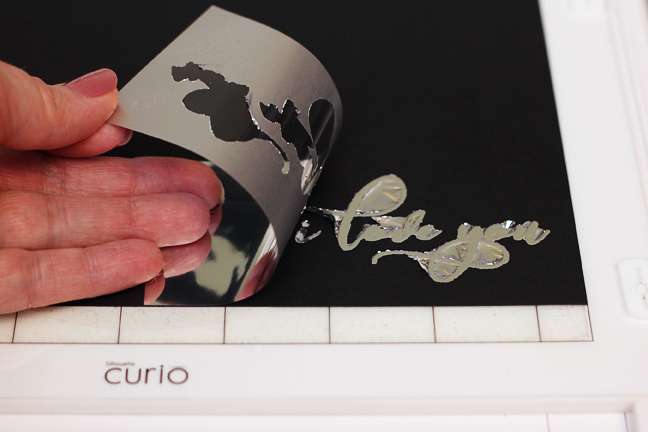
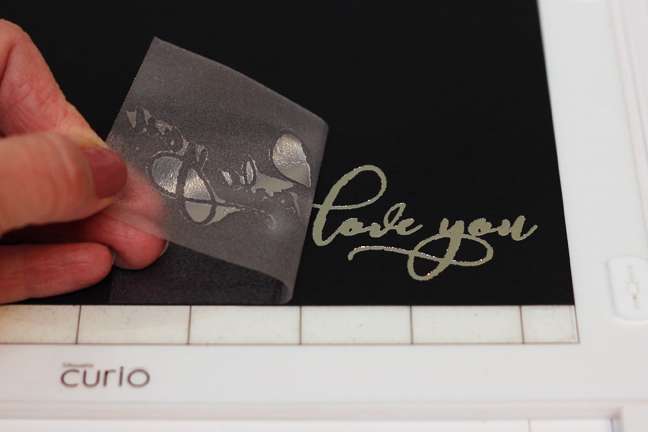
9. Press a piece of transfer tape or other tape against the foiled design and slowly peel it away to pull any excess foil from the design.
10. Remove the foiled cardstock from the cutting mat.
Step Four: Create Foiled Heart on Vellum
1. In the Design tab, move the phrase off the virtual mat.
2. Move the grouped heart and offset onto the upper right corner of the virtual mat.
3. Place a piece of vellum onto your cutting mat in the upper right corner. Mine is 3.5 inches by 3.5 inches, so the full design will fit on it.
4. Place a piece of transfer foil the same size on top of the vellum and press down so it sticks to the vellum.
5. Load the base, and go to the Send tab.
6. We want to add foil again, so leave the settings exactly the same so only the blue line action will cut/emboss.
7. Press Send when ready. The machine will use the emboss tool to press the heart design onto the vellum.
8. When it’s finished, do not unload the base, but do remove the foil sheet.
9. Uncheck the box for the blue line color in the software.
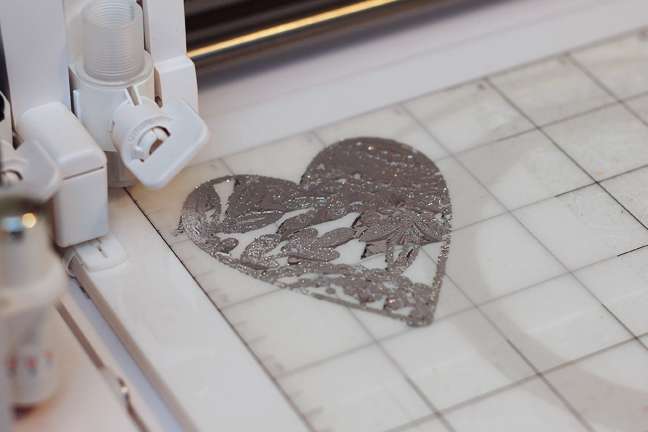
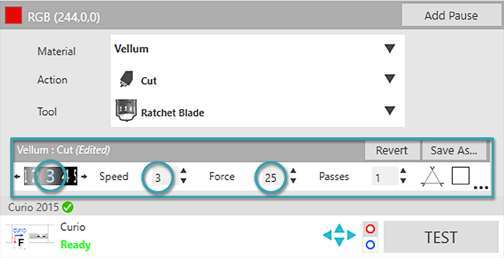
10. Check the box for the red line color and set it to cut vellum as follows:
- Tool No. 1 (red circle)
- Material = Vellum
- Action = Cut
- Tool = Ratchet blade

11. You can test the default settings on a scrap piece of vellum, but I’ve found better success cutting Silhouette brand vellum with Blade 3, Speed 1–3, Force 25. Platforms remain on 6. Adjust the settings on the screen as necessary.
12. With the base still loaded, press Send.
13. When finished, unload the base and use transfer tape to remove the excess foil just as before.
14. Carefully remove the vellum cutout and use tiny bits of foam adhesive hidden behind the foiled design to attach it to your folded card front.
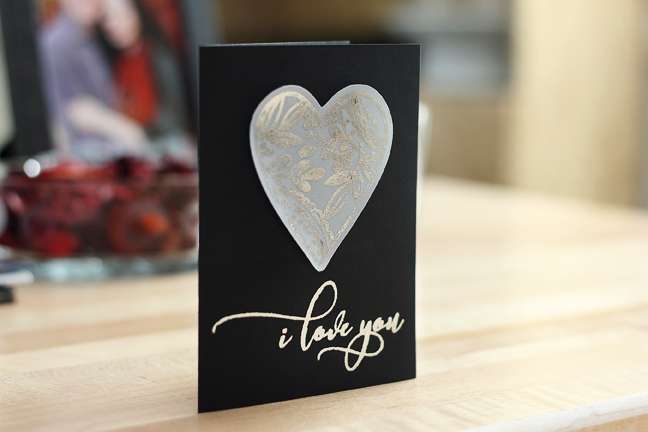
The very last thing you need to do is write something sincere and give this card to someone you love!
 Free Class - Father's Day Apron Set
  Free Class - Custom Graduation Tumbler