A lot of crafters work with heat transfer vinyl to create fantastic projects. It’s a material that’s simple to weed and easy to apply to different surfaces using a regular household iron. But have you ever layered heat transfer? It’s not as difficult as you might think!
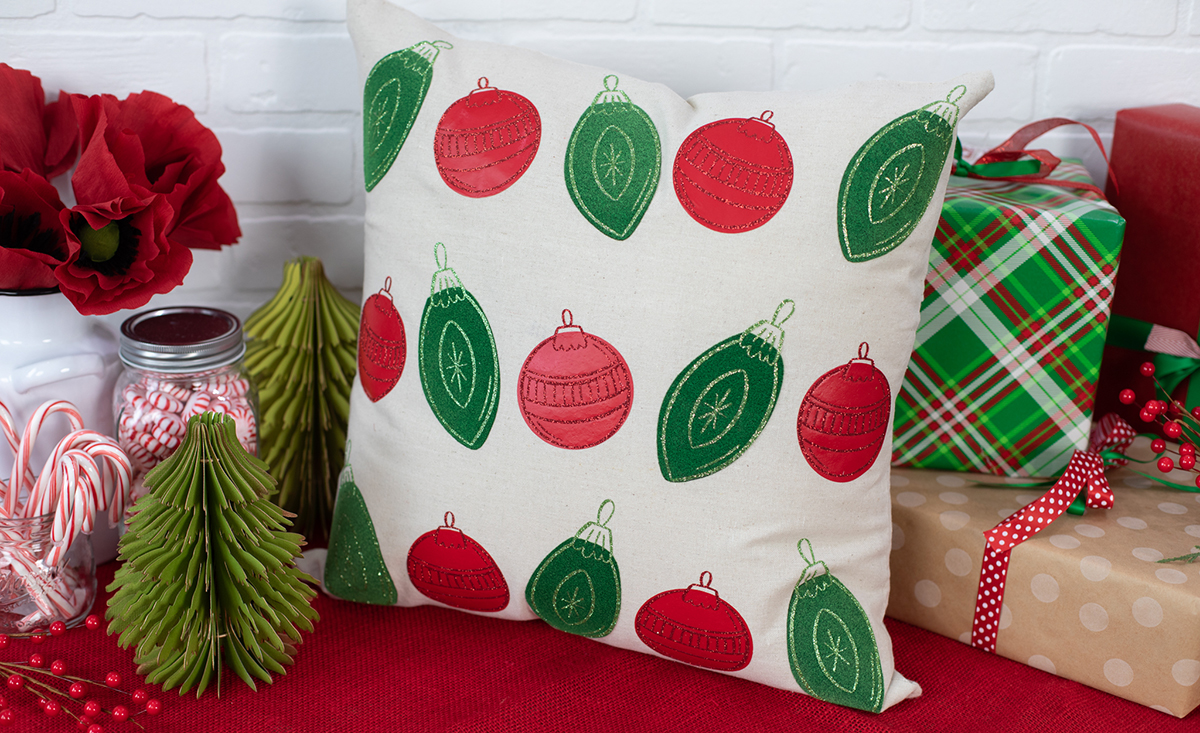
We’re using four kinds of heat transfer to create this Christmas throw pillow, but you can use the tips in this post to layer heat transfer in any project you’d like! We used two different colors and three different textures to add dimension to the different ornaments, and we love how it turned out. It also makes this pillow look super impressive while still being a beginner-friendly project. Ready to make your own? Let’s get crafting!
Supply List
- Silhouette Cameo® 4
- Silhouette Studio® – Basic Edition or higher
- Silhouette Cameo Cutting Mat – Standard Tack
- AutoBlade
- Heat transfer vinyl – we used green flocked, green glitter, red smooth, and red glitter heat transfer
- Blank pillow sham or throw pillow
- Household iron
- Dish towel or cheesecloth
- Hook
- Design ID #335603 by Lilium Pixel SVG
Step One: Design Pillow
After purchasing the Retro Christmas Ornaments design from the Silhouette Design Store, open Silhouette Studio and set up your document in the Page Setup Panel. We’re using the Cameo 4 for this project, so we’re using the following settings:
- Machine: Cameo
- Cutting Mat: Cameo
- Media Size: 12×12
We’re going to cut our heat transfer down to 12 x 12 in. and use a cutting mat for this project for a couple of reasons. First, we’re going to be cutting up our design after weeding it, so this will make cutting out our ornaments easier. We’re also using a cutting mat so this project is a little more beginner friendly. When you’re just starting out, it’s easier to expand your skills one step at a time!
Note: Intermediate crafters can use the matless cutting feature and add their heat transfer ornaments in four sections, but be sure to adjust your document settings if you’re going to cut without a mat!
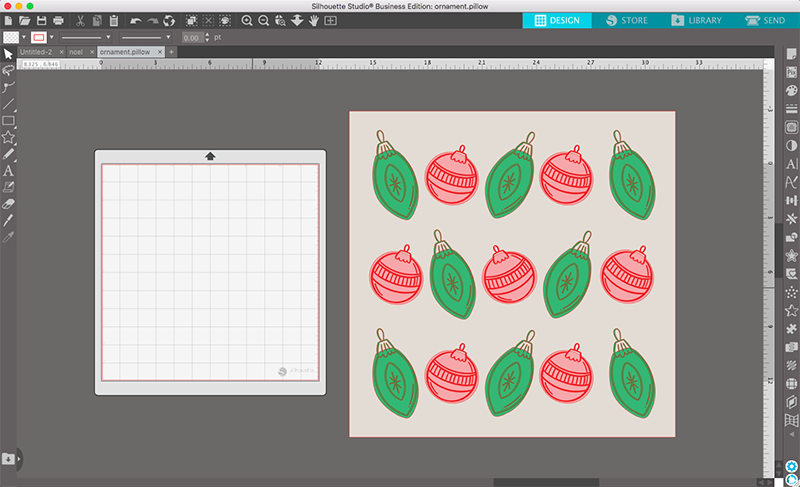
Next, go into your Library and open the ornament file by double-clicking the design. The two ornaments will open in your document with the outlines separated from the base. To design our pillow, we’re going to resize and recolor the ornaments, create a digital preview of our pillow, and duplicate & arrange the ornaments on our preview.
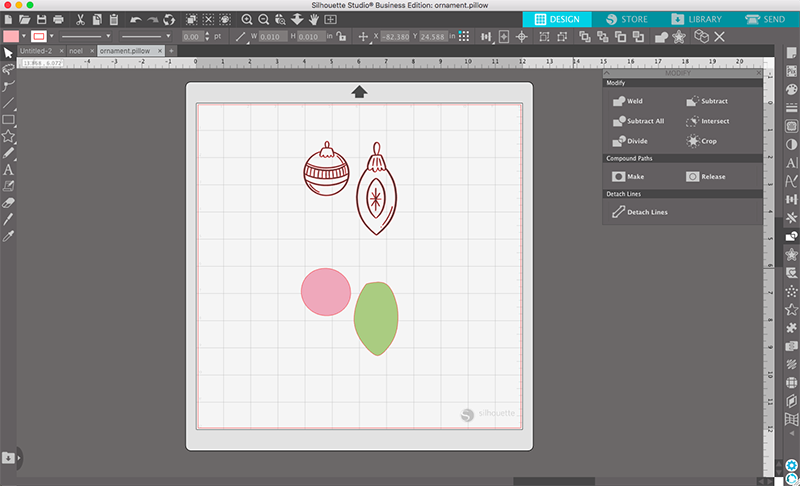
Let’s start by redesigning our ornaments. First, ungroup all of the pieces by selecting the design, right-clicking, and selecting Ungroup. Now we can recolor all of the pieces individually! Open the Fill Panel by clicking the paint palette icon on the right side of the screen. Then, select your ornament pieces and choose the color you want to use for them. We’re going to use the default colors in the Fill Panel, just because the colors you use in Silhouette Studio do not impact your final project—they’re just to help us visualize what the pillow will look like. We’re using different shades of red and green to indicate the different kinds of heat transfer we’ll be using for each piece.
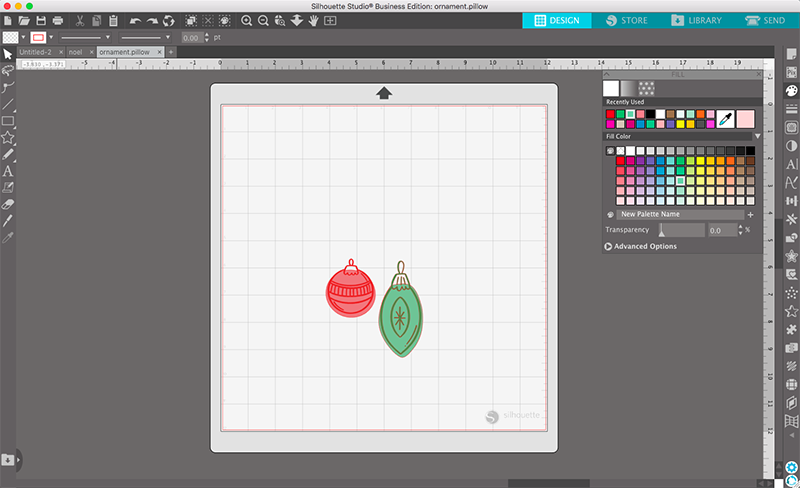
The next step is to layer the outlines on top of the ornament bases. This design is meant to be a little whimsical, so they won’t line up exactly. That’s okay! Use your creativity and decide how you want the ornaments to look. When you’re happy with your ornaments, temporarily group the outline and base together for each ornament so you can move both pieces at the same time when you’re designing the pillow.
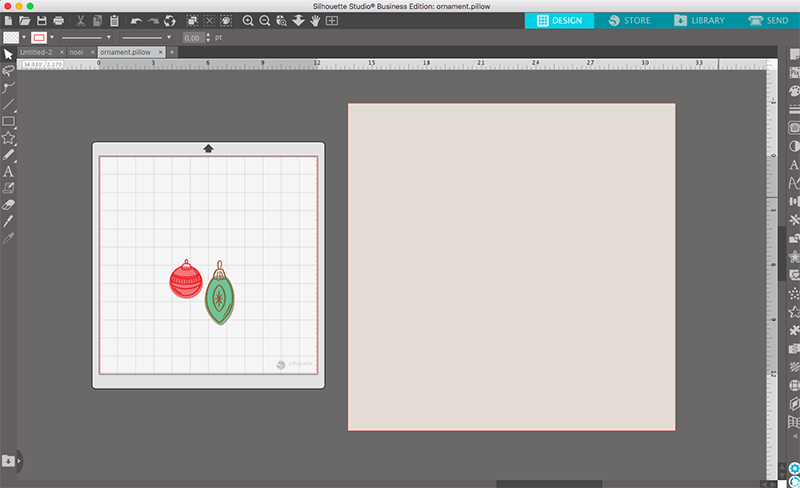
Now that our ornaments are ready, we can design the digital preview for our pillow. Measure your pillowcase and create a box of the same size, and recolor it using the Fill Panel if you’d like. We’re using a beige 18 x 18 in. sham. This is much bigger than the virtual cutting mat! We’re just using this to preview the final pillow, so it’s okay that the box is bigger than the cutting mat because we won’t actually be cutting out this piece.
With your digital pillow ready to decorate, begin duplicating and arranging the ornaments however you’d like. To copy each ornament, you can copy and paste the different pieces. Or, duplicate them by holding Alt (PC) or Option (Mac), clicking the design, and dragging away from it. Organic rows and columns are easy to put together if you’re not sure how you want to place yours. We’re okay with our rows not being perfectly spaced because we think it adds to the fun, retro design. If you want to make sure your ornaments are evenly spaced, you can use the Alignment tools in the Quick Access Toolbar at the top of the page.
Spend some time playing with your ornament pieces until you’re happy with the design, rotating and resizing them to get the look you want. We need to make a few more changes in Silhouette Studio before we cut out our ornaments, so consider saving your document now and making a copy of it so you can reference your final design when you’re assembling your pillow.
Step Two: Cut Ornaments
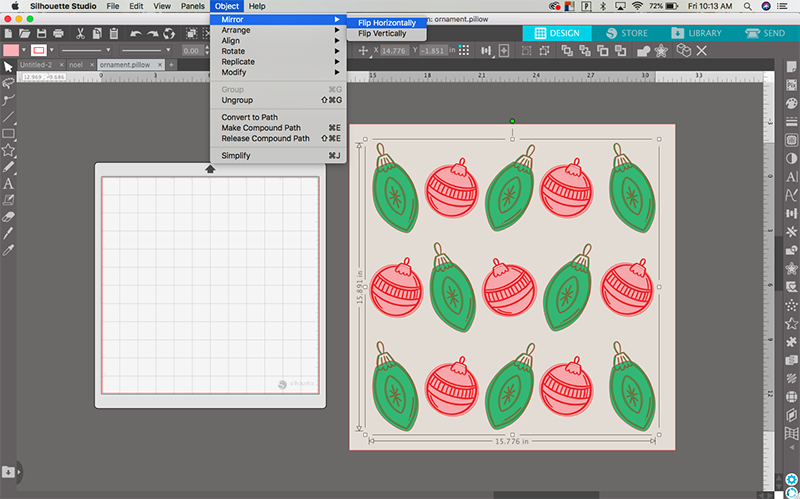
Before we cut our ornaments out of heat transfer, we need to mirror the design. When you work with heat transfer, you cut the design from the back side of the material. If you don’t mirror the design in Silhouette Studio, the final design will be backwards when you iron it onto your pillow! This is especially important if your design includes any text. To mirror your design, select all of the pieces and go to Object > Mirror > Flip Horizontally at the top of the screen.
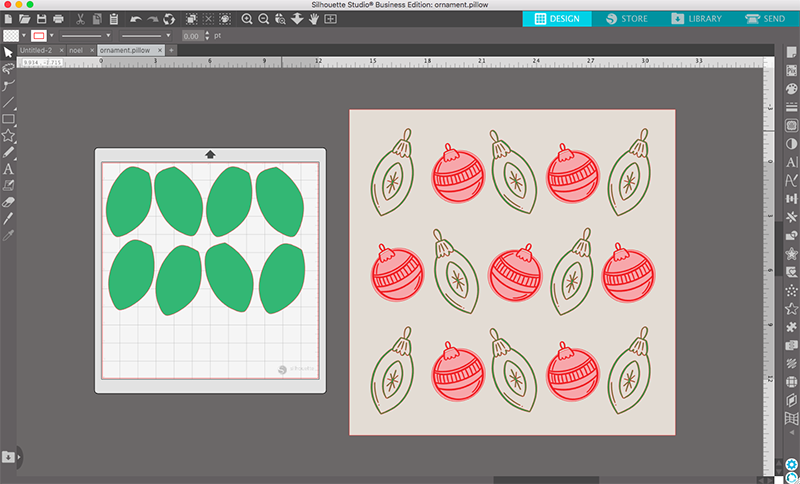
We’re ready to move pieces off of our digital preview and onto the virtual cutting mat. We grouped together the outlines and ornament bases so we could design our pillow easily, so be sure to ungroup all of the pieces so you don’t cut anything out that you don’t want. We’re going to start with the green background pieces, so select all of them and arrange them on your cutting mat so they fit tightly together. Because we’re going to be ironing on each piece individually, it’s okay if your ornaments aren’t spaced in the same way that they are in your digital preview.
It’s time to load our machine and send our first cut! Cut out a 12 x 12 in. piece of green flocked heat transfer and place it onto your cutting mat with the shiny side facing down. Then, load your cutting mat into the machine.
Next, go to the Send tab and select the type of heat transfer you’re cutting out. We’re using the default cut settings for all of our different materials, but perform a test cut to make sure that the settings are right for your blade and heat transfer. When you’re ready, click the Send button at the bottom of the screen. The AutoBlade will adjust automatically and then begin cutting out your ornaments. After it’s finished, peel away a small piece of your design to make sure that the blade cut all of the way through. If it hasn’t, send the cut job again without unloading your mat.
Once your green background pieces are complete, remove the ornaments and the excess heat transfer from the cutting mat and repeat the process with the other three design elements. We’re using green glitter heat transfer for the green ornament outlines, smooth red for the red ornament bases, and glitter red for the red ornament outlines. Be sure to adjust your material settings for each of your different heat transfer textures!
Step Three: Prepare Pieces
When you’re finished cutting out all of your design elements, use your hook tool to remove the pieces you don’t want. This process is called weeding. These ornaments are very beginner-friendly when it comes to weeding because none of the pieces are too small. Be sure to work slowly and use a sharp angle to remove the pieces cleanly. You may want to have a lint roller nearby to collect your excess pieces on so they don’t stick to your clothes or hands.
Now, cut the clear lining to separate all of your ornaments into individual pieces. This will make layering our pieces so much easier! Layering heat transfer can be intimidating if you’re layering large sections all at once and trying to line them up. When we place one piece at a time, layering all of the pieces is simple and easy. When you’re finished cutting, you should have four piles of your different design elements.
Step Four: Prepare Pillow
This step may seem insignificant, but it is very important! Before you add any heat transfer to your pillow case, iron out any wrinkles or creases. It’s important to apply your heat transfer to a flat, smooth surface. If you iron your pieces onto a wrinkle in the fabric, your design will be wrinkled, too!
Step Five: Iron On Design
We’re ready to apply our first layer of pieces to our pillow. Start by placing the middle row of ornaments onto the pillow with the shiny side facing up. Be sure to reference your original pillow design so you’re arranging your pieces correctly!
The temperature you need to set your iron to for your pieces to adhere to your pillow properly depends on your iron. We recommend starting with a medium-low temperature and increasing it if necessary. We also suggest using a thin dish towel or cheesecloth to prevent the material from melting. We’re using the cotton setting on our iron, but experiment with your settings and use what works best for you.
Place your cloth over your first row of designs and press down firmly with your iron. Hold your iron in place for about 10 seconds, then remove the cloth and allow the pieces to cool. Then, check to see if your pieces are attached to the pillow by peeling up a small corner of the heat transfer. If you’re able to peel it away from the pillow, increase your iron settings and try again. When the heat transfer is completely cool and adhered properly, peel off the protective plastic layer.
Repeat this process with the remaining rows of background pieces, then add the detailed designs on top. Like we mentioned before, this design is meant to be whimsical and fun. So don’t worry too much about the position of your pieces! Have fun placing your ornaments and make this pillow your own.
With that, your pillow is finished! We hope that these tips and tricks made layering your heat transfer a breeze. This is the perfect pillow to brighten any holiday space, and it was a lot of fun to make. Be sure to check out our other blog posts and our social media accounts for more festive project ideas!
 Free Class - Father's Day Apron Set
  Free Class - Custom Graduation Tumbler
Naszenaturalne
September 2, 2025
Really love your style
Kelly Wayment
June 28, 2024
You can use it with vinyl as long as it is smooth and flat to allow the static charge to hold on to it. Rolled vinyl that wants to go back to its rolled shape will not necessarily work well, and it would need to be trimmed to fit the ES mat cutting area.
Kelly Wayment
June 28, 2024
Yes, you can use the heat pen while using the ES mat. 🙂
Yurii
March 2, 2024
Hello. May it be used with heat pen?
Thanks
Jerome
February 24, 2024
Hi, works this with the normal vinyl foils or only with printer papter etc?
Kelly Wayment
February 16, 2024
Once you’ve pushed the mat up against the rollers, just press the “Load” arrow button (bottom right on the display). Does a regular sticky mat load into the machine for you?