
We are happy and excited to be celebrating Memorial Day a week from today! No matter how you are celebrating next weekend, it’s time to break out the red, white and blue decor. This cake topper is very patriotic and is a great way to remember and honor fallen soldiers and loved ones. This project is perfect for beginners. When the simple, repeated shapes come together, the final project is stunning. Let’s get started!
Supplies List:
- Silhouette Cameo or Silhouette Portrait machine
- Silhouette Studio Designer Edition+
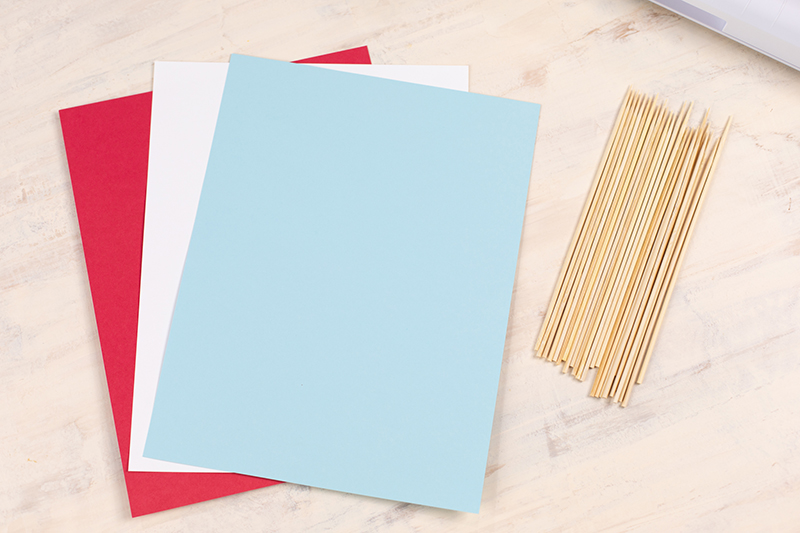
- Red, white and blue cardstock paper
- Bamboo skewers
- 3D adhesive dots
- Tape
- Cake of choice
- Design ID #61255 (if you aren’t using the flexishape star)
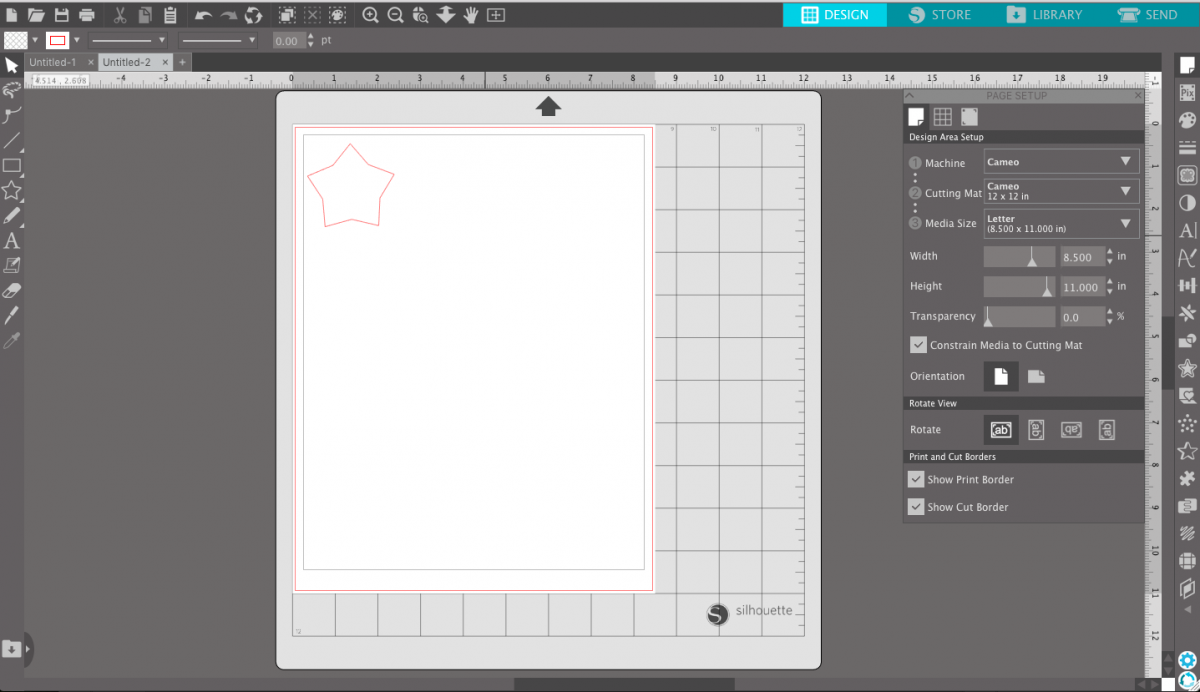
Step 1: Arranging the Stars in Silhouette Studio
After opening Silhouette Studio, you are ready to get started! If you are using the Designer+ edition of the software, you can use the star flexishape like we did! If you are using the basic edition of the software, you can purchase an upgrade here or you can purchase this star cut file from the design store. Either way, place a single star on your artboard. Your screen should look like the photo below.
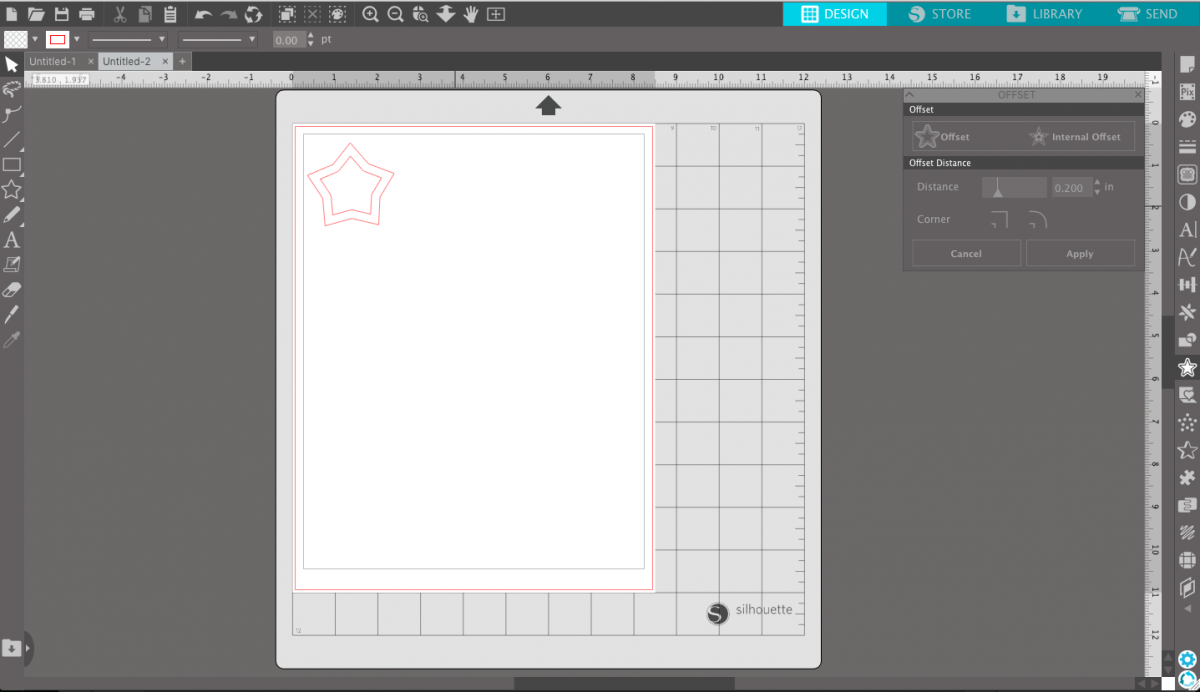
Step 2: Creating an Internal Offset
An internal offset allows you to simply create a scaled down version of your shape that fits perfectly inside the original shape. The internal offset tool is found on the tool bar on the right. It is towards the middle of the tool bar and it looks like a star with a smaller star in the middle of it. Once you have clicked on this tool, select your star shape. After your shape is selected, click “internal offset”. We made our offset .200′ in. Your screen should look like the image below.
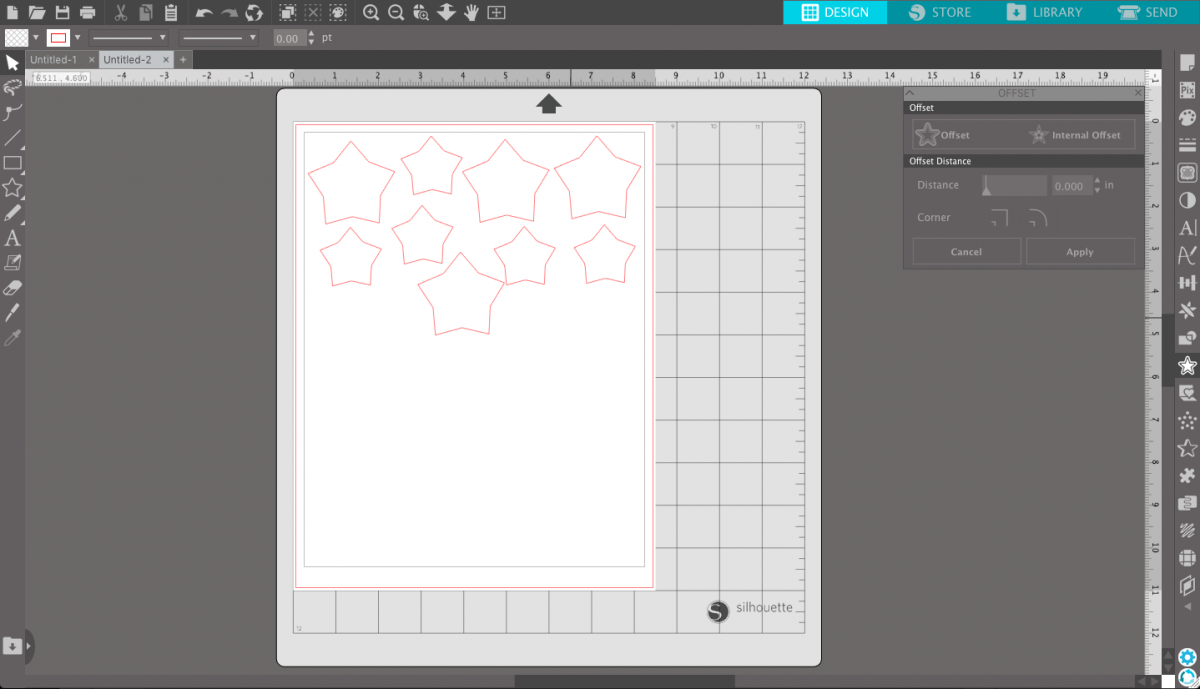
Step 3: Duplicating the Shapes
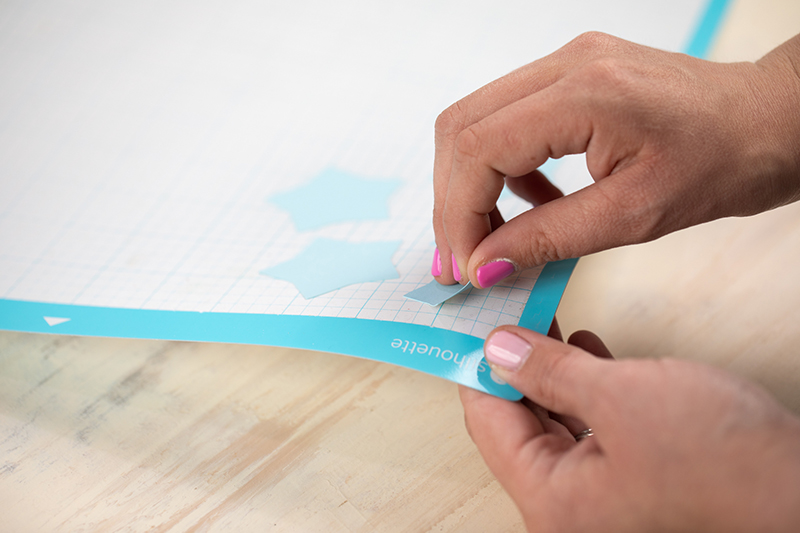
This step is very simple. You just need to duplicate these two shapes. You can do this by holding down the alt key and dragging or doing a simple copy and paste action by right clicking. Make sure you separate the shapes so that they are not cutting together. See an example image below. We cut out half a sheet of paper of each color. Feel free to fill the entire page if your cake is large! Cut a variety of large and small shapes.
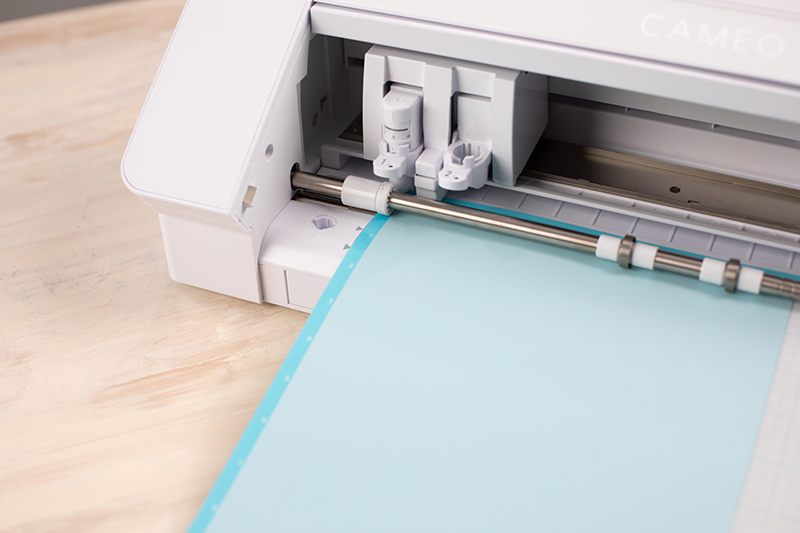
Step 4: Cutting
Now it’s time to use your Silhouette machine! You are welcome to use the Cameo or the Portrait machines. Both of them work great for this project! We chose to use the Cameo 4. Once you have loaded your paper, you will go to the send panel in the upper right hand corner of Silhouette Studio. Select “Cardstock, Textured – Heavy (80 lb)” as your material. After selecting your setting, press “send” at the bottom of the panel. Carefully remove the stars from your mat and repeat this process with the two other colors of paper.
Step 5: Assembling the Stars
Once you have cut all of your stars, use adhesive dots to create a few accent stars. Take one color of a large star and place another colored small star in the middle using an adhesive dot. If you don’t have adhesive dots, you can use glue to double sided tape! We made three accent stars for our cake. Take all the stars and tape a bamboo skewer to the backside of them.
Step 6: Place Star Skewers on Cake
This is the fun part! Now that all of your skewers are ready to go, you can place them into your cake. There is no right or wrong way to do it. We recommend spreading out the stars that are the same color/size and mixing them all together.


Now you’re done! Wasn’t that so easy? Take this cake to your neighborhood BBQ or family dinner for Memorial Day or the 4th of July! We think the project turned out stunning… and the cake was yummy too! Have a happy Memorial Day!

 Free Class - Stenciled Lotus Card
  Free Class - Crepe Paper Crocuses