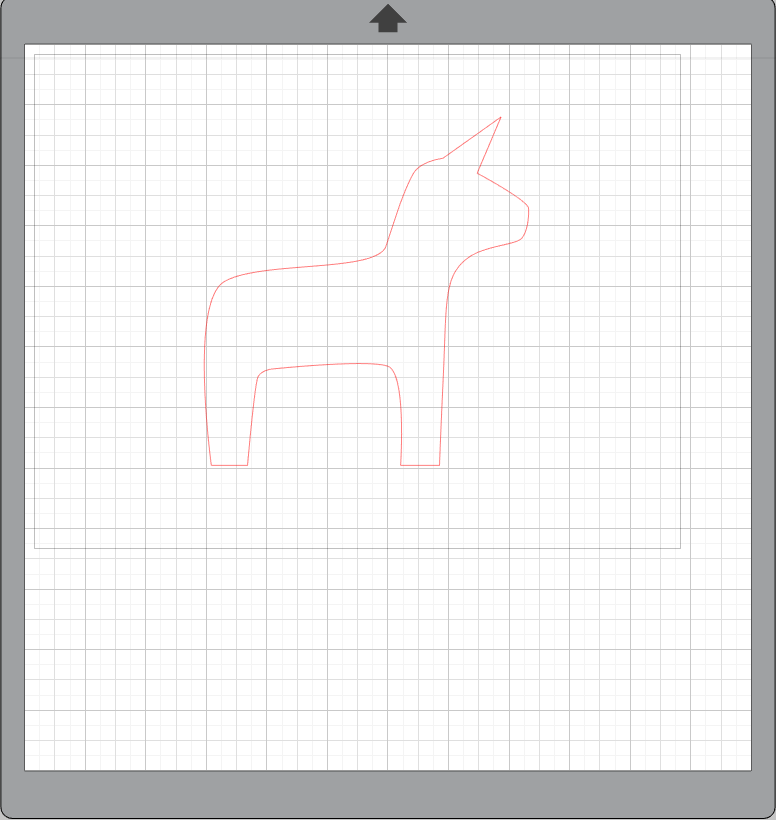
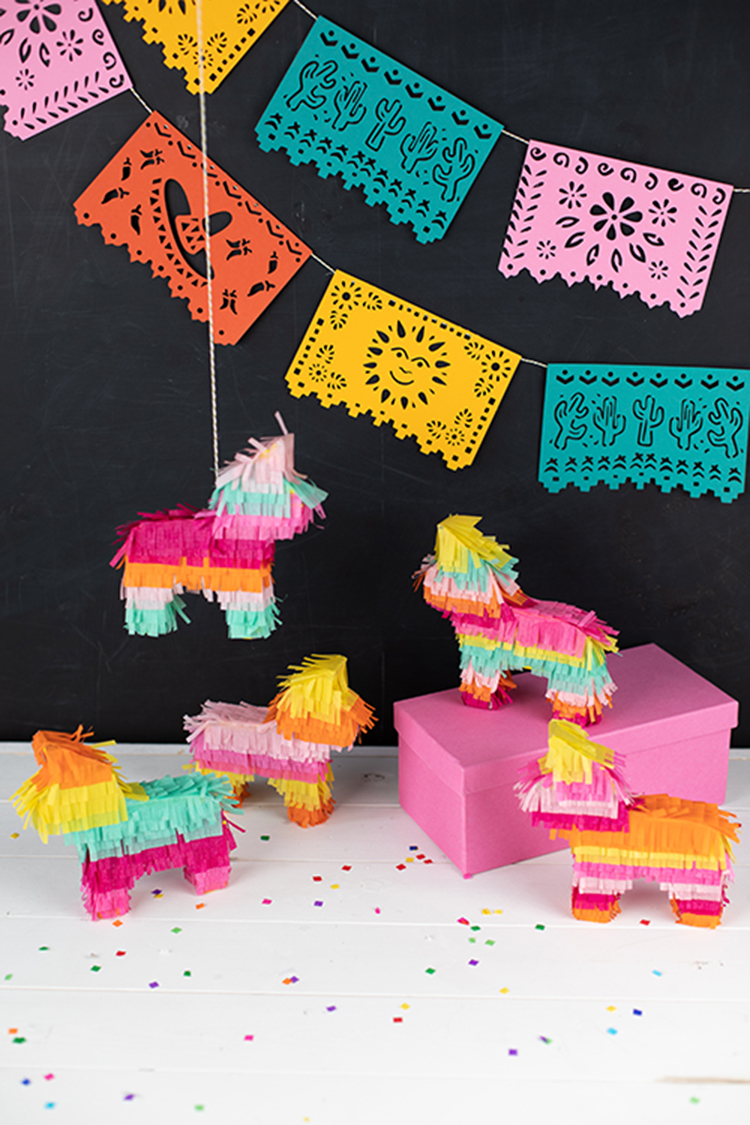
Cinco de Mayo is coming up, so it’s the perfect excuse to celebrate with a
pinata! Better yet, mini chipboard pinatas! These would make perfect party favors or place cards in addition to decorations. Line them down the table, hang them up, or fill them with candy for guests!
Supplies Needed:
- Silhouette CAMEO®
- Silhouette Cutting Mat
- Silhouette Cutting Blade
- Chipboard
- Tissue Paper
- Scissors
- Tape
- Glue
- Design ID# 59646
Step One: Preparing the Design
1. Open Design ID# 59646 in Silhouette Studio®. Right-click on the image and select “Ungroup.”

2. Delete all the additional design elements besides the full pinata shape.
3. Select the pinata shape, click on the Offset panel, and select Offset to create a border around the shape.
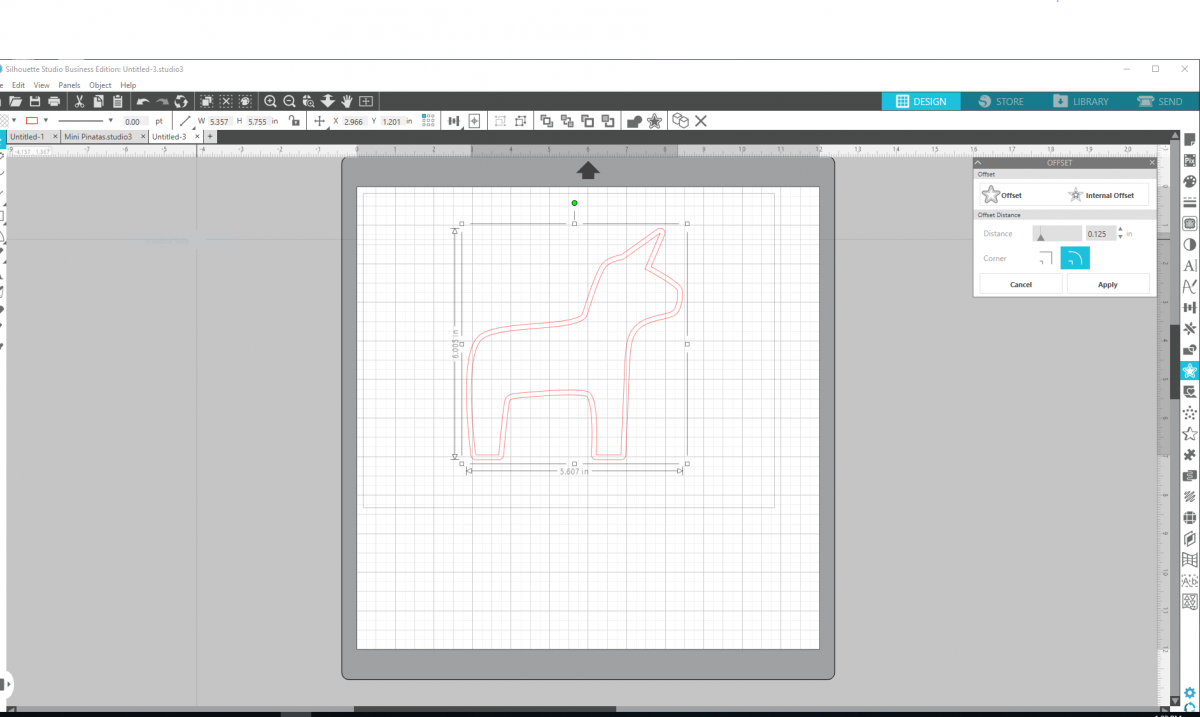
4. Delete the inner shape and duplicate the outer shape. This will create the front and back sides of your pinata.
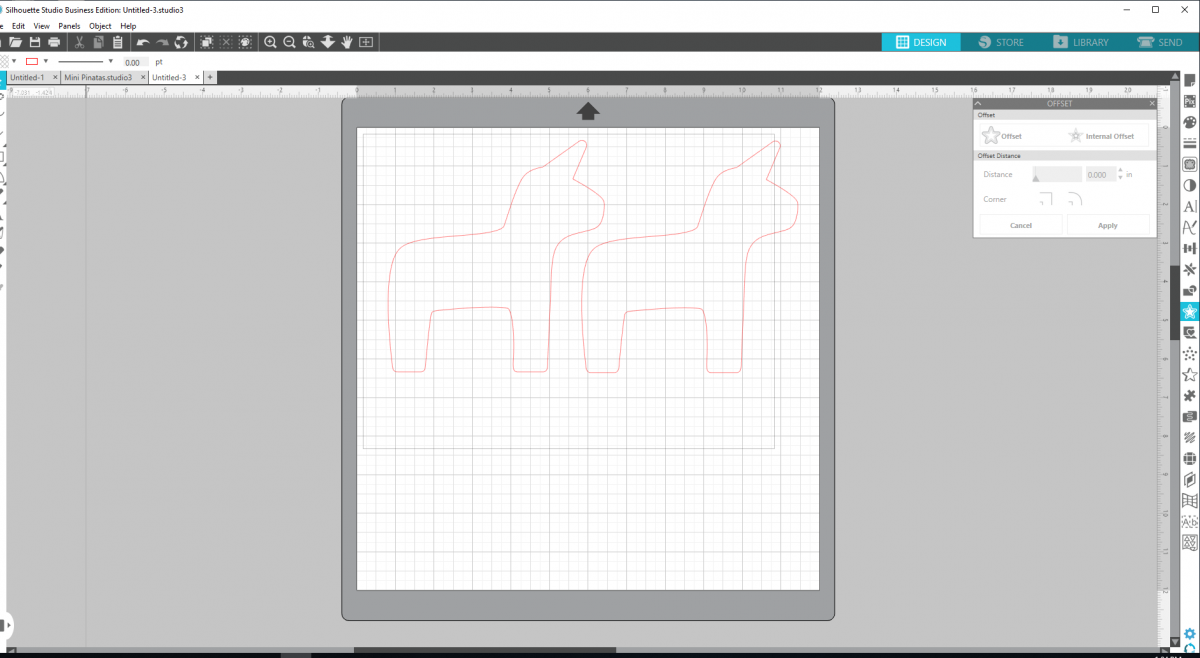
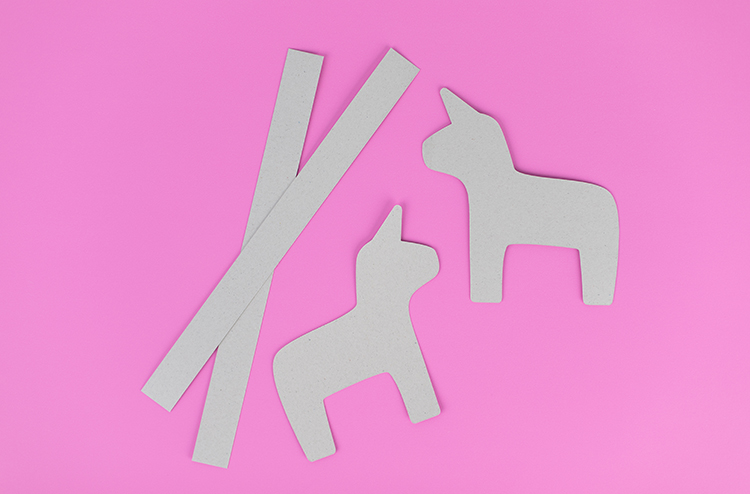
5. Using the shape tool, create two 1-inch thick by 11.75-inch wide rectangles. These will be the strips you use to surround your pinata.
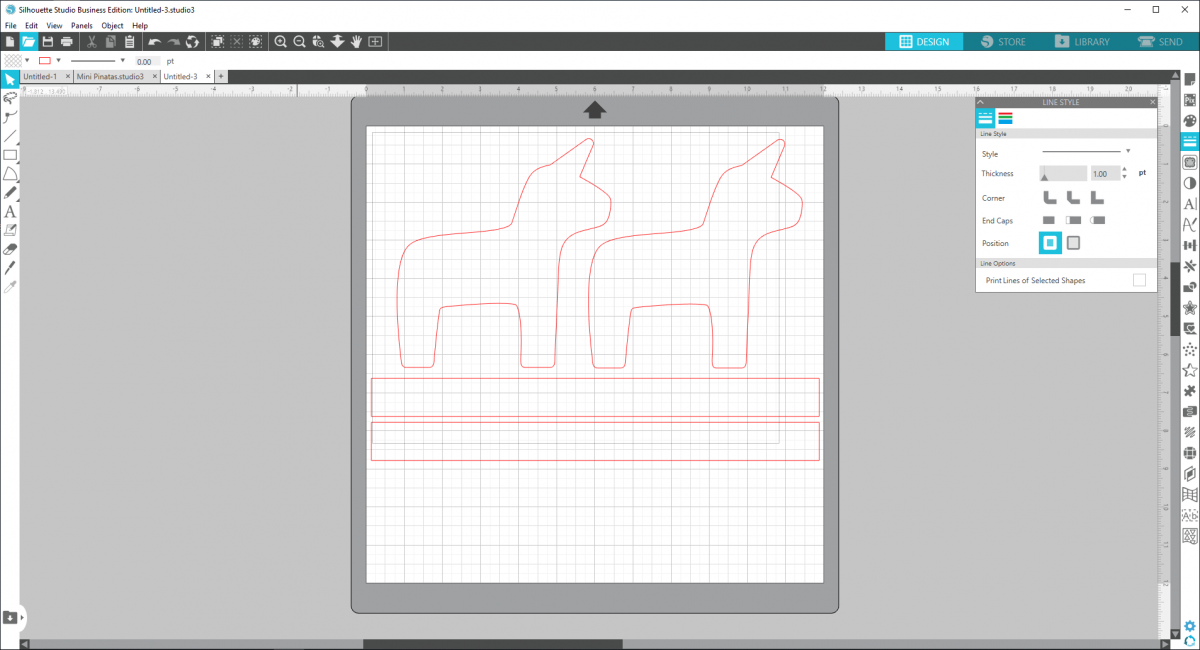
6. Load your machine with a piece of chipboard and send your design to your machine to cut. Make sure to adjust your cut settings as necessary.
Step Two: Assembling Your Pinata
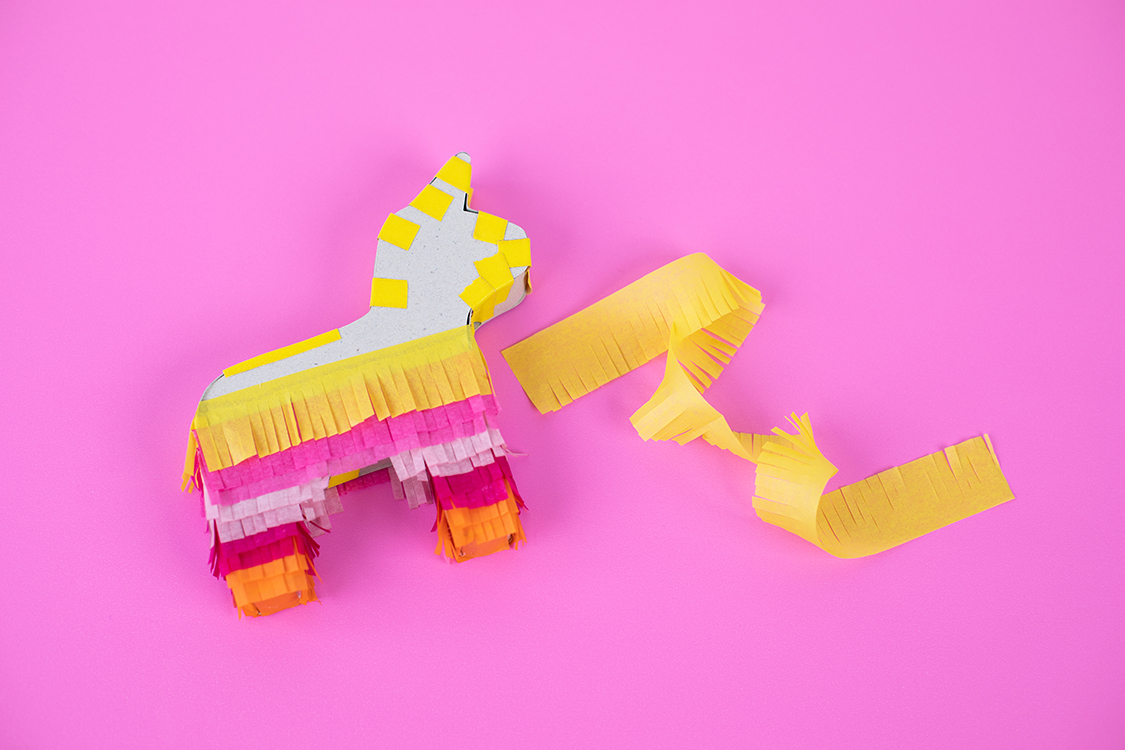
1. Using tape, begin to tape your strips of chipboard onto one of the pinata pieces.
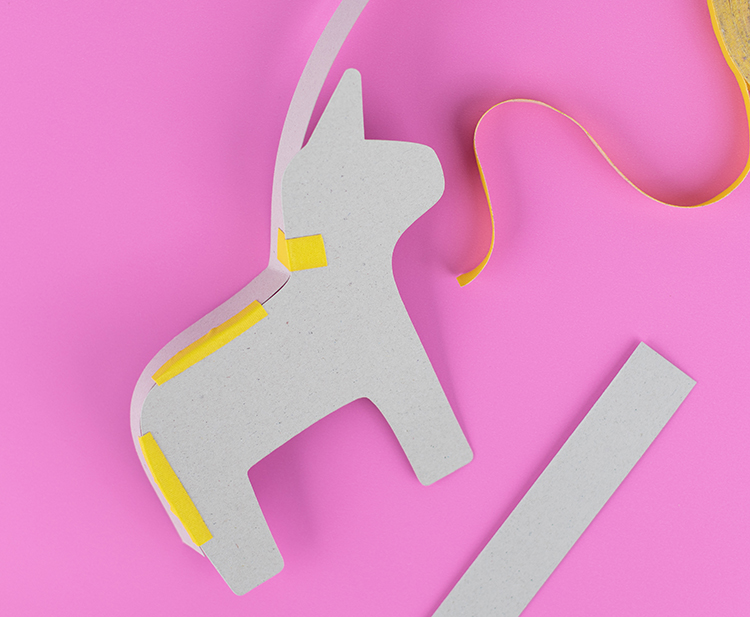
2. Tape all the way around the pinata shape, so create a “box” like shape. If you want to fill your pinatas with goodies, do so now!
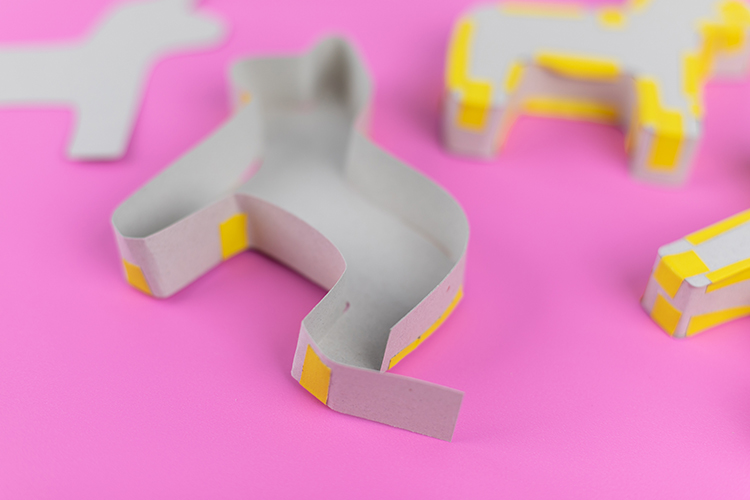
3. Once you’ve taped all the way around one side and filled your boxes, tape the other side of the pinata on, to close the box so to speak.

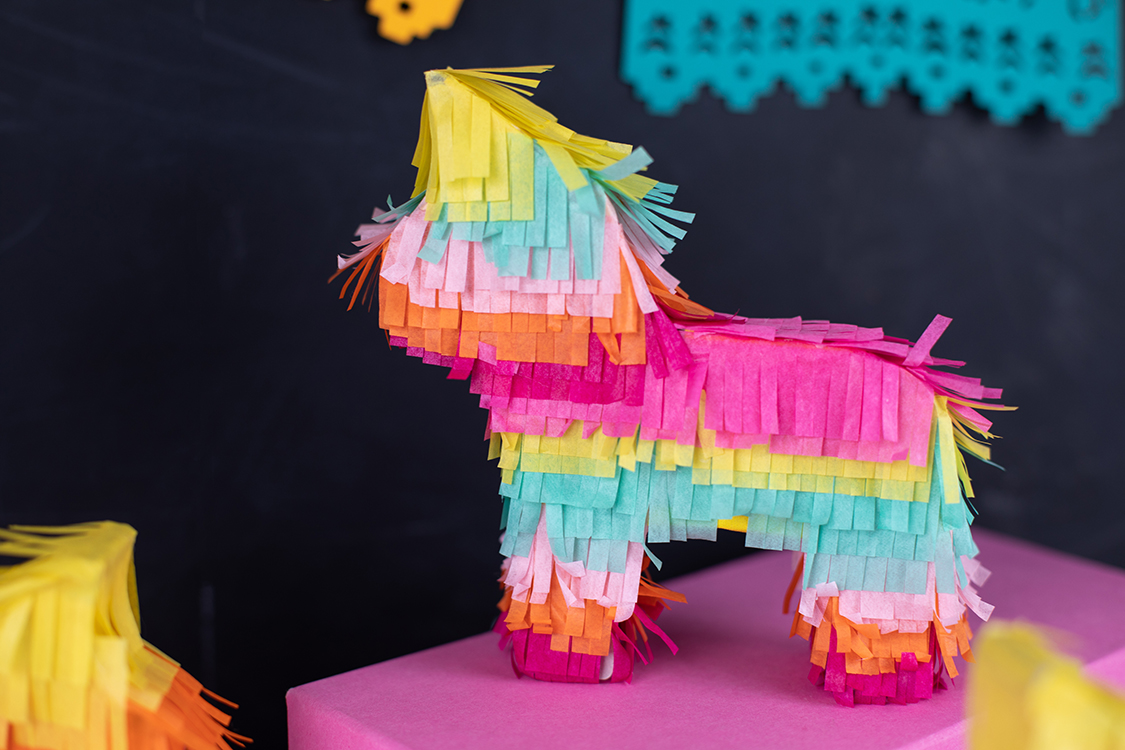
4. When your pinatas are filled and taped closed, it’s time to decorate them! Cut 1-inch thick strips of various colors of tissue paper. Fringe one edge of all your strips. Tissue paper is thin, so you can layer your pieces and cut many of them at the same time. Begin to glue your tissue paper onto each pinata, starting at the bottom and moving up.
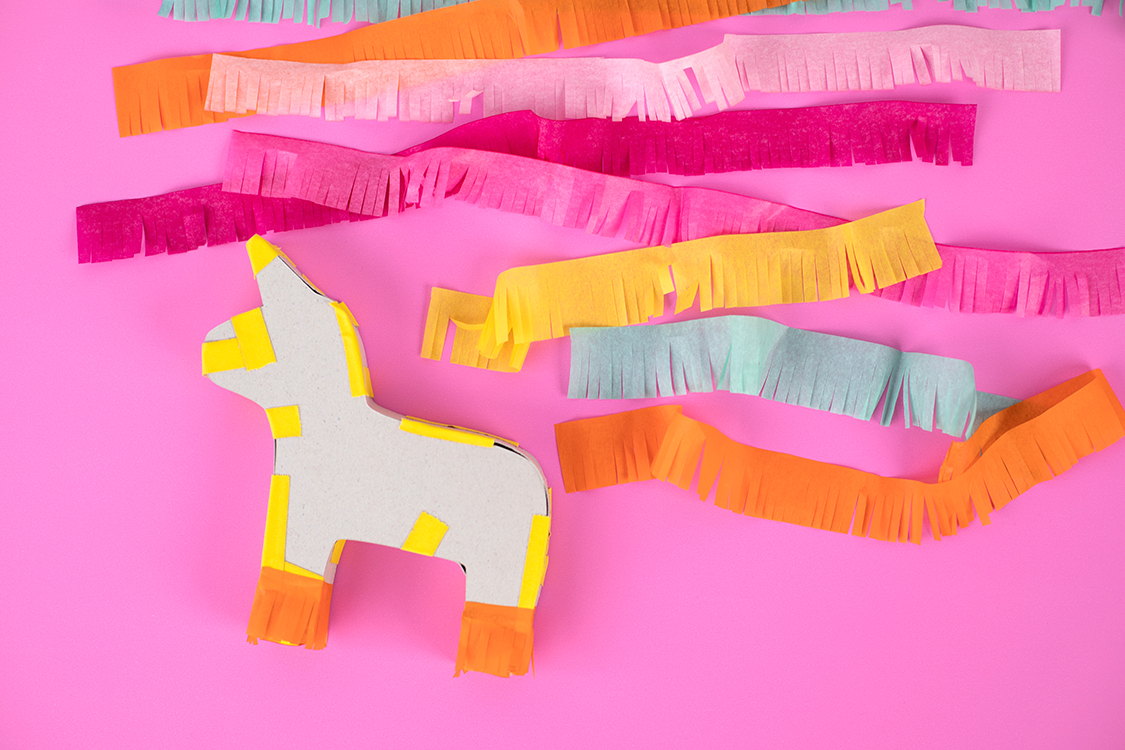
5. Layer the tissue paper slightly so the strips over lap, and alternate your colors of tissue paper every 2 to 3 strips.
6. Continue layering the tissue paper until you’ve covered your whole pinata.
Now that you know how it’s done, make a whole bunch of pinatas for your next fiesta!
 Fish Valentines to Share
  3D Printed Cupcake Topper Picks
Nasze Naturalne
September 3, 2025
Your authentic voice really shines through in everything you create and share
Naszenaturalne
September 2, 2025
Really love your style
Kelly Wayment
June 28, 2024
You can use it with vinyl as long as it is smooth and flat to allow the static charge to hold on to it. Rolled vinyl that wants to go back to its rolled shape will not necessarily work well, and it would need to be trimmed to fit the ES mat cutting area.
Kelly Wayment
June 28, 2024
Yes, you can use the heat pen while using the ES mat. 🙂
Yurii
March 2, 2024
Hello. May it be used with heat pen?
Thanks
Jerome
February 24, 2024
Hi, works this with the normal vinyl foils or only with printer papter etc?