
We were so in love with our Quilling Artwork that we wanted to create a simplified version you can do with your kids! Coiling the paper improves on fine motor skills, and kids can get creative with how they decorate their insects! If you try this project, remember to tag us on social media so we can share!
Supplies Needed:
- Silhouette Cameo® or Silhouette Portrait®
- Silhouette Studio®
- Silhouette Cutting Mat
- Silhouette Cutting Blade
- Cardstock
- Printer
- Adhesive
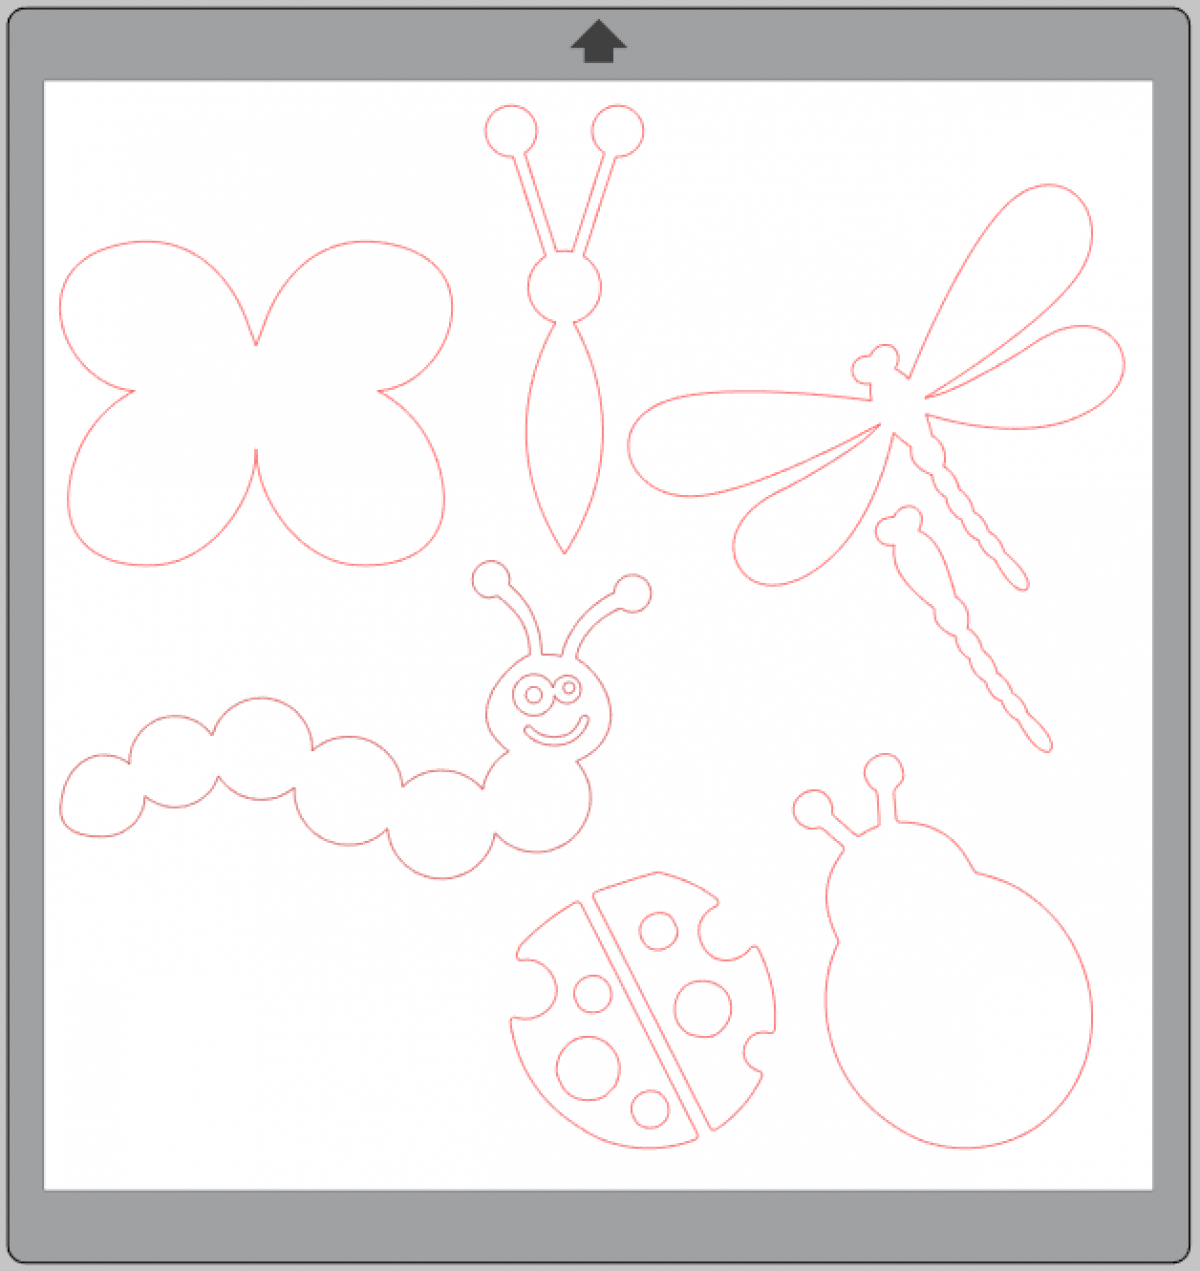
- Design ID #26967, #258608, #11403, #16329
Step One: Design in Silhouette Studio®
1. To begin, we’re going to make the bug templates for you to fill with the paper quills. Insert the designs listed above—or other designs of your choice—into Silhouette Studio®.
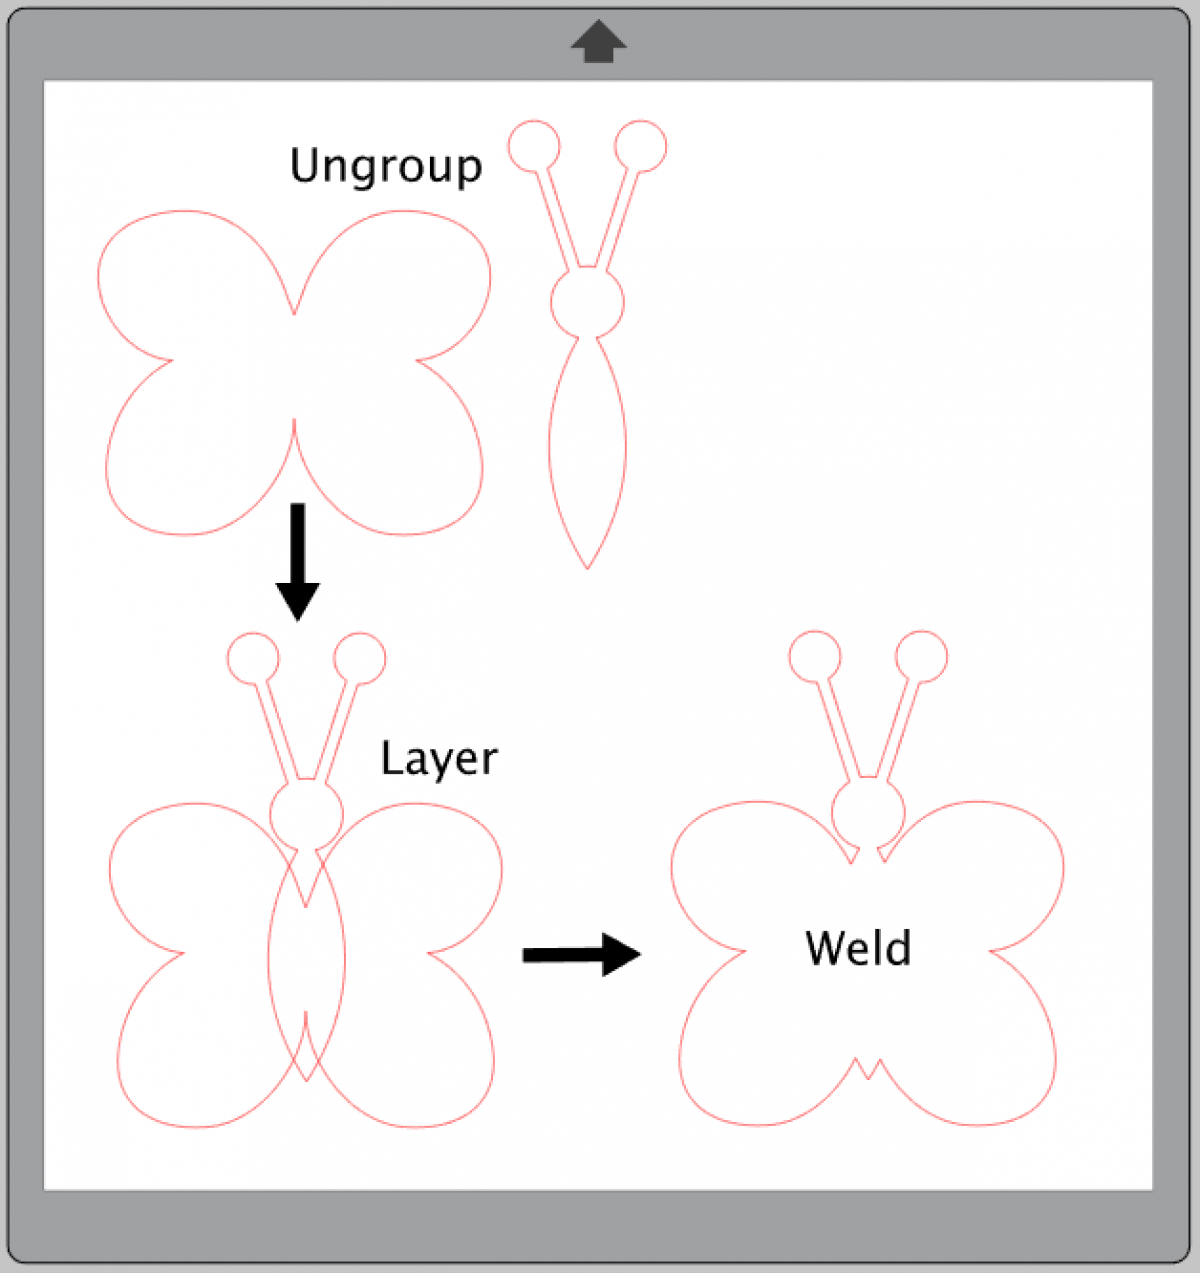
2. These bug designs come in multiple pieces. Ungroup, layer, and/or delete certain elements to design your bugs. We just want the main outline for this project. For example, we ungrouped the butterfly, layered the body over the wings, and used the “Weld” tool to group them together.
3. Size your bugs to your desired size and cut them out of cardstock with the appropriate settings on your Silhouette cutting machine.
Step Two: Cut the Paper for Quilling
1. Using the draw a rectangle tool, create a long thin rectangle and duplicate it until your paper is filled.
2. Using the Transform panel, space the rectangles equally apart.
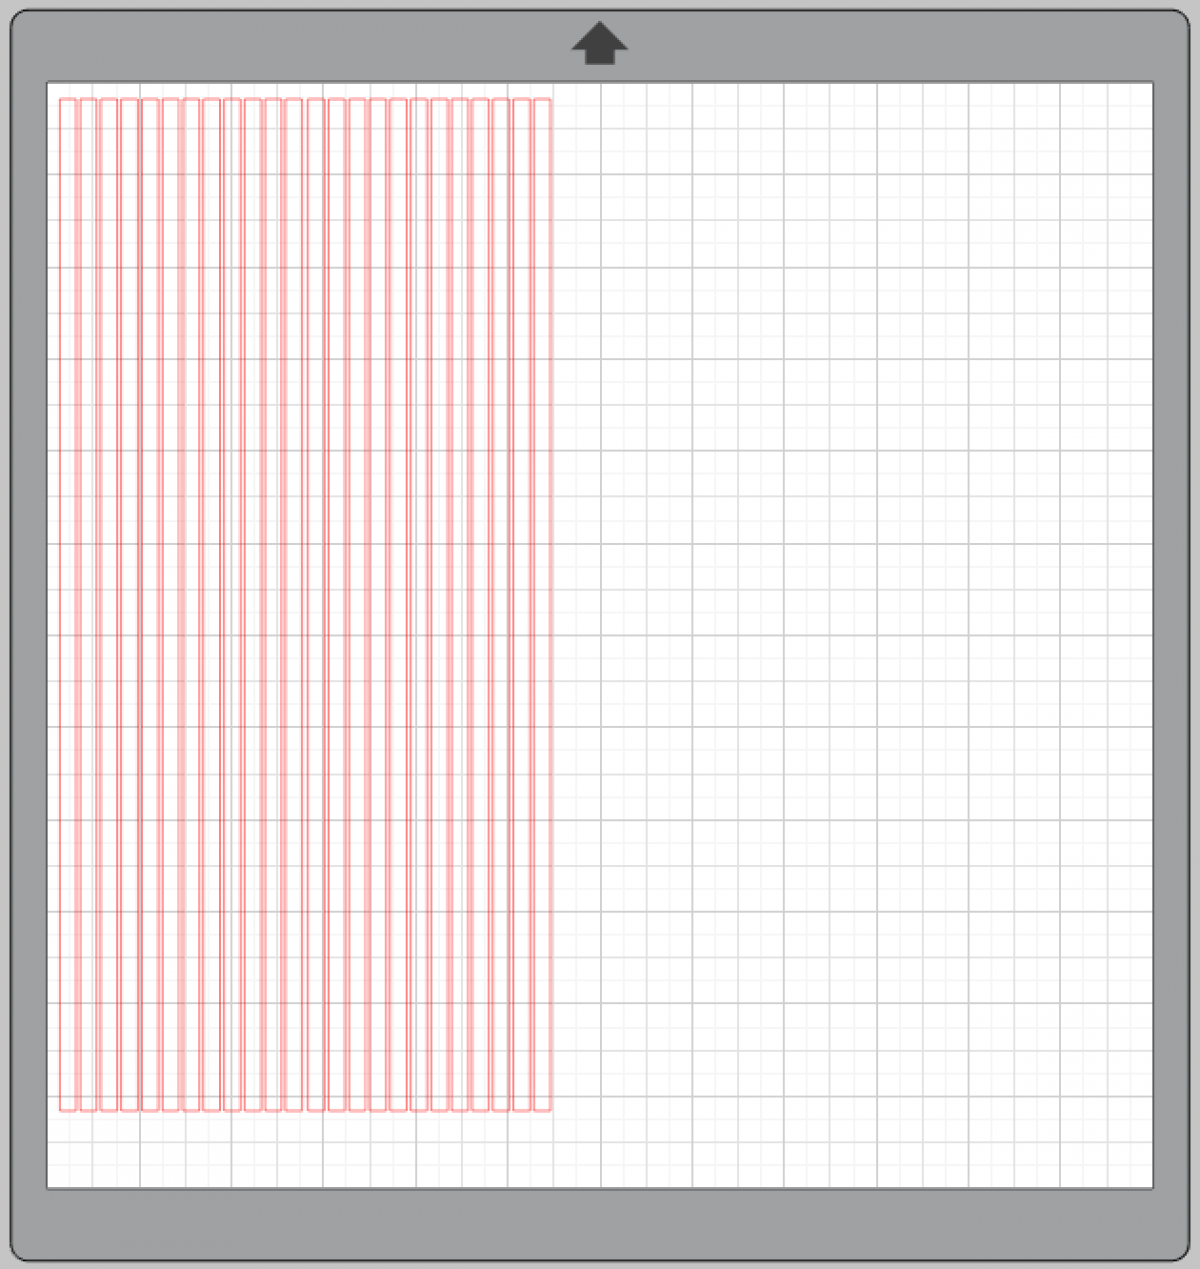
3. Send the design to your machine to cut using the colors of paper of your choosing.
Step Three: Quill Paper and Fill Designs!
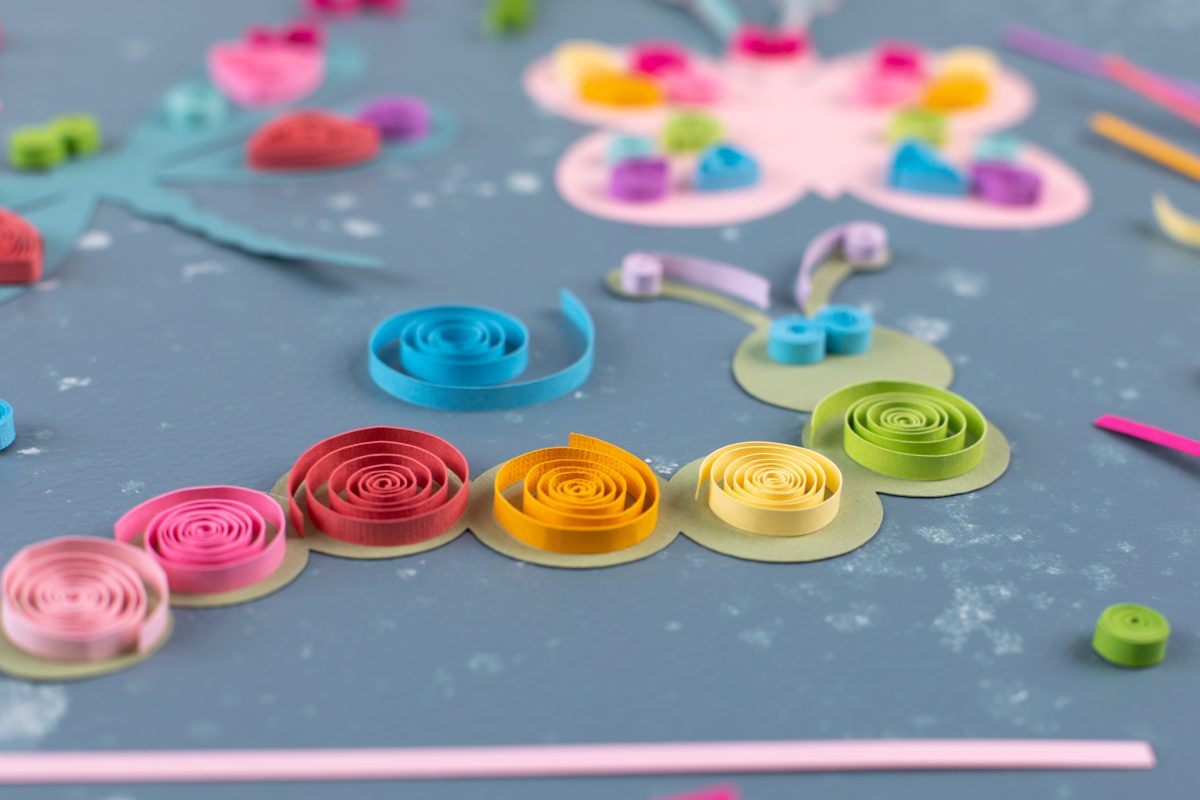
1. Once all your paper strips are cut, coil the paper, and secure it with adhesive. There are many intricate forms of quilling, but you can go as simple as you like, depending on the age of your kids.

2. Then adhere your coils to the paper bug cutouts. Create various designs and let kids use their imagination!

 Free Class - Shaker Card with the ES Mat
  Free Class - Foiled Gift Tags with the Heat Pen