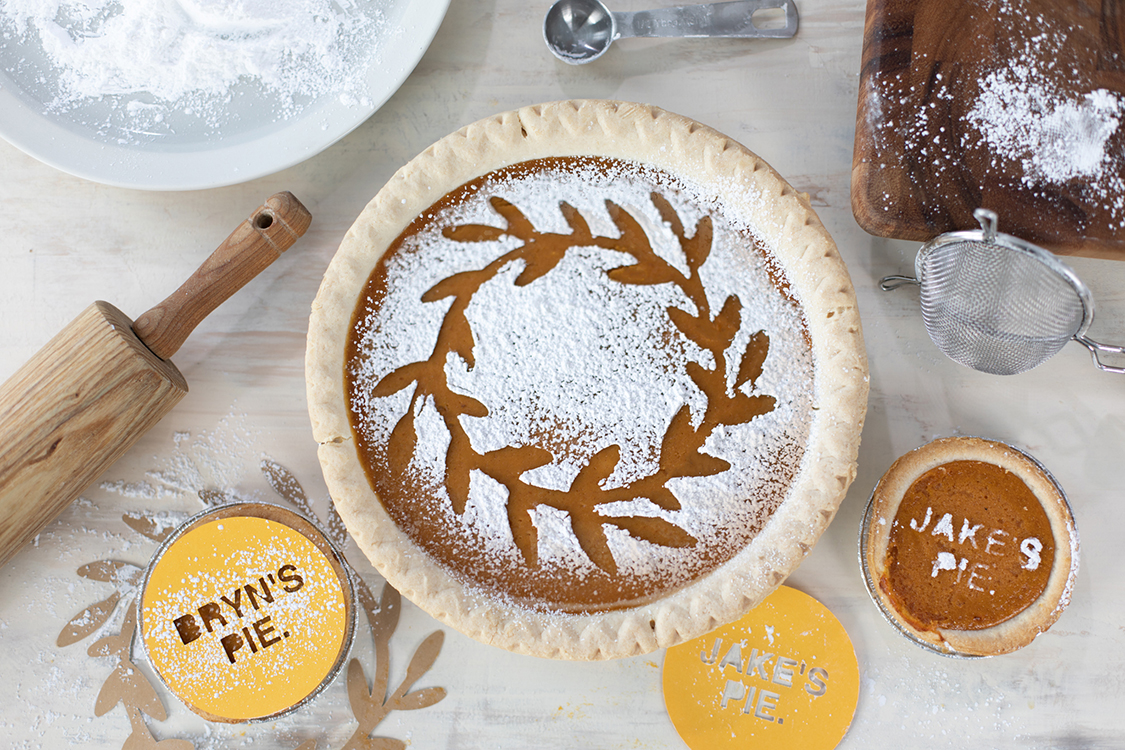
With a year that has felt extra long, we are thankful for all of our Silhouette Family this holiday season! We wish you all a fabulous Thanksgiving full of relaxation, yummy food, and beautiful pies! This simple project is the perfect addition to any Thanksgiving gathering. Embellishing your pie with this cardstock stencil will add a memorable touch to your holiday celebration.
The process of decorating the pie only took about 10–15 minutes! It was so easy, and it turned out beautiful. Let’s get started!
Supplies Needed:
- Silhouette Portrait® 3
- Silhouette Studio®
- Cardstock Paper
- Pie of Choice
- Powdered Sugar
- Flour Sifter
- Plate
- Design ID #331880
Step One: Setting up the Design
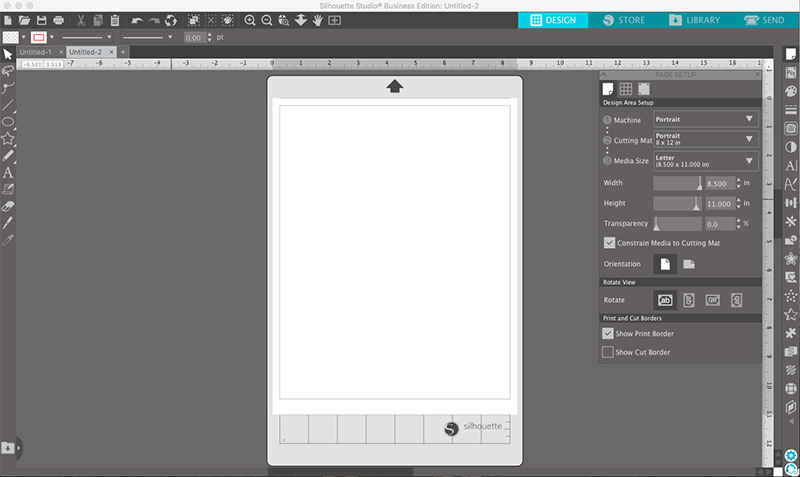
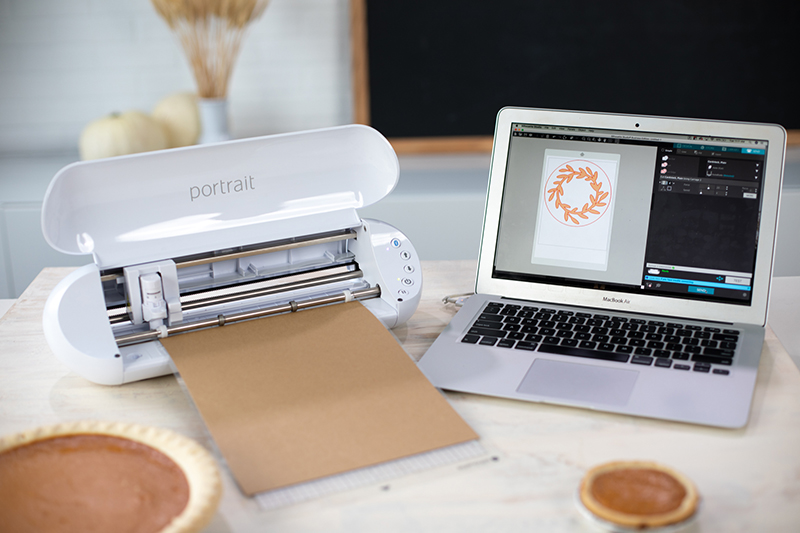
1. After opening Silhouette Studio®, we will begin by selecting the correct machine in the “Page Setup” panel. Make sure you select that you are using the Portrait 3 machine and that you are using the Portrait cutting mat. We used a standard piece of card stock for the stencil, so we selected “Letter” for the media size. Your page should look like the image below.
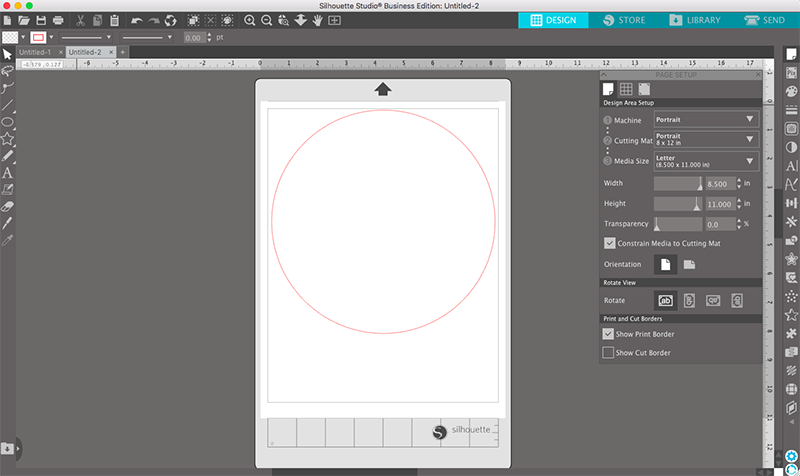
2. We are now ready to start designing! We measured the pie to see how large we needed to make our stencil. Make sure that the stencil will fit inside the crust so it will lay flat against the center of the pie. The inside of our pie measured to be 7.75 inches, so we made a circle that was that size and placed it in our cutting area.
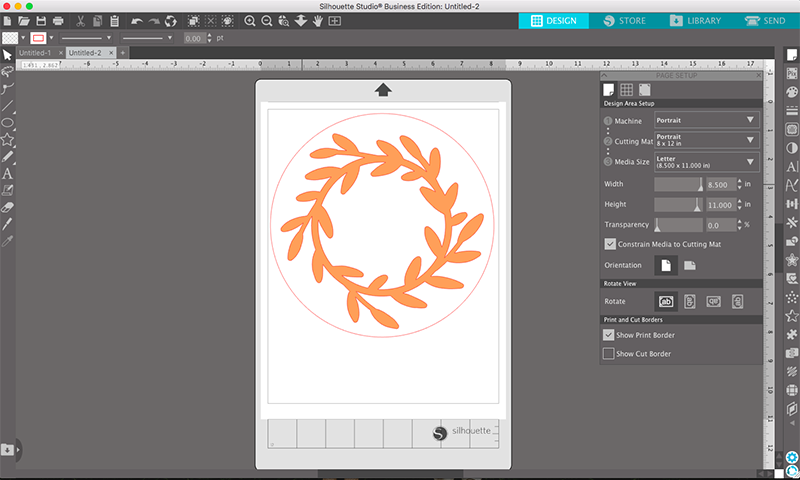
3. At this point we are ready to add our design. If you haven’t done so, you can download the design here. We chose this design, but the possibilities are truly endless! We recommend picking a design that is more on the simple side. After downloading the design, we went to our Library. The Library tab is one of the teal tabs in the top right-hand corner. We found the wreath in the library and opened it by double-clicking the design. You may have to resize the design to fit inside the circle.
Step Two: Cutting the Design
1. This cut is very basic. For our material, we selected “Cardstock, Textured – Heavy (80 lb),” and it worked like a charm! We love the AutoBlade because it adjusts itself for you. Cutting the circle around your design is optional and may not be necessary for some designs. Once your machine is connected, you can click “Send.”
Step Three: Using the Stencil
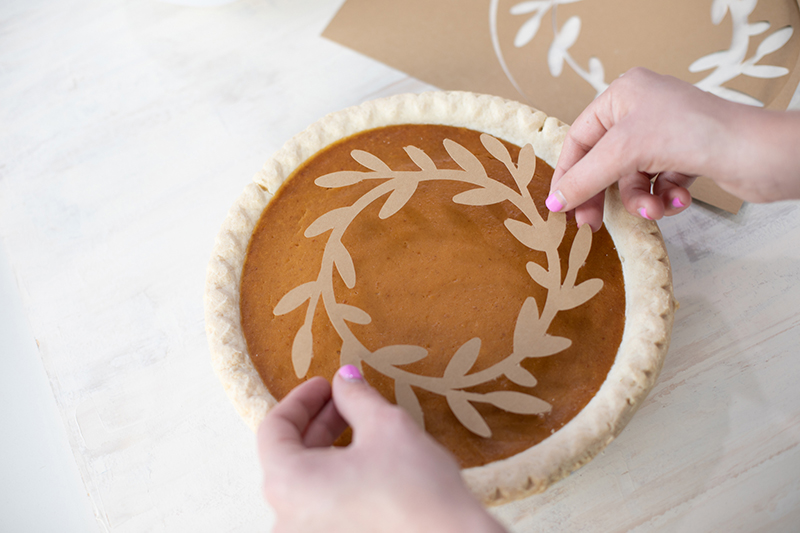
1. Once you have removed the stencil from the cutting mat, you can place it int the center of the pie. If you are using a pie that has a “wet” consistency, we recommend dabbing the top of the pie with a paper towel before placing the stencil on top of it. We like to hold the stencil directly over the pie to center it before placing the stencil in place. After you are sure it is where you want it, you can lightly press down the edges. To avoid making indentations in the pie, don’t press too hard. That will make it very difficult to remove the stencil!
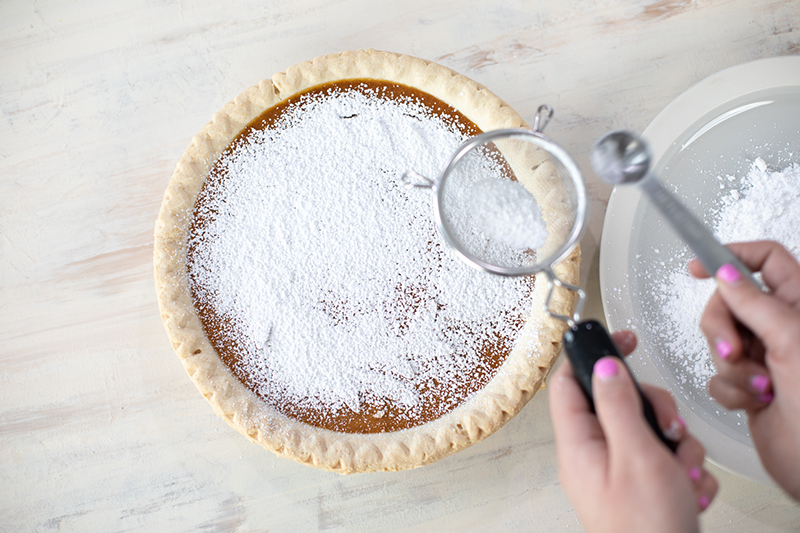
2. The easiest way to apply the powdered sugar is with a small flour sifter. We poured some powdered sugar onto a nearby plate and then held the sifter over the pie. Take a spoon and gently fill the sifter with a few spoon fulls of powdered sugar. After the sifter was full, gently tap the side of the sifter with the spoon to apply it to the pie. You may have to fill the sifter a few times to get good coverage on your pie. You want the design to be covered, but don’t make powdered-sugar layer too thick. A light dusting is the look we are going for.
Step Four: Removing the Stencil
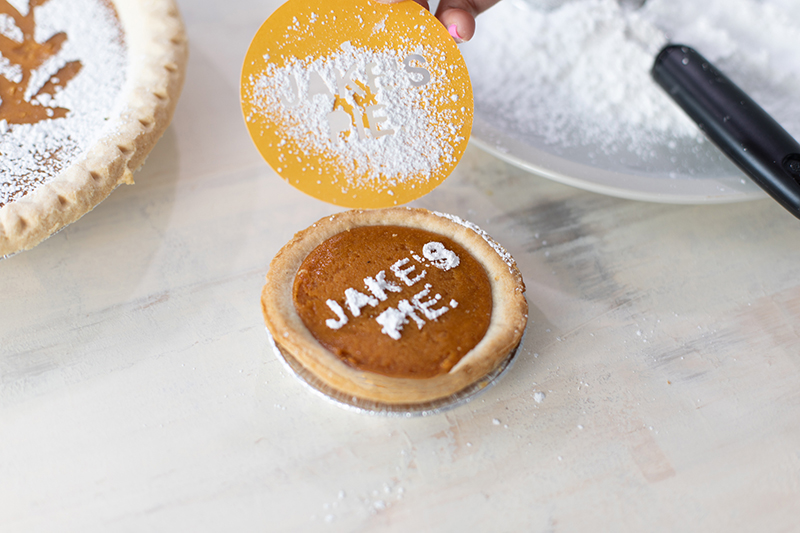
1. Removing the stencil is probably the most daunting part of the whole project. If you have lightly pressed your stencil into the pie, it should be a breeze! Once you’ve finished with the sugar, we recommend using a knife or pie server to get under the edge of your design. Next, lift the stencil; try not to peel it. Peeling may cause the sugar to shift and ruin your design! Go slowly. A slow speed is the key to getting a perfect lift of the stencil!

2. Bon appetite! Your pie is reading for serving! The sugar will dissolve into the pie within about 20 minutes, so we recommend adding these final touches right before serving. Your guests will love this detail, and it is sure to add a memorable touch to this year’s gathering.
Optional Variation
What kid wouldn’t love their own personalized pie? Using the same technique as above, we created these name personalized pies. We picked up these mini pies from a local store. The children will be thrilled to not only have their own pie but a pie with their own name on it! They would even make a fun place setting if you aren’t too worried about them spoiling their dinner!
Happy holidays, everyone! We appreciate all that you do for us, and we love creating with you! Best of luck with your embellished pies!
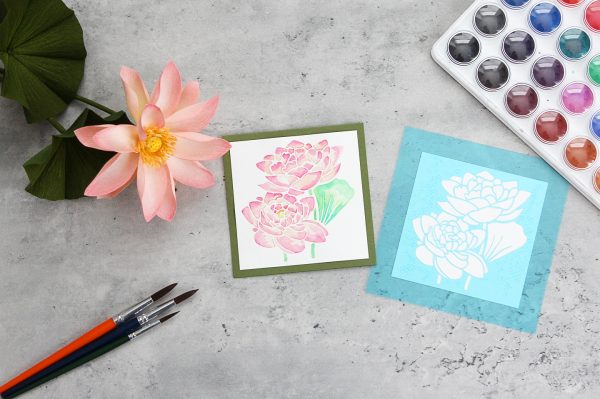 Free Class - Stenciled Lotus Card
  January Online Classes