One of the best features about the new Silhouette Curio definitely has to be the emboss and deboss features. How many times have you wanted to emboss a birthday card or make a cool piece of art, or even wanted to create a paint-by-numbers style watercolor piece? Well now you can with ease by either embossing or debossing!
Here’s what you’ll need to make this romantic heart art:
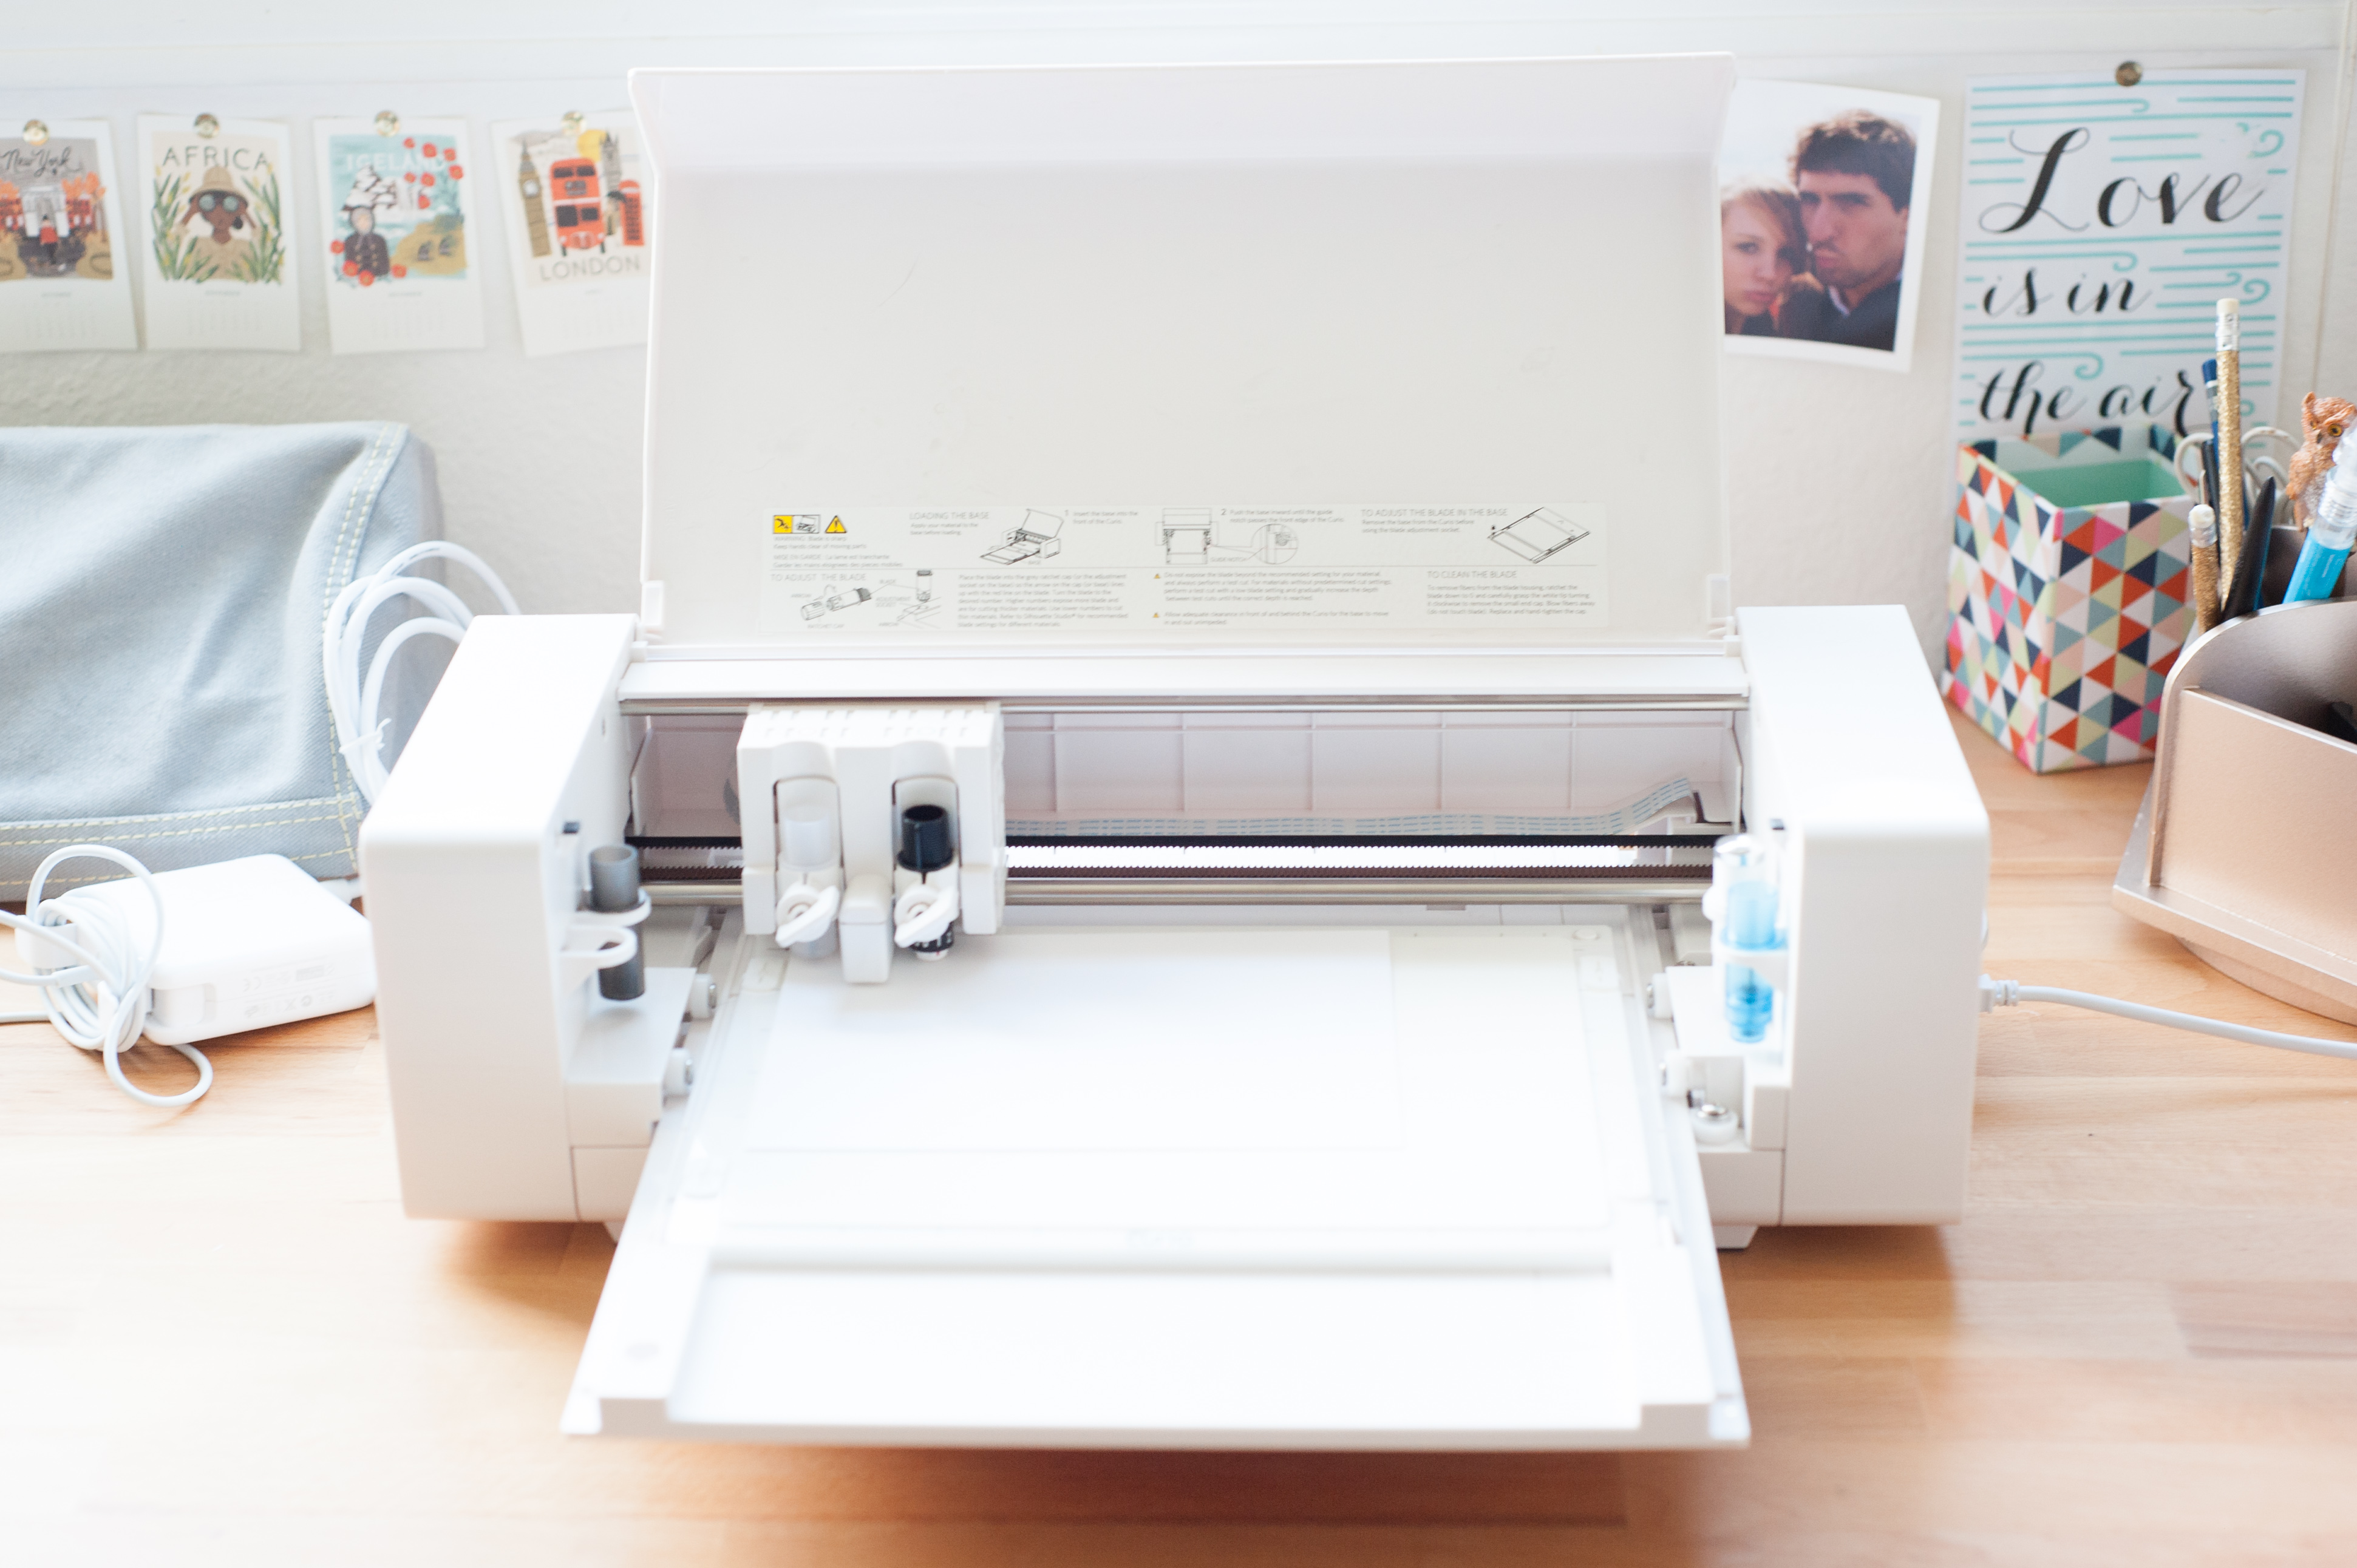
- Silhouette Curio
- 6 in. x 8.5 in Curio Base Kit
- Fine Embossing Tool
- 5 in x 7 in Score and Emboss Paper
- Ratchet Blade
- Red Vellum
- Brown Kraft Paper
- Glue
- Foam dots
Let’s get started!
Step 1
Open up your Silhouette Design Studio and download/open the woodgrain heart design. Size it to your liking then head on over to the Emboss/Deboss Menu by clicking the little swirly box icon up in the top right hand corner. For this project we are using the Deboss feature.
The difference between Emboss and Deboss is that embossing is where your design will have raised edges and debossing is where your design will be impressed into the paper, providing indents.
If you want your design to have even more texture, you can choose one of the effects in the Deboss/Emboss menu like cross-hatching or spirals. This heart design already has enough texture of it’s own as it is so we will just leave the effects off. Once you are satisfied with your heart’s size, and effects, it’s time to get it ready to send to the Curio!

Step 2
Now for a maximum efficiency tip: you can deboss and then cut your paper heart out without ever having to switch out your tools or mat!
To get your heart ready to cut out, click on the heart and then go to the ‘Trace’ menu which is denoted by a yellow-outlined butterfly. Click ‘trace outline’ and it will come up with a red line that goes around the entirety of the heart.
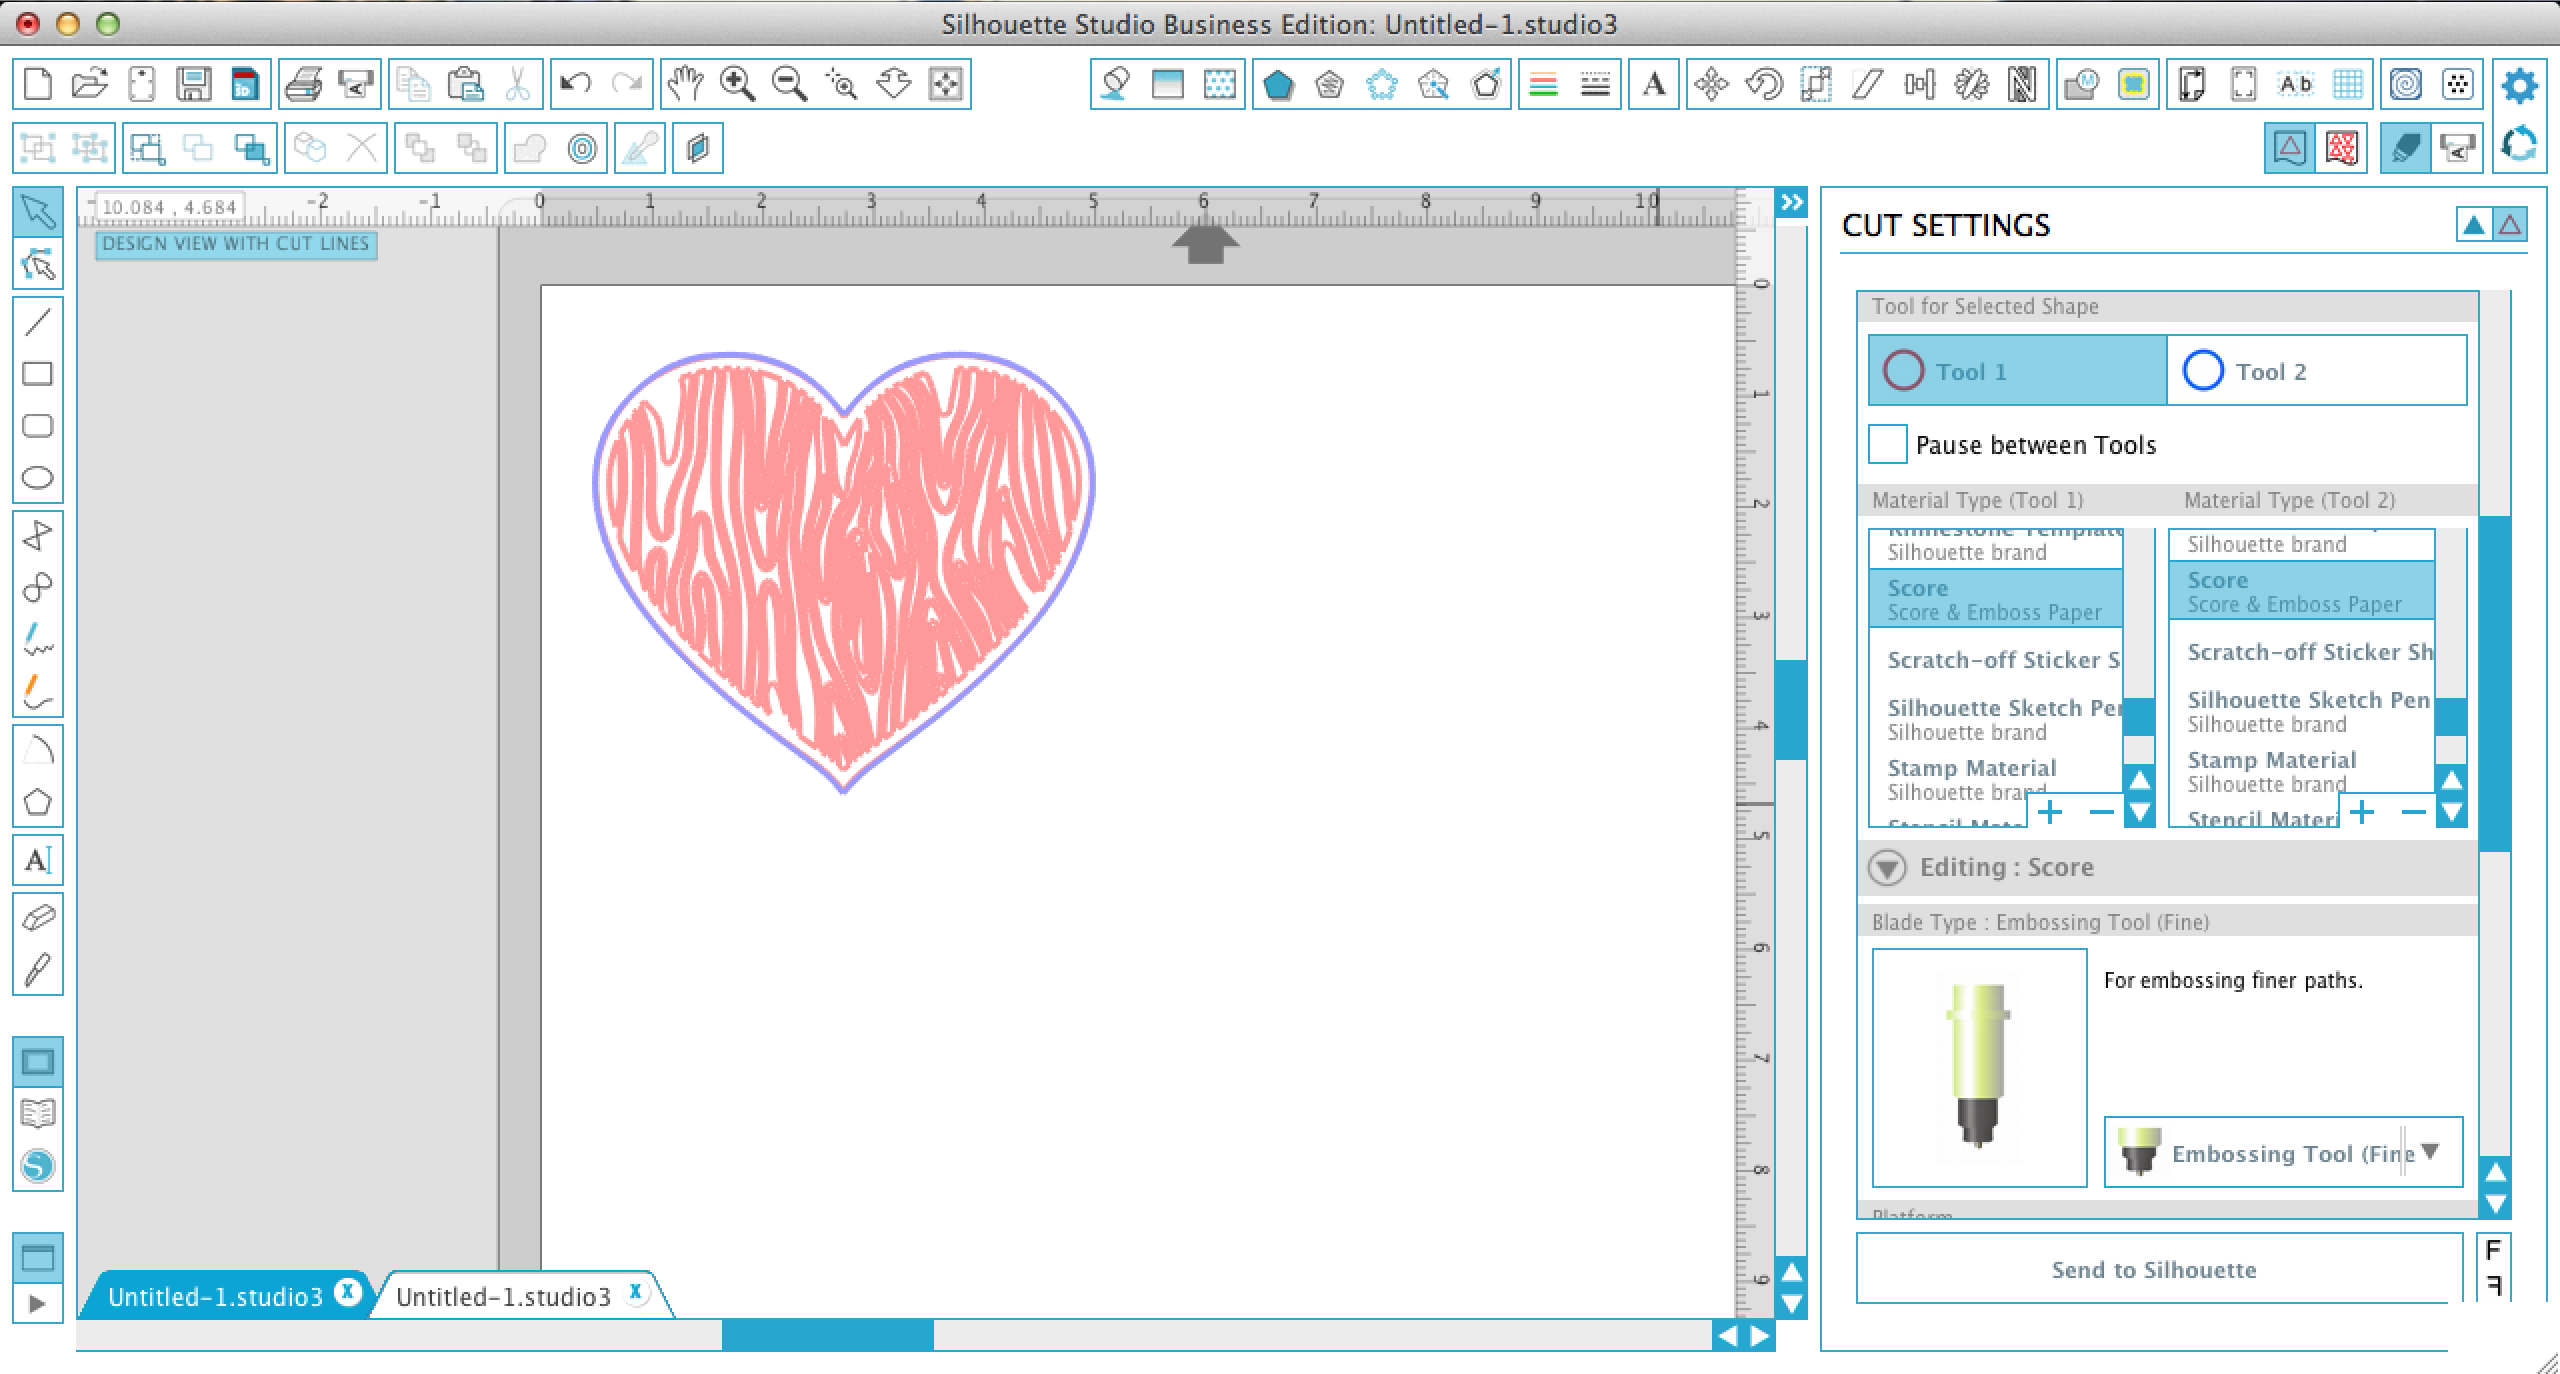
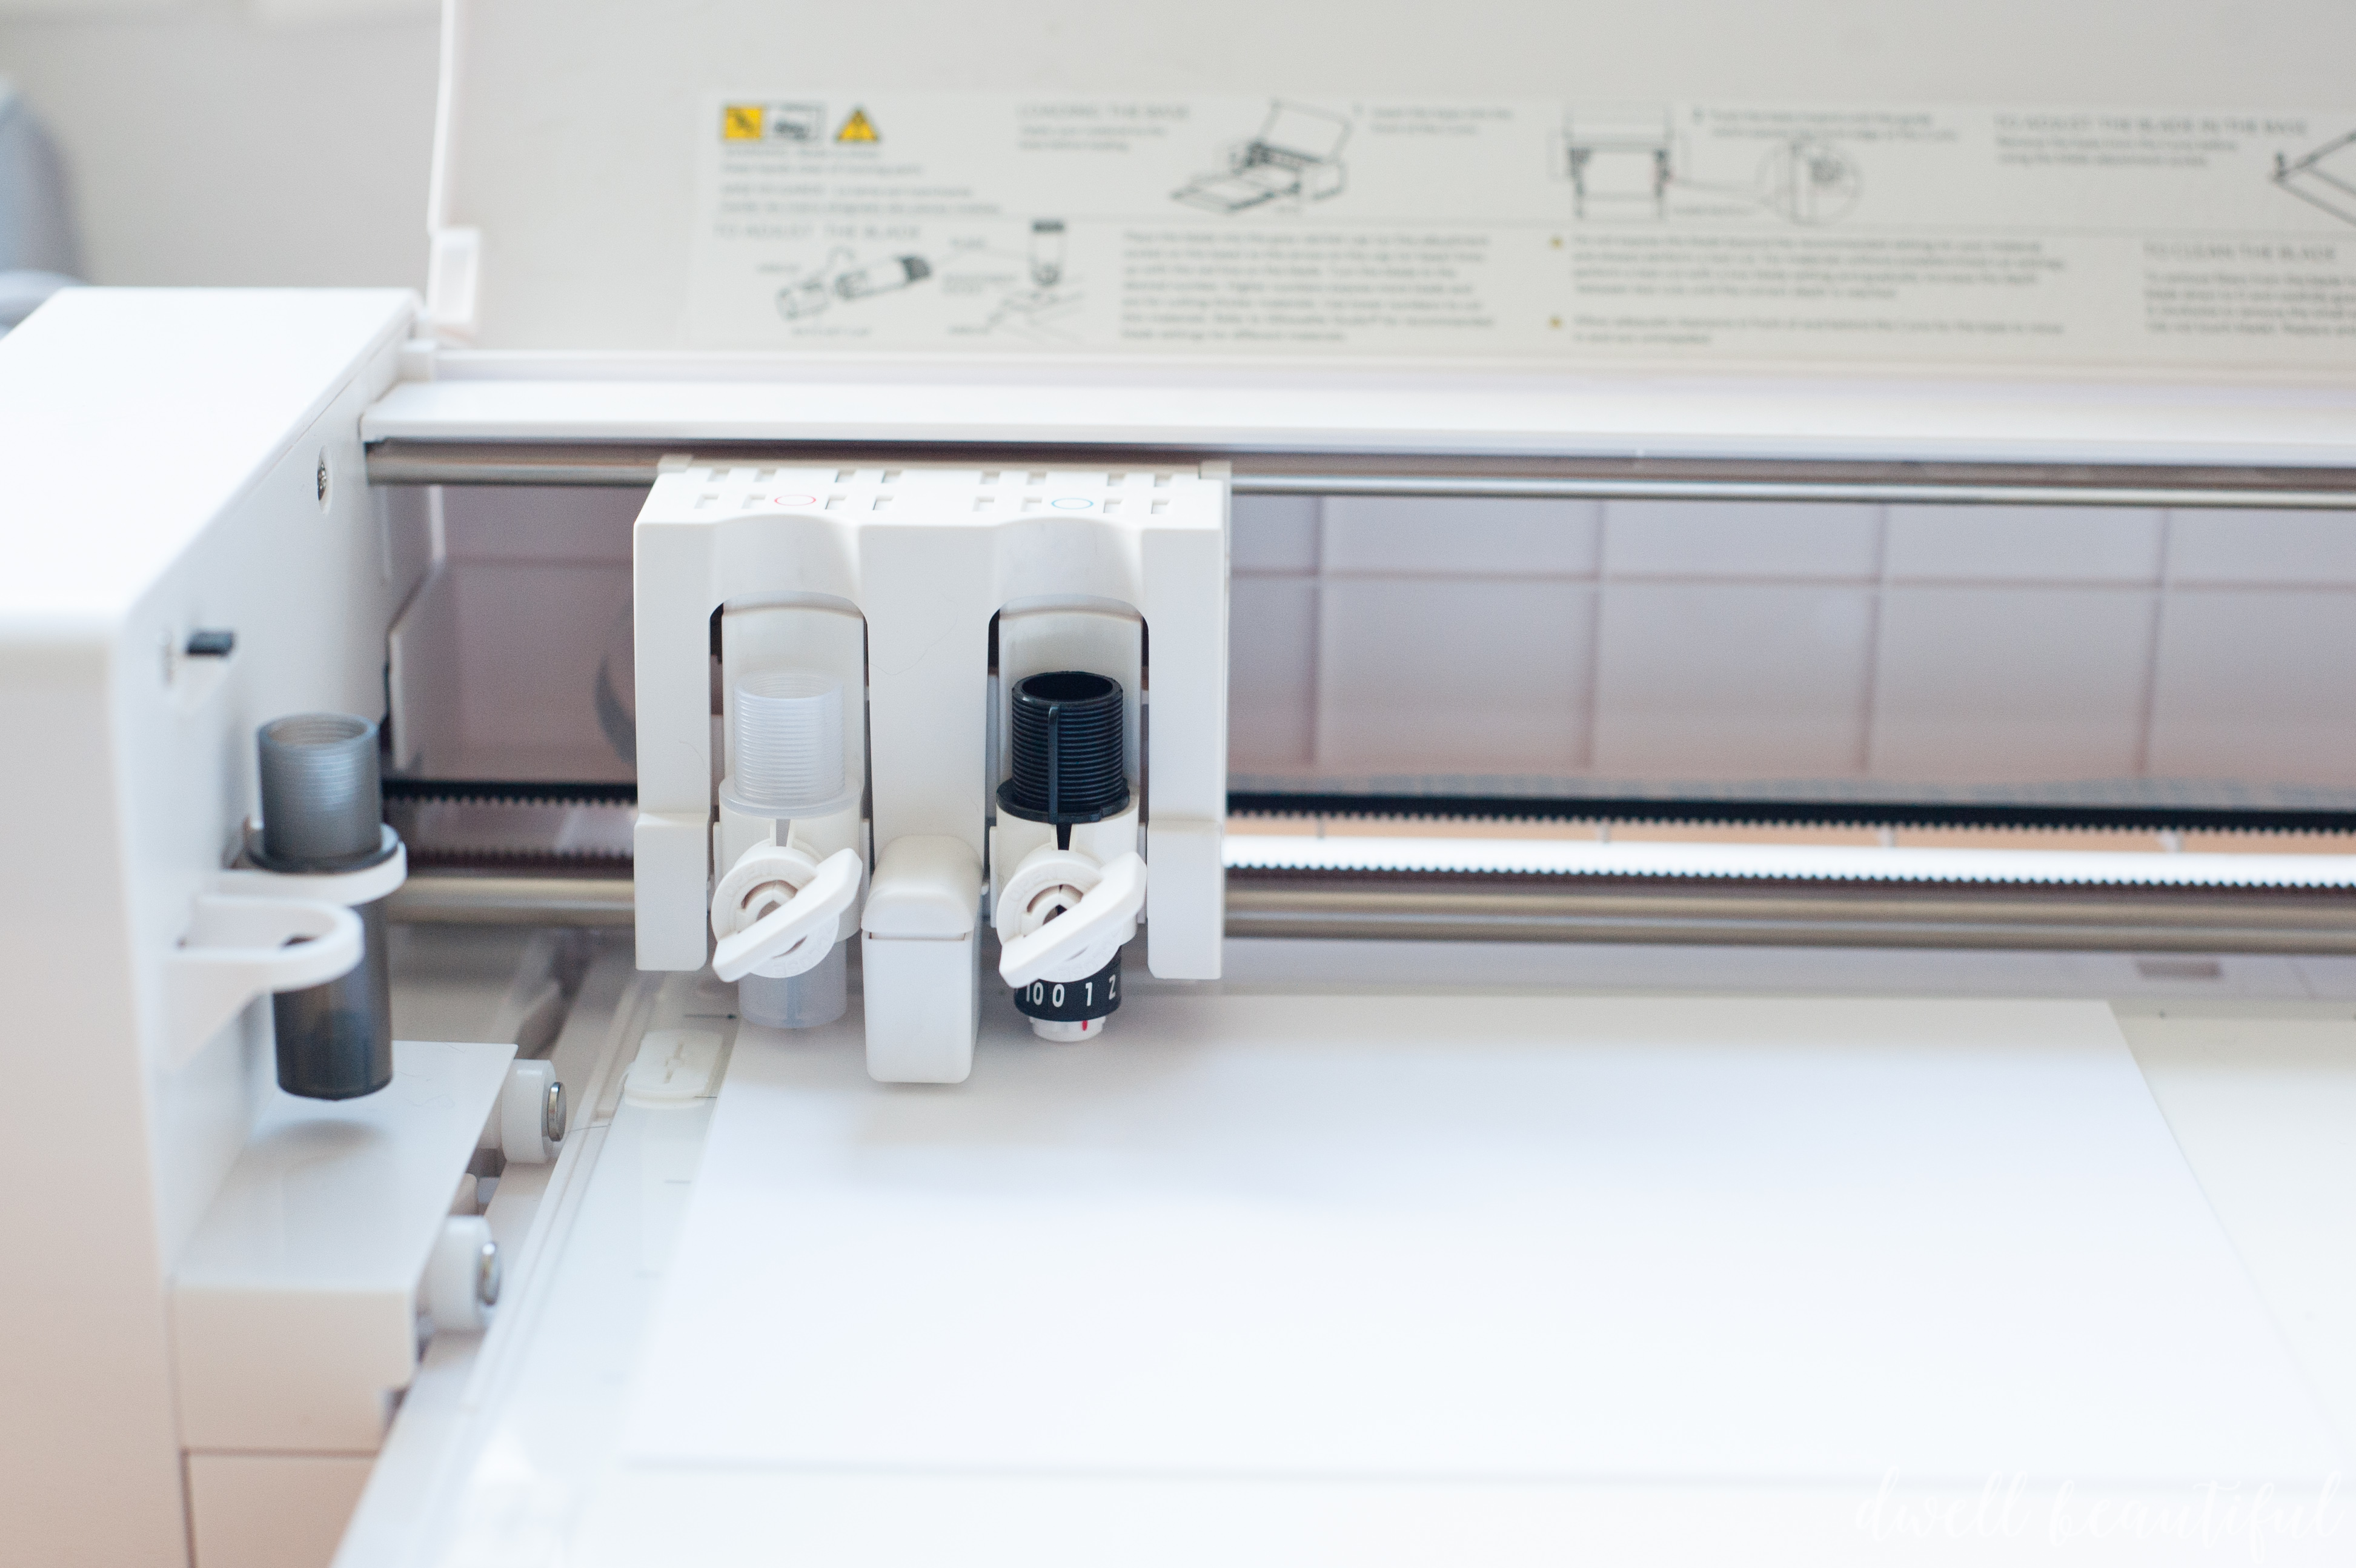
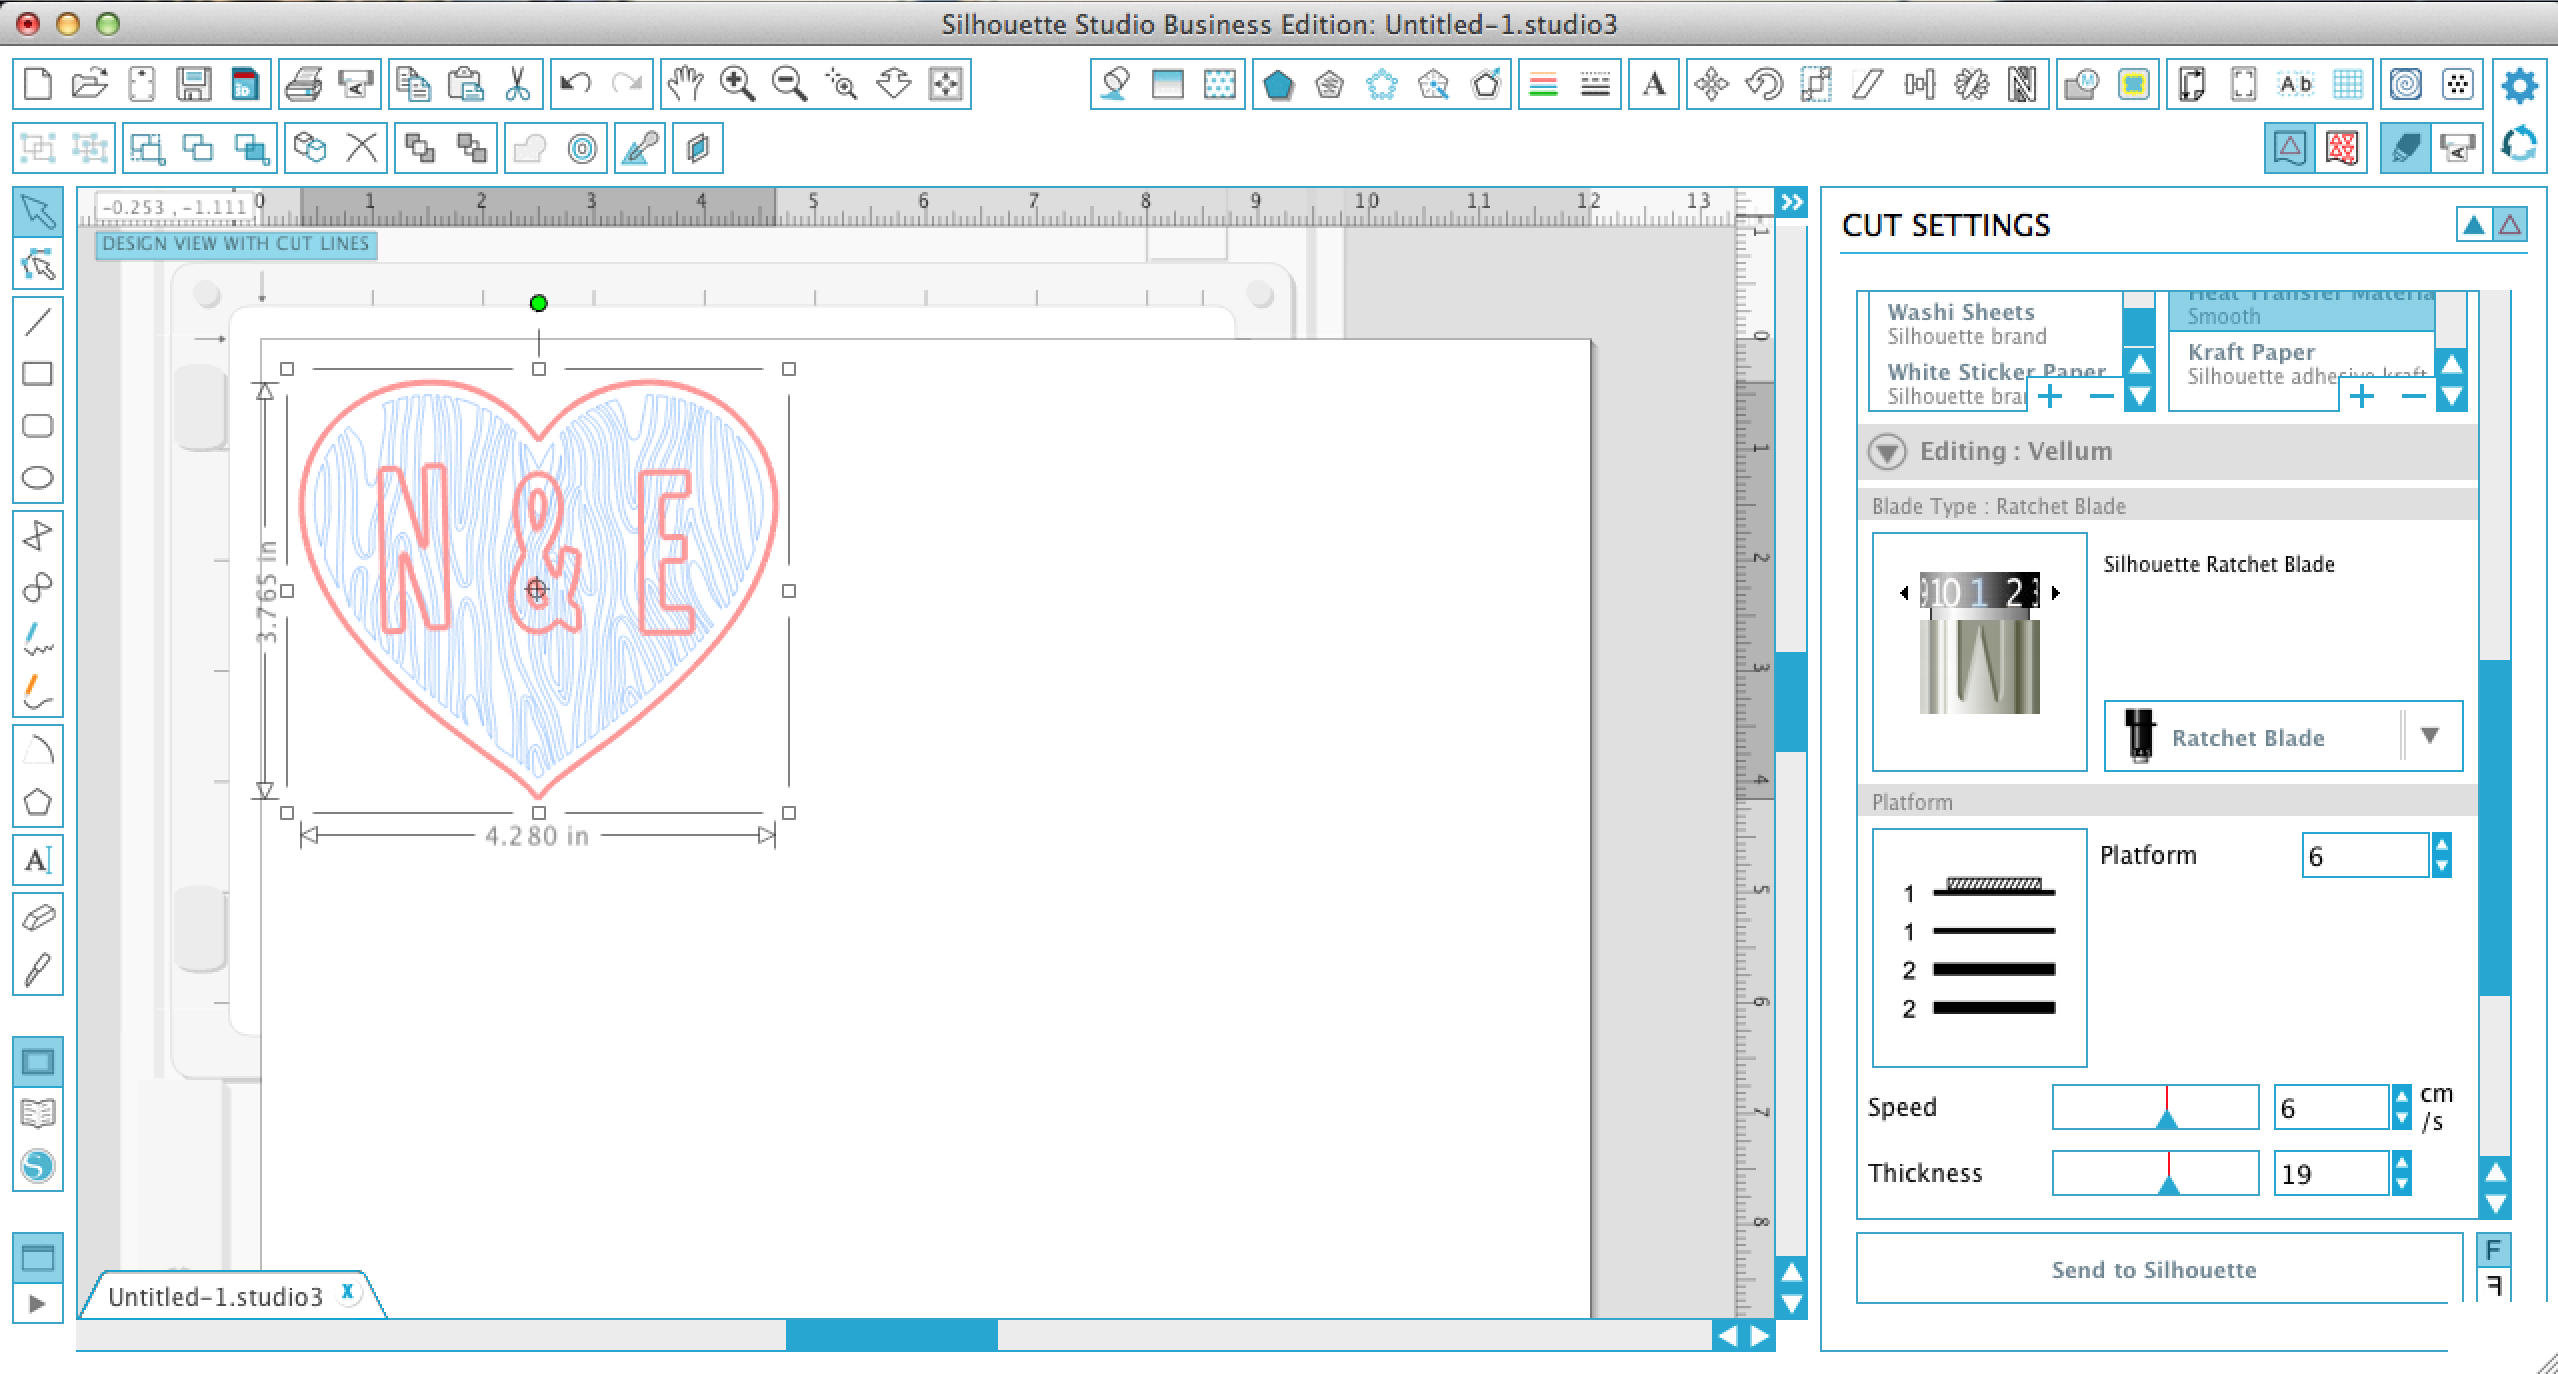
Then, head on over to the ‘Cut’ Menu, which is denoted by a Ratchet Blade in the top right hand corner. Go through the menu and set your material to Score & Emboss paper. This will bring up a dialog below it that will tell you how you need to set up your machine and settings. Here’s where the time saving part comes in – you can put two tools into the Curio at the same time! The first carrier is denoted by a red circle, and the second carrier is denoted by a blue circle. The Curio knows to do the action associated with the red circle first and the blue circle second. You can toggle between tools by clicking ‘Tool 1’ and ‘Tool 2’ in the cut settings dialog box.
We want to deboss first, so Select the ‘Fine Embossing Tool’ for the blade type under the red circle. To get a deeper debossed line, I changed the preset settings from 5 to 4 for Speed and from 4 to 27 for thickness. This will produce a deeper, more visible debossing!
Then change your Blade Type under the blue circle to the ‘Ratchet Blade’, making sure that ‘Score & Emboss Paper’ is also selected for the material on Tool 2. It will tell you to set your blade to 4.
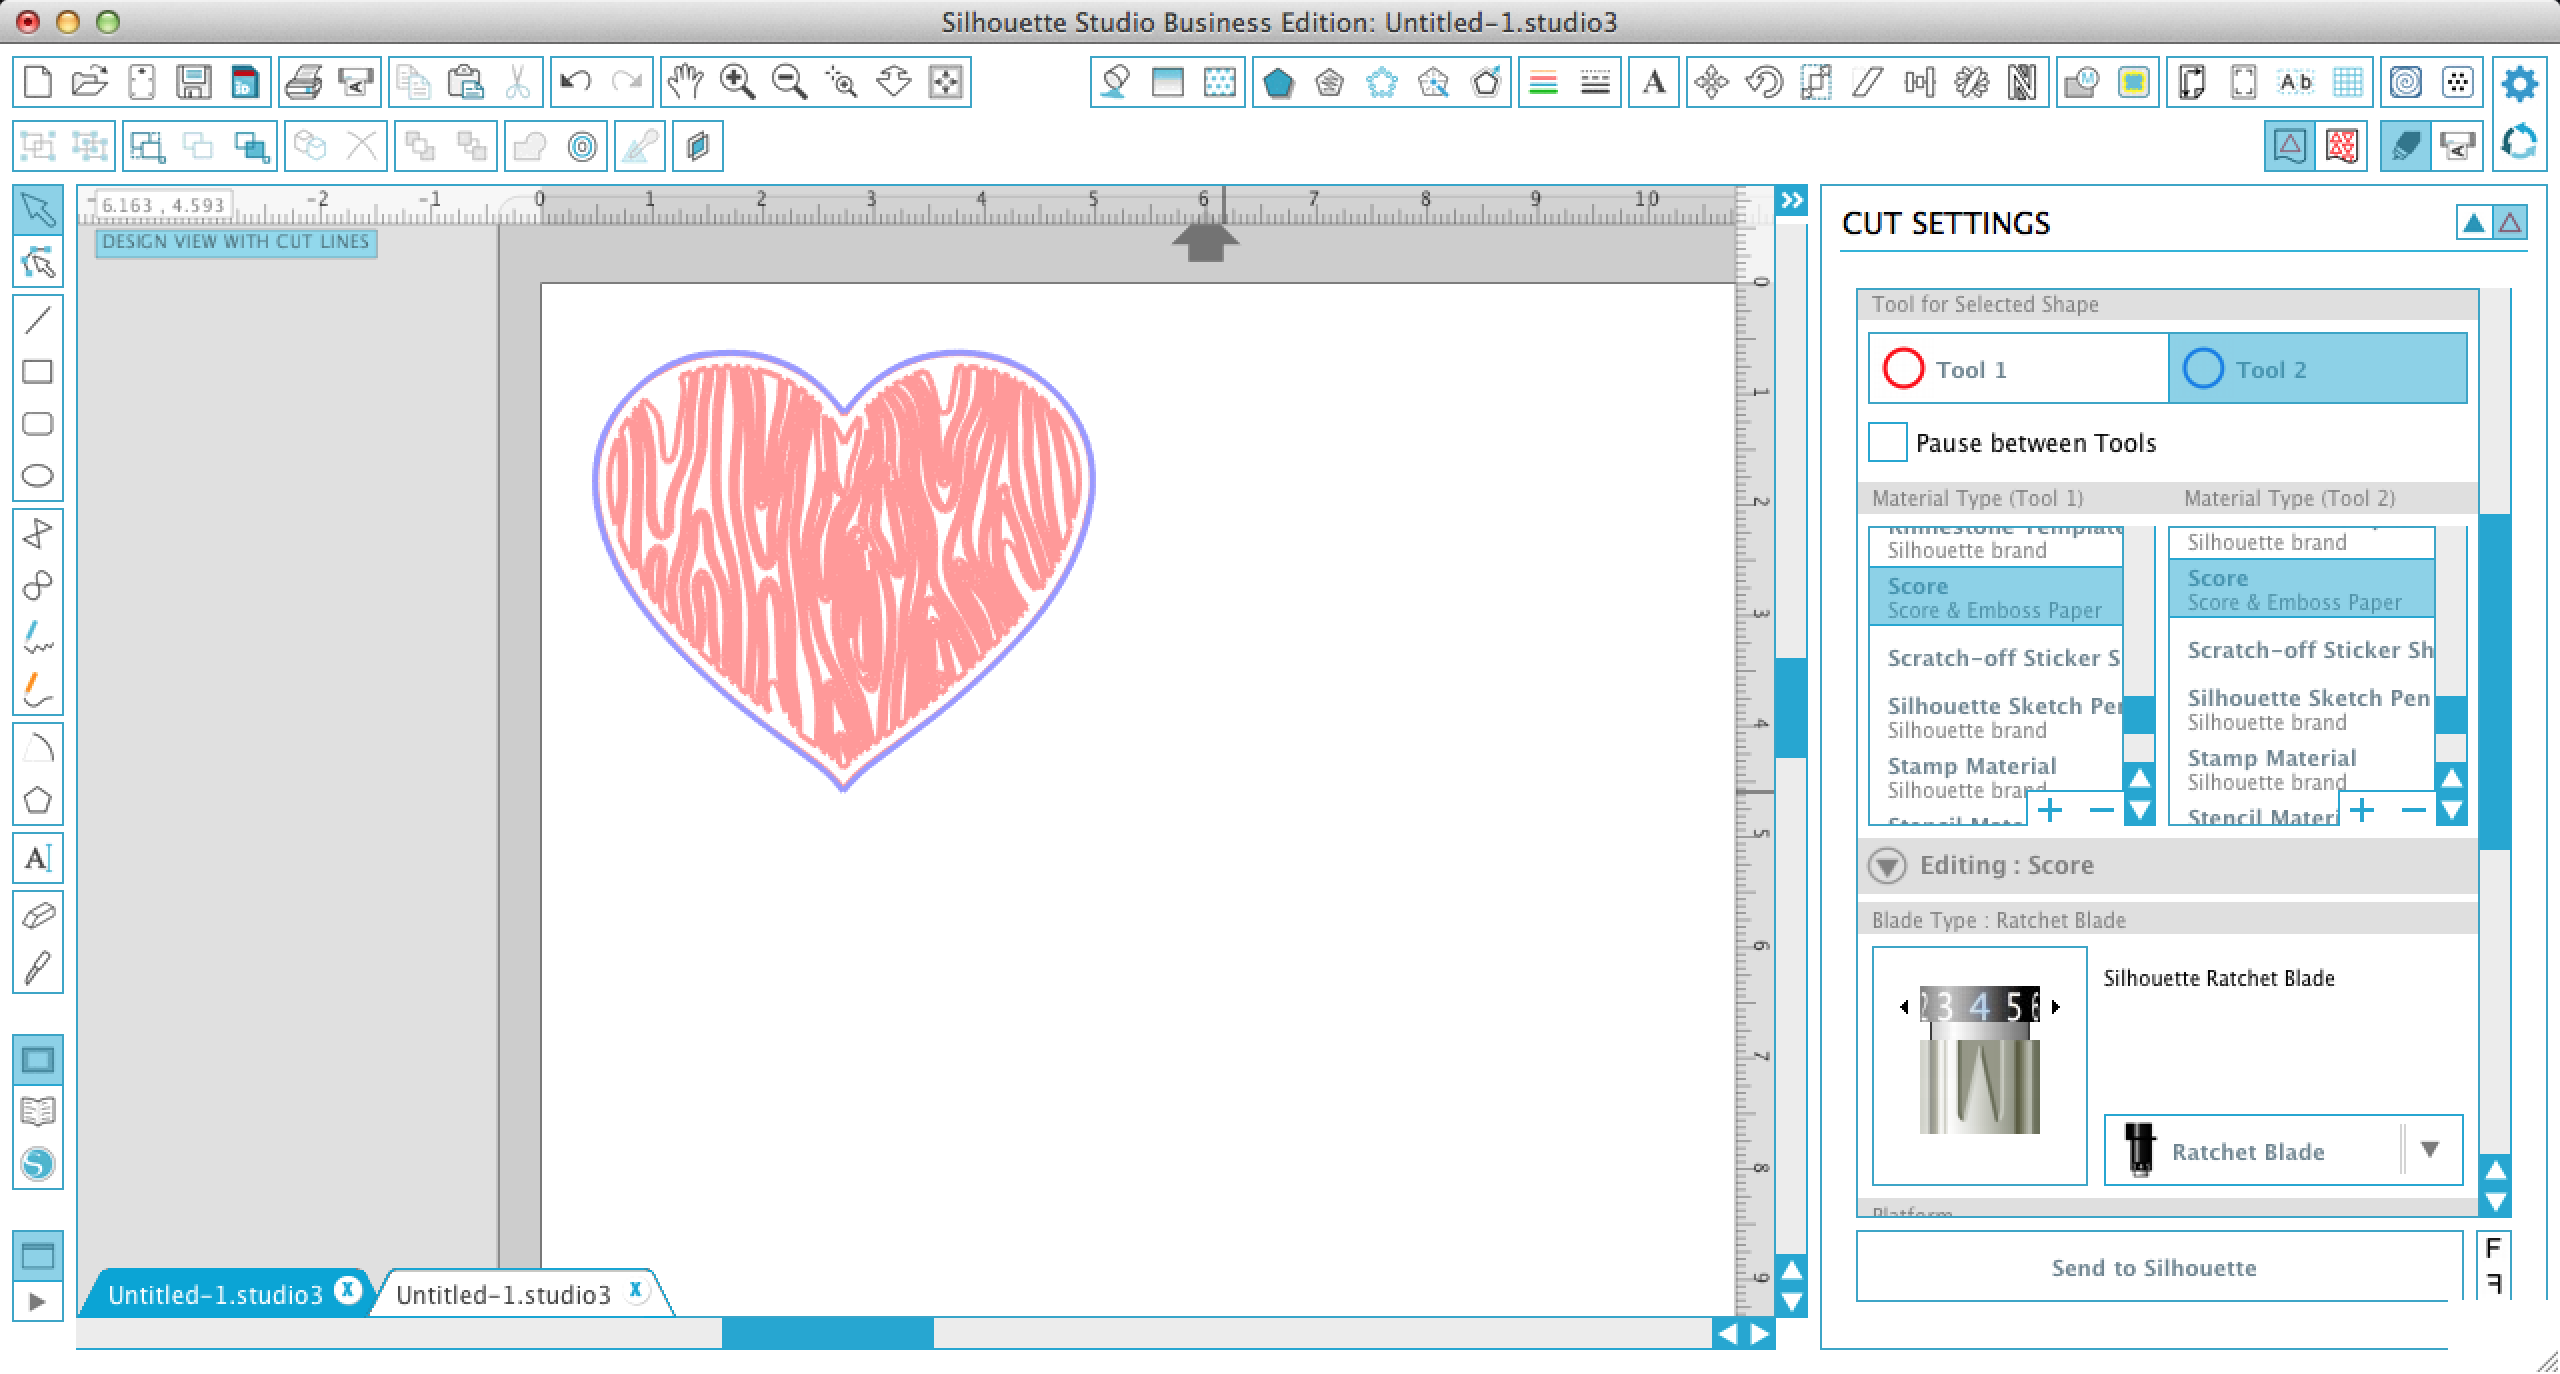
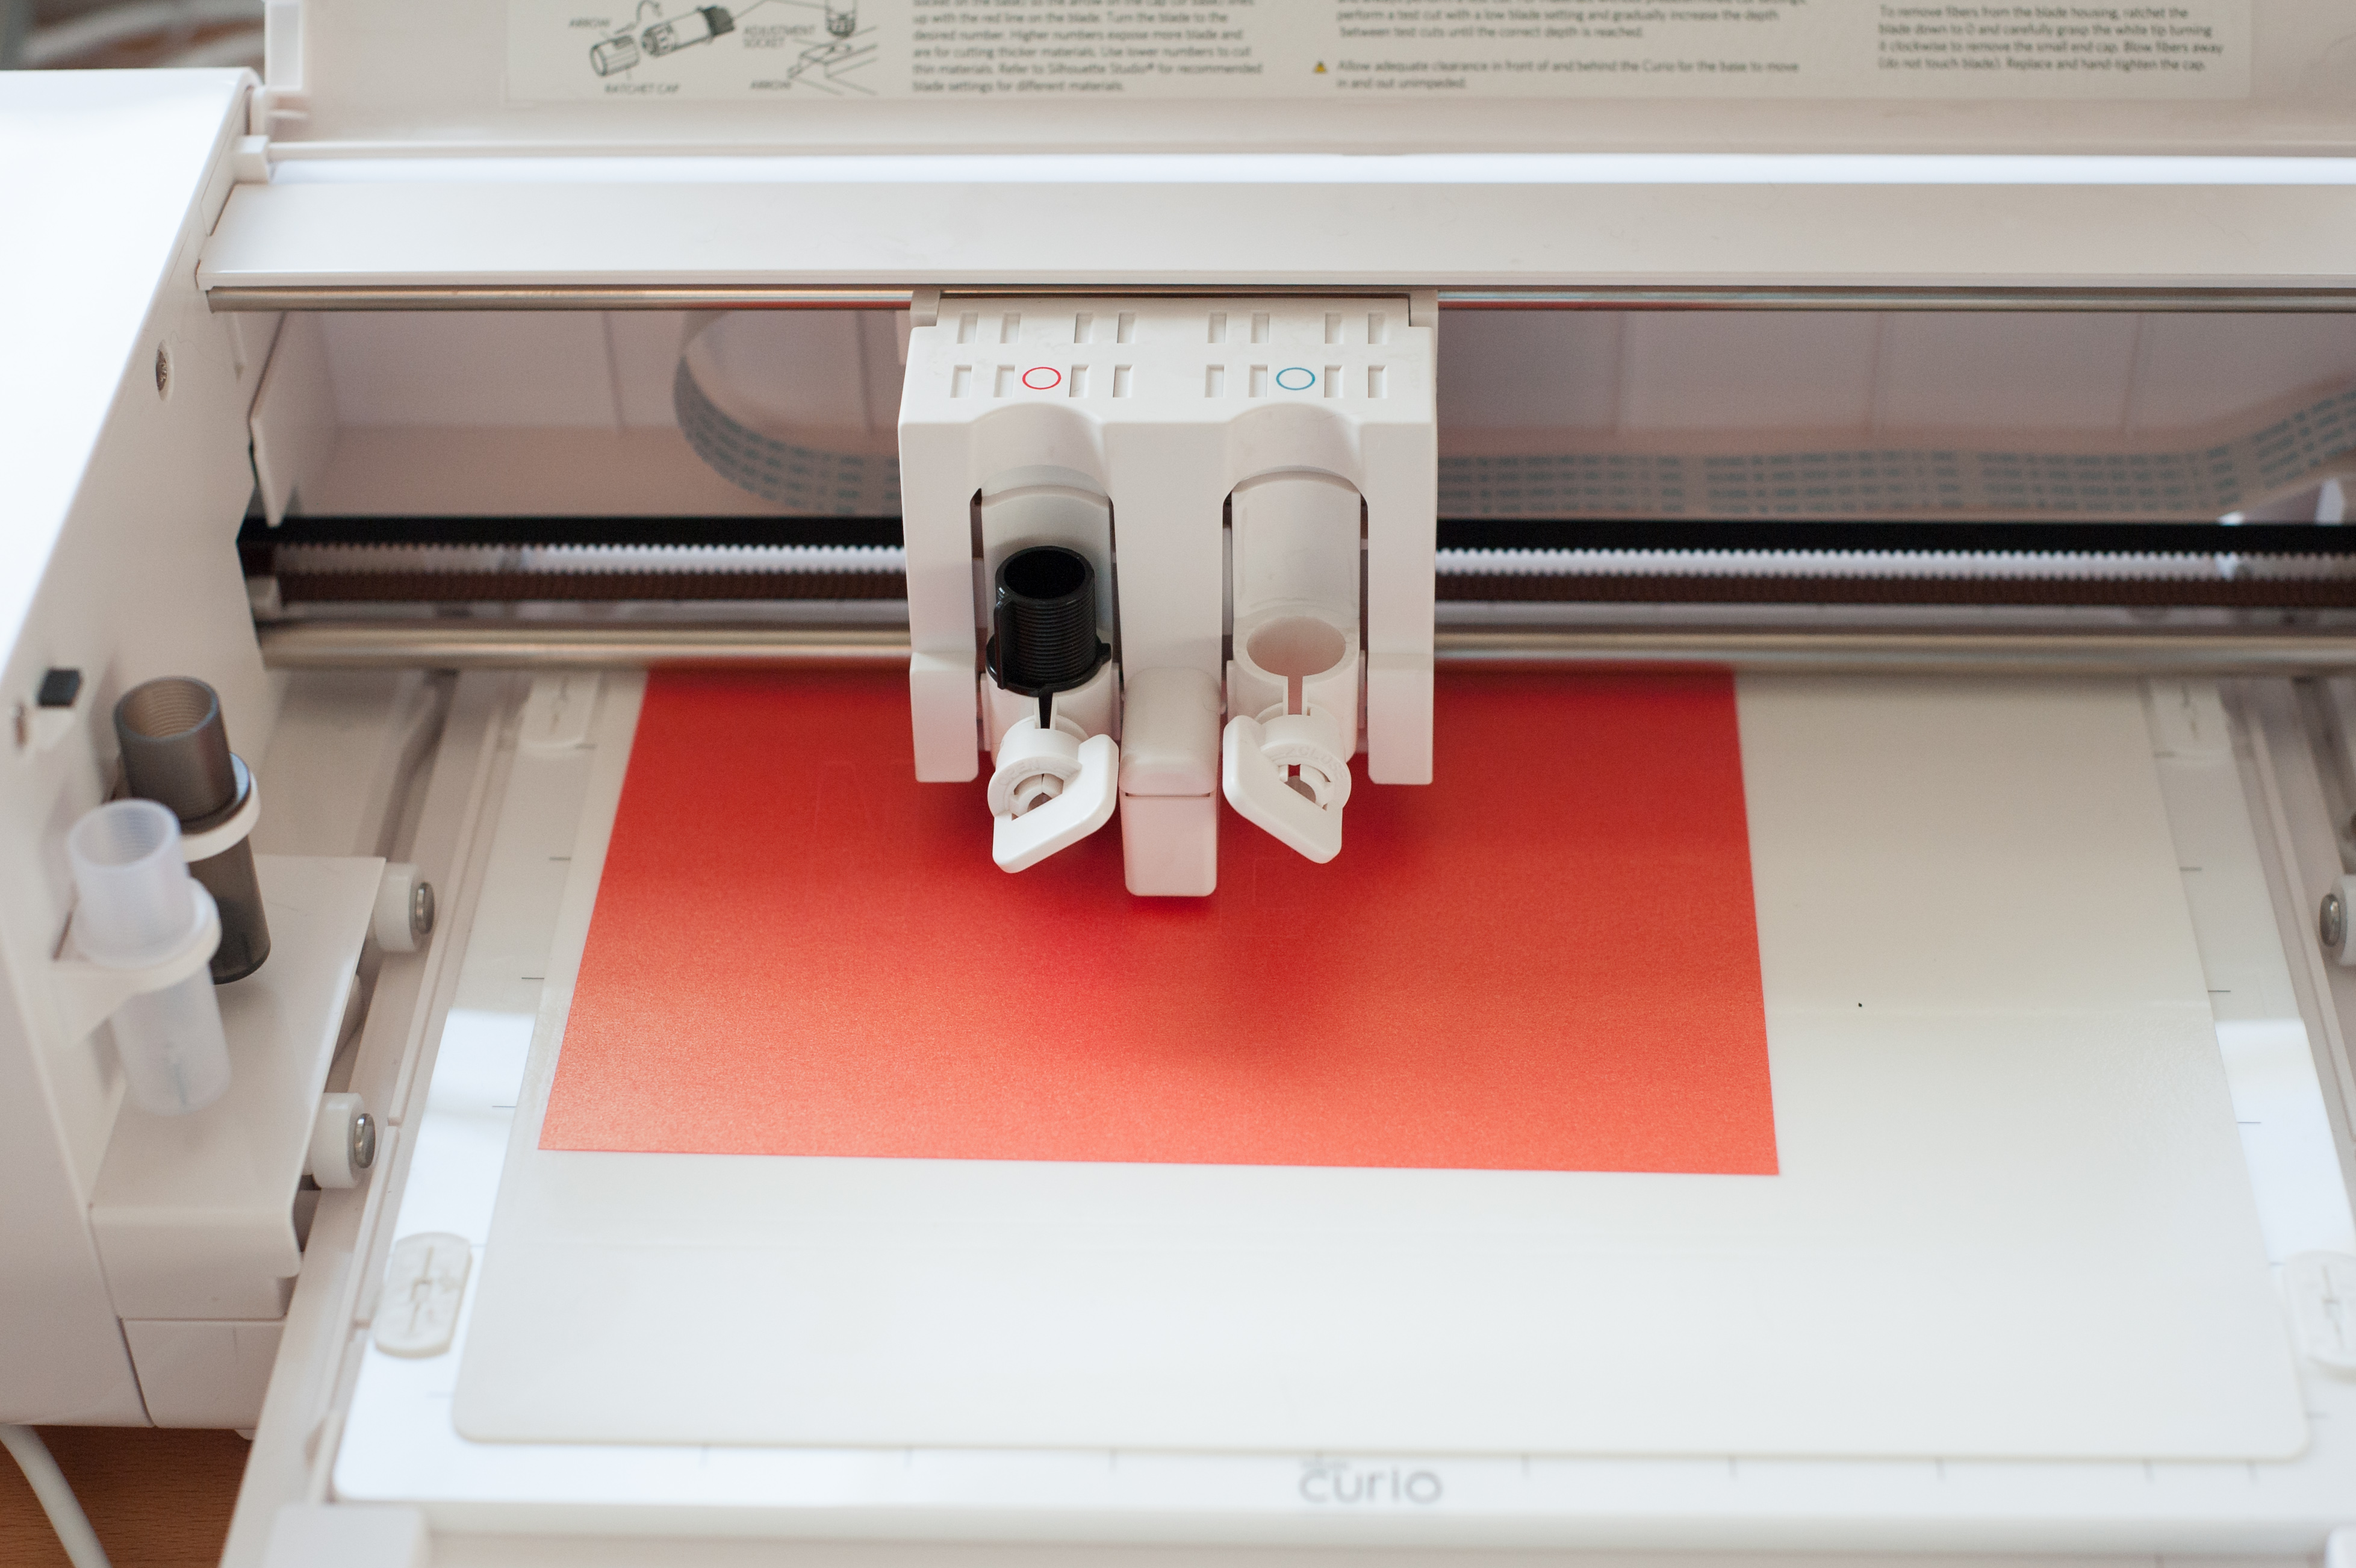
In your Curio machine, place the Fine Embossing tool in the left carrier (red circle) and the Ratchet Blade in the right carrier (blue circle) and turn the knobs on the carriers to lock both tools in place.
Step 3
The software helpfully shows you how many platforms you’ll need for the project you are working on in the Cut Menu dialog. For this heart art, you’ll need both ‘2’ platforms and then just your Embossing mat with your Score & Emboss paper on it. No need for the spare ‘1’ platform! Once you place all your platform layers on your Curio base, feed it into the machine, pushing the base about half way through the machine. Then turn the Curio on – it will grab and feed the base to the correct starting position! Then hit ‘Send to Silhouette’ and it will deboss and cut away!
Step 4
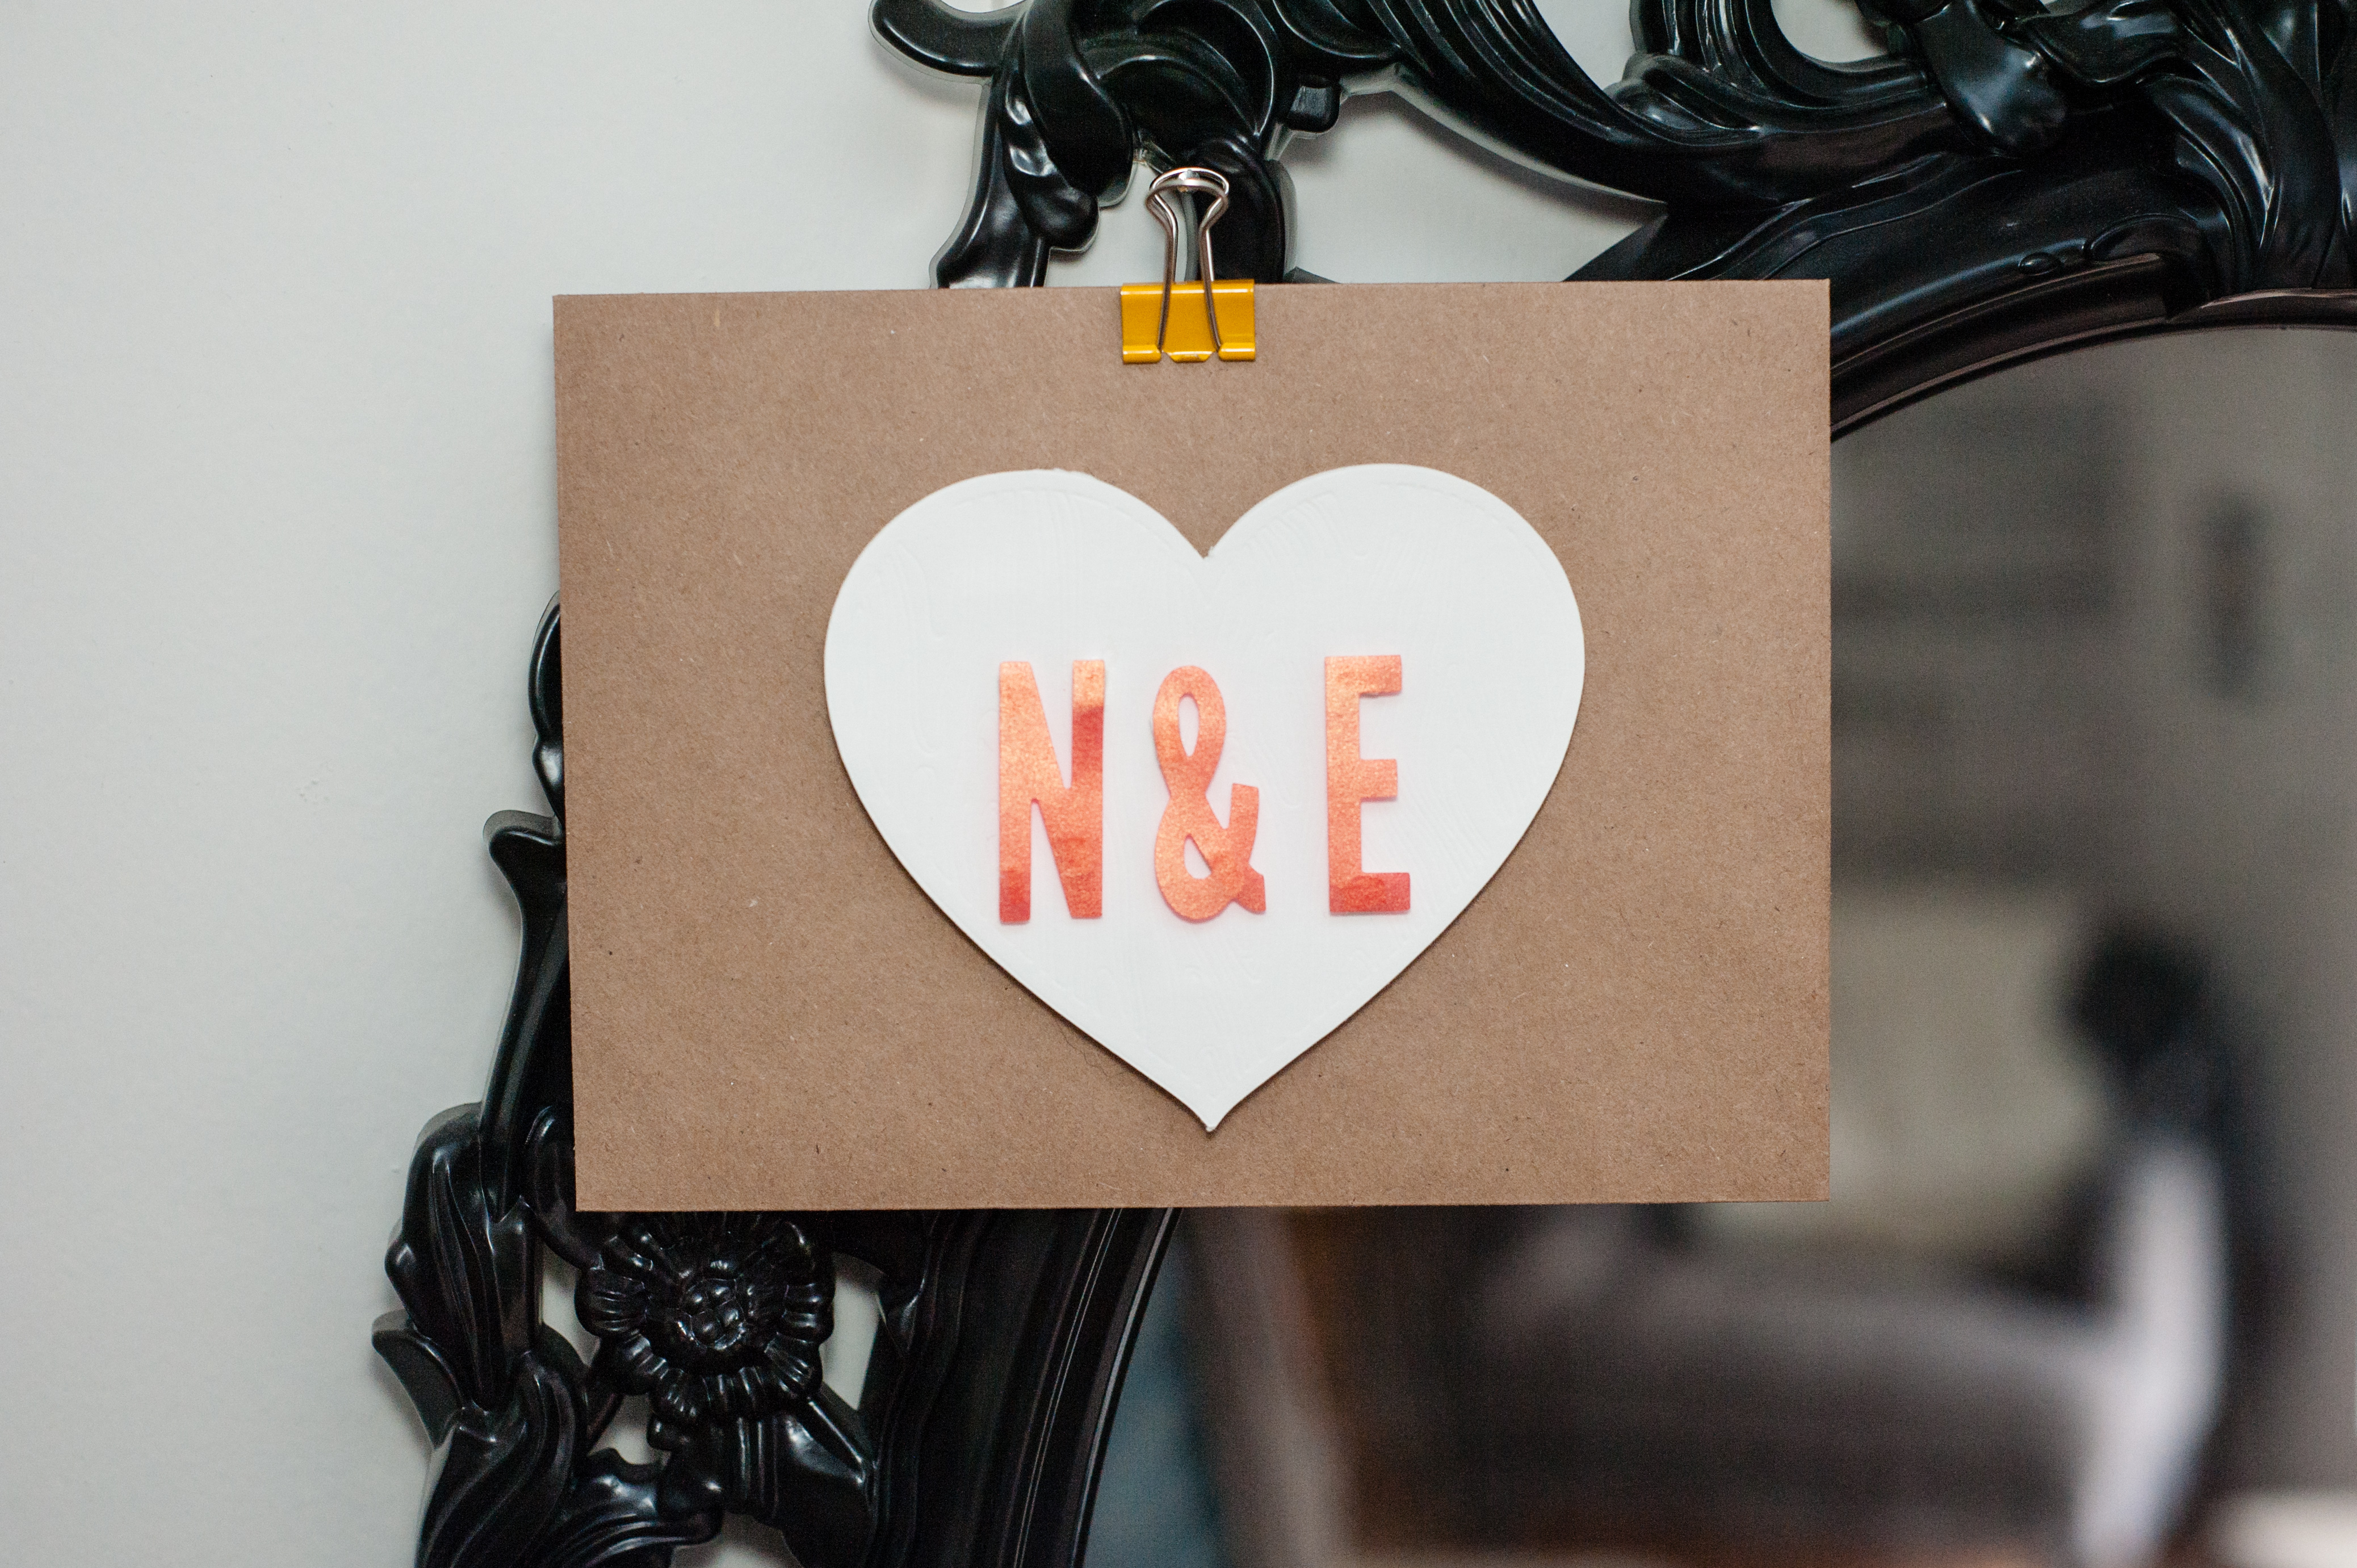
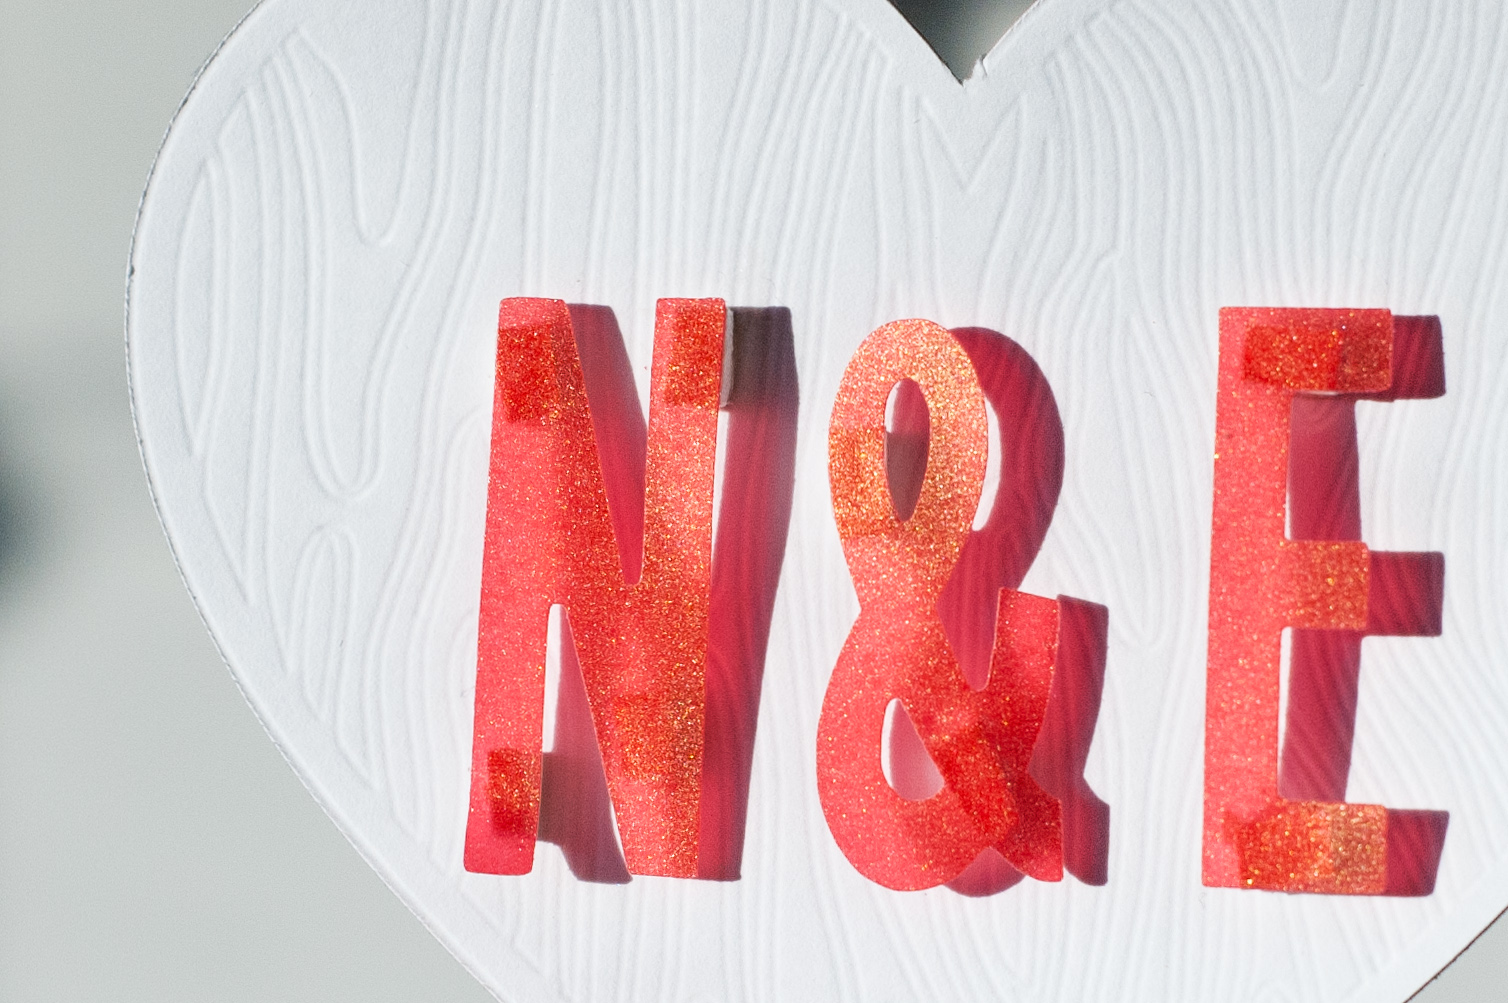
For the red N + E letters (insert you and your sweetheart’s own initials here), pull up the fonts by clicking on the letter ‘A’ symbol on the left hand side. I used LW Lovely Day for the font. Type the initials and then size and move it until you are satisfied with the placement on your heart.
In the ‘Cut’ Menu, change your material to ‘Vellum’ (or paper/cardstock/whatever type of material you want your red paper to be). Be sure to set your heart to “No Cut” and your letters to “Cut” – you will know if you’ve done it right if the letters are in red and the heart is in blue.
Step 6
Set your ratchet blade to 1, add the ‘1’ platform to the two ‘2’ platforms on your Curio base, and then place your piece of vellum onto the Curio cut mat, snap it into place on the base, and feed into the machine as you did previously. Hit ‘Send to Silhouette’ to cut out your letters!
Step 7
Once your letters are cut, give them a little dimension before gluing them to you debossed heart by attaching little foam pads to the undersides of your letters.
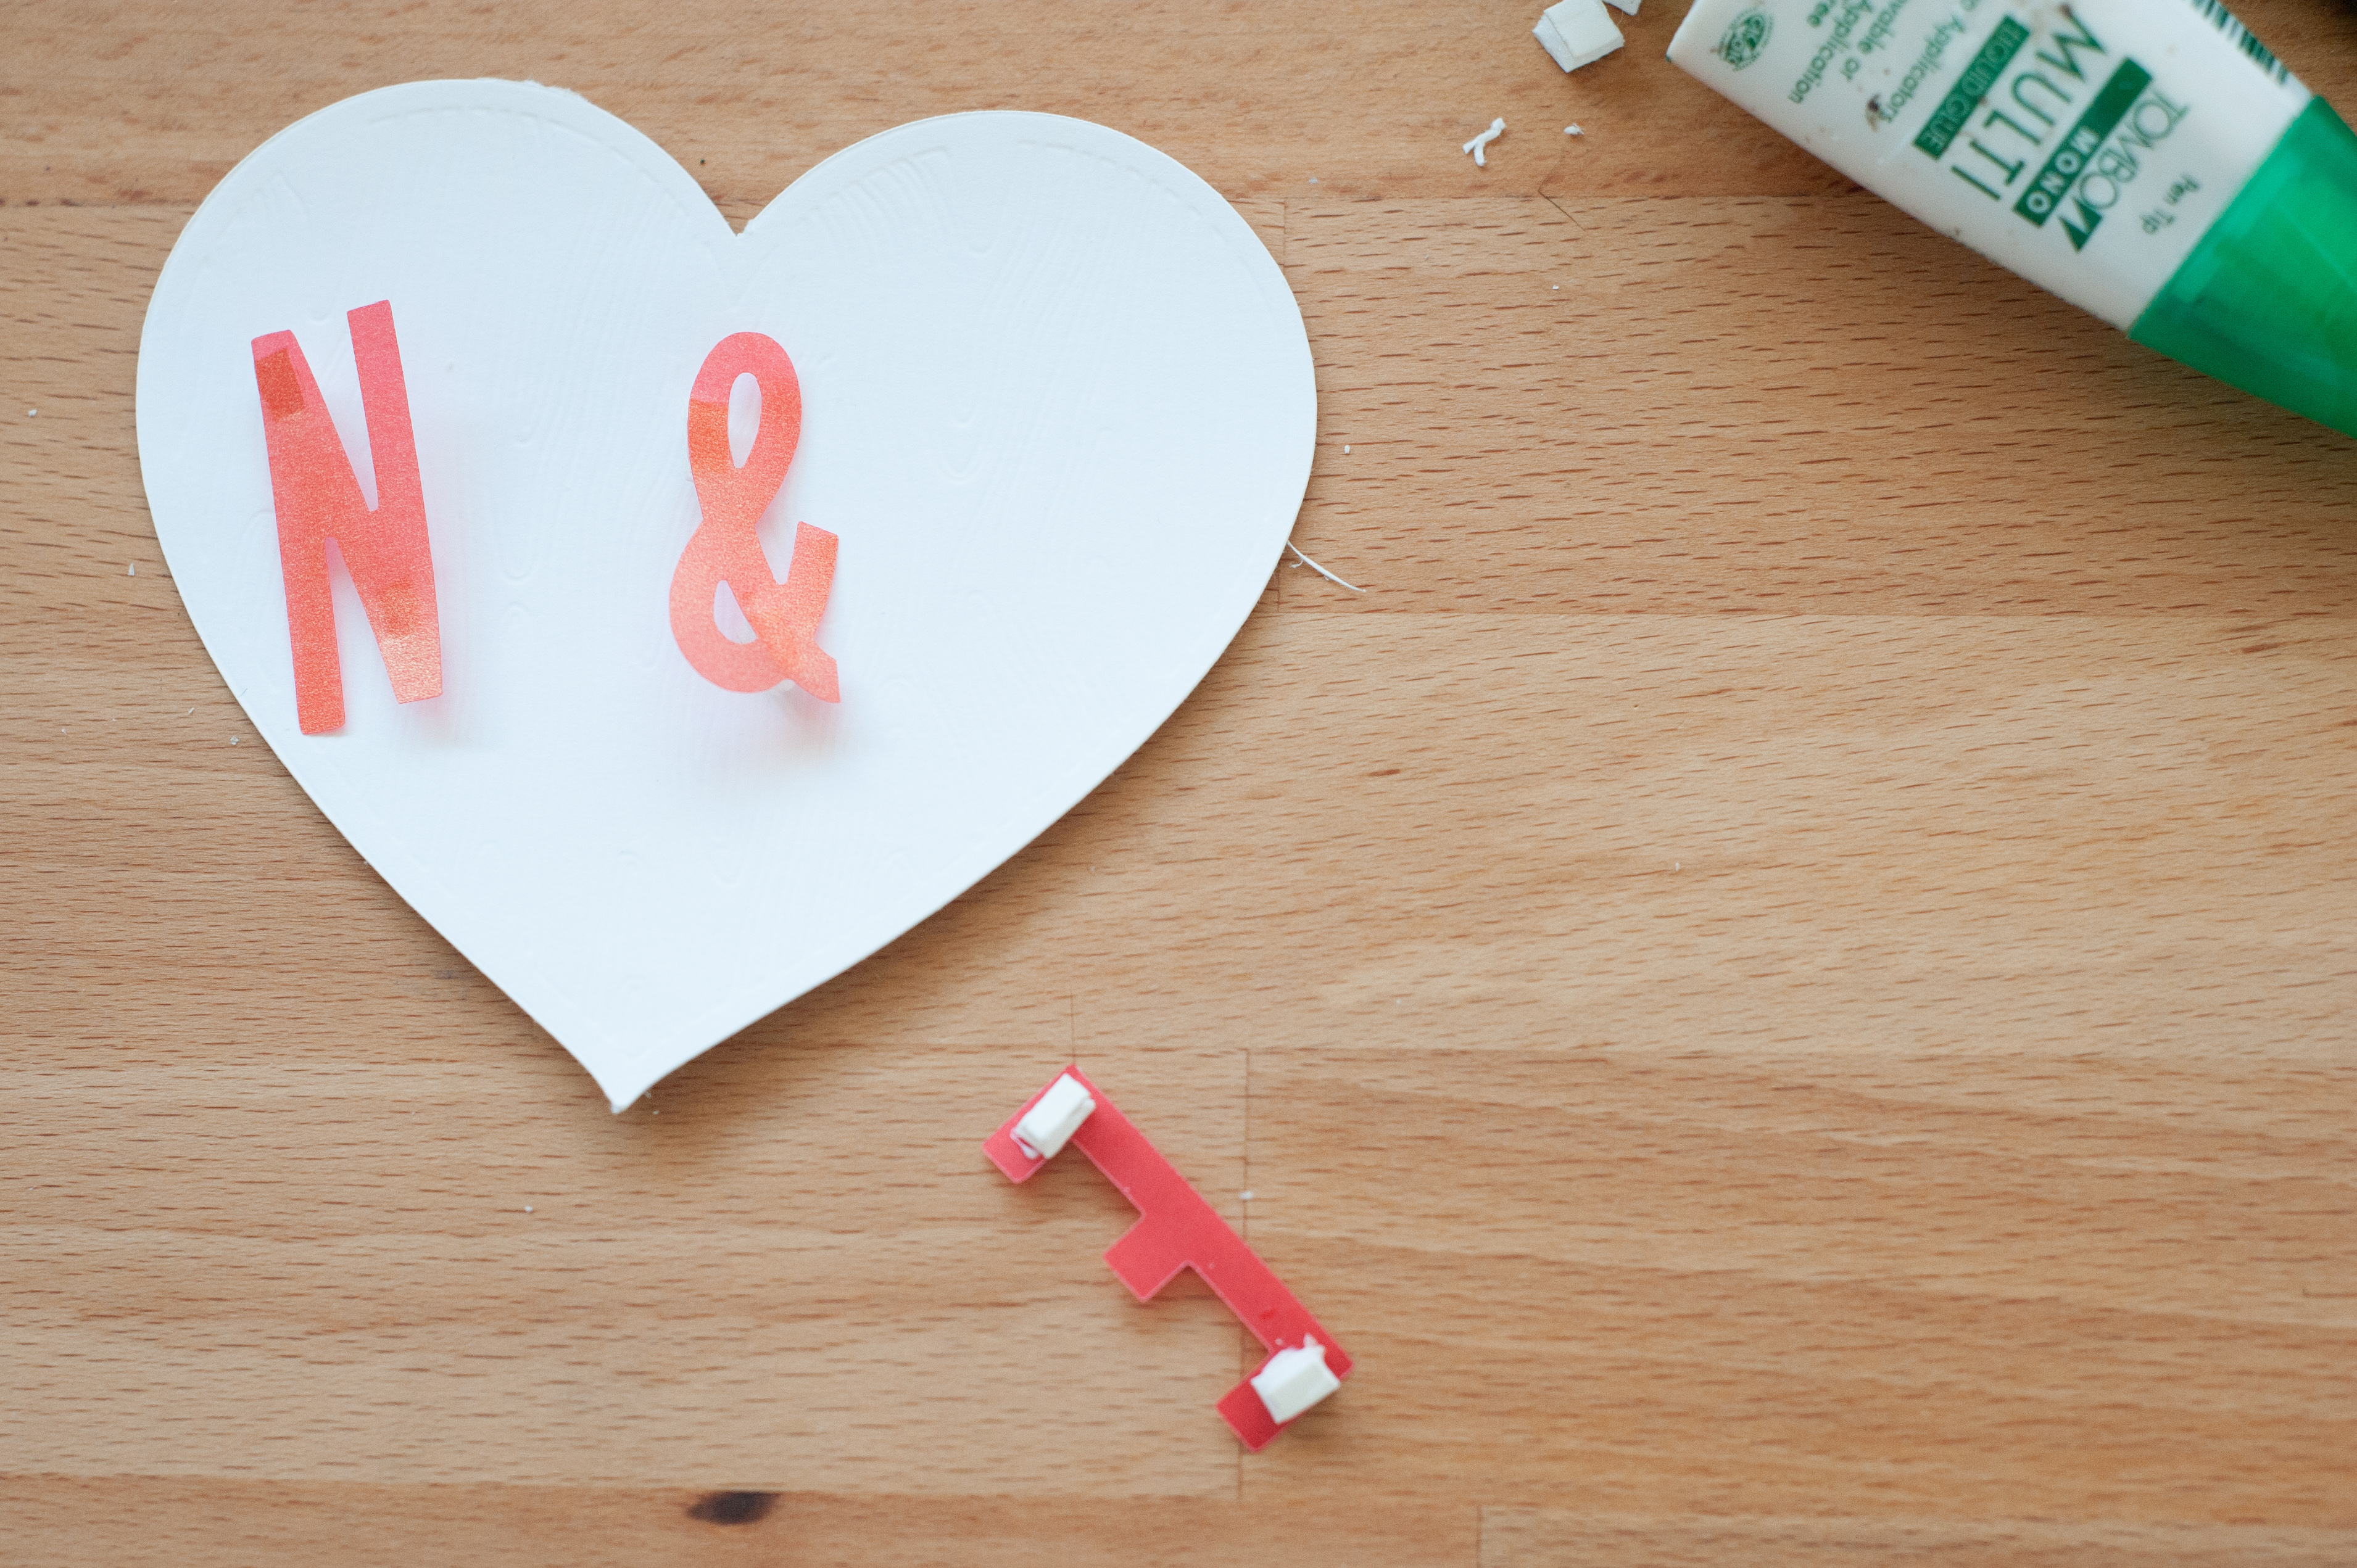
It really gives this heart art a bit of extra pop! And isn’t the debossed woodgrain texture just delicious??
Once you are done with this, add a couple more foam pieces to the back of your heart and then glue down to a square of brown kraft paper. Now you have a romantic piece of heart art (or even a card) that you can give to your loved one this Valentine’s Day!

Nasze Naturalne
September 3, 2025
Your authentic voice really shines through in everything you create and share
Naszenaturalne
September 2, 2025
Really love your style
Kelly Wayment
June 28, 2024
You can use it with vinyl as long as it is smooth and flat to allow the static charge to hold on to it. Rolled vinyl that wants to go back to its rolled shape will not necessarily work well, and it would need to be trimmed to fit the ES mat cutting area.
Kelly Wayment
June 28, 2024
Yes, you can use the heat pen while using the ES mat. 🙂
Yurii
March 2, 2024
Hello. May it be used with heat pen?
Thanks
Jerome
February 24, 2024
Hi, works this with the normal vinyl foils or only with printer papter etc?