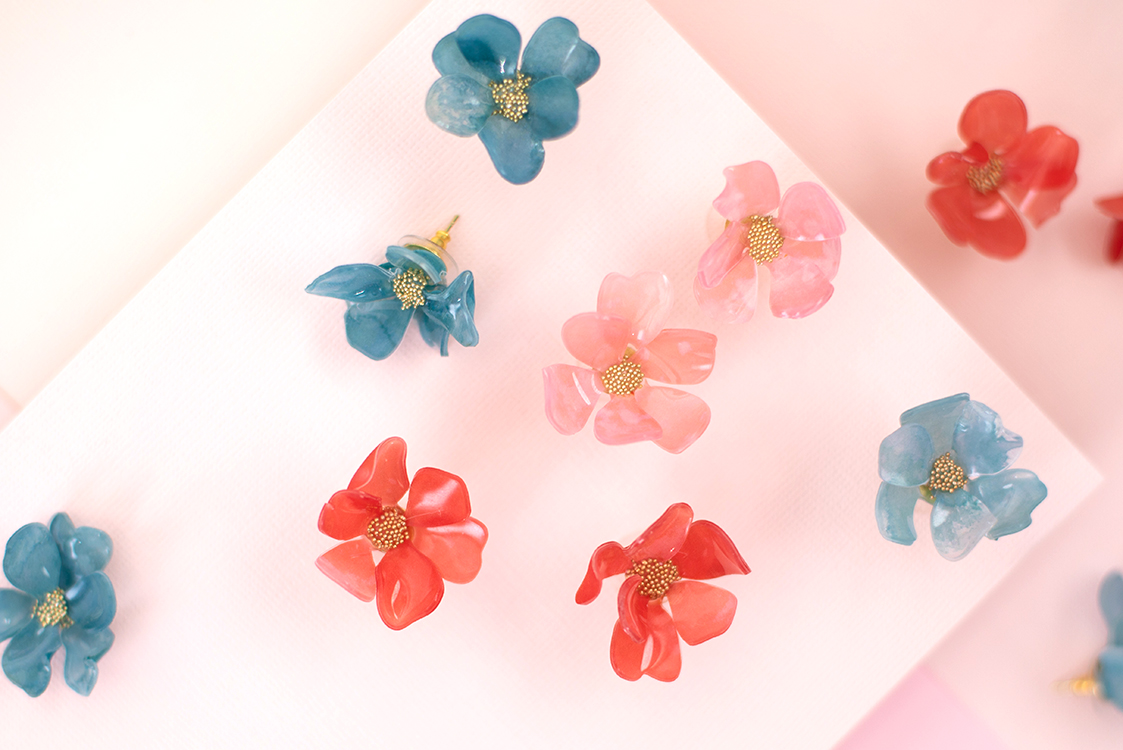
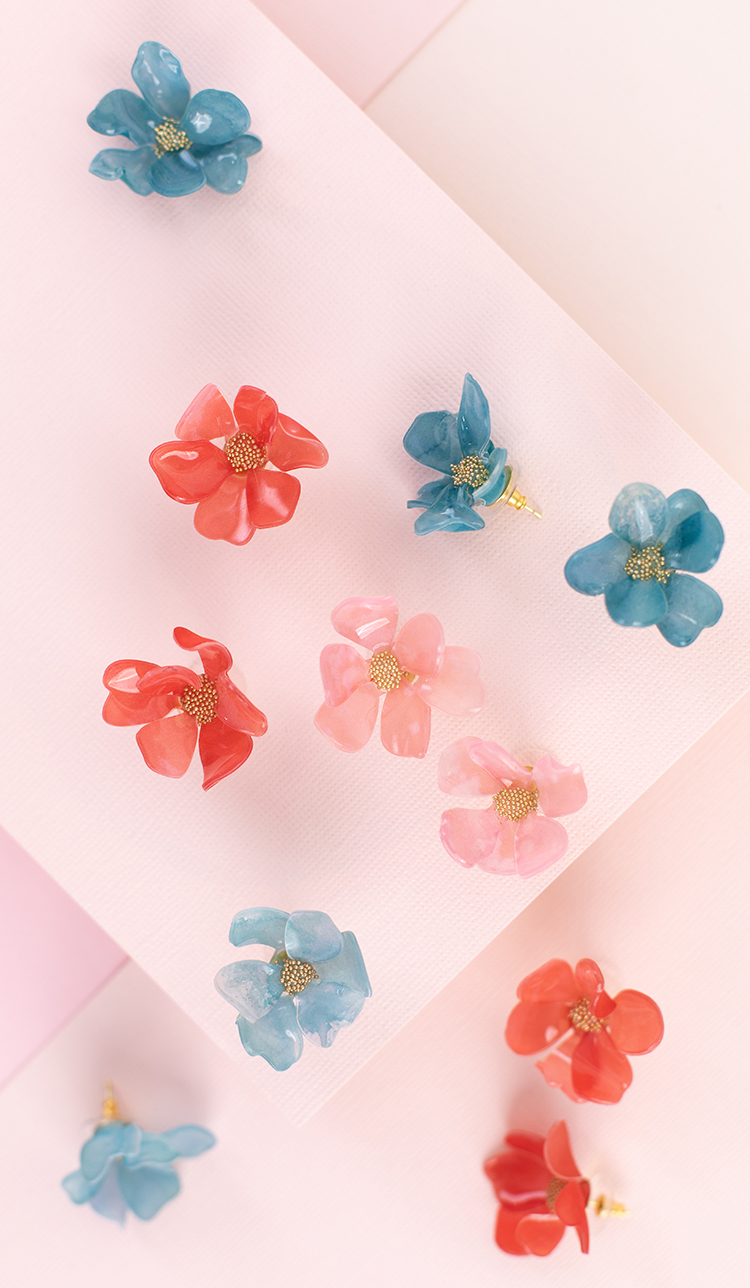
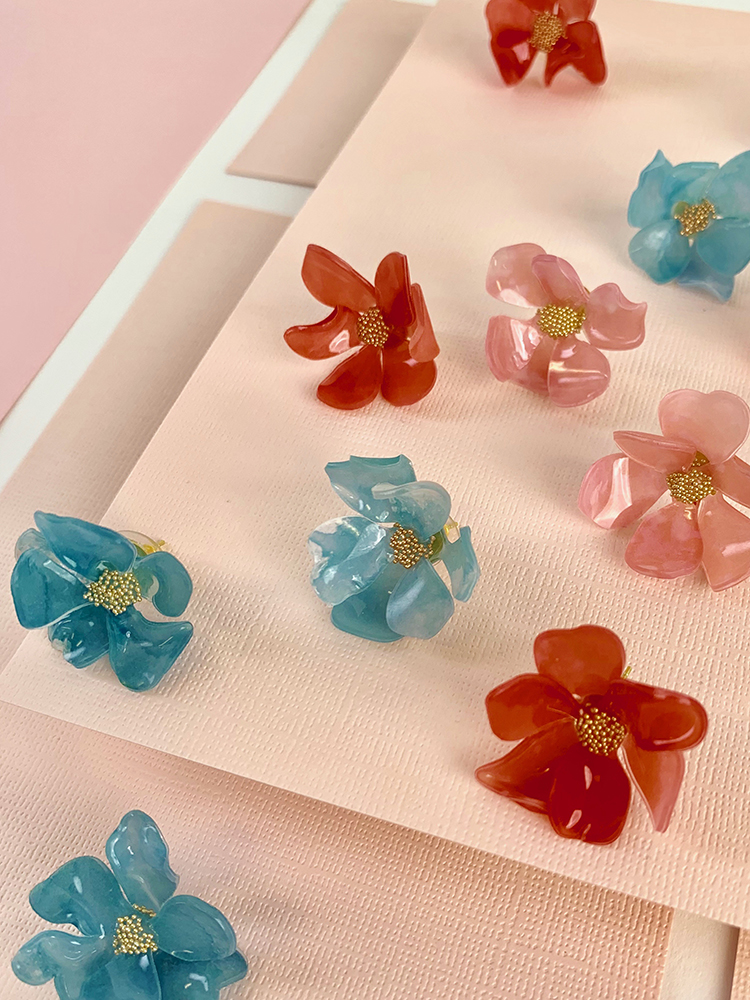
Statement earrings are always a fun addition to an outfit, and these shrink plastic flower earrings are no exception! Using clear printable shrink plastic and a few notions, you can create acrylic-like blooms that look way more expensive than they are!
Supplies Needed:
- Silhouette CAMEO®
- Silhouette Cutting Mat
- Silhouette Cutting Blade
- Clear Shrink Plastic
- Heat/embossing tool
- Earring posts
- Earring Back Disks
- Super Glue
- Hot glue gun
- Gold microbeads
- Design ID #95013 (for the flower petals)
- Design ID #59762 and #57486 (for the watercolor backgrounds)
Step One: Preparing Your Design
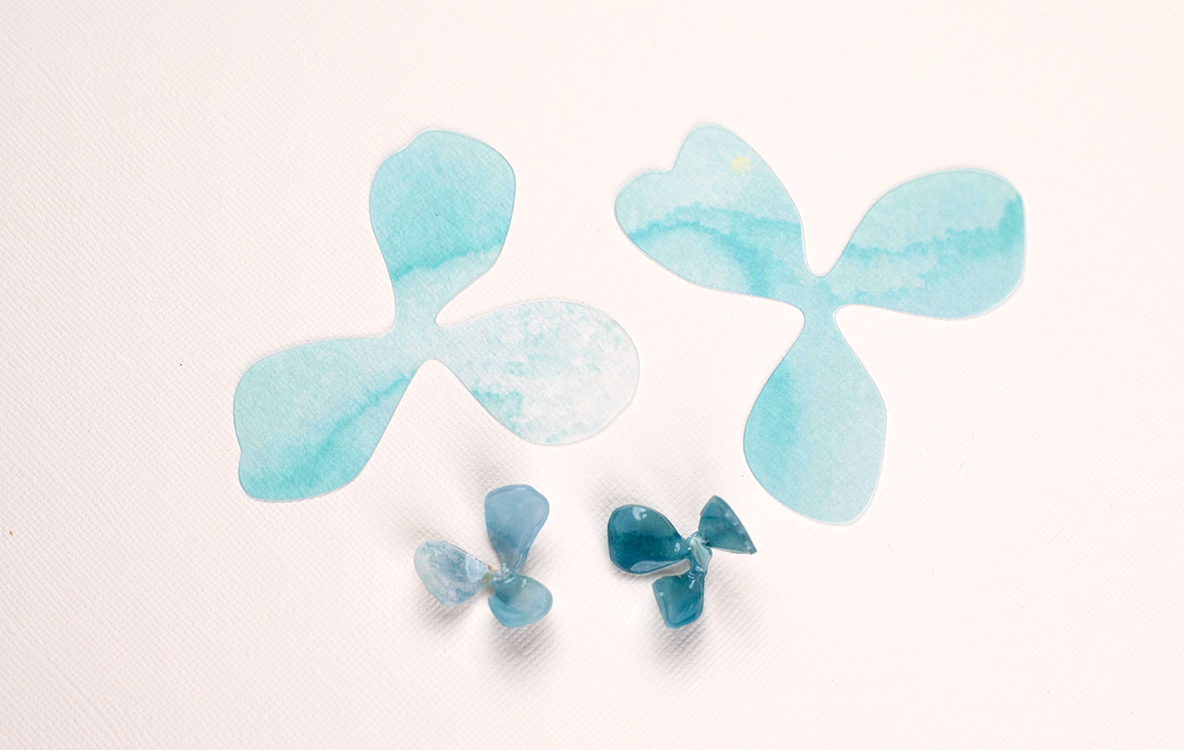
1. Insert Design ID#95013 into Silhouette Studio®. Ungroup the design and delete the centers. Turn on registration marks.
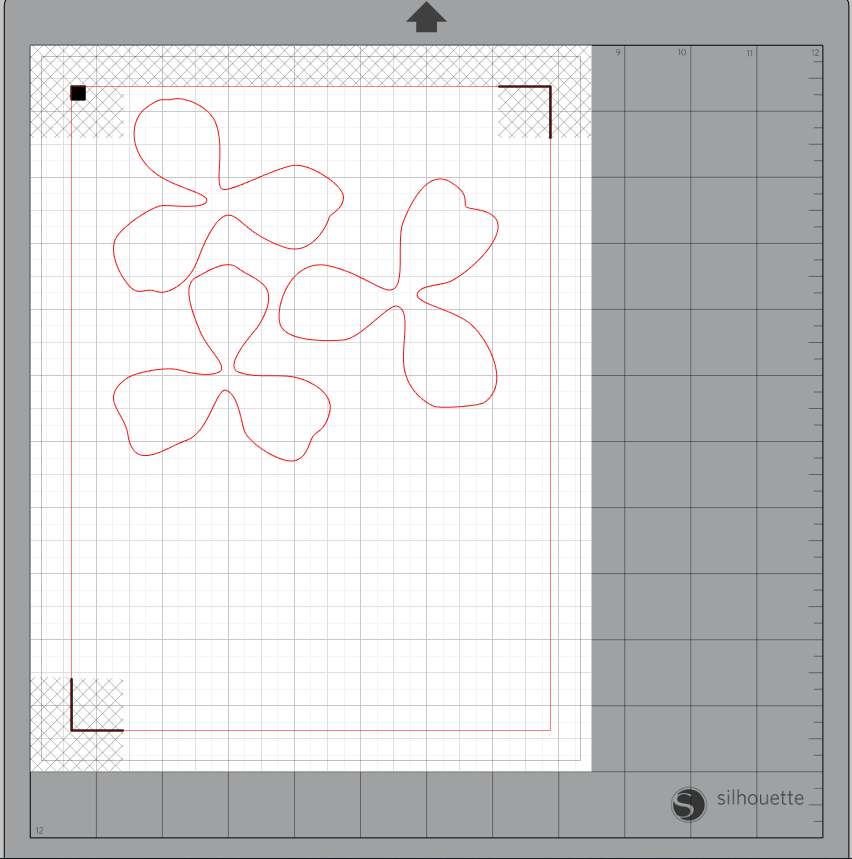
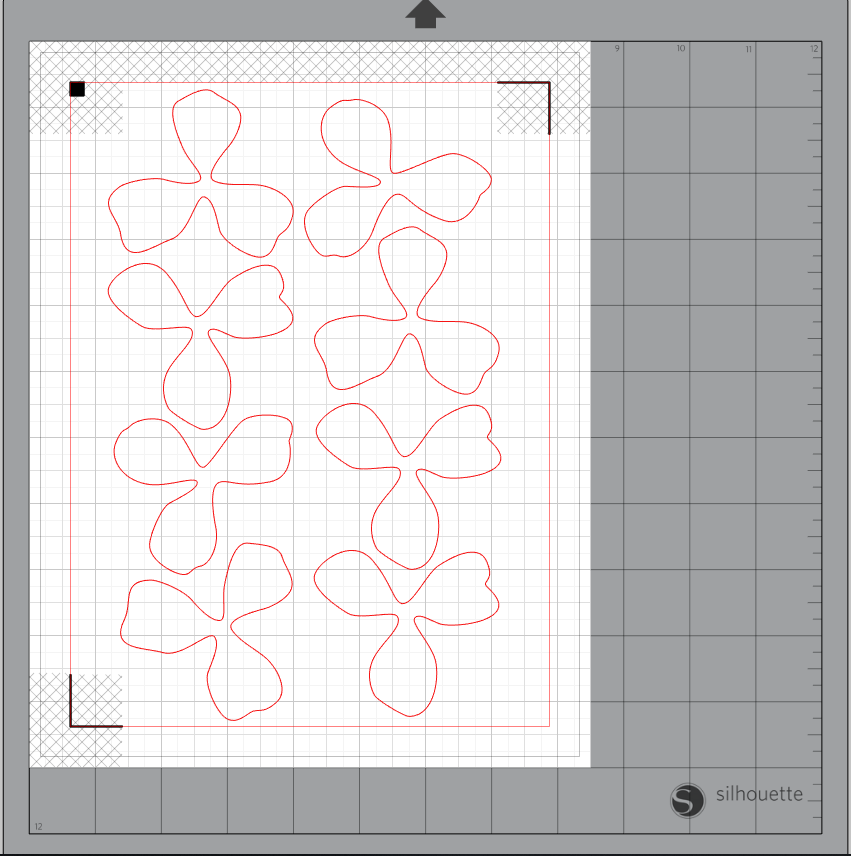
2. Resize the flower shapes so they’re in between 2.5 and 3 inches wide. Note: Shrink plastic will shrink to about a third of the size once heated. Each earring requires two flower shapes; a set of earrings means you’ll need 4 flower shapes. Duplicate the shapes to make the desired number of earrings. The photo below will create 2 pairs of earrings or 4 individual earrings.
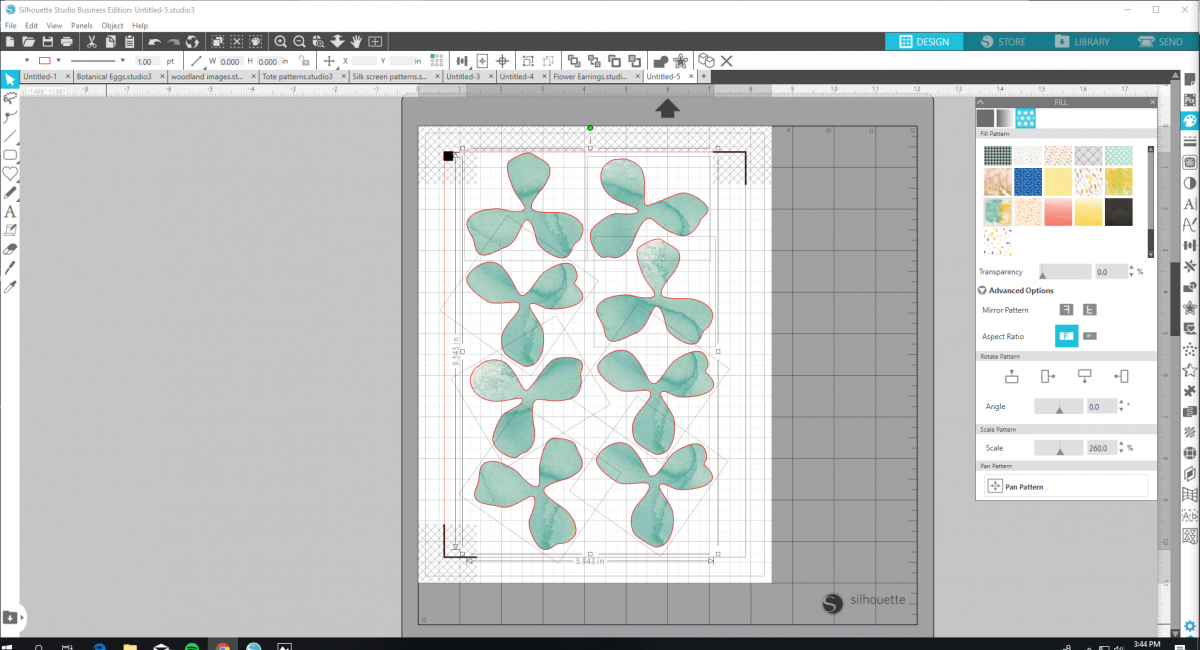
3. Select all your flower petals and fill them with your watercolor pattern using the Fill panel. Increase the scale of the pattern to 260%.
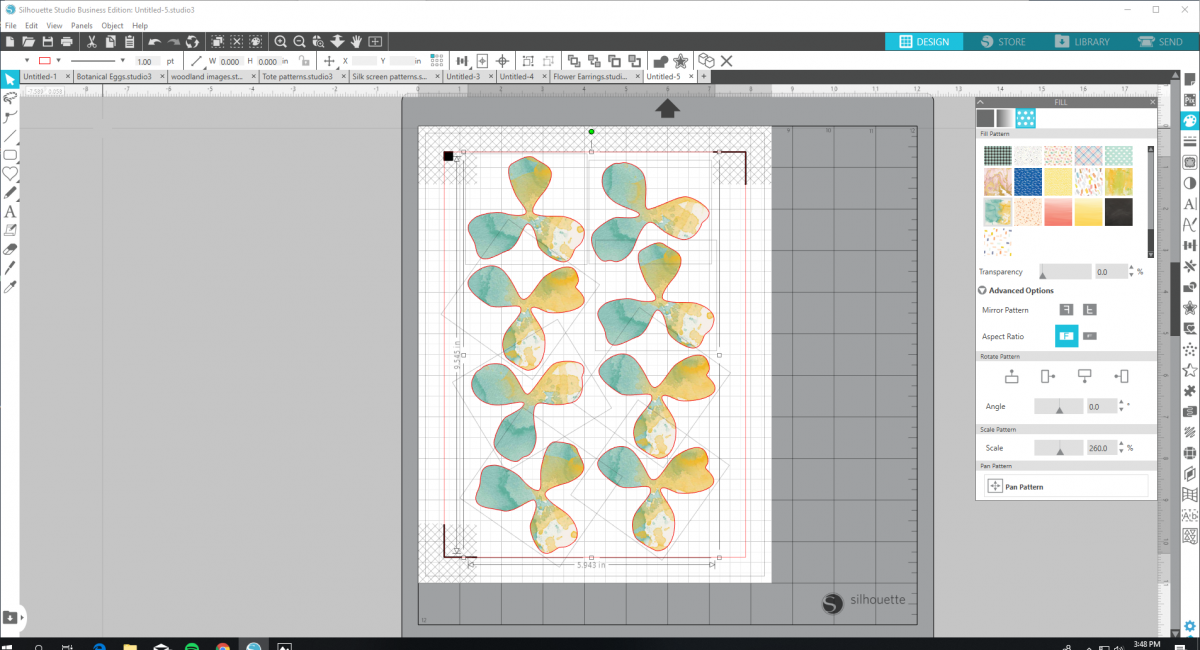
4. Then select each flower individually and pan the pattern so each petal has no yellow showing and is slightly different from the others.
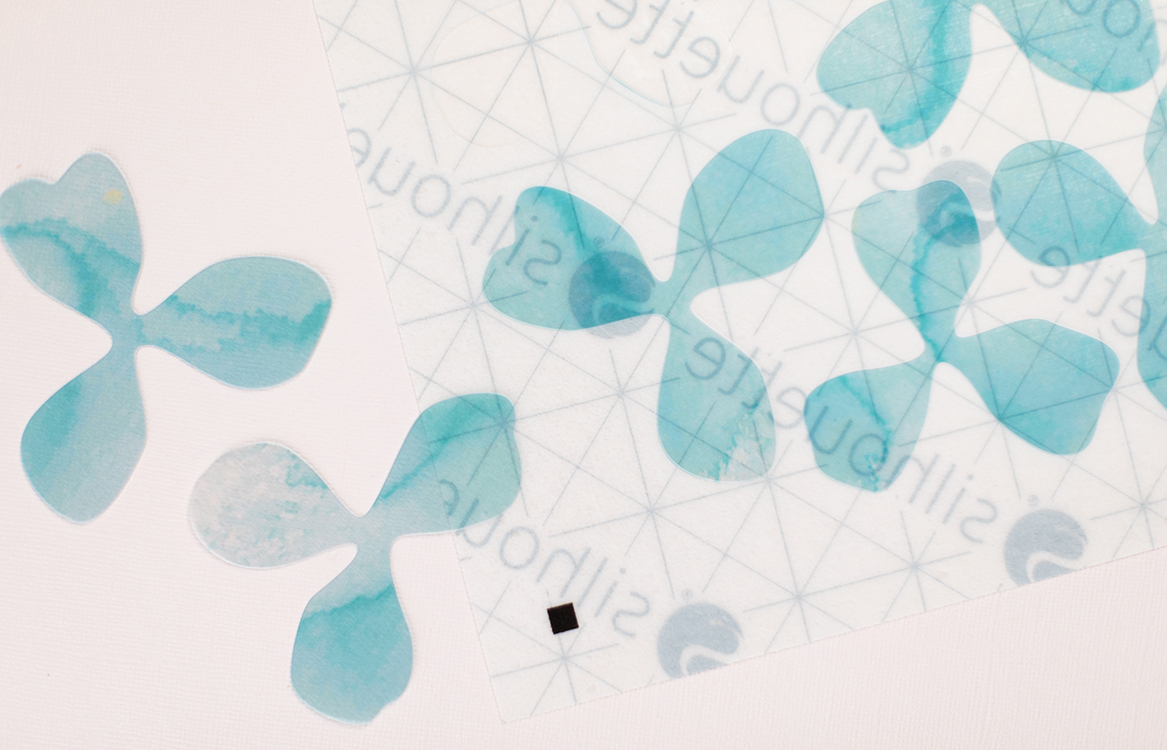
5. Load your clear shrink paper into your ink-jet printer and print this design on the correct side of the paper.
6. Once printed, load your paper into your machine to cut, insuring that your machine is set to the correct cutting settings for shrink plastic.

Step Two: Creating Your Earrings
1. Place a pencil or your weeding tool into the center of one of the flower petal pieces, shiny side up, and heat with a heat gun.
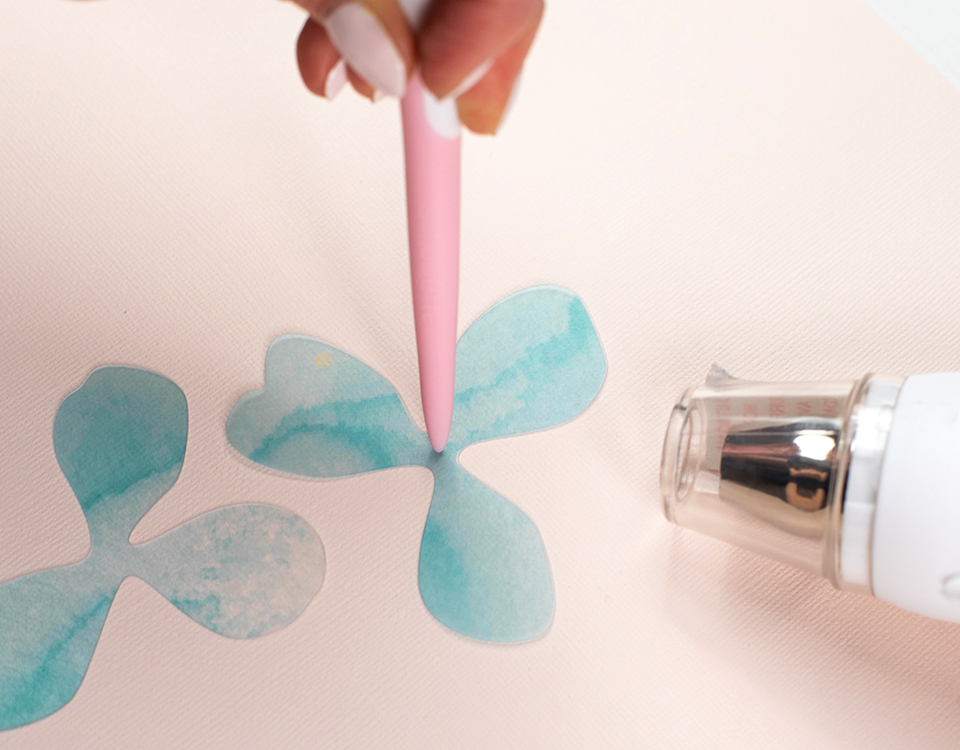
2. The petals will curl up and shrink when heated. Turn off the heat gun once the pieces are done shrinking and manipulate the petals with your hands while the pieces is still warm if you want to many any adjustments to the petal shape.
3. Repeat with all your flower petal pieces. Then layer two of the petals on top of one another and secure with super glue.
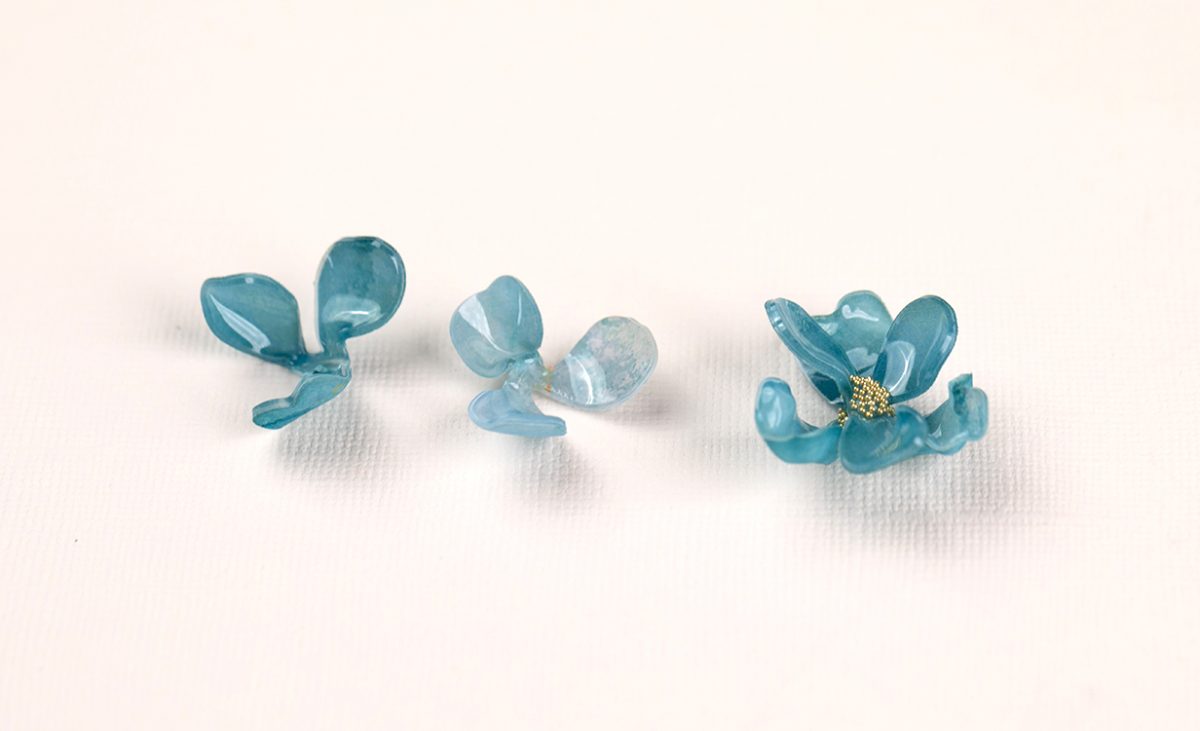
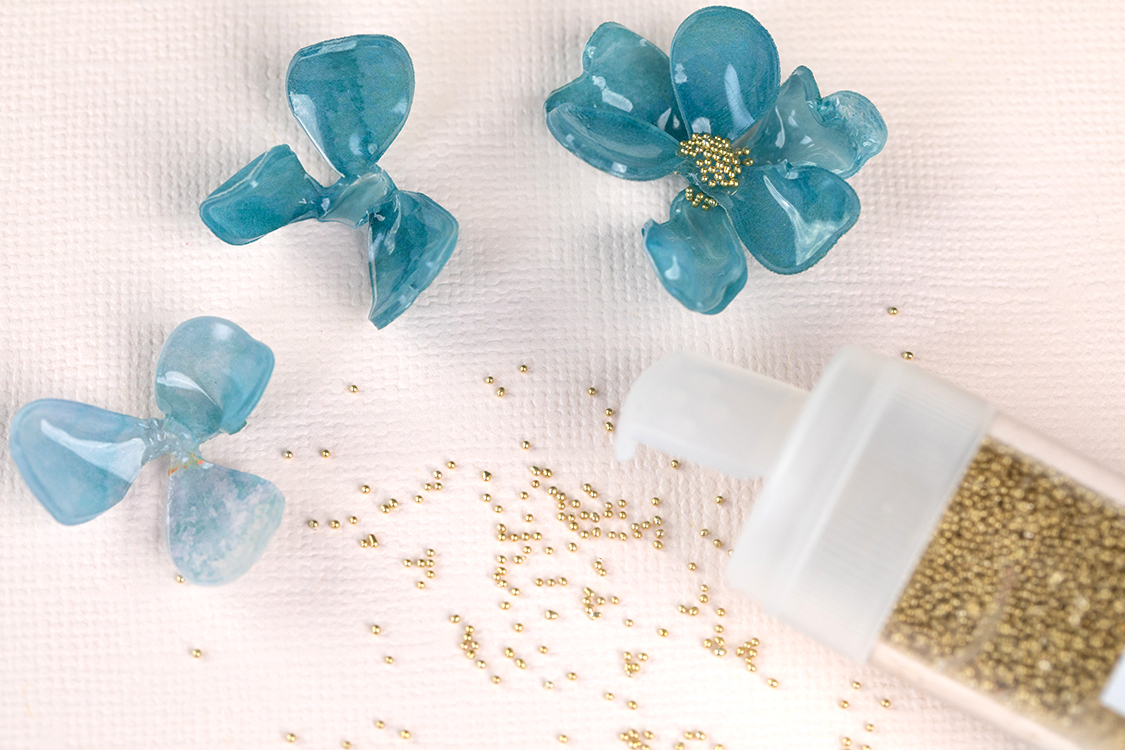
4. Add a dab of hot glue into the center of your flower and pour over tiny gold beads to create a center.
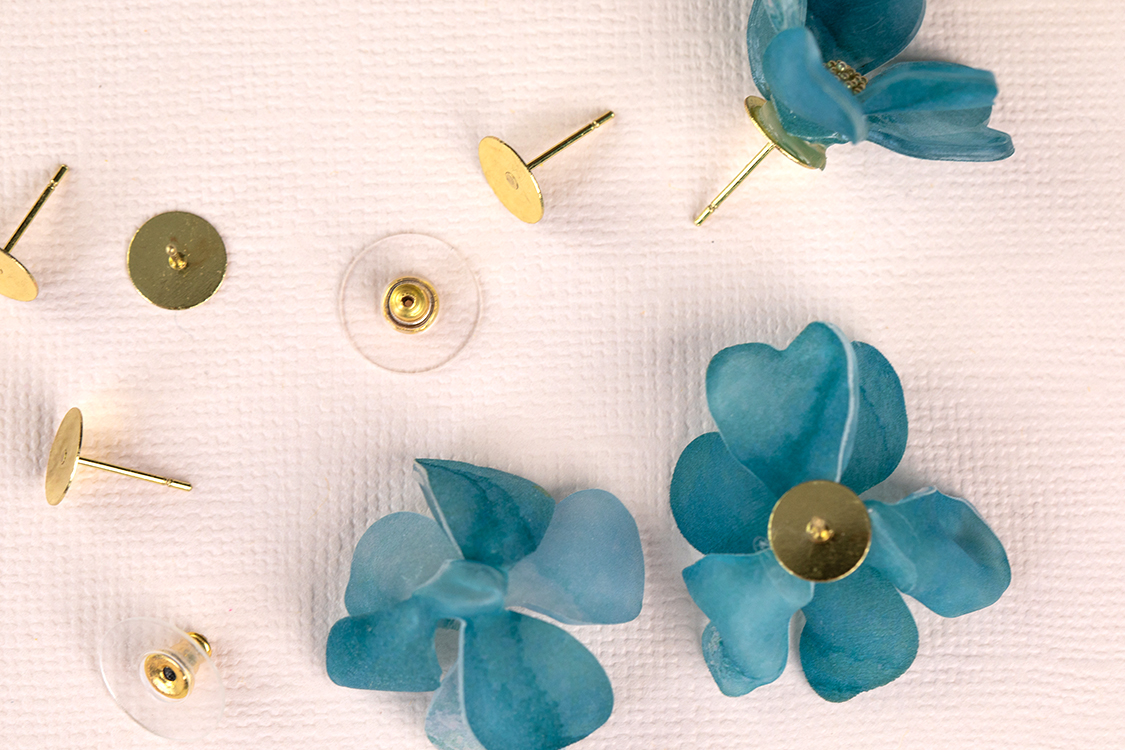
5. Super glue earring posts onto the back of your flowers.
6. Make your flower earrings in various colors and create a whole garden of earrings!
 Shrink Plastic Butterfly Sign
  Silhouette Online Classes
Kelly Wayment
June 28, 2024
You can use it with vinyl as long as it is smooth and flat to allow the static charge to hold on to it. Rolled vinyl that wants to go back to its rolled shape will not necessarily work well, and it would need to be trimmed to fit the ES mat cutting area.
Kelly Wayment
June 28, 2024
Yes, you can use the heat pen while using the ES mat.
Yurii
March 2, 2024
Hello. May it be used with heat pen?
Thanks
Jerome
February 24, 2024
Hi, works this with the normal vinyl foils or only with printer papter etc?
Kelly Wayment
February 16, 2024
Once you’ve pushed the mat up against the rollers, just press the “Load” arrow button (bottom right on the display). Does a regular sticky mat load into the machine for you?
Michelle a goodall
January 24, 2024
Hello! I just got my new electrostatic mat and have watched every video i can find on it. However, what i can t find is why it wont feed into my cameo 5/ it slides right up the rollers but wont go any further. and yes- iam pushing the into button. help!