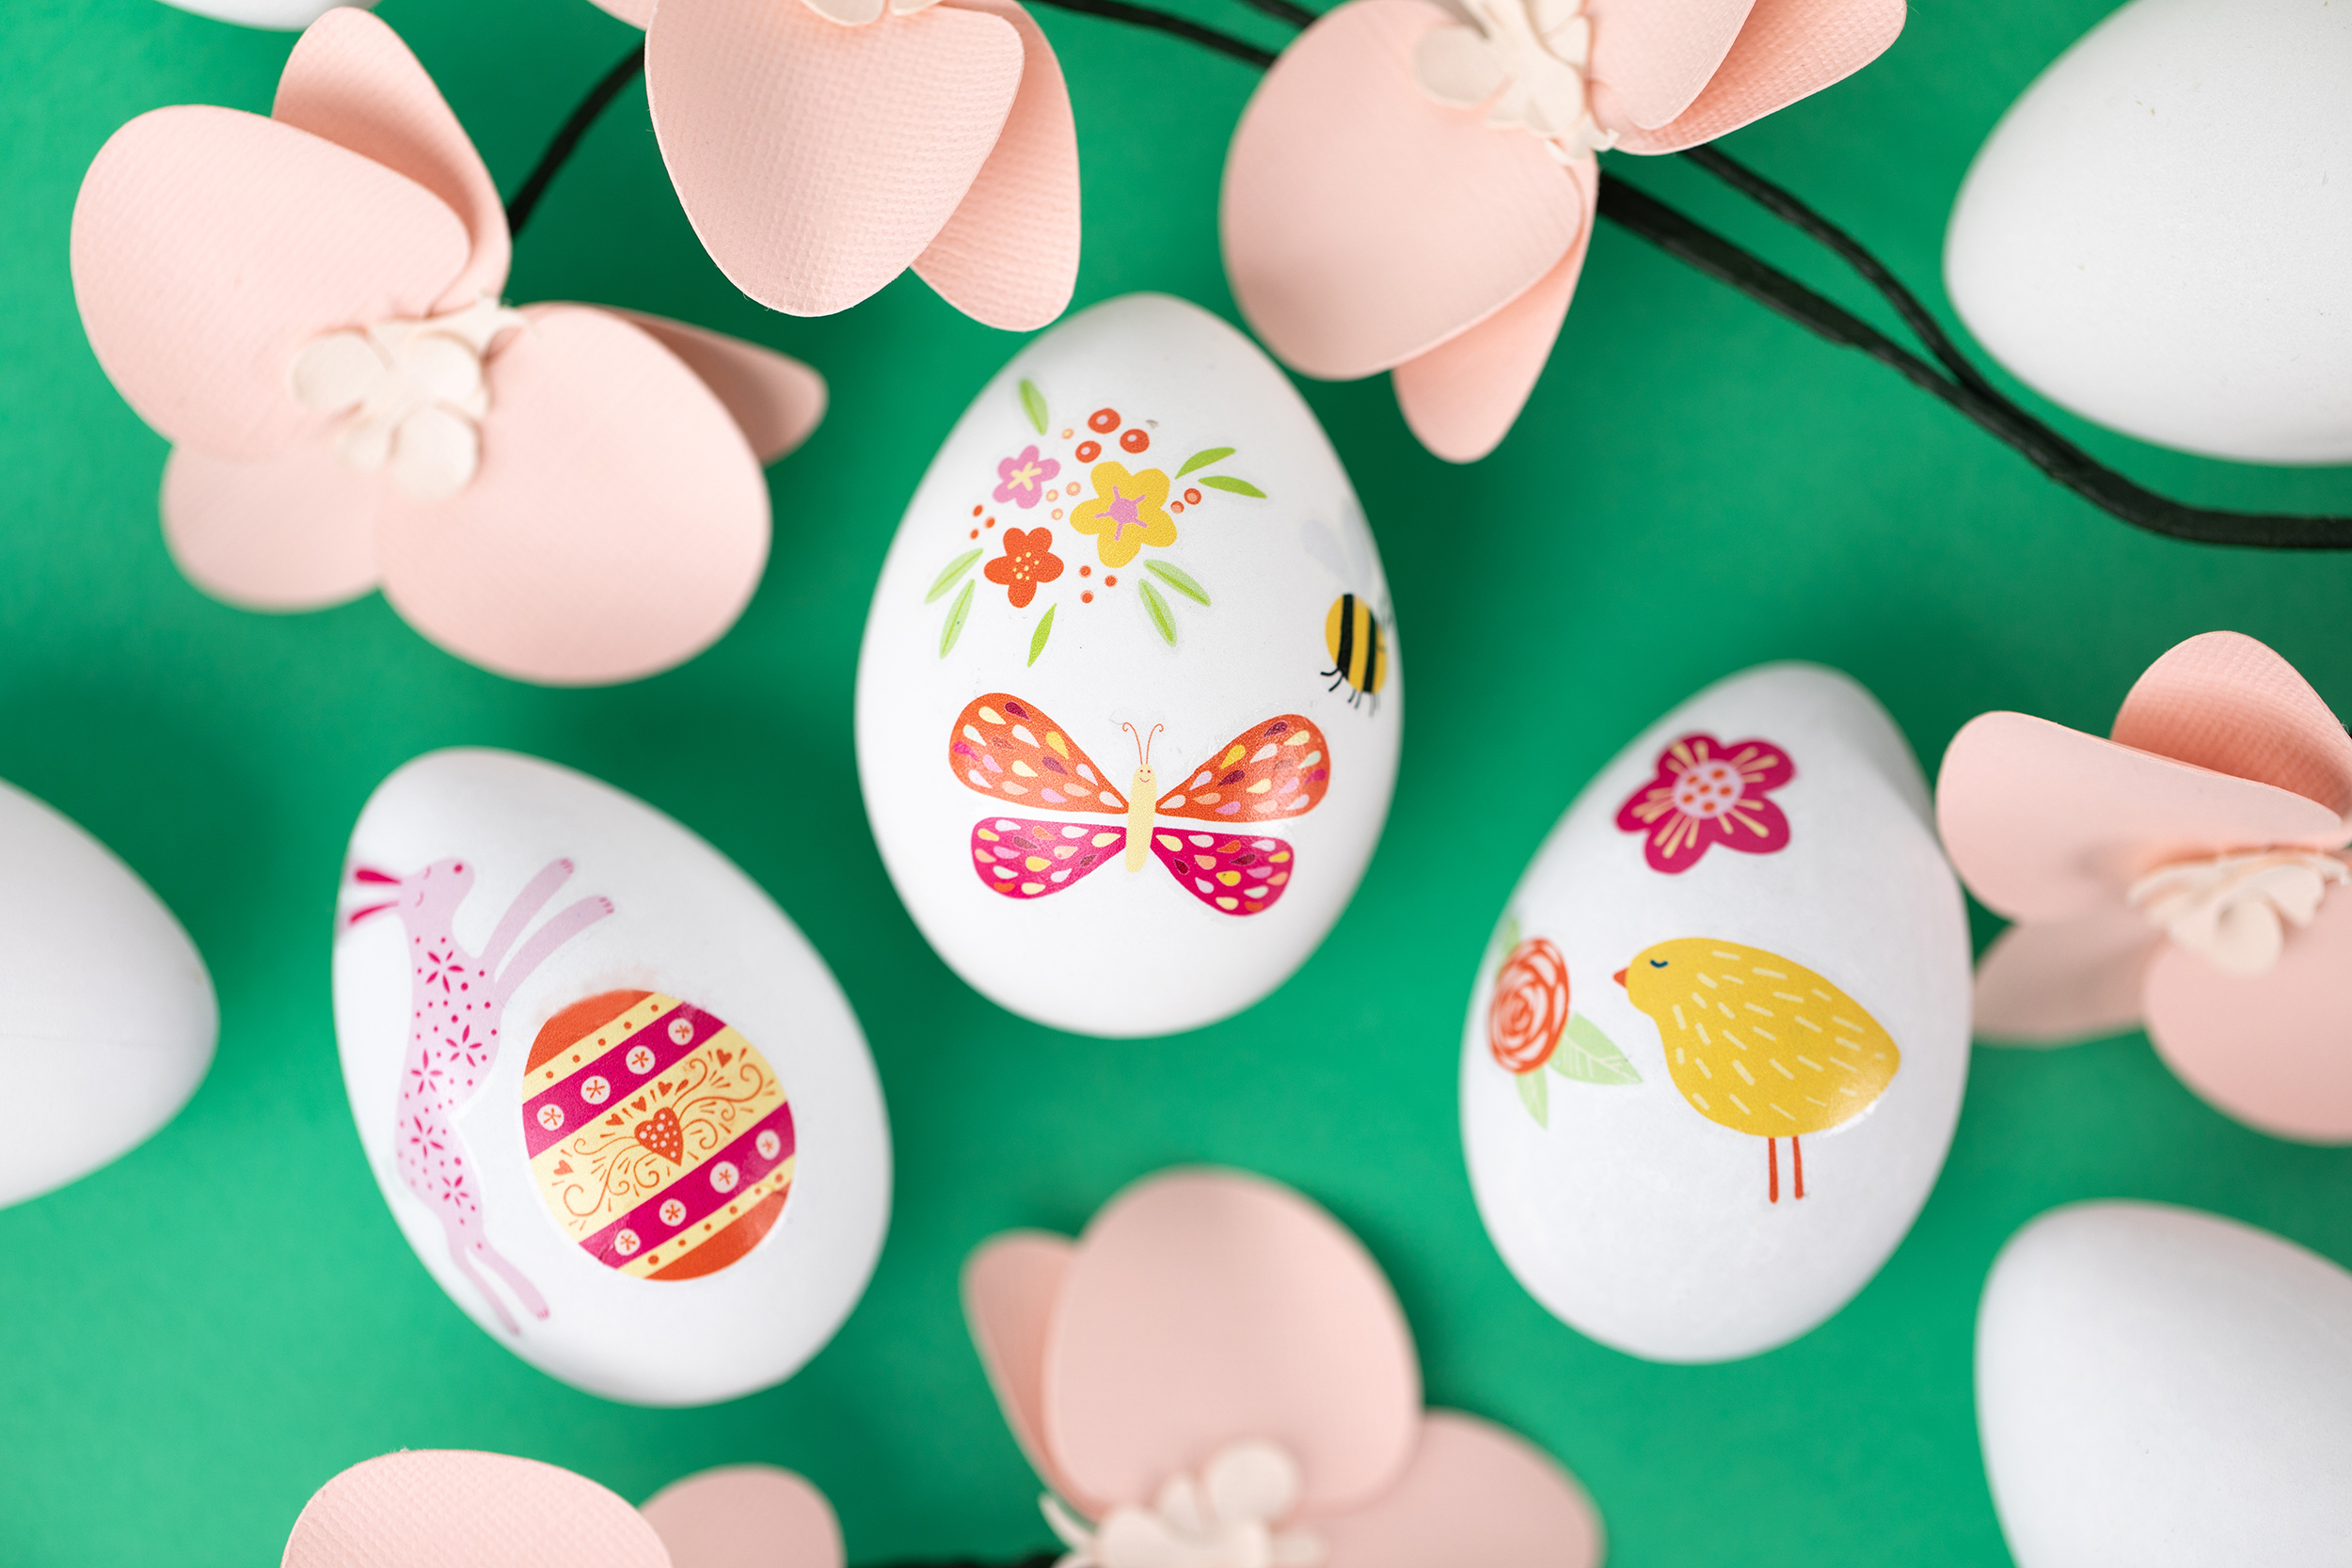
Looking for an easy way to decorate eggs this year without the mess? Temporary tattoo paper allows you to add beautiful, detailed designs to eggs in just a few simple steps! We’re using a sweet Easter Print & Cut design for our eggs, but the sky’s the limit to what you can use!
Supplies Needed:
- Silhouette Cameo® or Silhouette Portrait®
- Silhouette Cutting Mat
- Silhouette Cutting Blade
- Silhouette Temporary Tattoo Paper – Clear
- Ink Jet Printer
- Scraper Tool
- Eggs—Faux or Real
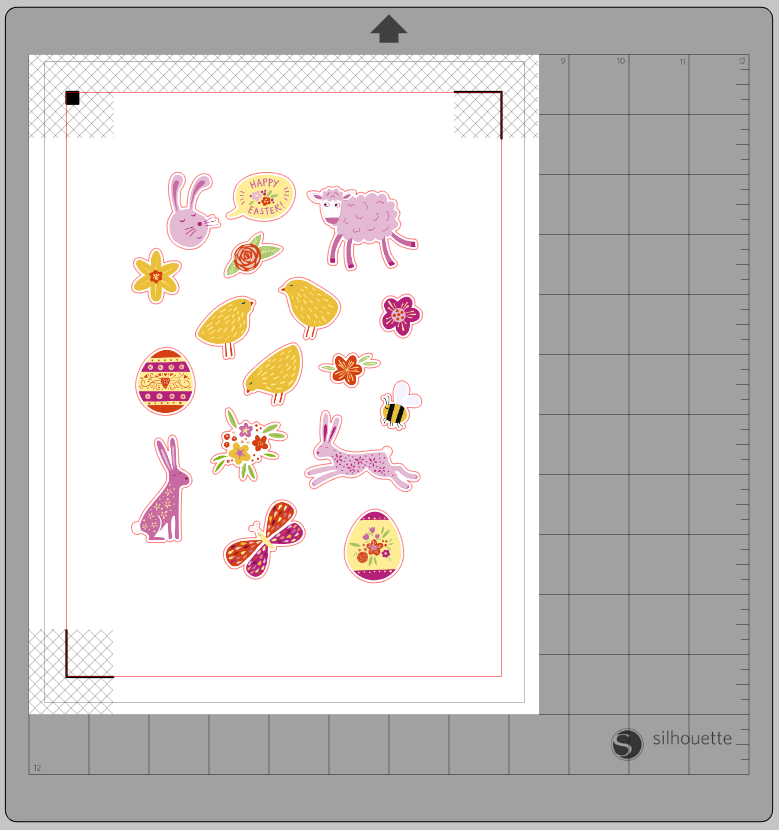
- Design ID #289953
Step One: Formatting Your Design
1. Insert the design into Silhouette Studio® and set up your page for a Print & Cut design. Set your media size to Letter (8.5 by 11 inches), turn on your Print & Cut borders, and turn on the registration marks. If anything looks strange, click “Restore Defaults” on the Registration Marks tab. Make sure your design falls within the marks and doesn’t overlap with any of the crosshatched areas.
2. Load the clear temporary tattoo paper into your inkjet printer, and print on the glossy side of the paper. Let the ink dry.
Step Two: Apply Adhesive Sheet to Tattoo Paper
1. Remove the thin green backing strip from the edge of the adhesive sheet.
2. Align the edge of the adhesive sheet with the edge of the printed side of the tattoo paper and press it into place.
3. Slowly remove the rest of the green backing as you smooth the adhesive sheet over the tattoo paper using the scraper tool. (You can watch this short video if you’d like to see how to apply it.)
Step Three: Cut Out Tattoo Designs
1. Place the tattoo paper on your cutting mat and load it into your Silhouette machine.
2. Open the Send panel, go to the cut settings, and click on “Temporary Tattoo Material” under the material type.
3. Click Send. (If your machine has difficulty reading the registration marks, this tutorial has several good tips to help you out.)
4. Carefully remove the cut tattoos from the cutting mat using the spatula tool.
Step Four: Adhere Tattoos to Eggs
1. Peel off the clear backing on the tattoo to expose the adhesive.
2. Press the adhesive side onto the egg. Because the object is round, it helps to start in the center of the image and press outward from there.
3. Apply a damp cloth on top for several seconds. When the paper backing begins to slide off of the tattoo, you know you’re done.

 March Online Classes
  Retro Fall Manicure with Tattoo Paper