
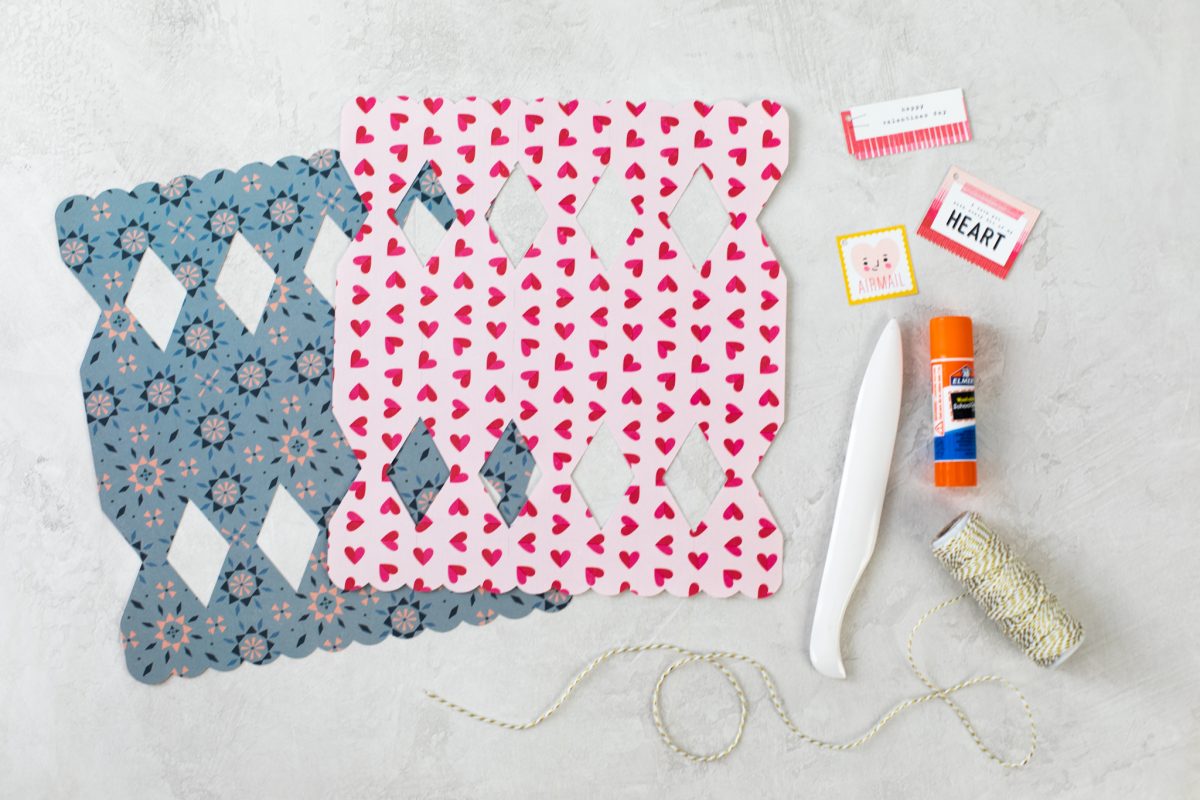
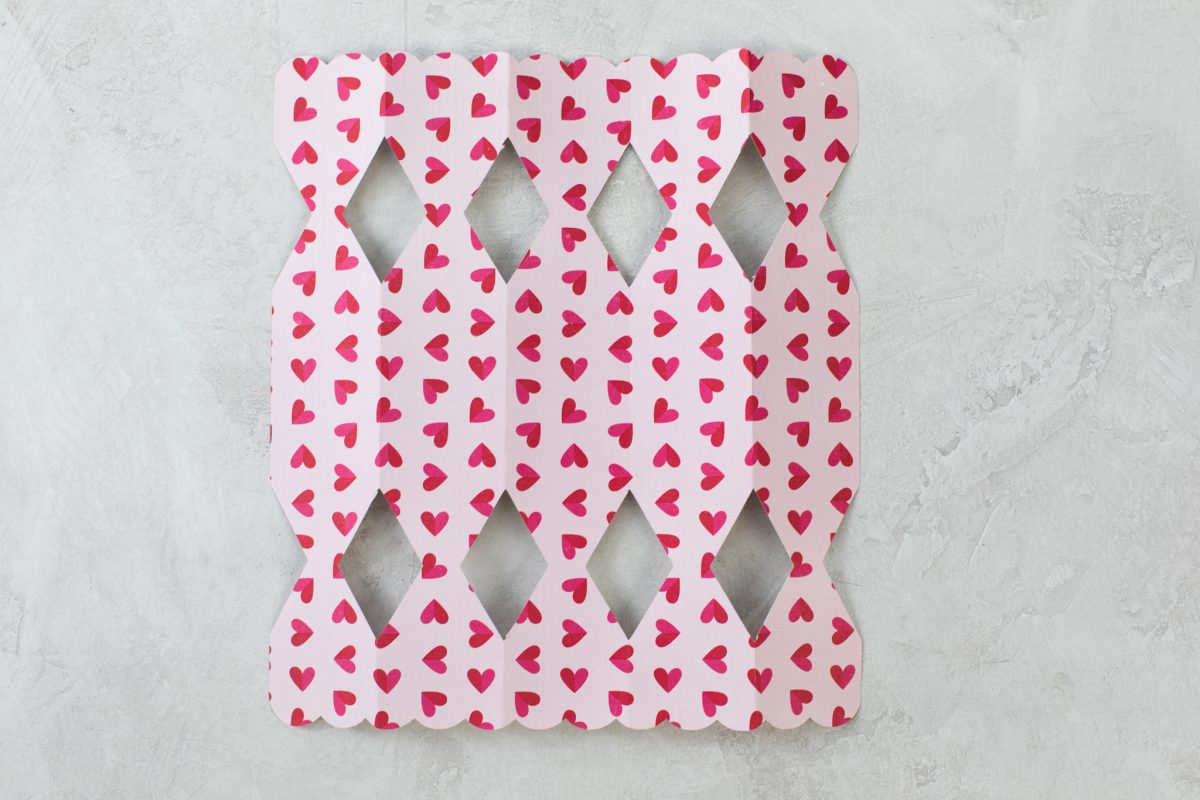
Valentine’s Day is in less than a month away, and we can hardly wait! A holiday marked by love notes, chocolates, and flowers galore—we are all for it! These paper poppers make a sweet vehicle for treats and love notes and can be customized in a million ways. We used patterned paper and Print & Cut tags to create the popper and stuffed the poppers with yummy candies!
Supplies Needed:
- Silhouette Cameo® or Silhouette Portrait®
- Silhouette Studio®
- Silhouette Cutting Mat
- Silhouette AutoBlade or Silhouette AutoBlade for Cameo 4
- Patterned Paper
- White cardstock to print your tags
- Glue Stick or adhesive
- Ribbon or twine
- Goodies to fill your poppers!
- Design ID #72429 for the scalloped box
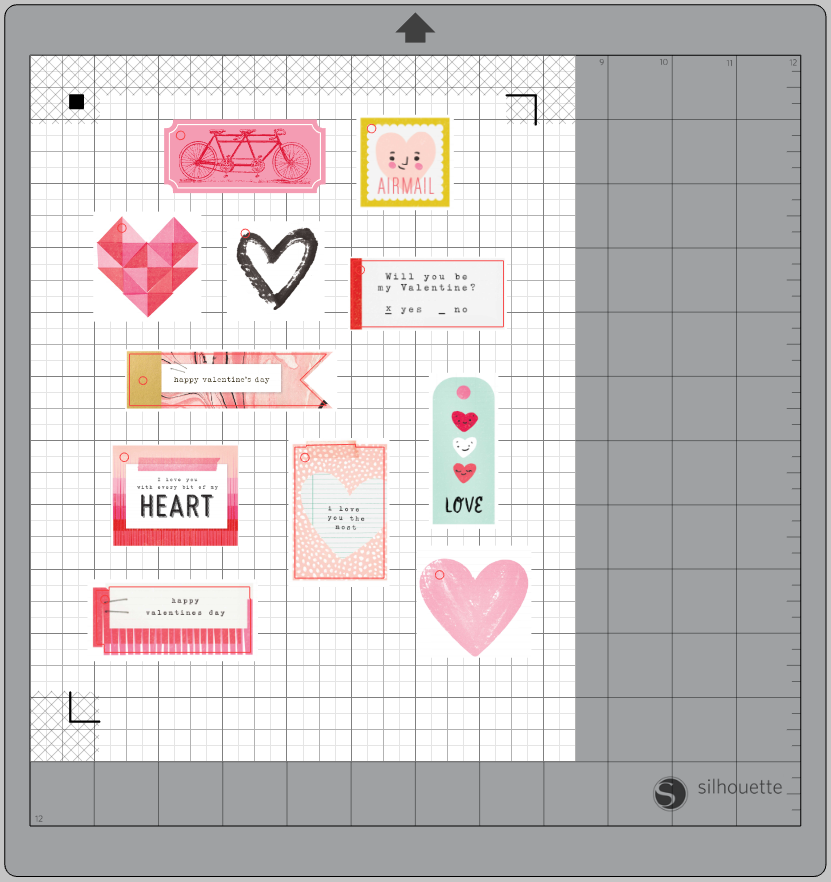
- For the tags, we used a variety of designs! Use them all or pick your favorites! They include design ID #37337 (bike stamp), #183298 (geometric heart), #183295 (hand-drawn heart), #246076 (Happy Valentines Day tag), #183289 (I Love You Label), #183478 (Love Tag), #181771 (Love You The Most), #183505 (Pink Heart), #183313 (Valentines Day Tag), #183316 (Valentines Ephemera).
Step One: Cut Out the Popper Design
1. Insert the popper design into Silhouette Studio®. Adjust the size of the design to your liking. We increased the size of our design to be approximately 9.5 inches tall and 8.5 inches wide for a finished box measuring approximately 9.5-inches long and 2 inches wide.
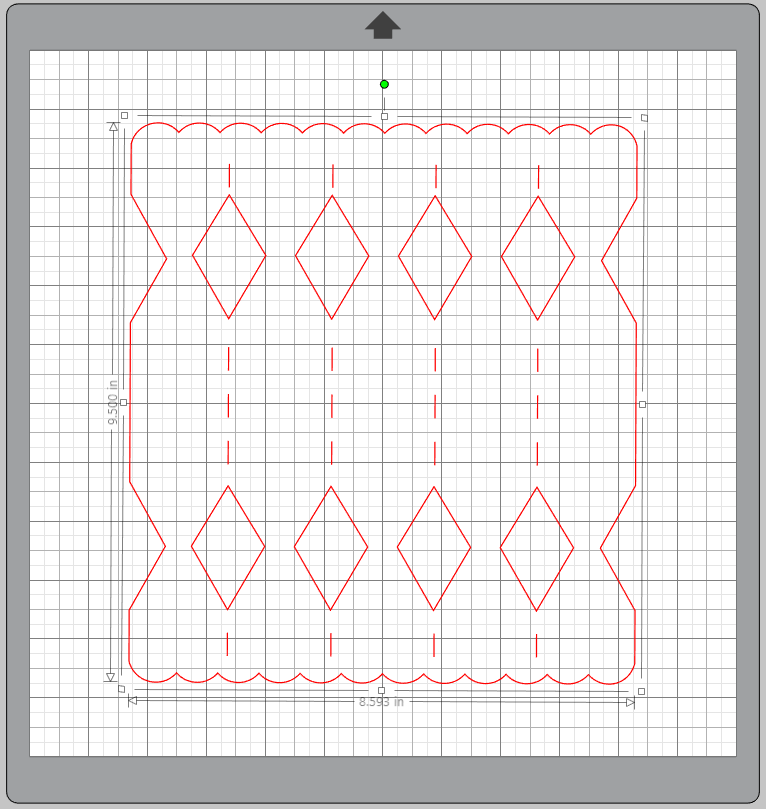
2. Cut out your popper design on patterned paper with the appropriate cut settings for your material, and repeat for as many poppers as you’d like!
Step Two: Preparing Your Tags
1. Insert your desired tag designs into Silhouette Studio® and size them as desired. Add a small circle to some of the designs if you want to tie them onto your poppers easily.
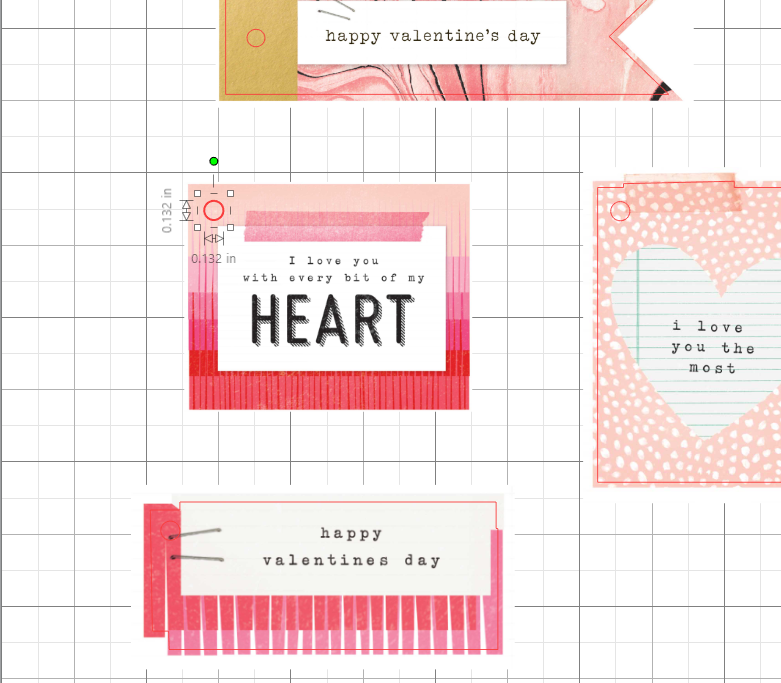
2. Set your media size to letter and turn on registration marks. Send to printer and then cut on your Silhouette machine.
Step Three: Assemble Your Poppers
1. Once your popper template is cut, fold along the perforated lines.
2. Glue the two ends together
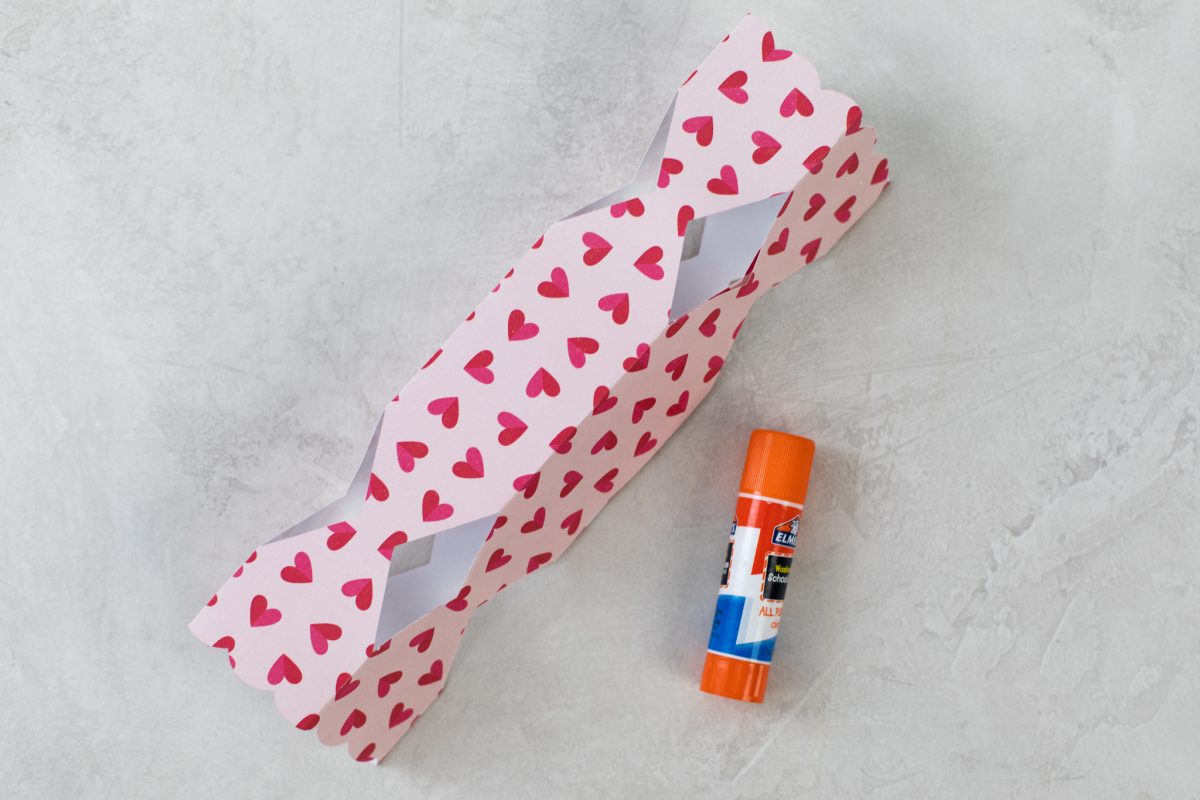
3. Fill with goodies, and then secure the ends by tying them closed with twine or ribbon.

4. Add on a tag(s) or stickers to adorn!


 Free Class - Stenciled Lotus Card
  Free Class - Crepe Paper Crocuses
Nasze Naturalne
September 3, 2025
Your authentic voice really shines through in everything you create and share
Naszenaturalne
September 2, 2025
Really love your style
Kelly Wayment
June 28, 2024
You can use it with vinyl as long as it is smooth and flat to allow the static charge to hold on to it. Rolled vinyl that wants to go back to its rolled shape will not necessarily work well, and it would need to be trimmed to fit the ES mat cutting area.
Kelly Wayment
June 28, 2024
Yes, you can use the heat pen while using the ES mat. 🙂
Yurii
March 2, 2024
Hello. May it be used with heat pen?
Thanks
Jerome
February 24, 2024
Hi, works this with the normal vinyl foils or only with printer papter etc?