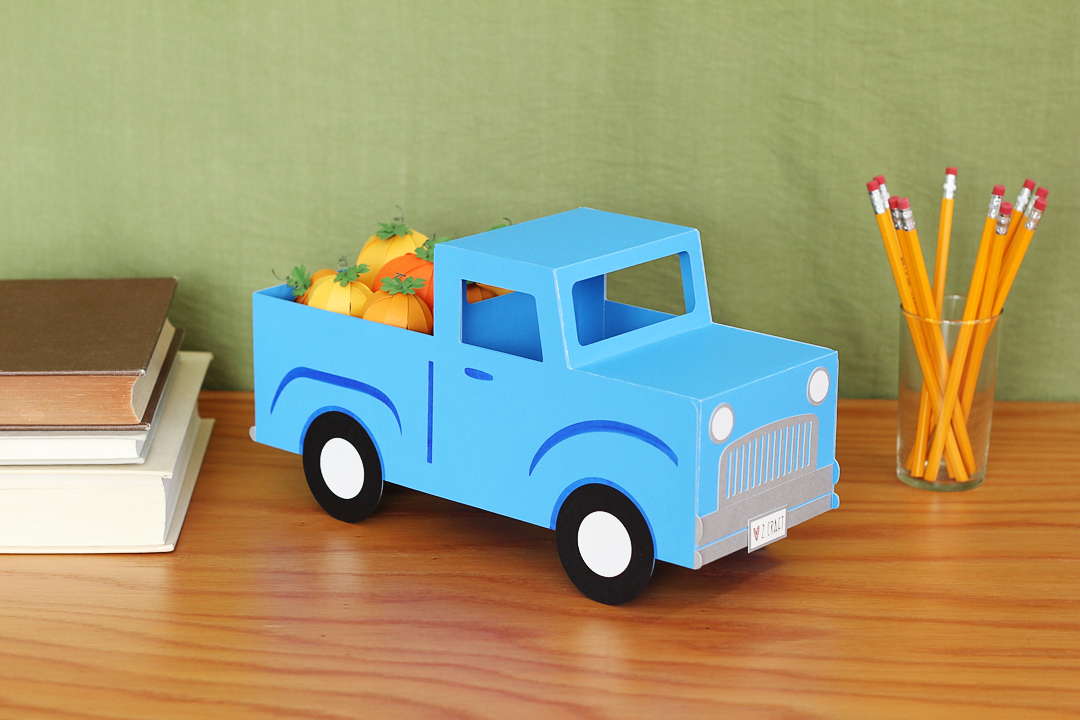
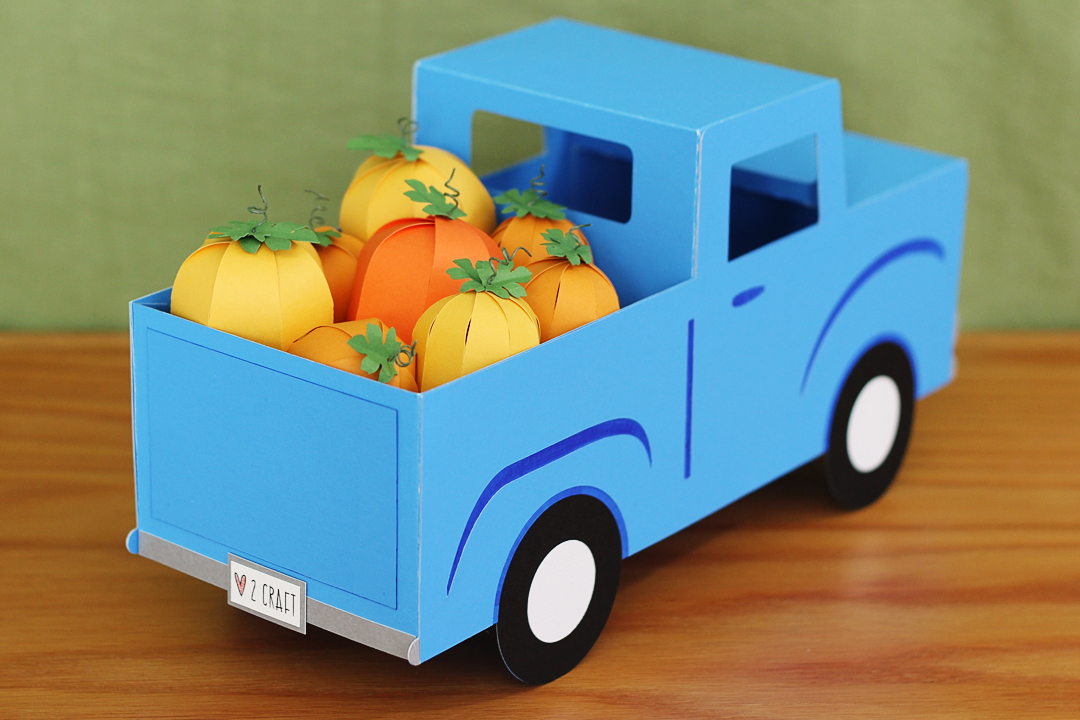
It’s time for another extra-large papercraft with the Cameo Pro! You may have seen these giant snowflakes for winter and these giant stars for summer. This time, I’ve made a supersized fall project— a 3D pickup truck with pumpkins.
This tutorial uses the Cameo Pro, but if you want to make this truck using a standard Cameo machine, you can create it without resizing any of the files. Portrait users will need to resize the pieces so the truck is slightly smaller.

Supply List:
- Silhouette Cameo® Pro
- Silhouette Studio® Basic Edition
- Cameo Pro Cutting Mat
- AutoBlade
- 2-3 sheets of 22 x 28 in. poster board in shades of blue
- Cardstock in orange, green, black, grey, and white
- Needle-nose pliers with wire cutter
- 24-gauge green paper-covered floral wire, cut to 4.5” lengths
- Hot glue gun
- White tacky glue or other adhesive
- Design ID #346273 by Lori Whitlock
- Design IDs #33506 and #33590 by Jennifer Wambach
Step One: Set up Design
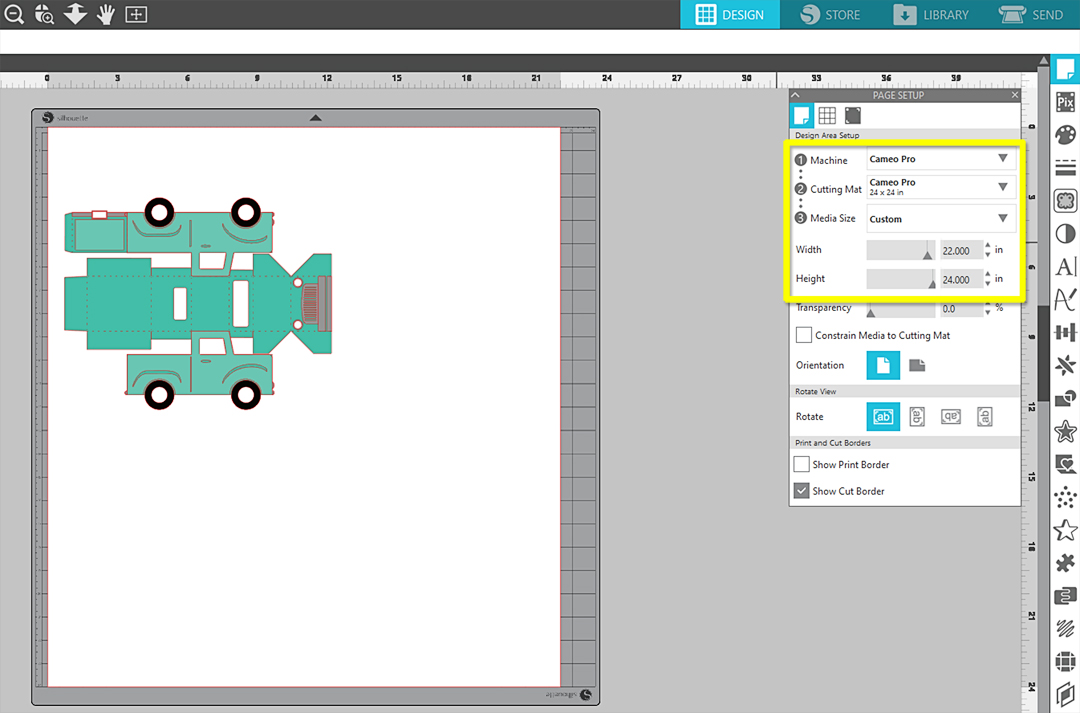
In Silhouette Studio®, set the Page Setup Panel for your poster board using the following settings:
- Machine: Cameo Pro
- Cutting Mat: Cameo Pro
- Media Size: Custom (22 in. width x 24 in. height)
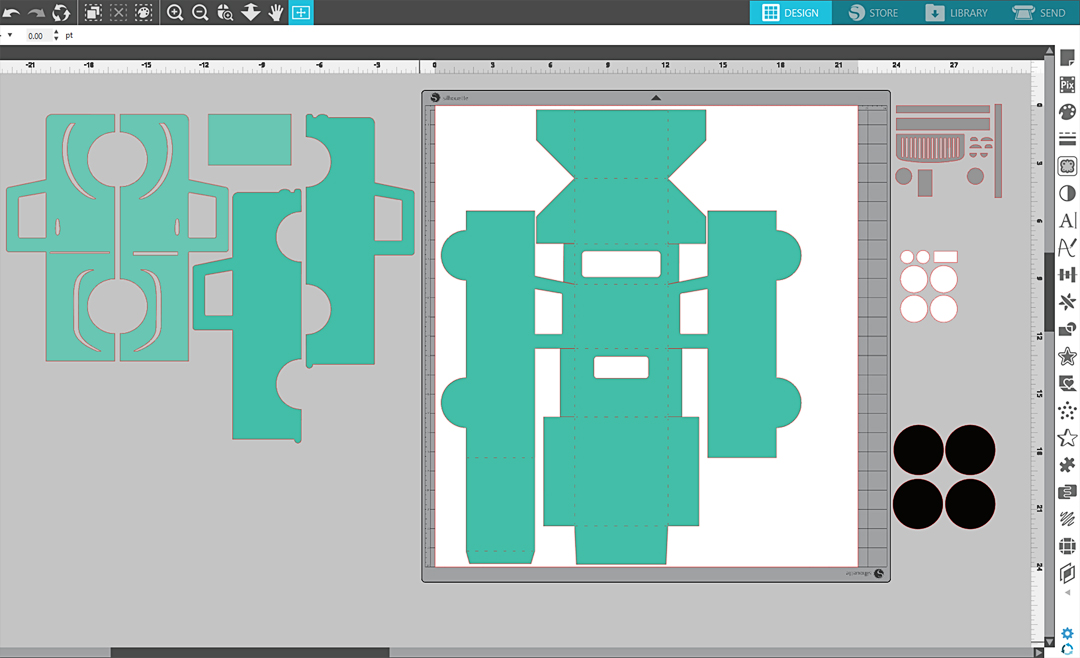
Next, open the 3D Pickup Truck Flowers file. Ungroup and remove all of the flowers and leaves. We’re going to use our pumpkin designs instead, although the flowers would also be cute in fall colors.
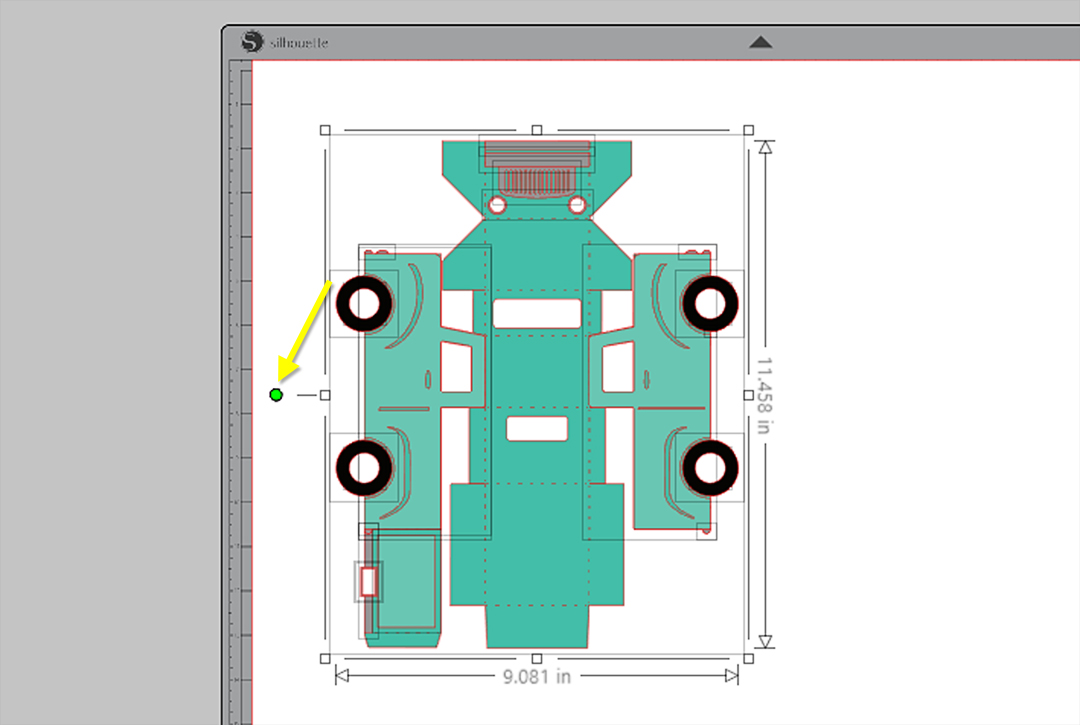
Select all the truck pieces and rotate them 90 degrees so the vertical length is longest on the page. The fastest way to do this is to click and drag the green rotation handle to the left while holding the Shift key so it snaps to 90 degrees.
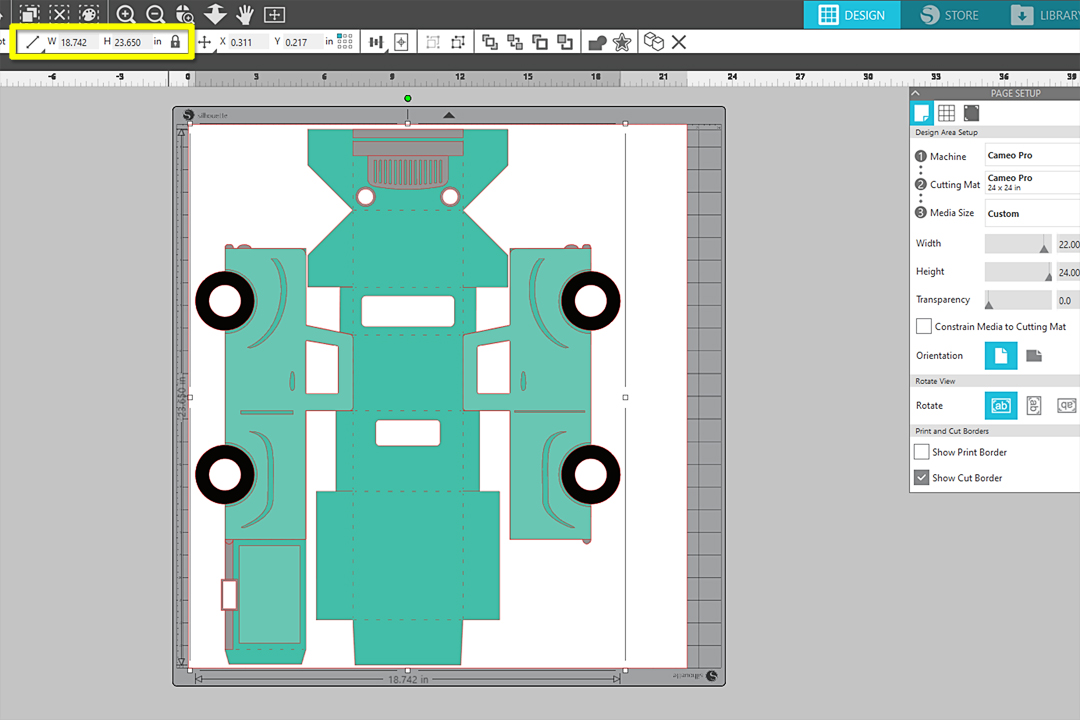
Group the shapes using Ctrl or Cmd + G to make sure the entire design is resized equally. Then, use the Scale tool on the Quick Access Toolbar (QAT), make sure the aspect ratio is locked, and set the height to 23.650 in. Position the entire design so it fits on the virtual media.
Now, we can start separating our pieces to be cut in different colors. Ungroup and move all of the pieces but the base aside. You might find it helpful to group the pieces by color for easier cutting later.
Because the truck pieces are larger than 12 inches, you’ll need to cut those from a larger paper format. I’m using poster board.
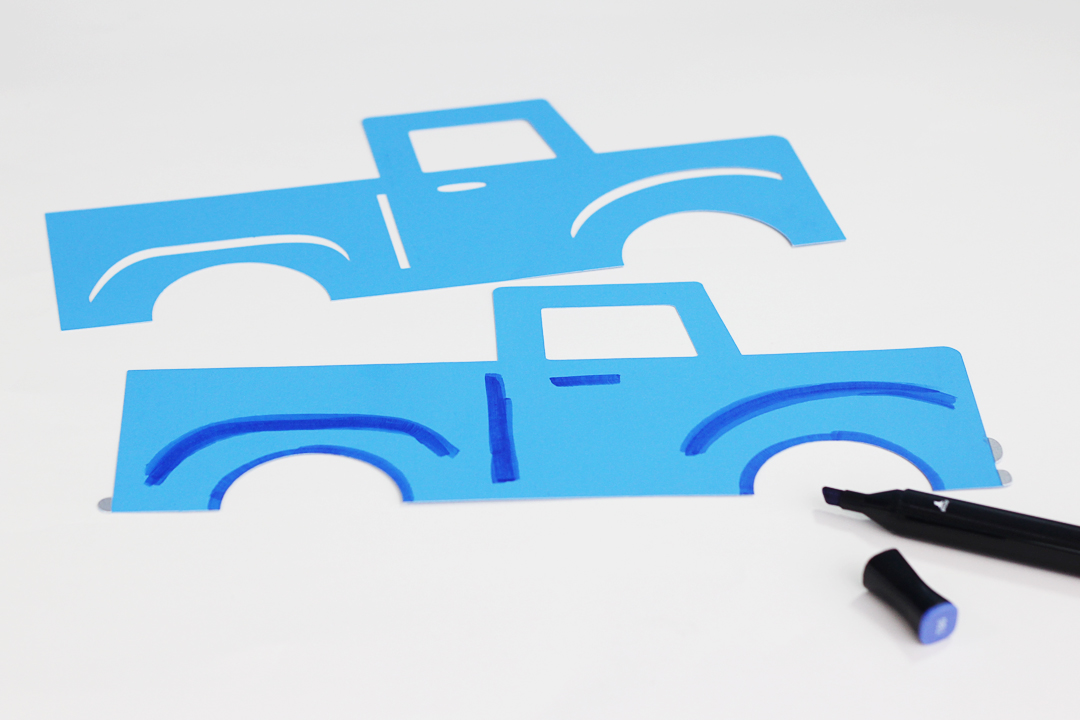
Note: This design uses two shades of a similar color for the truck layers. You can cut into two sheets of blue and one sheet of dark blue. Or, you can cut all of the truck pieces from two sheets of the same color poster board and use a marker to color the dark accent areas on the appropriate pieces once cut.
Step Two: Cut Truck Base Pieces
Go to the Send Tab and adjust the settings to cut poster board on your Cameo Pro. You should do some test cuts for your own blade and mat, but I use the following settings:
- Blade Depth: 6
- Force: 28-33
- Speed: 3
- Line Segment Overcut: On
- Passes: 1
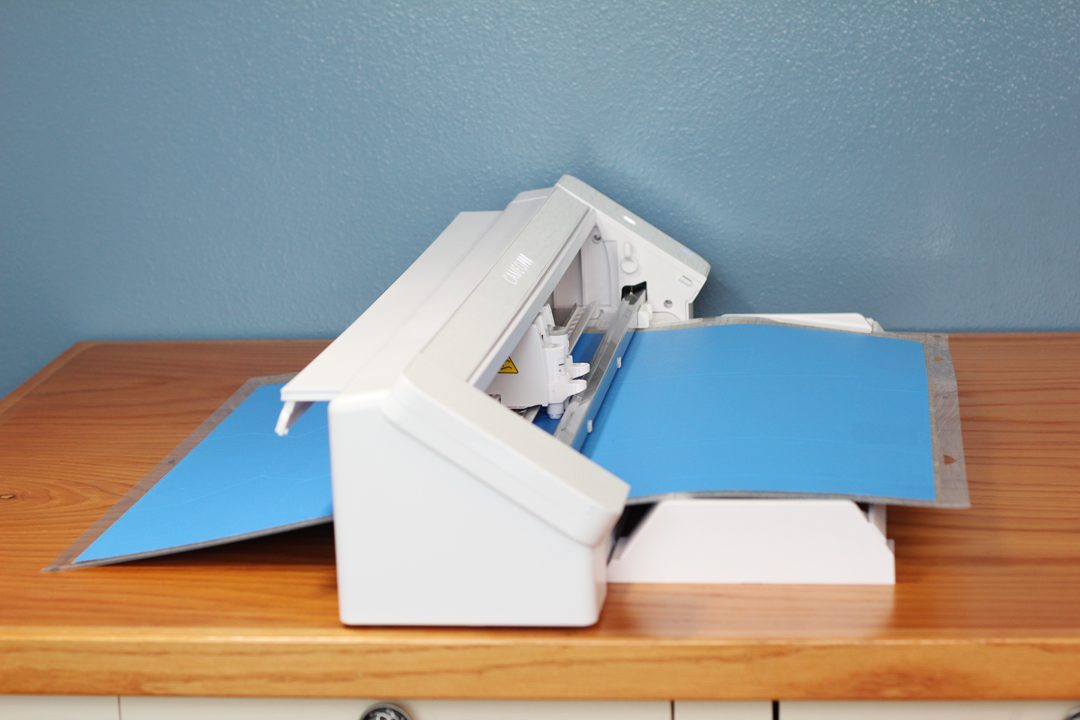
Trim 4 inches off the length of the poster board so it all fits on the mat, and remove any stickers from the poster board. Place the poster board on the mat with a 1/2-inch inset along the left, with the 22-inch width going across the top. This ensures that the paper is only on the sticky portion of the Cameo Pro mat. Load the cutting mat so its left edge aligns with the left-most loading guide mark. (The inner guide mark is for smaller mats and media without a mat.)
Note: Always use the mat support system that comes with the Cameo Pro when using the 24 in. cutting mat, and leave table space in front of and behind the Pro so the mat is supported at all times in front and back. See this video for further explanation on loading your Cameo Pro.
Once your settings are correct based on your own practice cuts, send to cut. Remove the cut pieces carefully from the mat. You may find it easier to do this by flipping the mat upside down and peeling it away from the paper, especially if your mat is very sticky.
Repeat this process for the other blue truck pieces, moving pieces off of the virtual mat that do not need to be cut and placing the pieces that do need to be cut onto it. Be sure to load the correct poster board color into the machine before sending any cuts!
Step Three: Cut Smaller Pieces
Once all your poster board pieces are cut, you can cut the smaller design pieces from regular cardstock. I suggest doing this one paper color at a time to avoid confusion.
In the Design Tab, adjust the Media Size in the Page Setup Panel to reflect the size of paper you’ll be using for each cut. Only place the pieces you intend to cut on the virtual mat, and leave the other pieces off to the side until it’s their turn.
In the Send Tab, adjust your settings based on practice cuts for each color of paper you’re cutting, then cut each color.
Step Four: Assemble Truck
Lori Whitlock created assembly instructions to go along with her original design. Watch this video for information on how to assemble the truck.
The things I changed from Lori’s instructions are as follows:
- I used hot glue for the glue tabs on the 3D truck base because I feel it gives a quick, strong hold for large poster board projects.
- I folded the truck bed flaps down into the truck instead of pressing them up against the sides as shown in the video because I think it looks cleaner and provides rigidity at the lower-back end.
- You do not need to make the flowers because we’ll make pumpkins in the next step. Or, as an alternative to making the paper pumpkins, you could use mini pumpkins from your local craft store.
Step Five: Cut Mini Pumpkins
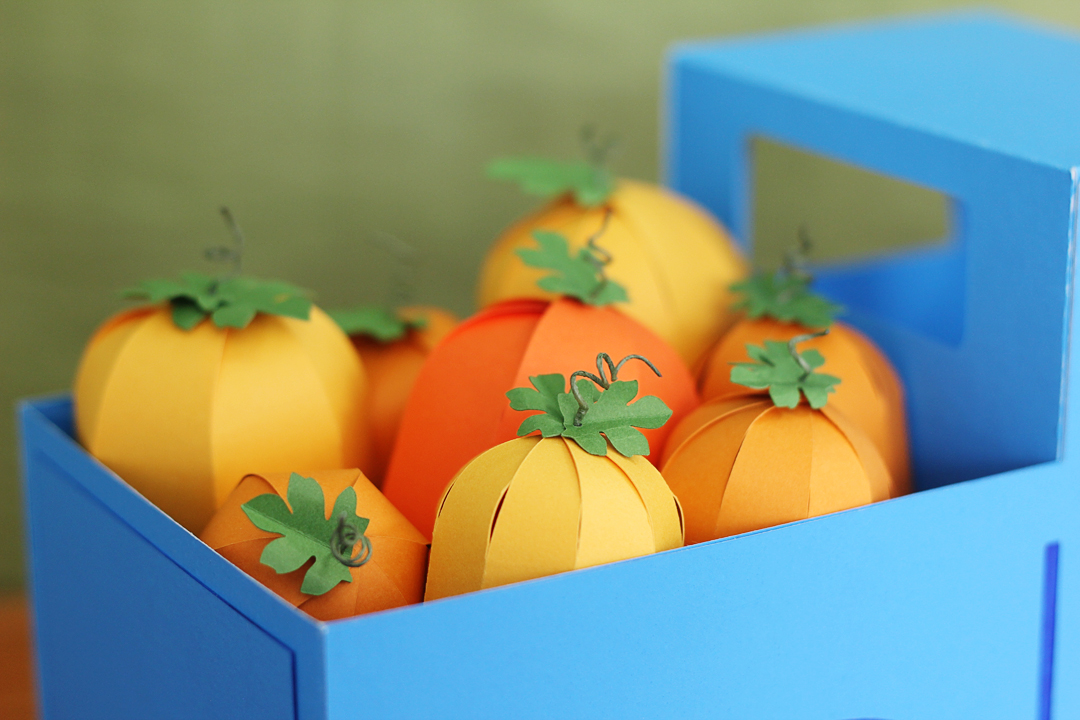
The pumpkins will need to be sized down to fit in the truck bed, and you’ll need to cut multiples of each pumpkin. I cut some at 50% of their original size and some at 65% of their original size.
Note: I do not recommend going smaller than 50% size for these pumpkins. If you are making the truck in its original size and a 50%-reduced pumpkin seems too large, you may wish to find other 3D fall items to put in the truck bed or create the original flowers in warm autumn colors.
Open a new document and set the Page Setup Panel in Silhouette Studio® as follows:
- Machine: Cameo Pro
- Cutting Mat: Cameo Pro (or Cameo, if that’s what you are using)
- Media Size: Letter (or the size you are using)
Now, open the 3D Spherical Pumpkin and 3D Pumpkin designs. Make a copy of each pumpkin and set it to the side.
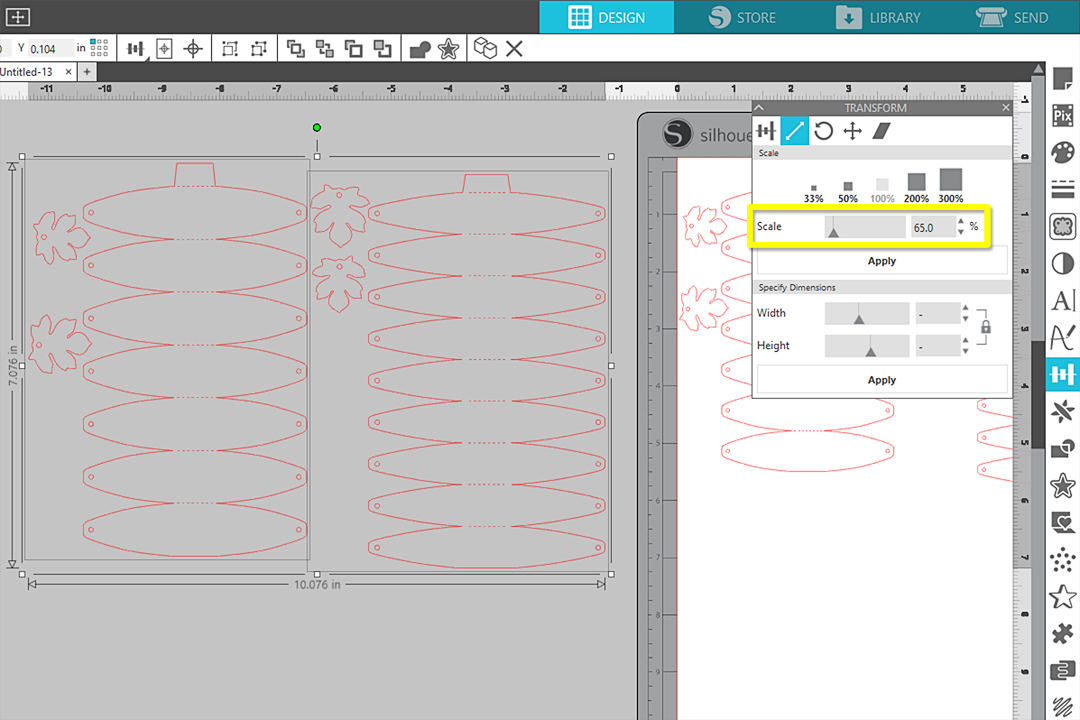
It’s time to resize our pumpkins. Start by opening the Transform Panel and going to the Scale Tab.
Select two of the pumpkins (one of each kind) and click on the “Scale by 50%” option.
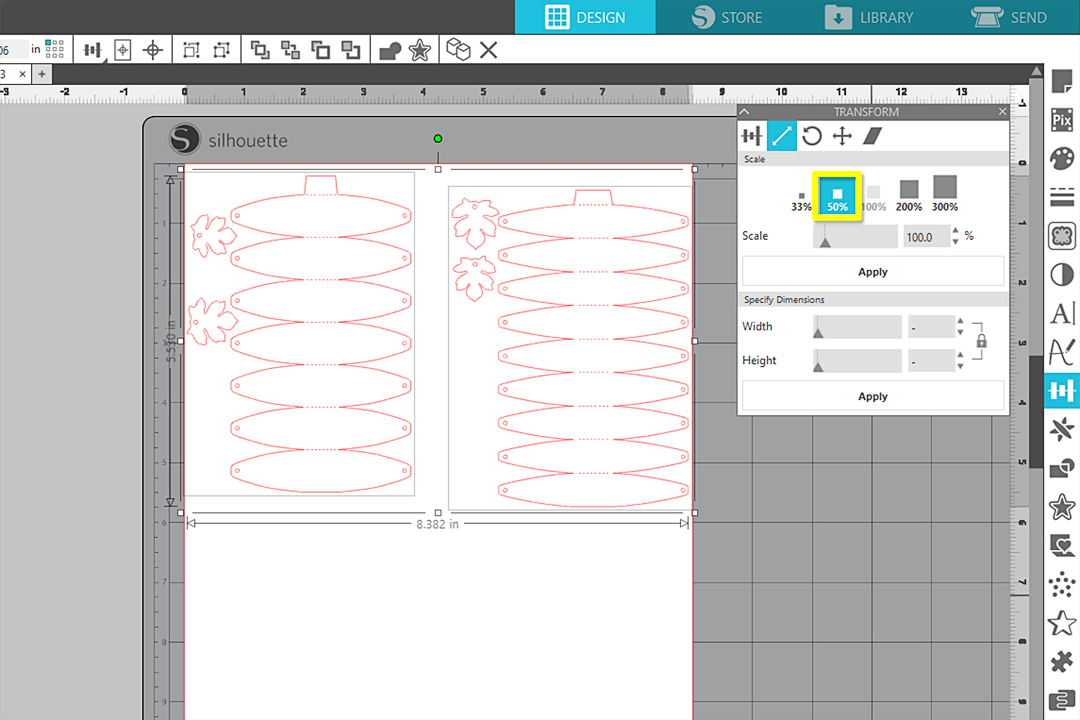
Select the remaining two pumpkins, input 65.0% in the Scale input box, and click Apply.
Ungroup all of the leaves and set them aside to cut from green. Cut a few pumpkins of each size from orange cardstock and their corresponding leaves from green cardstock, using the cardstock cut settings in the Send tab or whatever cut settings work for your blade and machine.
Note: You can cut smaller paper on your 24-in. Cameo Pro mat, or you can use a 12-in. Cameo mat in your Cameo Pro. Pay attention to paper placement as represented on the virtual mat when you have the correct machine, mat, and media size selected in the Page Setup Panel. The smaller 12-in. mat should be loaded against the inner load guide mark on the Cameo Pro, and the right roller must be adjusted inwards to the 12-in. mat position.
Step Six: Assemble Mini Pumpkins
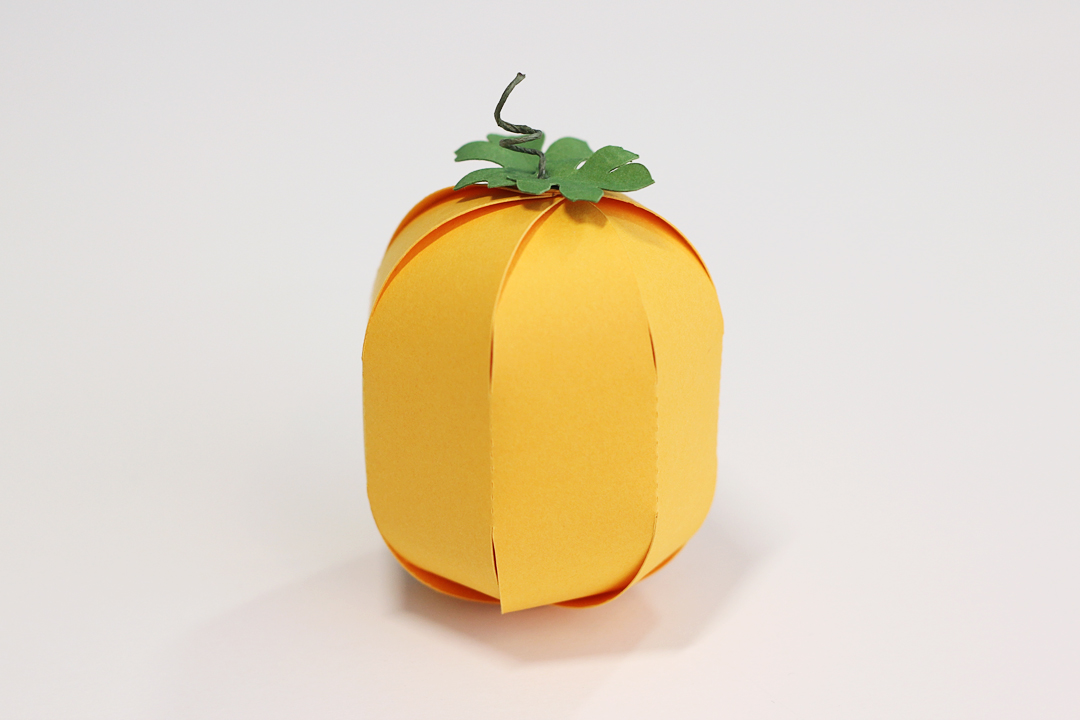
Once your pumpkins and leaves are cut, glue the glue tab on each pumpkin.

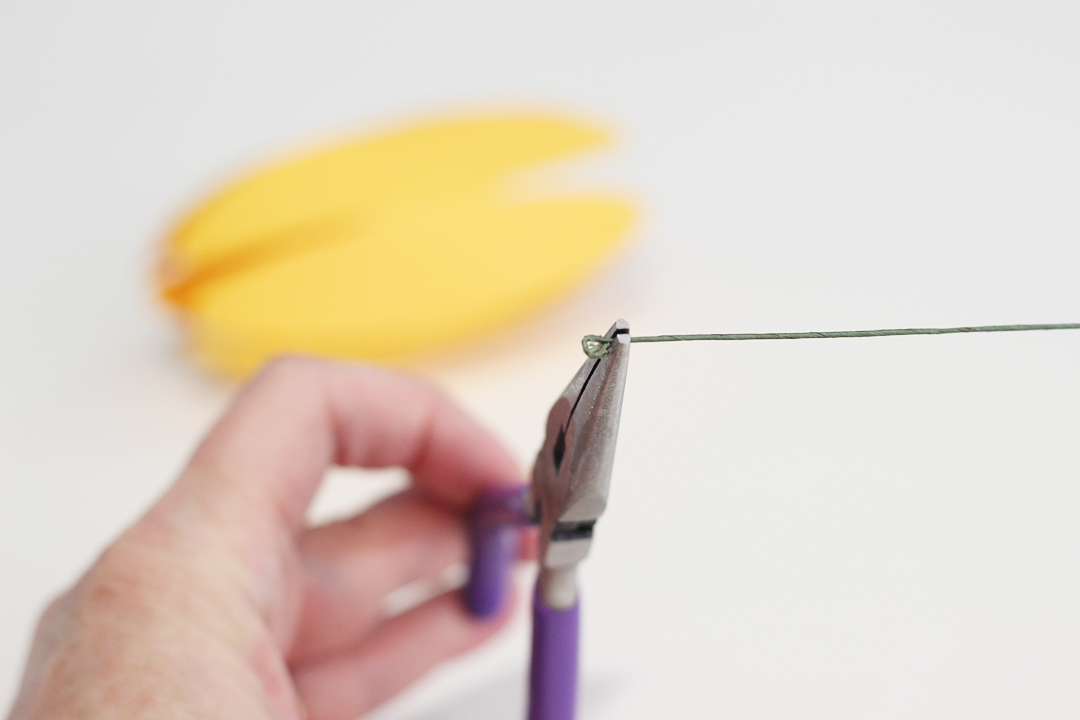
For each pumpkin, use needle-nose pliers to make a small loop on one end of the 24-gauge floral wire (trimmed to 4.5-in. length).
Slide the wire through all the holes on one end of the pumpkin, then pull through.
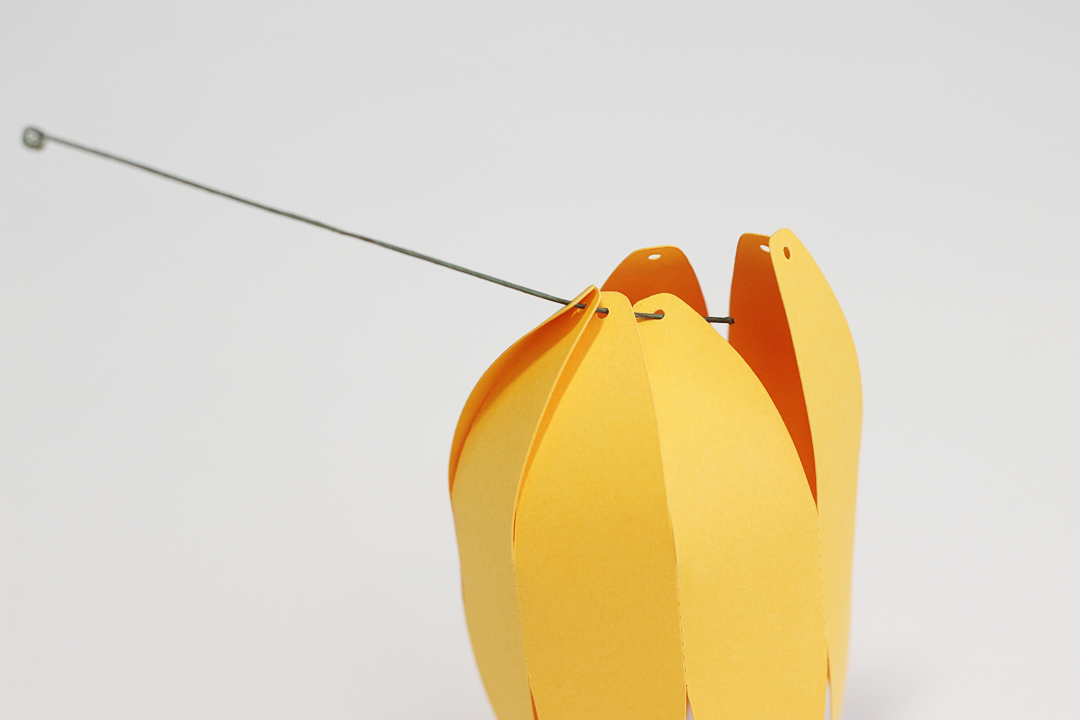
Slide the wire through all of the holes on the top end of the pumpkin.
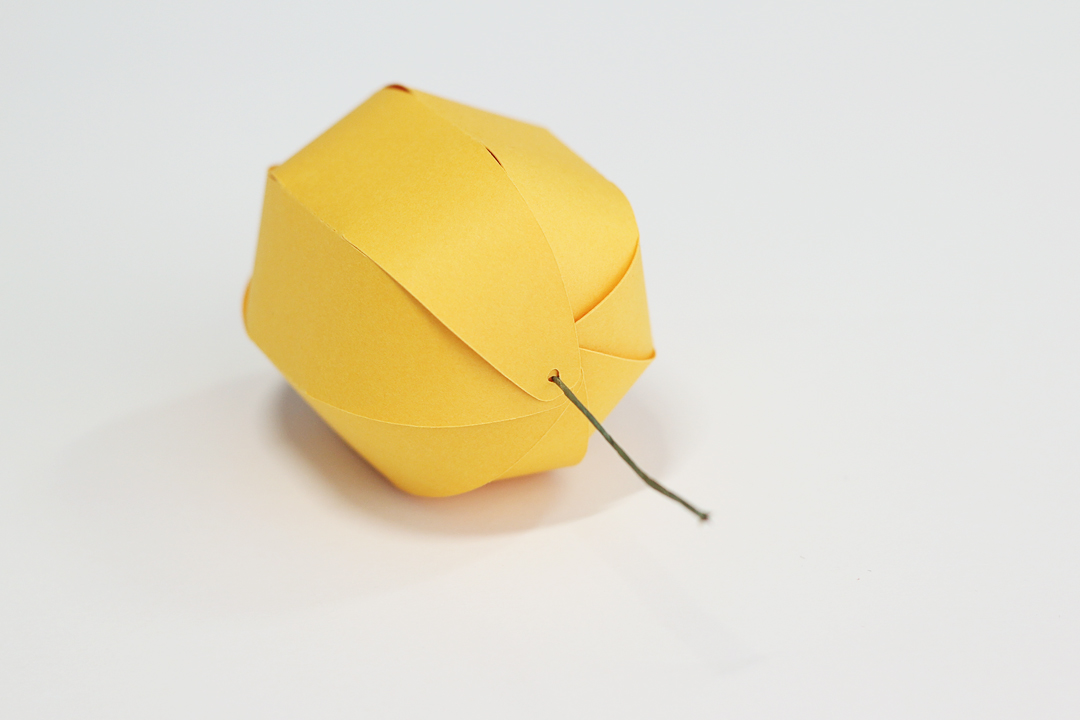
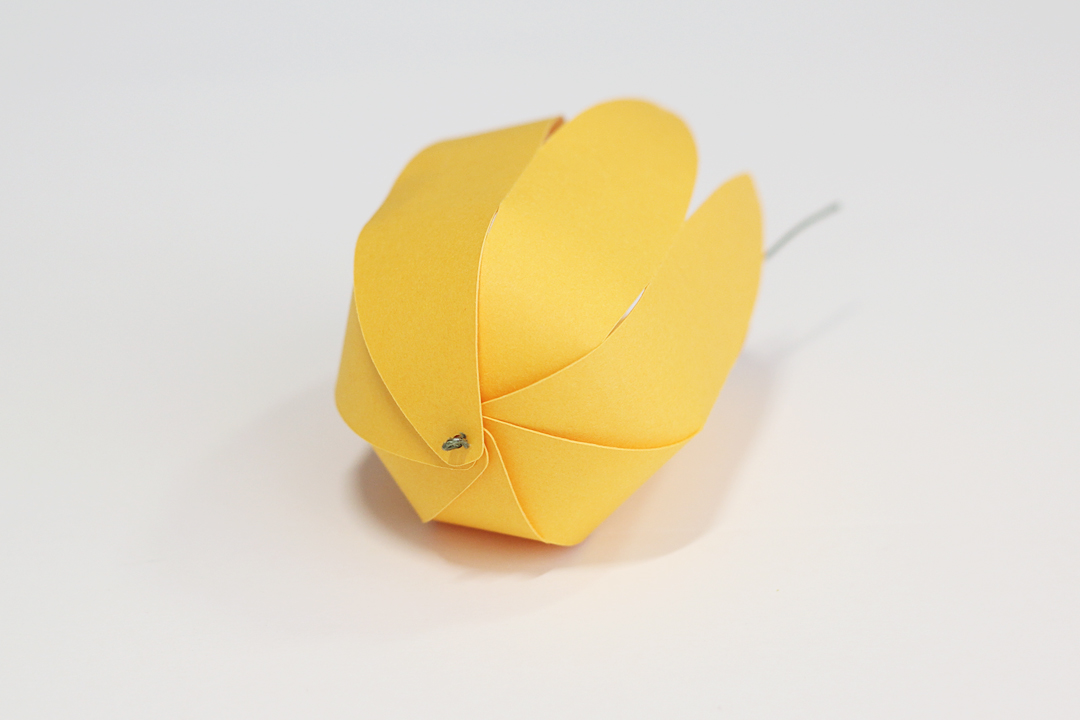
Slide a leaf or two onto the wire and add a dab of hot glue under the leaves to make the pumpkin stay in position. I like to shape the leaves a little with folding and curving before sliding onto the wire. Use your pliers to shape the exposed wire into a curly stem.
Place the finished pumpkin into the completed 3D truck bed, and add as many pumpkins as you want.
Isn’t this a fun fall 3D paper craft? You could even change up what the pickup is carrying based on the season. I see lots of possibilities with this cute 3D pickup truck! What would you add to the back?
 Get to Know the ES Mat
 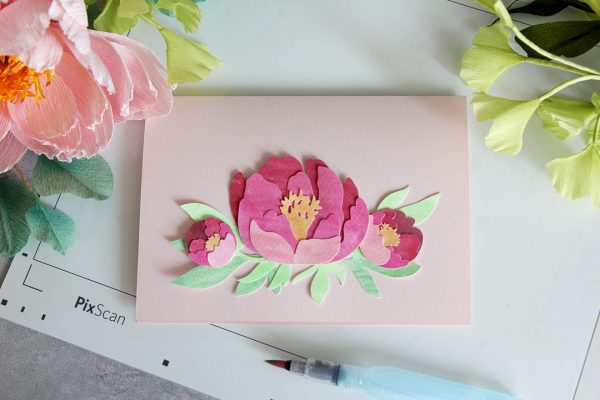 Layered Card with PixScan