
These blossoms are sweet to look at and sweet to eat! Crepe paper petals are wrapped around lollipops to create the perfect Valentine! We are using the Rotary Blade on the Cameo 4 to make cutting out the petals a breeze. Kids will love assembling these for friends and classmates, who will be equally giddy to receive them!
Supplies Needed:
- Silhouette Cameo® 4
- Silhouette Studio®
- Silhouette Cutting Mat—Use a high-tack or extra sticky mat for best results
- Silhouette Rotary Blade for Cameo 4 (Available Now!)
- Crepe paper in various colors
- Hot glue gun
- Scissors
- Small Lollipops or suckers
- Design ID #4547 for the scallop border and #193198 for a leaf if desired
If this is the first time using a Rotary Blade, be sure to check out our 4 Things to Remember about the Rotary Blade video and our Smart Cut video that explains how the cut settings work!
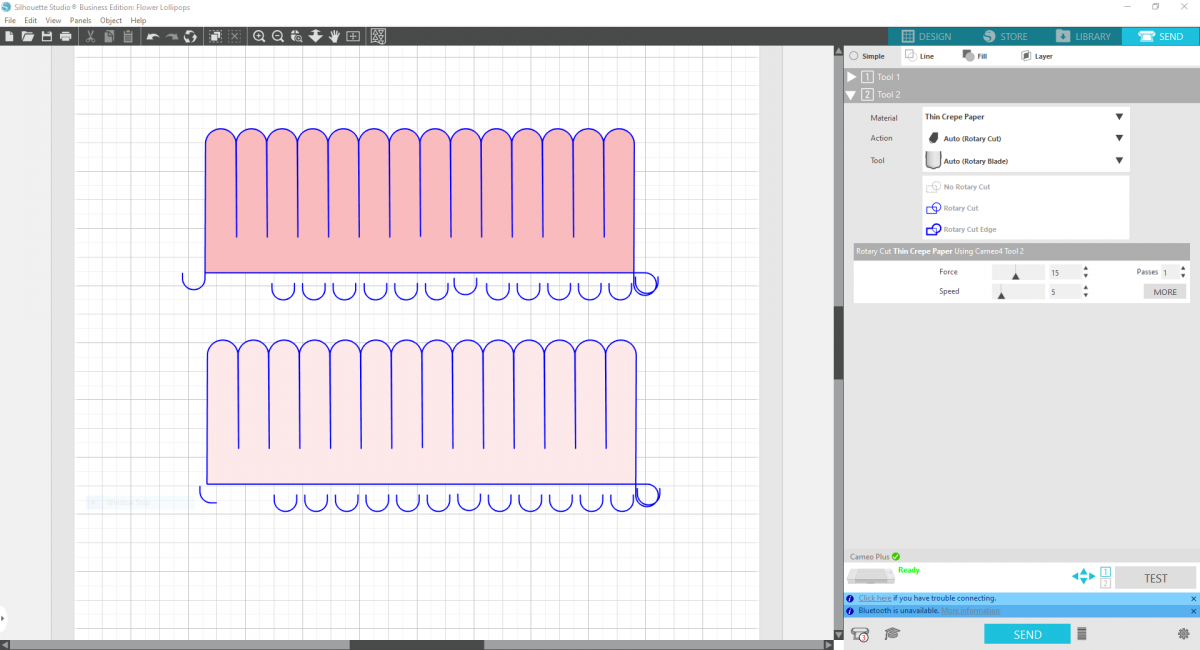
Step One: Formatting the Petal Design
1. Insert the scallop border design into Silhouette Studio®. Make a duplicate of the border and align the two borders side by side. Use the “align” tools on the top toolbar to make sure they’re perfectly level.
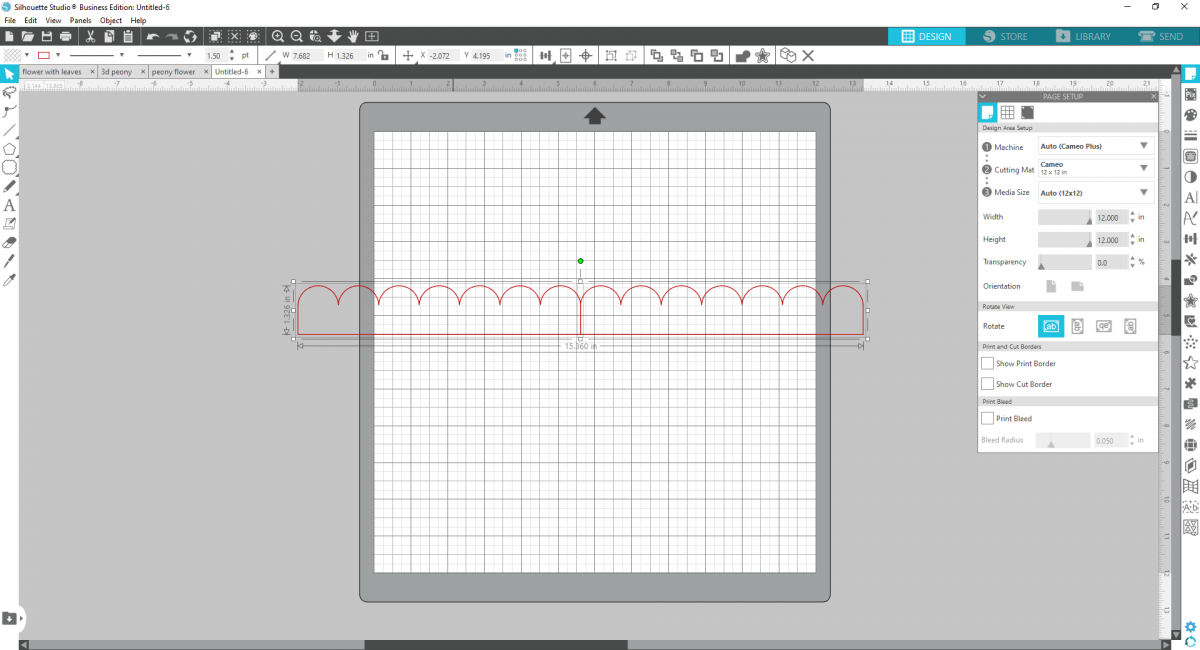
2. You want the two edges to overlap just barely so you can weld the two pieces together. Simply select both borders, right-click, and select “Weld” to make the two borders one piece.
3. Now adjust the width of the border piece to measure approximately 7.5 inches wide.
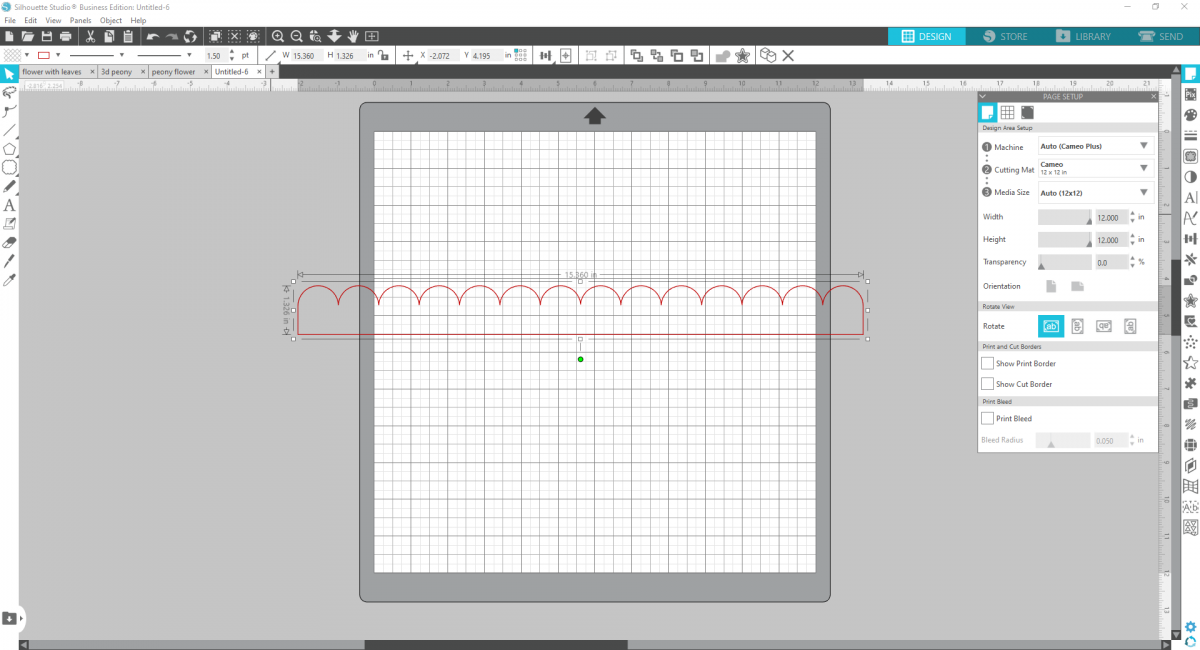
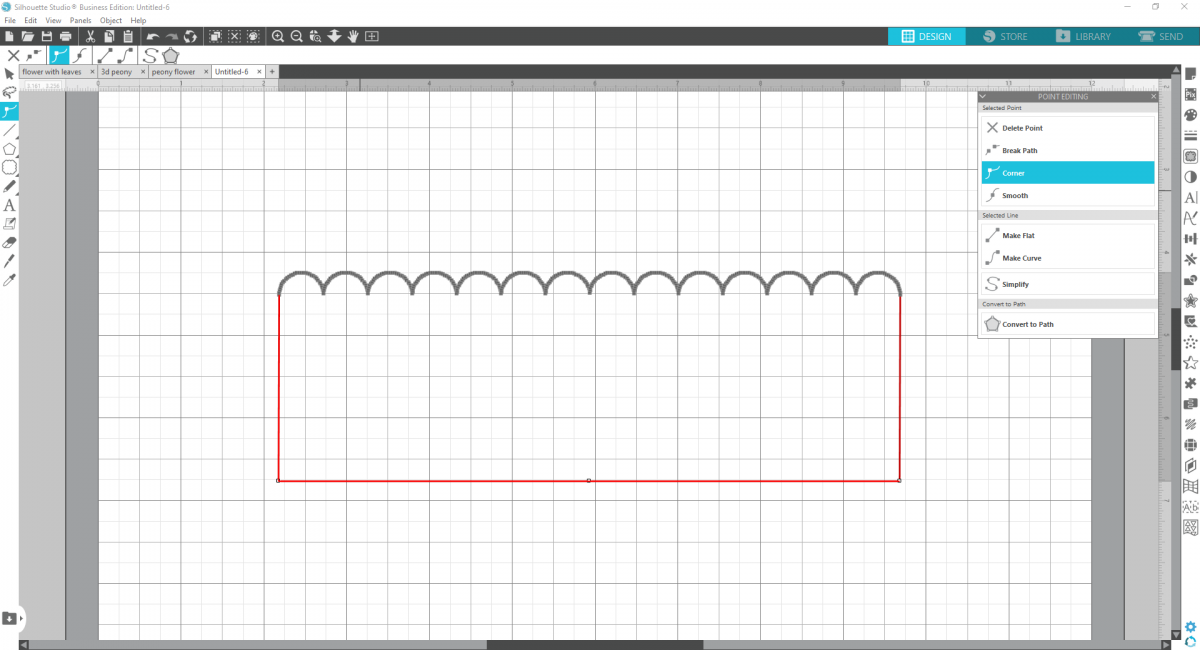
4. Now double-click on the border to reveal the Edit Points. These are small grey dots that you can adjust to alter the design. Select the three lower dots on the bottom, flat side of the border.
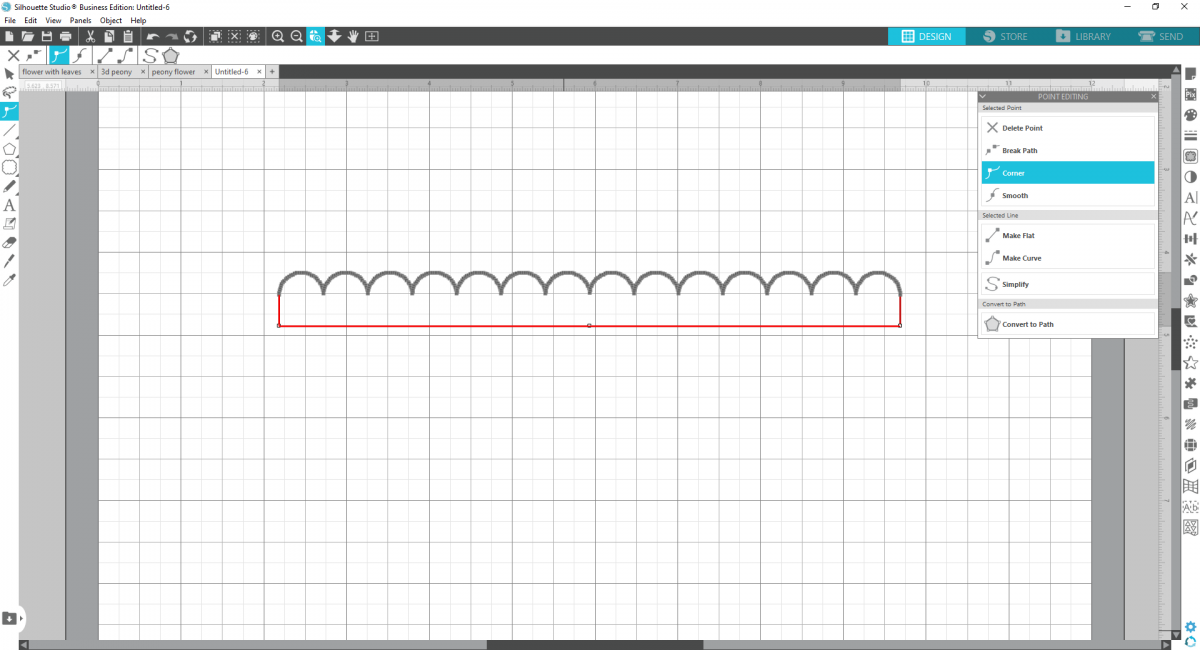
5. Then click directly on one of those three dots and extend the lower half of the border to the whole design is about 2.5 inches wide.
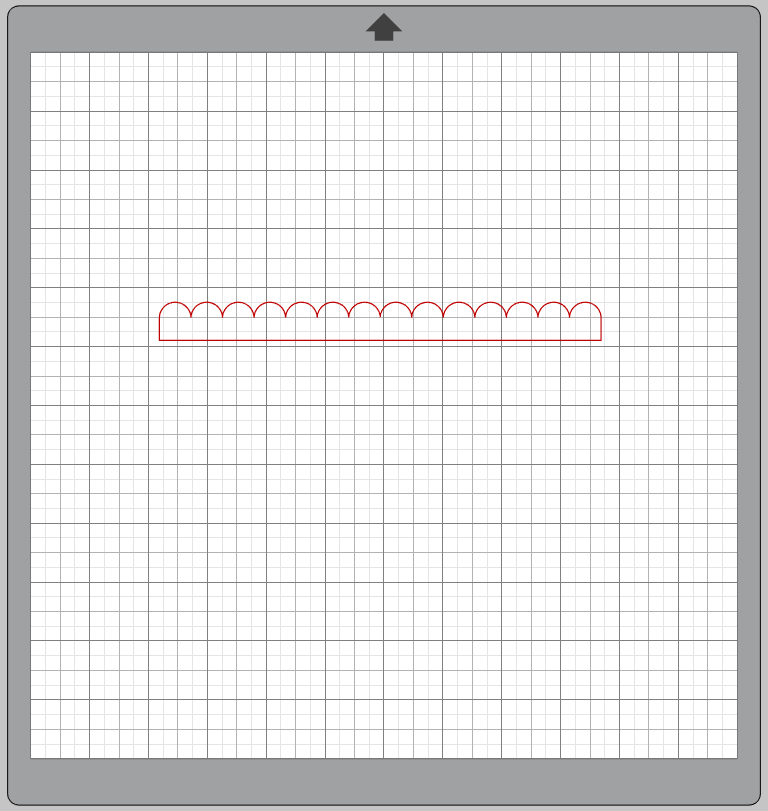
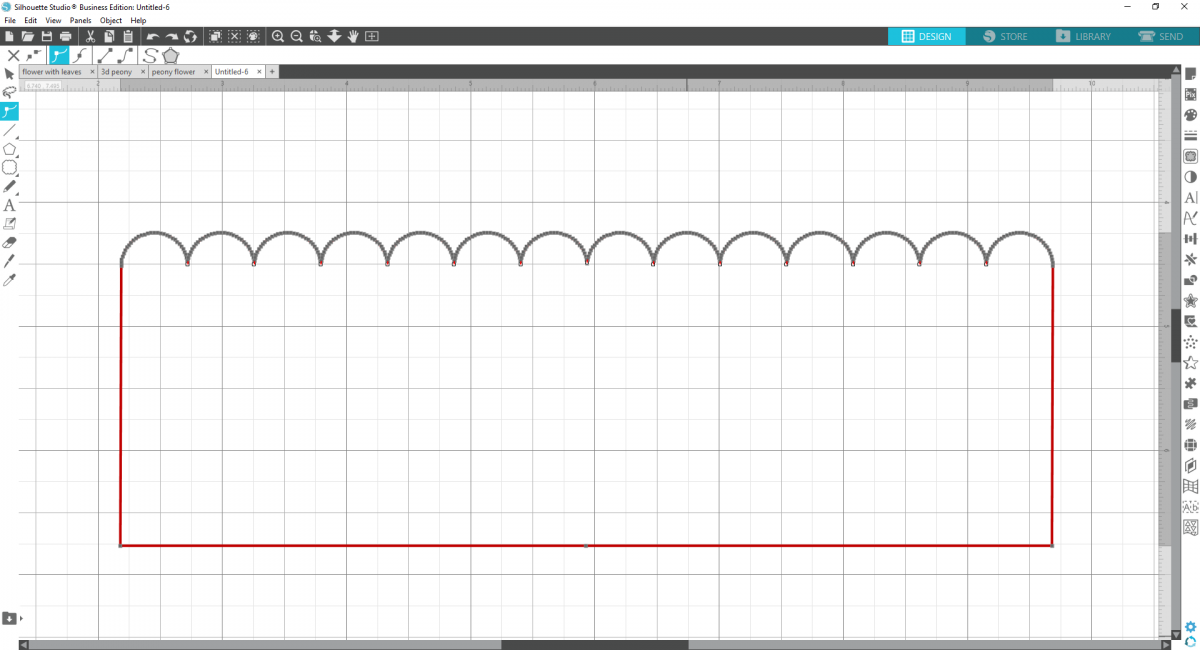
6. Now with the edit points still visible, click on the point at the base of the first scallop, press and hold down the Shift key, and select all of the points at the bases of the scallops. You should have 13 edit points selected at once.
7. Once the edit points are all selected, drag down the dots to create lines extending into the border piece. Pull the points down so they extend about 75% of the way down.
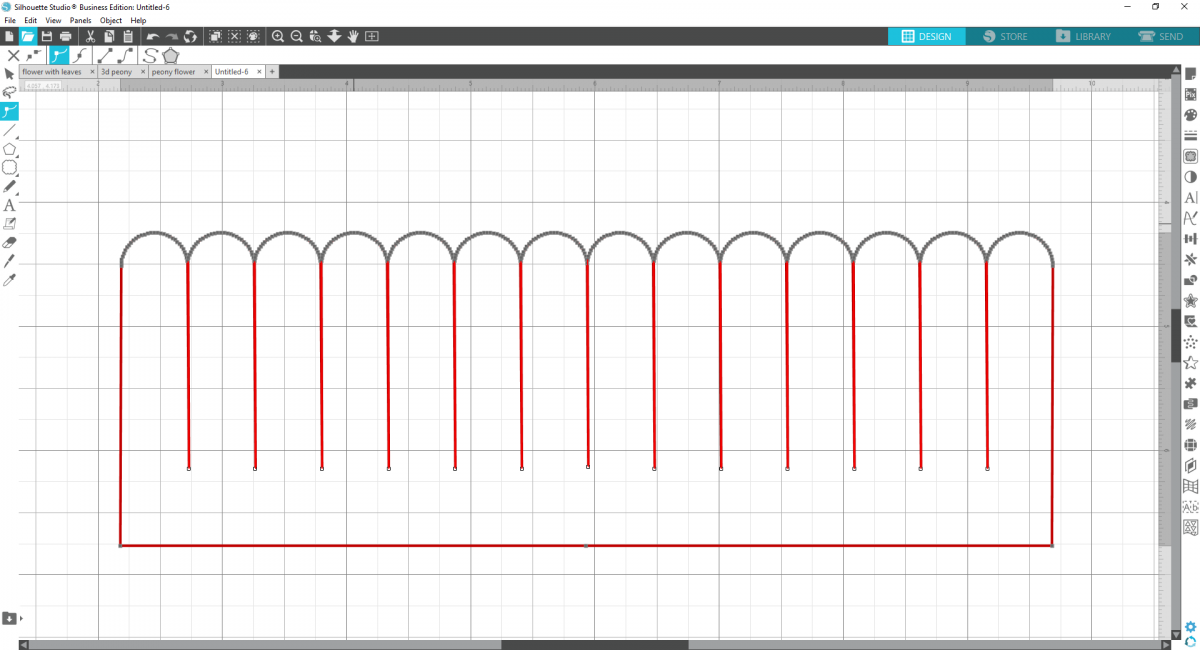
8. Now your flower petals are done! Duplicate the shape, so you have two pieces. These two pieces will create one flower pop!
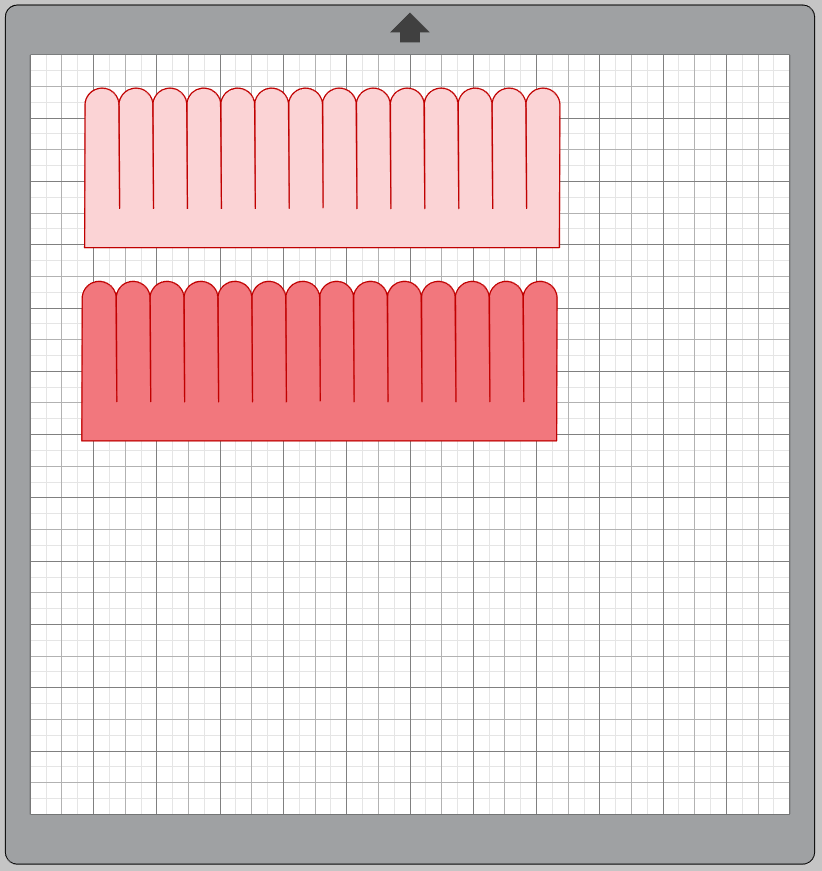
9. Click the Send panel, and set your tool to Tool 2 and insert the Rotary Blade so your action is Rotary Cut. There are currently no saved settings for the Crepe Paper setting in the software, so we’re going to make a custom setting! Just “Add New Material” name it whatever you’d like—I used “Thin Crepe Paper” and saved the settings as Force: 15, Speed: 5, and Passes: 1.
Those settings worked well on my crepe paper, but you may need to do your own testing as different brands have different weights and textures.
Remember to use a strong tack mat for the best results! Or just a very sticky standard mat. I like to tap around the sides of my crepe paper for extra stability when cutting. Smooth out as much as you can for a secure grip.
Step Two: Assembling the Flower Pops
1. Once your two petal rows are cut, scissor curl the edges of the petals to gently curl them under.
2. Using hot glue, adhere the edge of the first crepe paper petal row to the base of your lollipop. Begin to wrap around the pop, using dots of glue to secure as you go, making sure the petals are curling towards the center of the pop.
3. Once you’ve wrapped around the first row of petals, add the second row of petals in the same manner, only having the petals facing outwards this time.
4. Adjust your petals with your fingers to your liking and add a leaf, if desired.
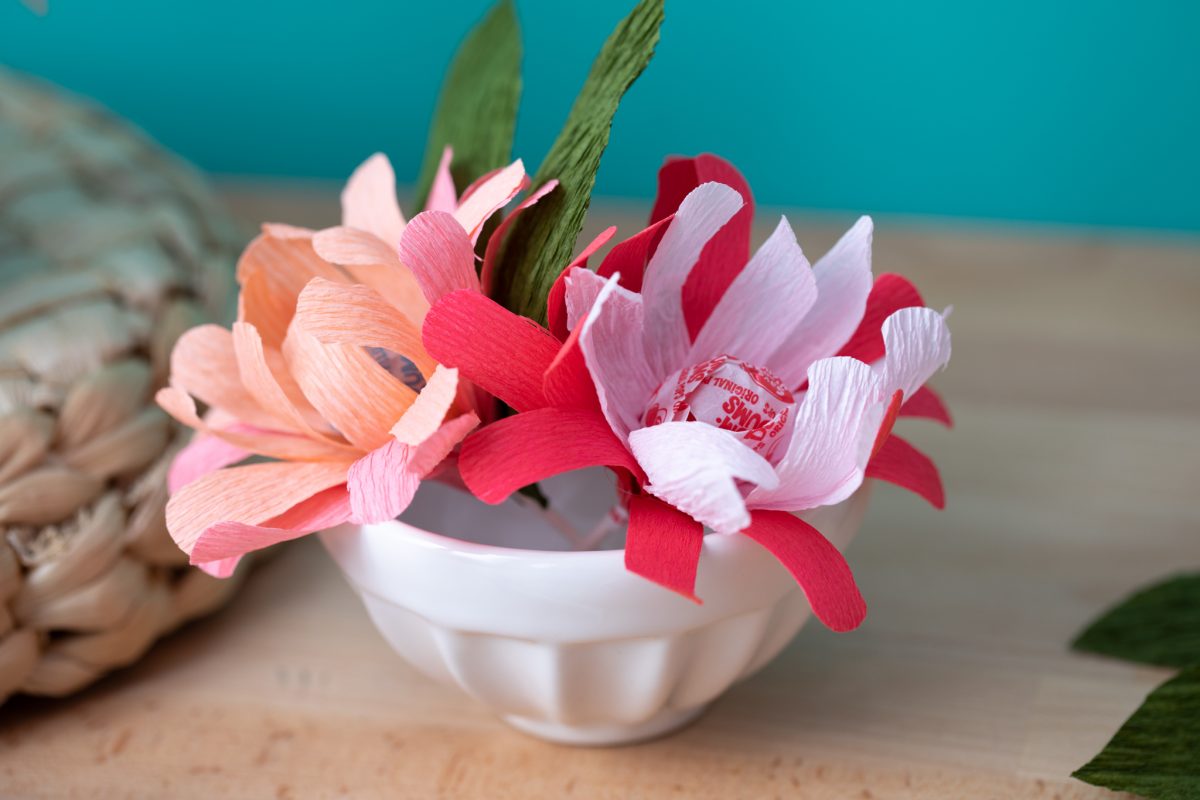
These sweet blooms make perfect valentines and such a cute display!

 Free Class - Crepe Paper Crocuses
  Quirky Mug
Kelly Wayment
June 28, 2024
You can use it with vinyl as long as it is smooth and flat to allow the static charge to hold on to it. Rolled vinyl that wants to go back to its rolled shape will not necessarily work well, and it would need to be trimmed to fit the ES mat cutting area.
Kelly Wayment
June 28, 2024
Yes, you can use the heat pen while using the ES mat. 🙂
Yurii
March 2, 2024
Hello. May it be used with heat pen?
Thanks
Jerome
February 24, 2024
Hi, works this with the normal vinyl foils or only with printer papter etc?
Kelly Wayment
February 16, 2024
Once you’ve pushed the mat up against the rollers, just press the “Load” arrow button (bottom right on the display). Does a regular sticky mat load into the machine for you?
Michelle a goodall
January 24, 2024
Hello! I just got my new electrostatic mat and have watched every video i can find on it. However, what i can t find is why it wont feed into my cameo 5/ it slides right up the rollers but wont go any further. and yes- iam pushing the into button. help!