Supplies Needed:
- Silhouette CAMEO®
- Silhouette Studio®
- Silhouette Cutting Mat
- Silhouette Cutting Blade
- 3 pieces of 18 gauge green stem wire (18 inches long)
- Green Floral Tape
- 12 x 12 piece of green cardstock
- 12 x 12 piece of cardstock – in the flower color of your choice
- White cardstock
- Black cardstock
- Glue dots and adhesive of your choice
- Design ID #291327
Step One: Download, Open, and Arrange the Design
1. Go to the Silhouette Design Store and purchase Design ID #291327
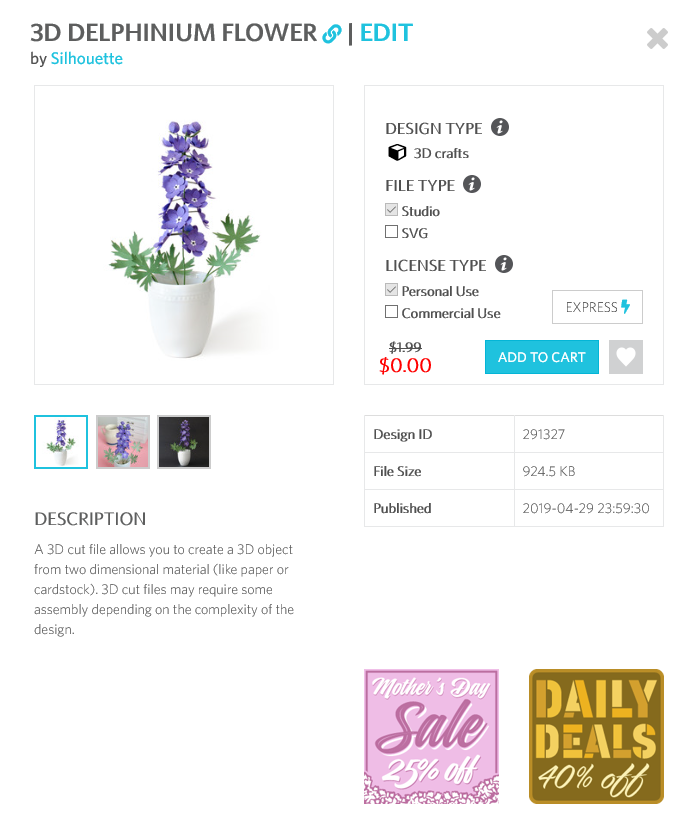
2. Go to your Silhouette Studio® Library and open the design.
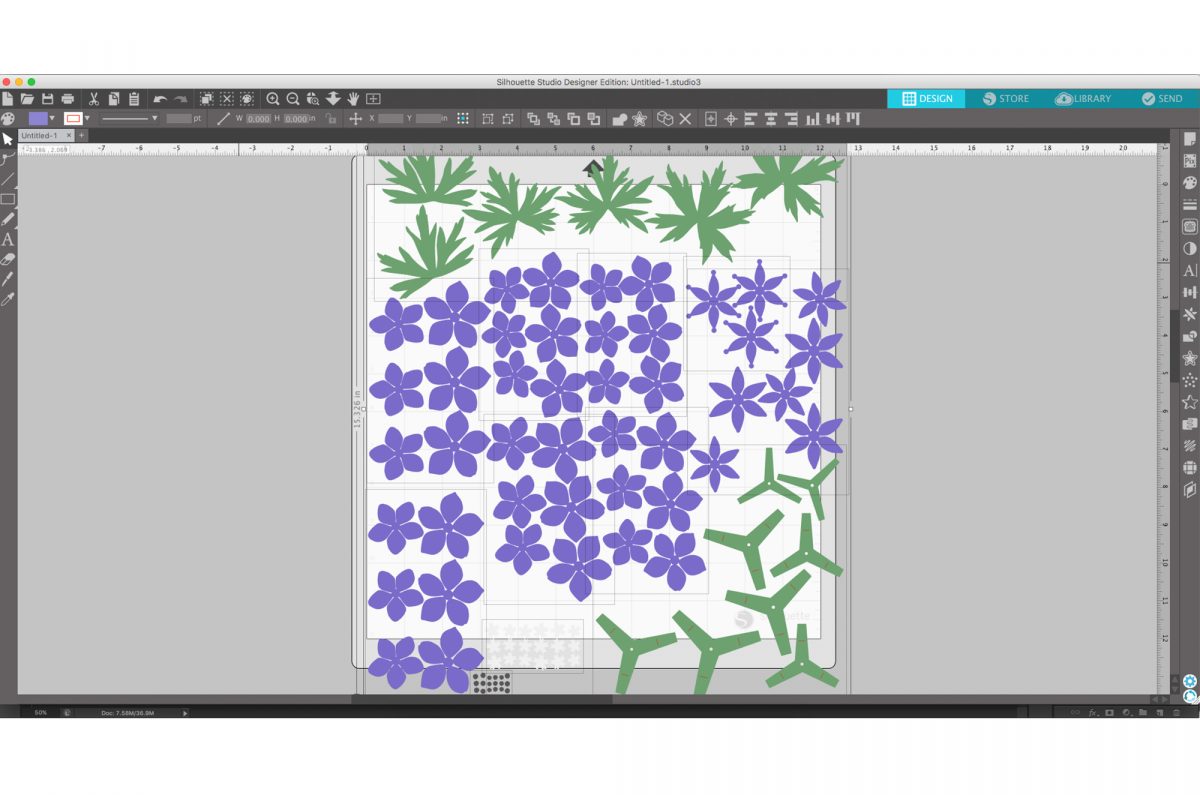
3. Right-click on the design and click “Ungroup.”
4. Arrange and group by color. You’ll need to cut multiple times for the different cardstock colors.
Step Two: Cut the Design
1. Load your machine with your mat and corresponding colored cardstock. Choose the correct cut settings for your type of paper. When you’re ready to cut your design, click the Send button.
Step Three: Assemble the Design
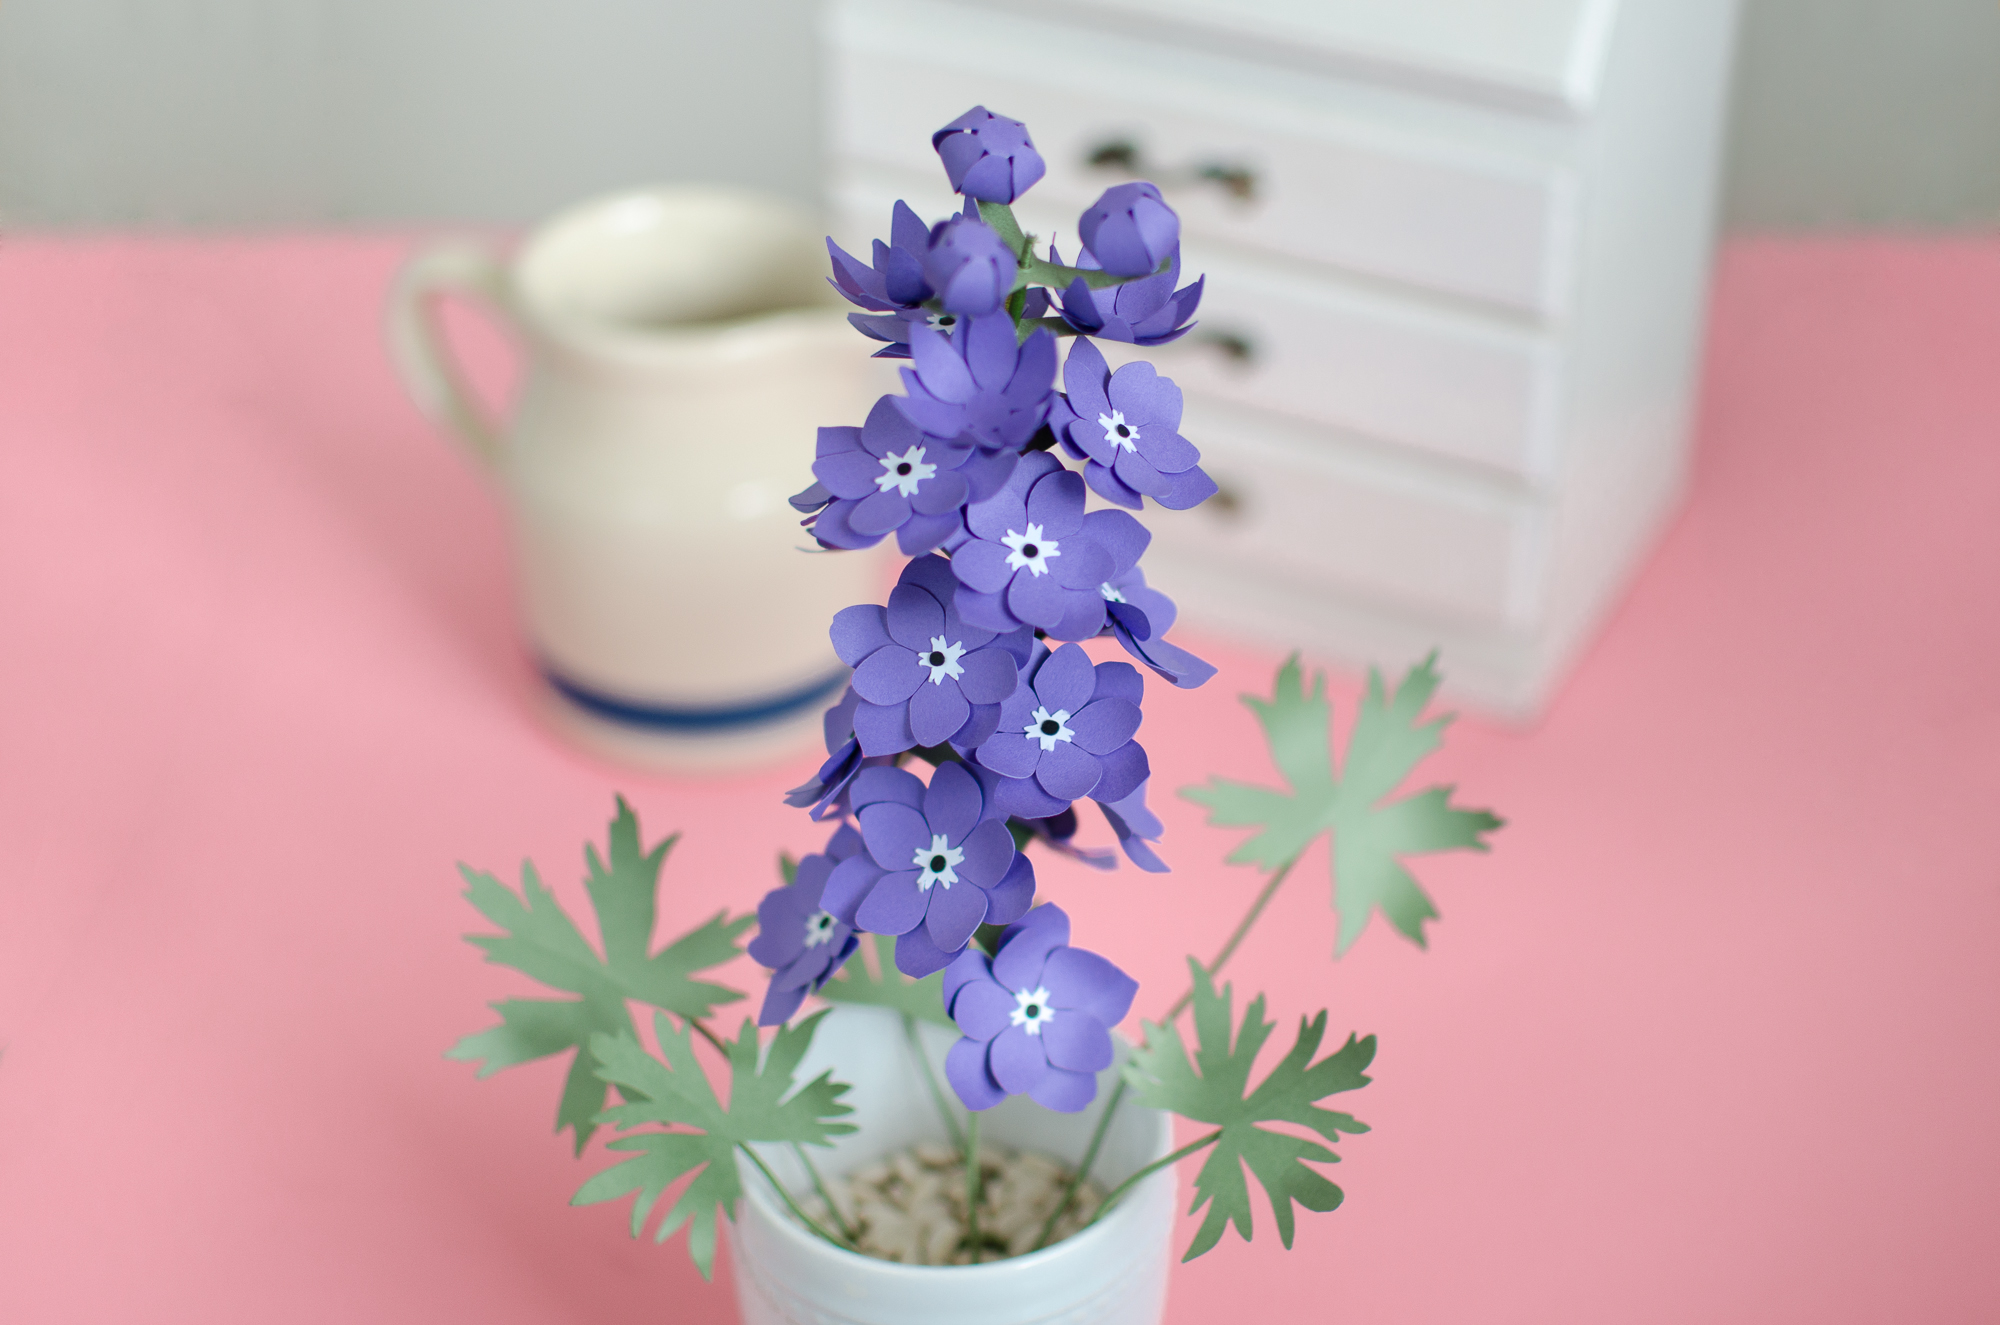
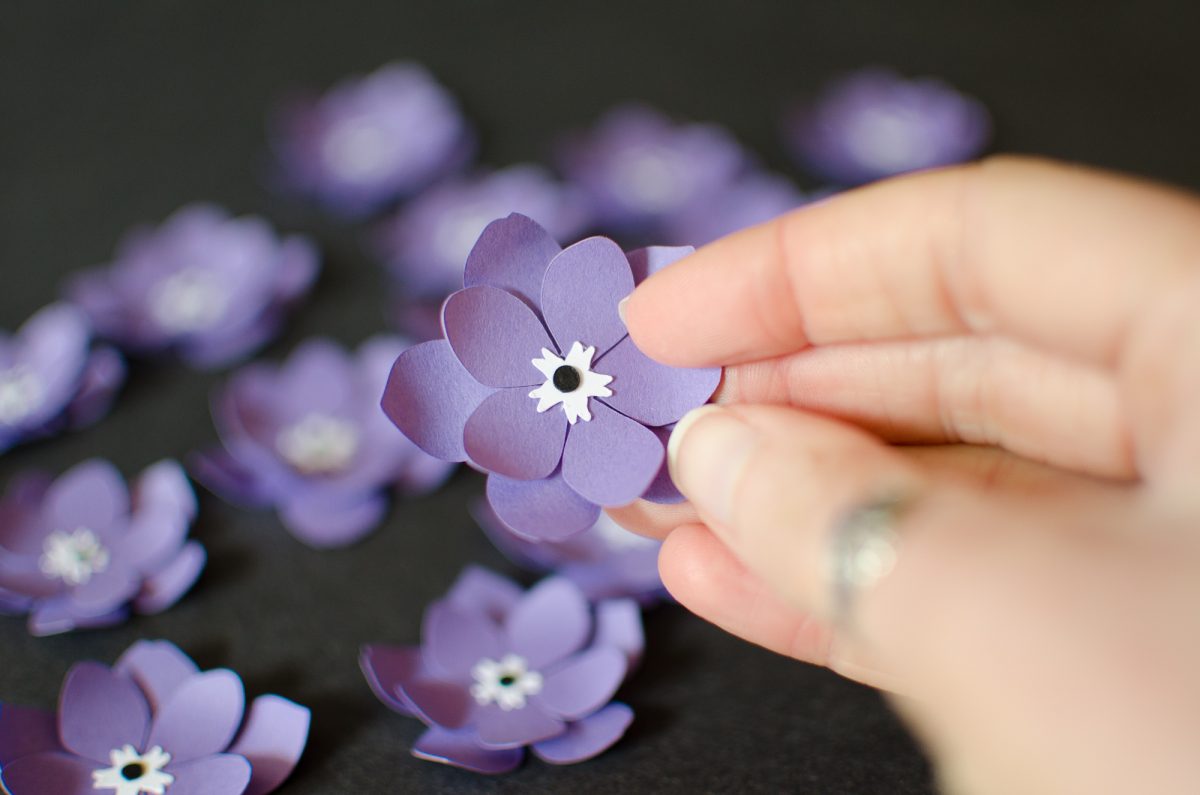
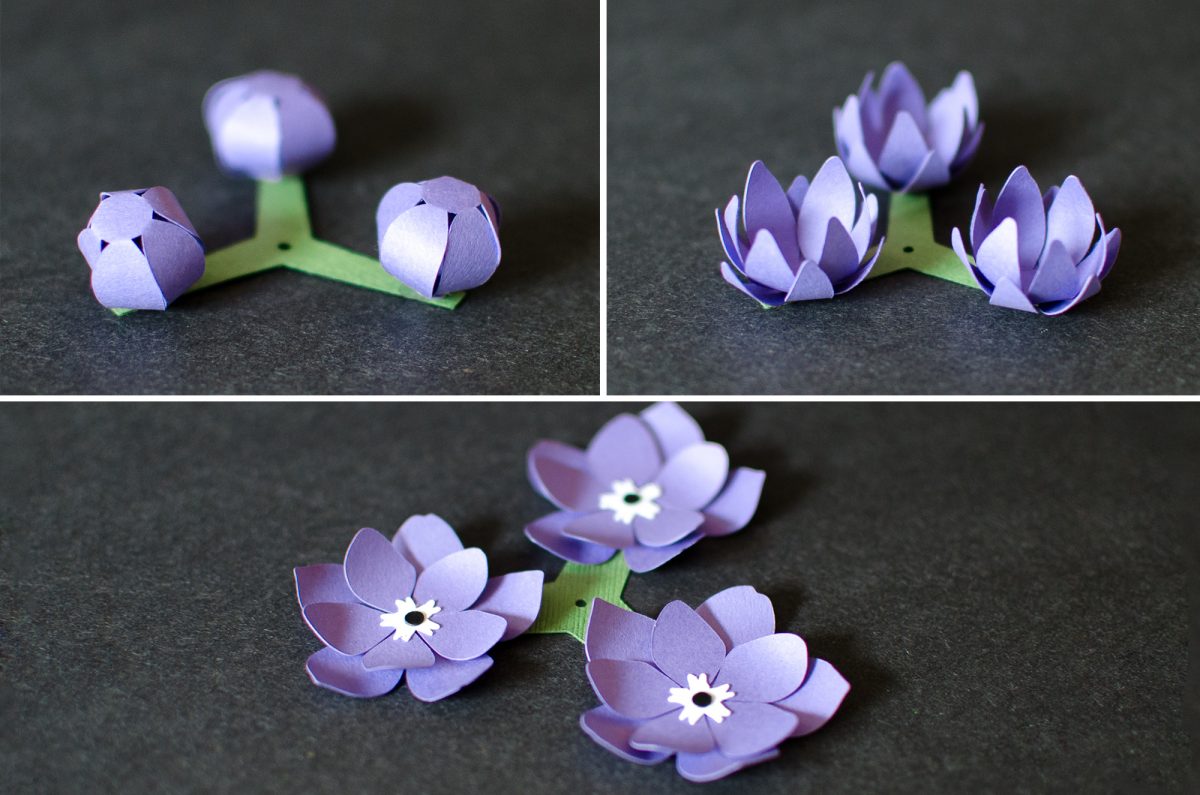
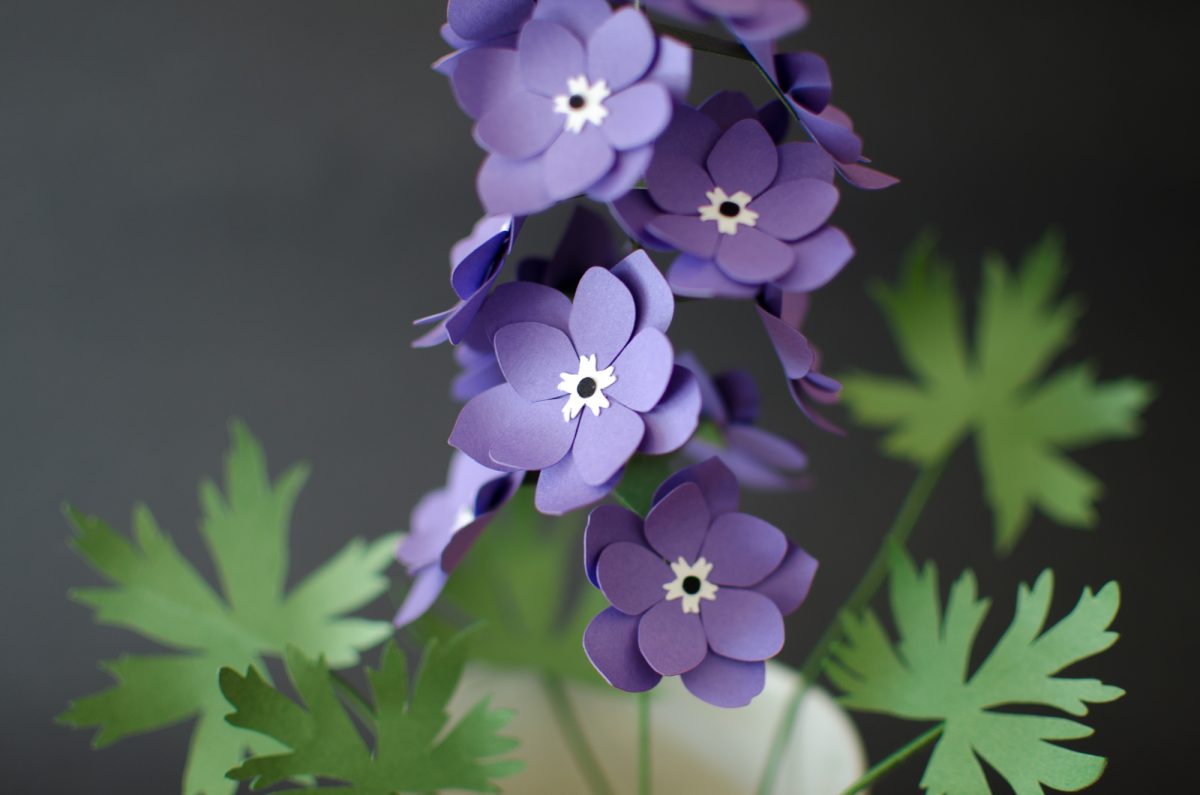
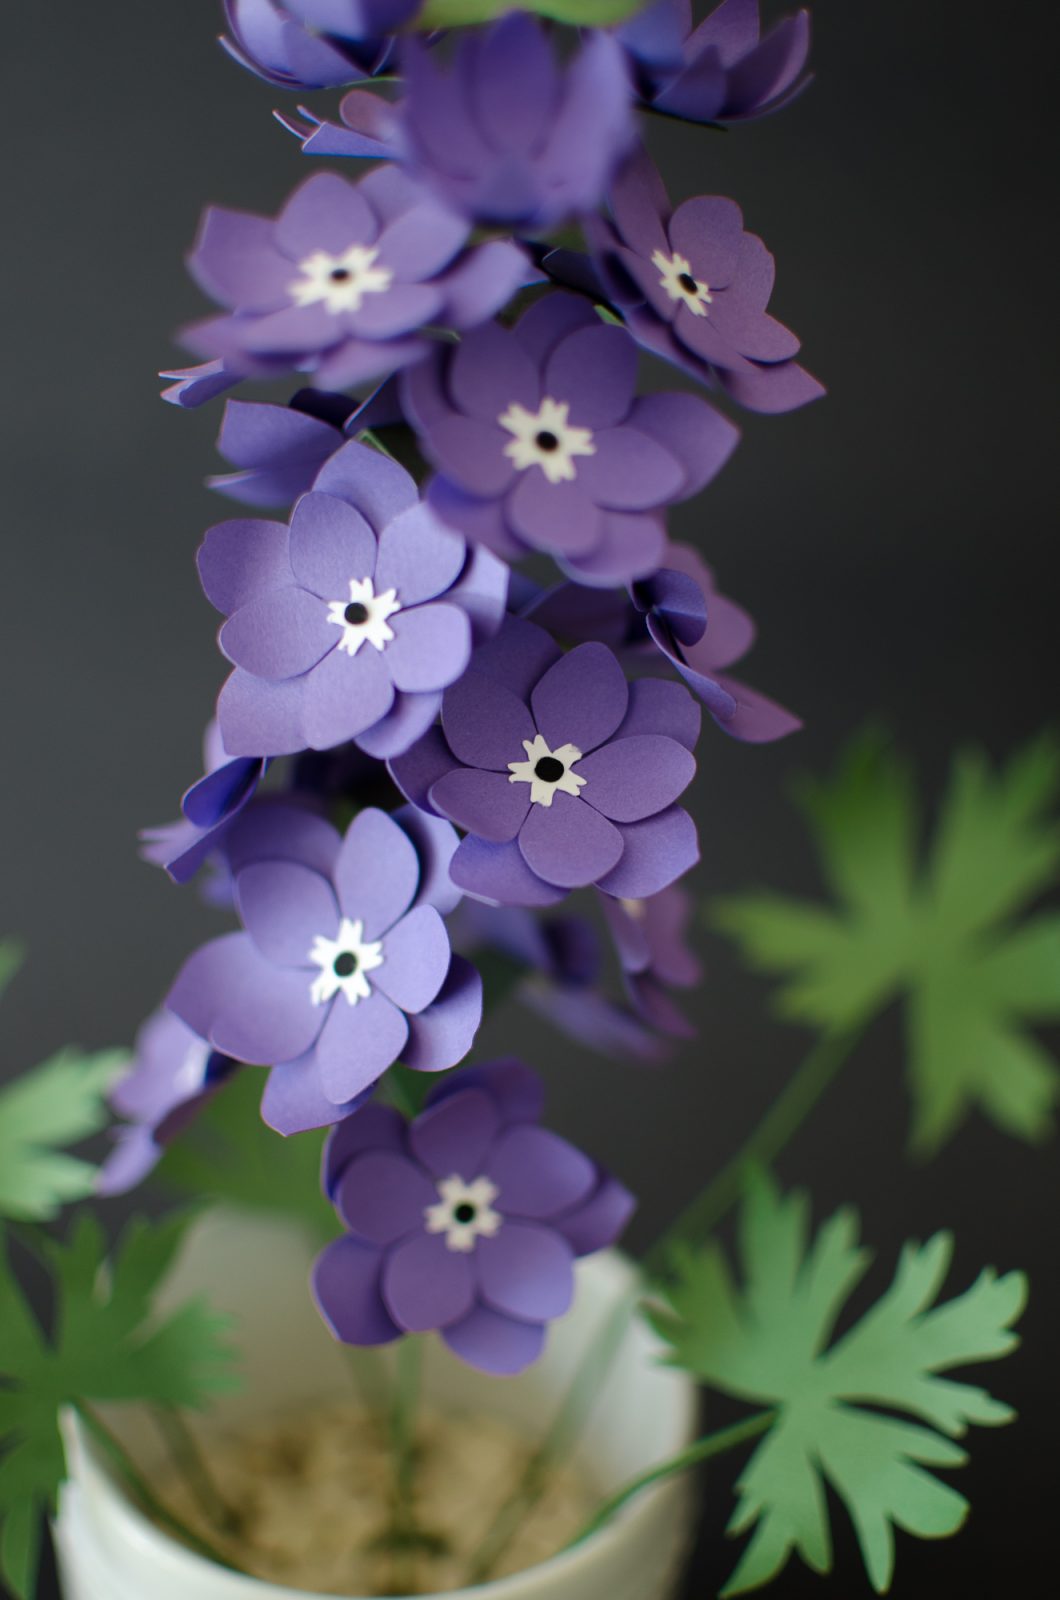
1. Once your design is cut, it’s time to start assembling the flower. Carefully remove the pieces of paper off of your mat. To assemble the buds, curl the edges around a pen or the end of your hook tool. Use adhesive on the top circle tabs to adhere them together, stack them on one another. To assemble the open buds, stack the layers so the smaller piece is on the bottom, and adhere. Curl the edges upwards. To assemble the flowers, take a smaller petal piece and stack it onto a larger one. We used glue dots to make this process quicker. Use glue to adhere the small white and black detail pieces onto the petals.
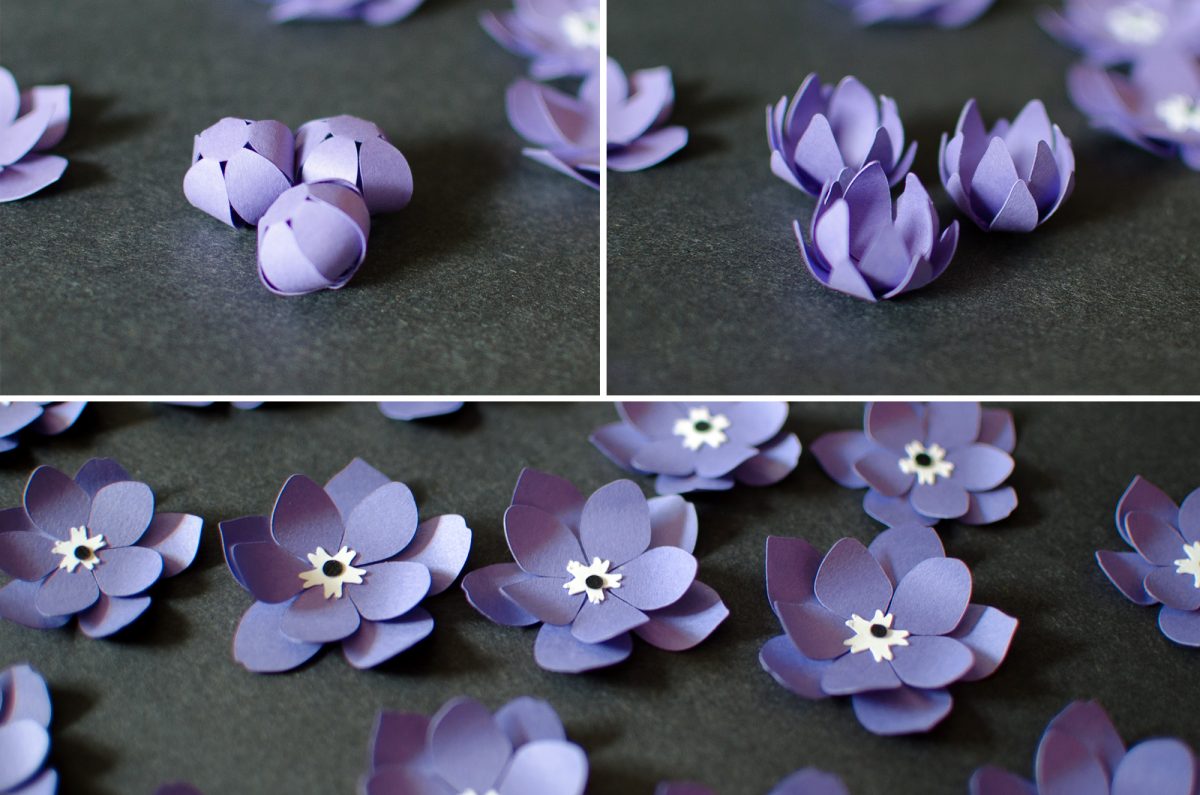
2. Curl the edges of the petals upward and arrange the flowers by size. Organize the flowers in groups of three, the first group being the smallest flowers and the last group being the largest flowers. We want the larger flowers on the bottom of the flower stalk, and the smaller flowers near the top.
3. Now we’re going to start to build the foundation of our flower stalk. Take the smallest green brace piece and adhere the closed buds to the ends. The stacked circles will be on the bottom. Take the second smallest green brace piece, and adhere the open buds to the ends. Stack the remaining green brace pieces by size, and match them up with the corresponding flower groups. Largest brace piece matches the largest flowers, etc. Using adhesive, adhere the three flowers to the end of the matching green brace piece. Repeat until all groups are assembled.
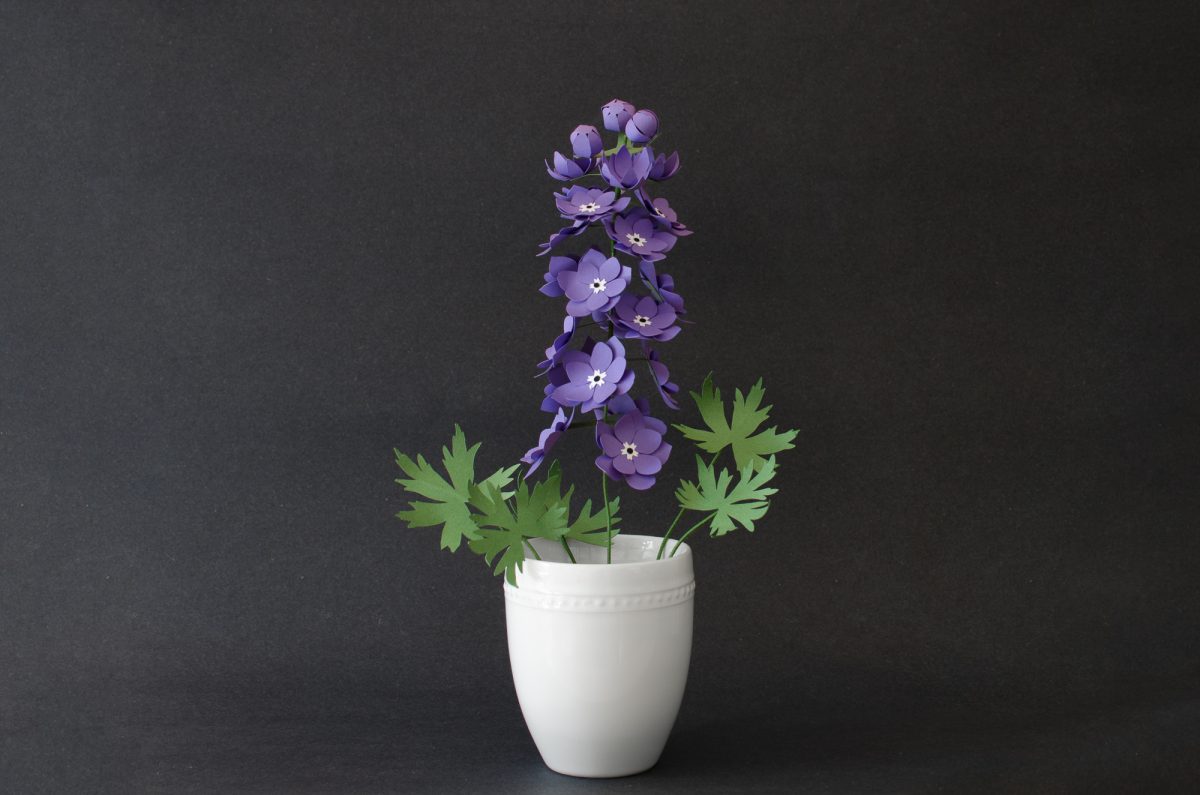
4. All of these pieces that you just assembled with become ‘layers’ on the flower stalk. Take a piece of wire and bend a loop at the bottom; this will be used as a base for the stalk. Place it into a small flower pot and fill the pot with dried beans or small stones. Start to stack the layers onto one another, starting with the largest flower group and working your way to the smallest. Then stack on the open buds and then the closed buds.
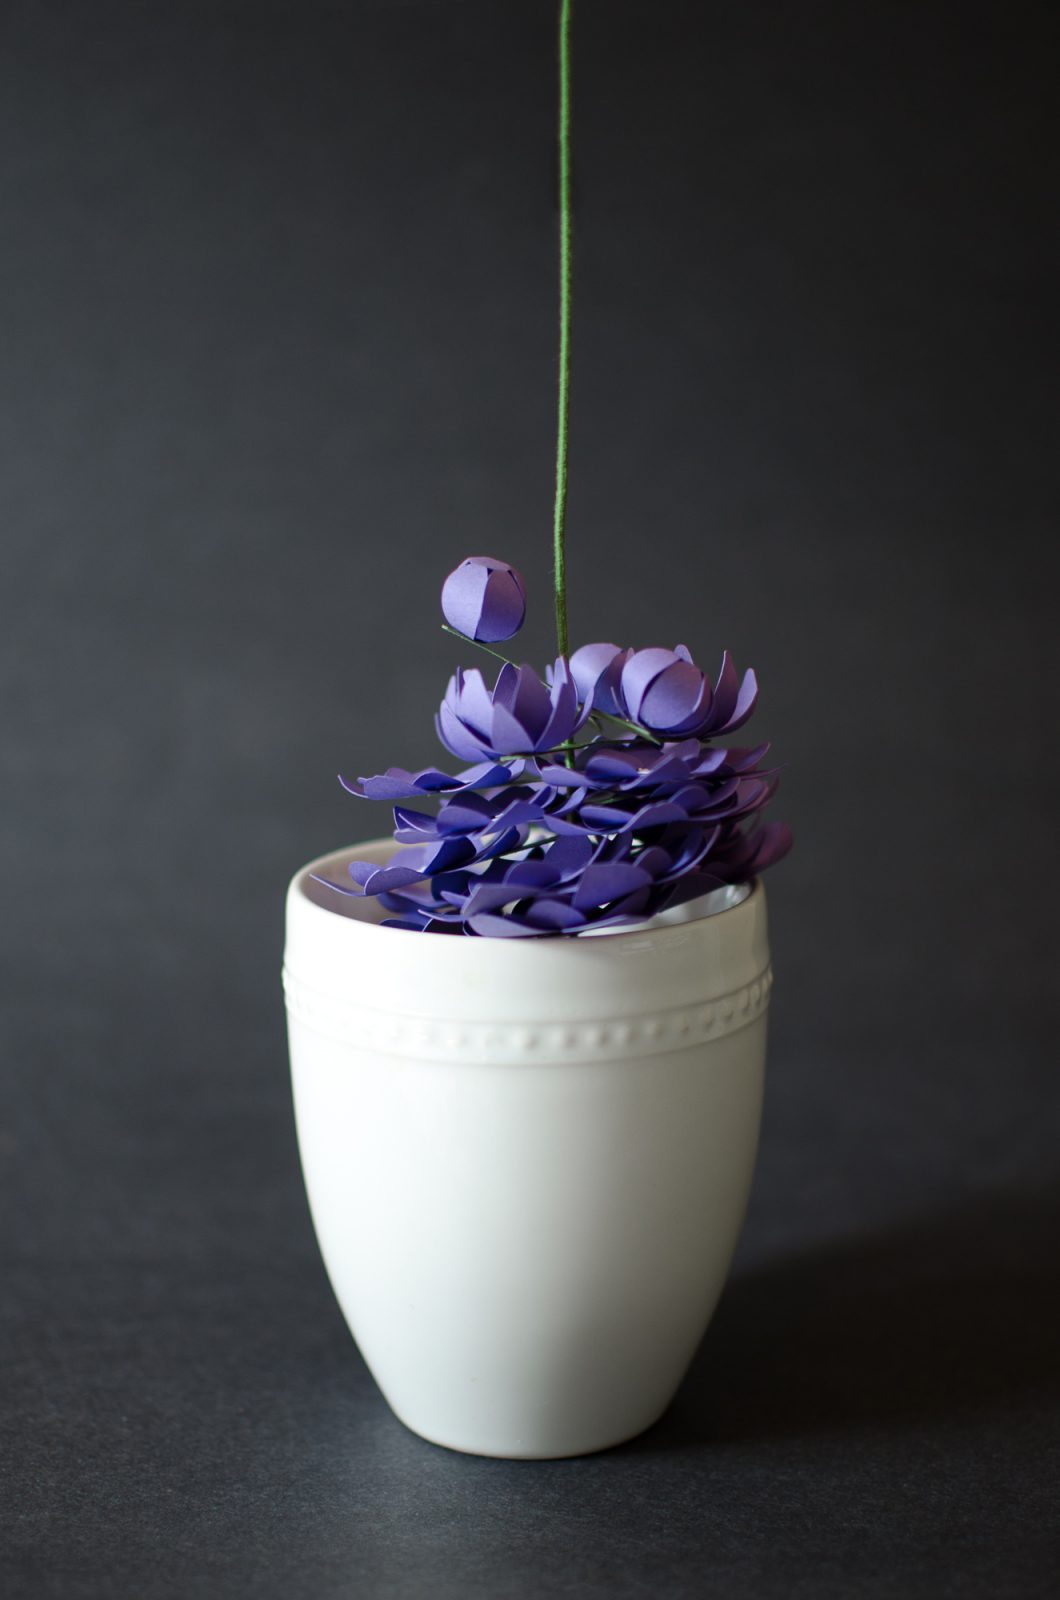
5. We’re going to use floral tape as the spacers between our layers. Grab the top bud layer and bring it up to the top of the stalk but make it so it is still resting on the wire. Take a piece of floral tape and wrap it around the wire directly below the bud layer. Pull it tight to activate the adhesive. You can see that the top bud layer will be resting on the floral tape. When that’s secure, bring up the next layer—the open bud layer—and wrap a piece of floral tape directly below the layer. Repeat with the next layer—the smallest flowers. You’ll be able to start to see the construction of the flower stalk. As you work your way down the stalk, you’ll want to add a little bit more space between the layers. The bigger flowers near the bottom will need more space from the layer above. This also mimics the natural composition of delphiniums.
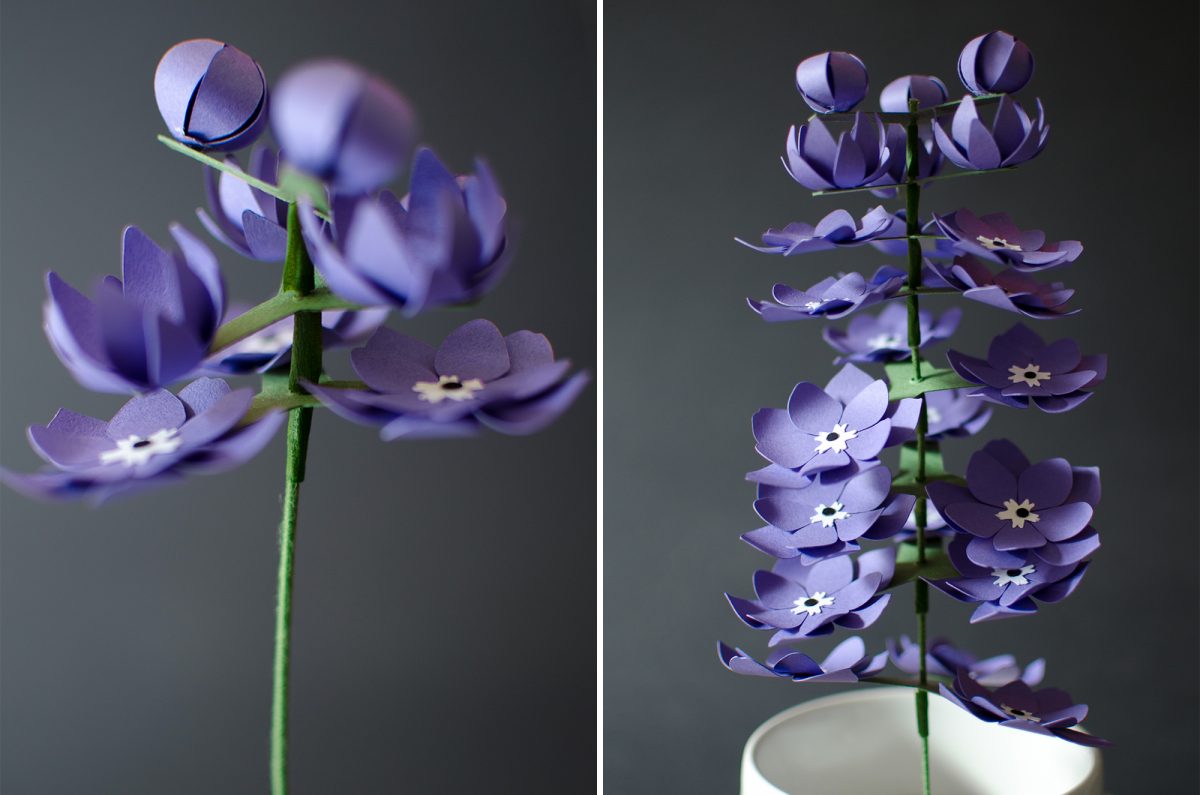
6. Now that the layers are spaced apart, we’ll want to fold down the edges of the braces. Start at the bottom and work your way up, folding the braces at the fold line. When you get to the bud layers, curve the braces upward slightly. Twist the layers so that the flowers on the layer above, fit into the free spaces on the layer below. If any of the layers are unbalanced, you can use some glue to attach the layer to the wire firmly. To assemble the leaves, take 3 pieces of wire and cut them in half. Use glue to adhere the leaves onto the end of the wire. Stick the opposite ends of the wire into your flowerpot and arrange as you’d like.
7. Make sure the stalk wire is somewhat straight and the leaves are arranged how you want!
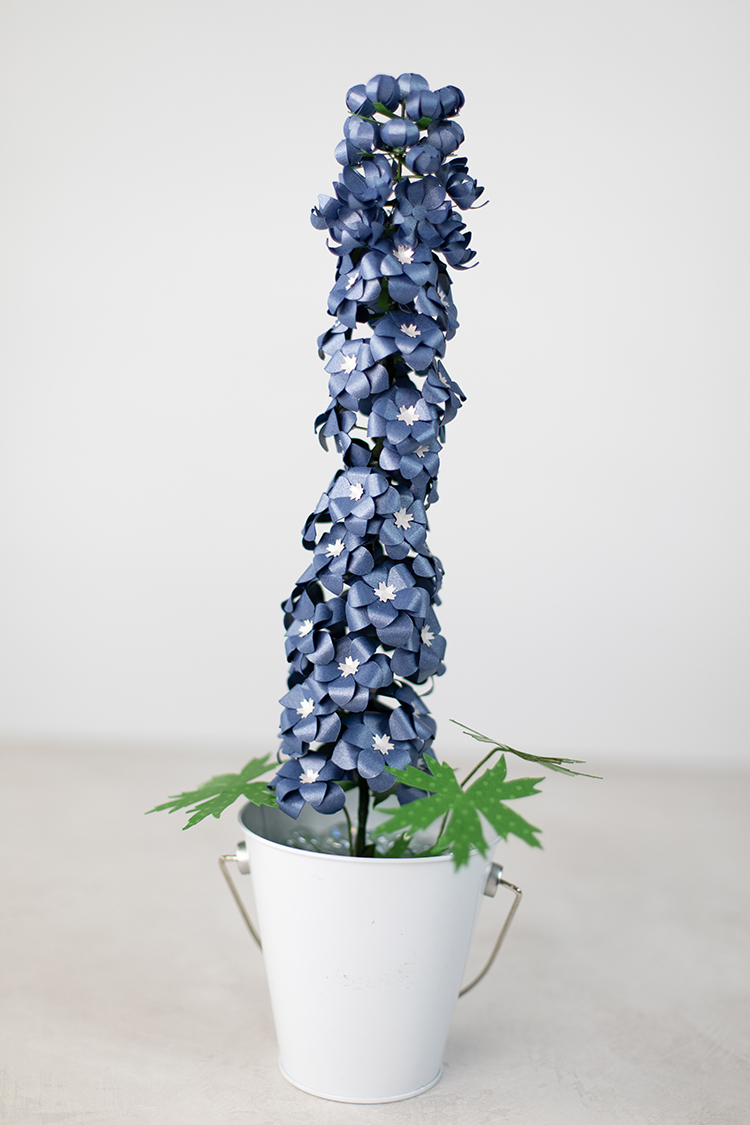
This project is super showy, and a really impressive papercraft to display around springtime or summer! Dephiniums mainly come in purple or blue, but you can make these whichever color you’d like.
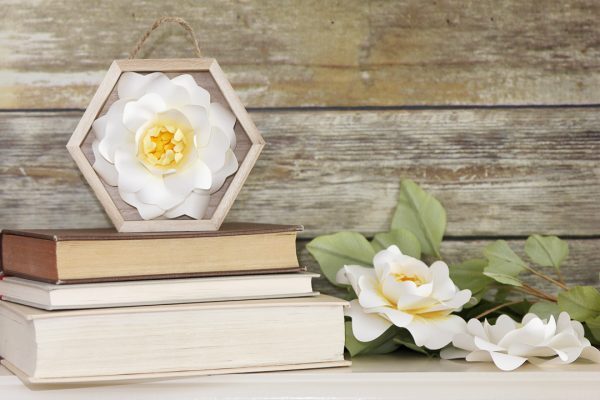 Floral Shadow Box Display
 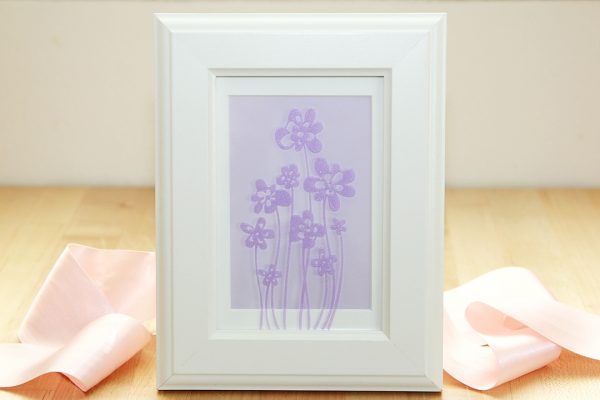 Dress Up a Frame With Vinyl
Nasze Naturalne
September 3, 2025
Your authentic voice really shines through in everything you create and share
Naszenaturalne
September 2, 2025
Really love your style
Kelly Wayment
June 28, 2024
You can use it with vinyl as long as it is smooth and flat to allow the static charge to hold on to it. Rolled vinyl that wants to go back to its rolled shape will not necessarily work well, and it would need to be trimmed to fit the ES mat cutting area.
Kelly Wayment
June 28, 2024
Yes, you can use the heat pen while using the ES mat. 🙂
Yurii
March 2, 2024
Hello. May it be used with heat pen?
Thanks
Jerome
February 24, 2024
Hi, works this with the normal vinyl foils or only with printer papter etc?