Have you ever wanted to created your very own stained glass artwork? We can show you how with Silhouette’s shrink plastic sheets. Just follow along with the tutorial below to see how easy it is!
Supplies Needed:
- Silhouette CAMEO® or Silhouette Portrait®
- Silhouette Studio®
- Silhouette Cutting Mat
- Silhouette Cutting Blade
- Silhouette Shrink Plastic – Clear
- Gallery Glass Simulated Liquid Leading – Black
- Glue Gun
- Two complementing stained glass patterns
- Inkjet Printer
- Design ID #77259
Step One: Edit Design in Silhouette Studio®
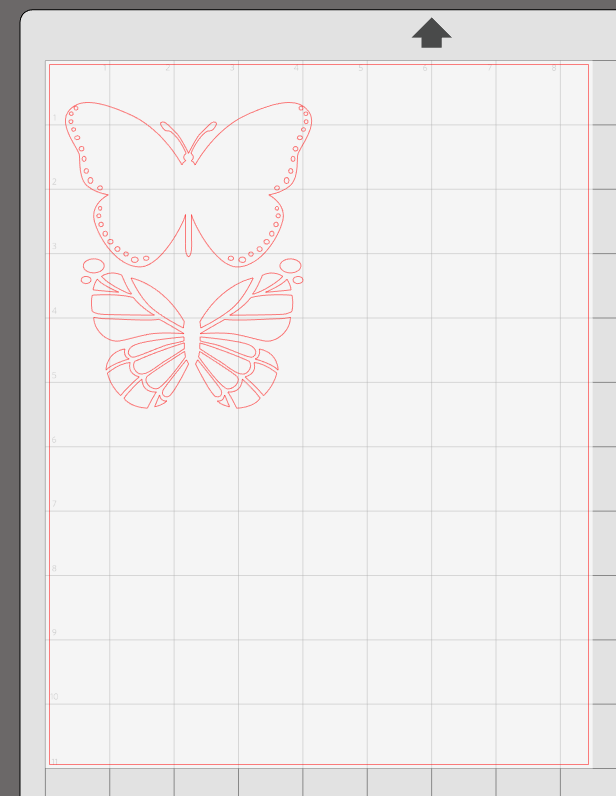
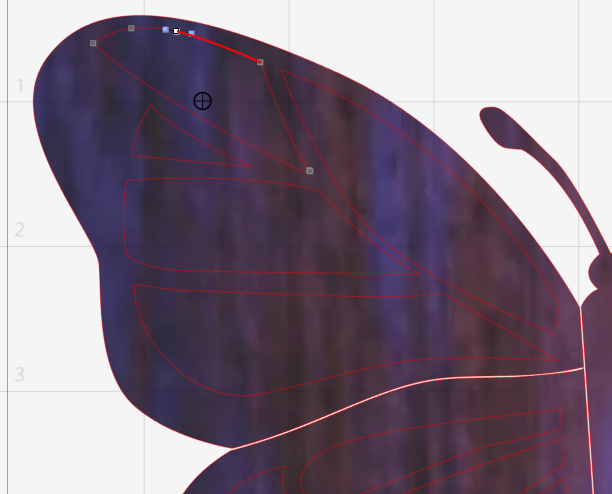
1. Open the design (ID #77259) in Silhouette Studio®. It will open up like the image below. We are going to Ungroup it (using Ctrl + G or Cmd +G) and erase all the circles from the design.
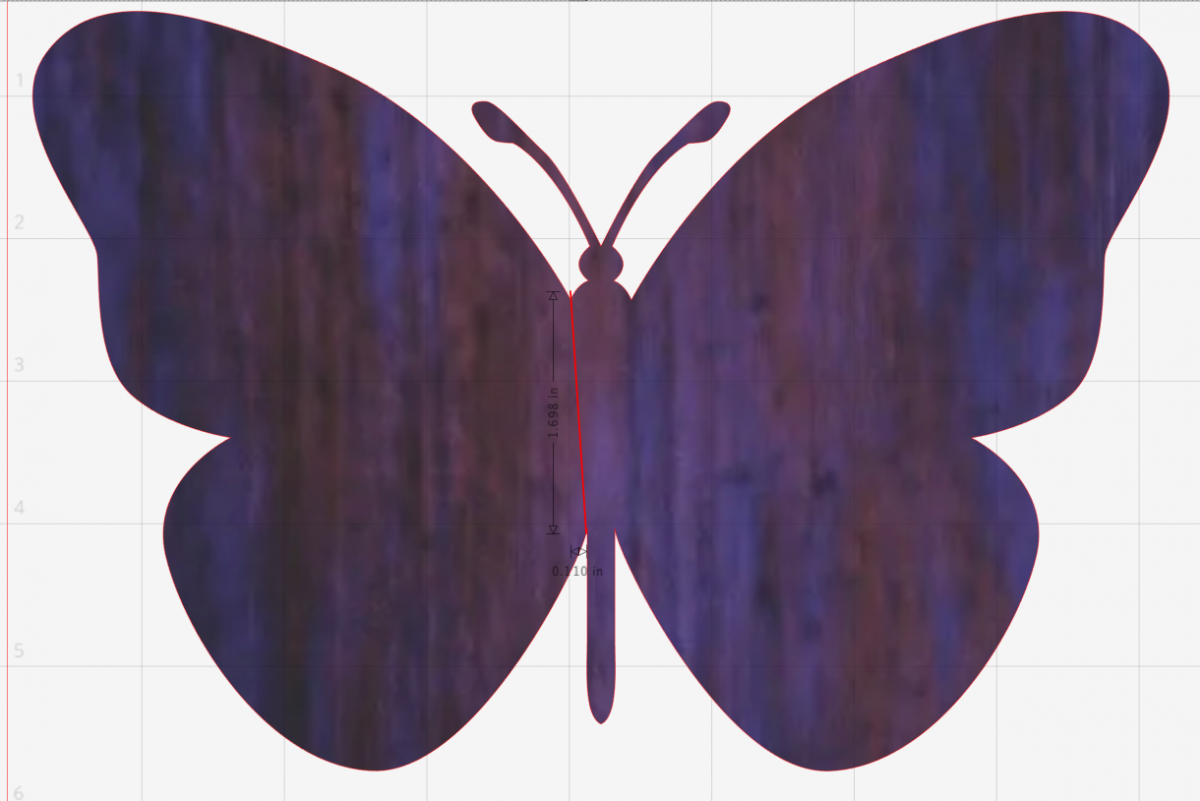
2. Fill the background butterfly image with a blue or a purple stained glass color. Follow the steps found here to learn how to add an image to your fill Pattern colors.

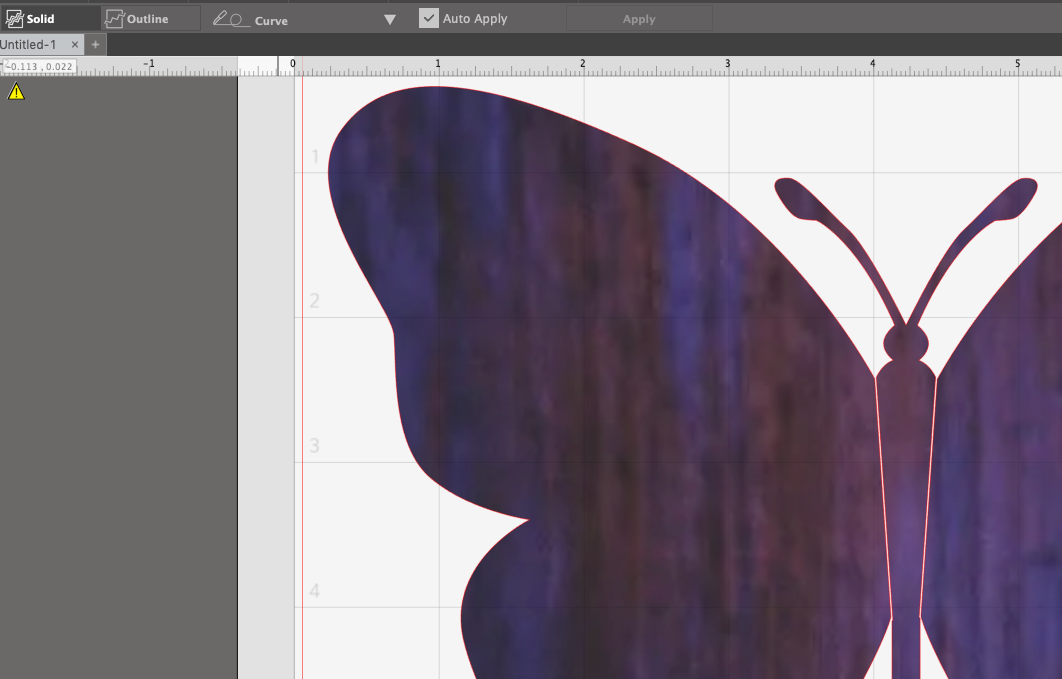
3. Open the Knife tool and draw a slice line in between the body and the wing of the butterfly.
4. Then slice the wings starting from the side indentations moving to the body of the butterfly. (If necessary, you can wait until you’ve put the segments back into place in step 6 if you’d like to guide your cut line along the segments.)
5. Layer the section pattern of the butterfly wings onto the background layer. Double-click on each section. and we are going to adjust each segment.
For a more in depth tutorial on line editing, read here.
6. After double taping on a segment, adjustment boxes will appear. Simply click and drag them to where you want them to go. We wanted to pull each section closer to the edge of the wing.
7. After each segment is adjusted open the fill panel and fill with your orange stained glass.
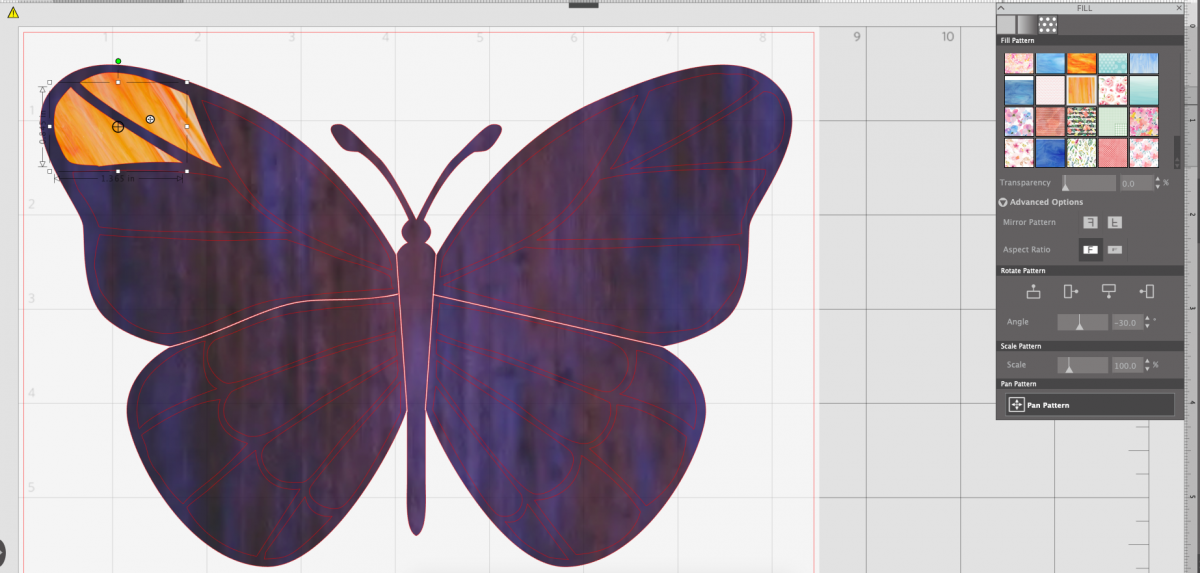
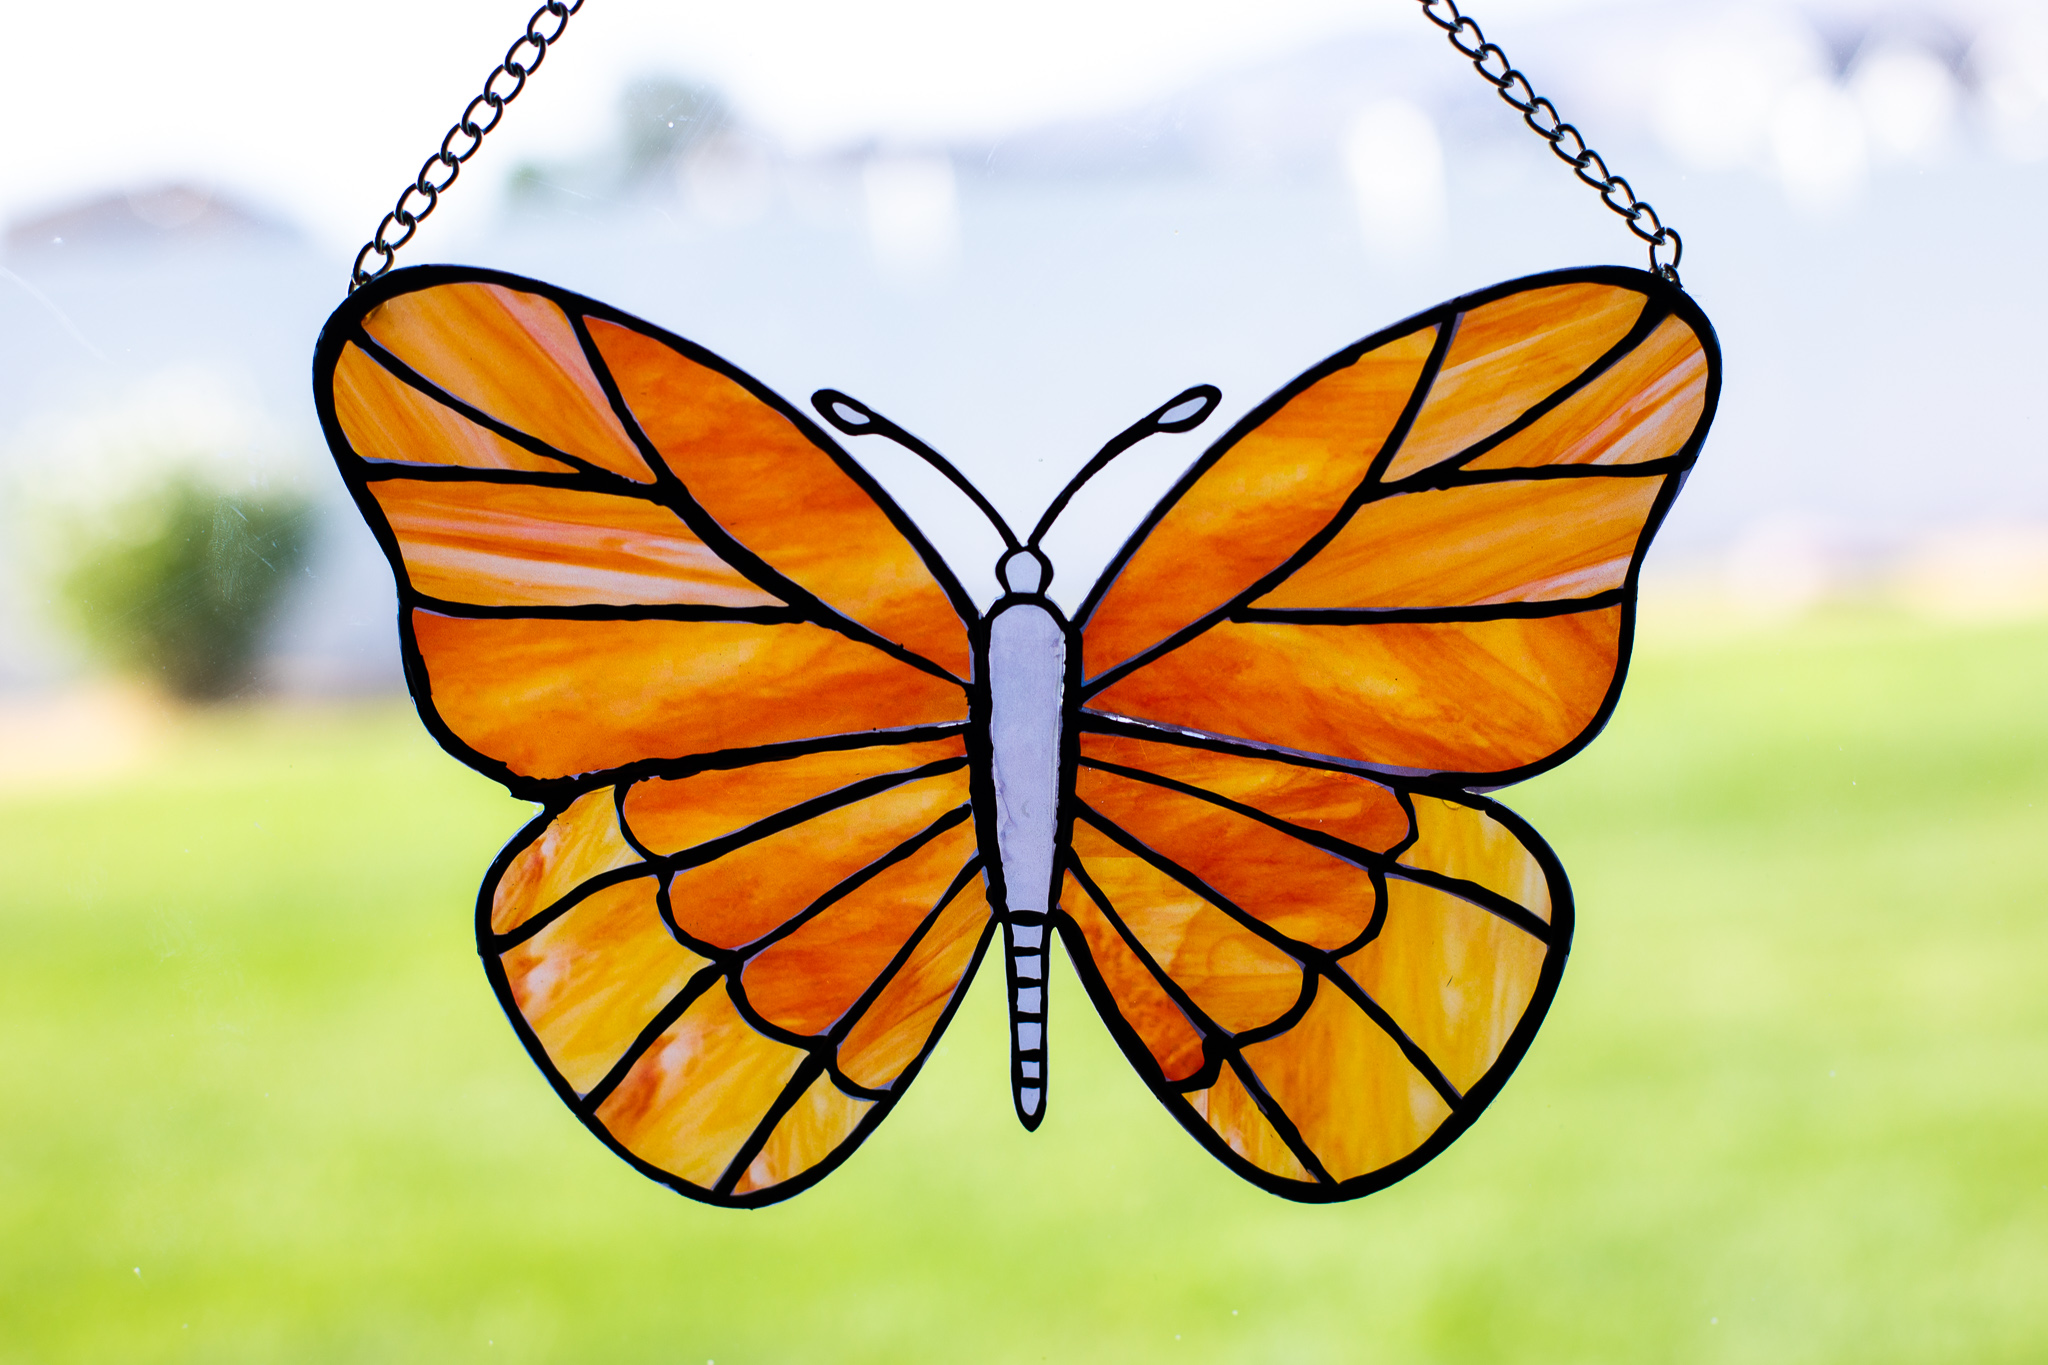
You’re end result should look something like this.
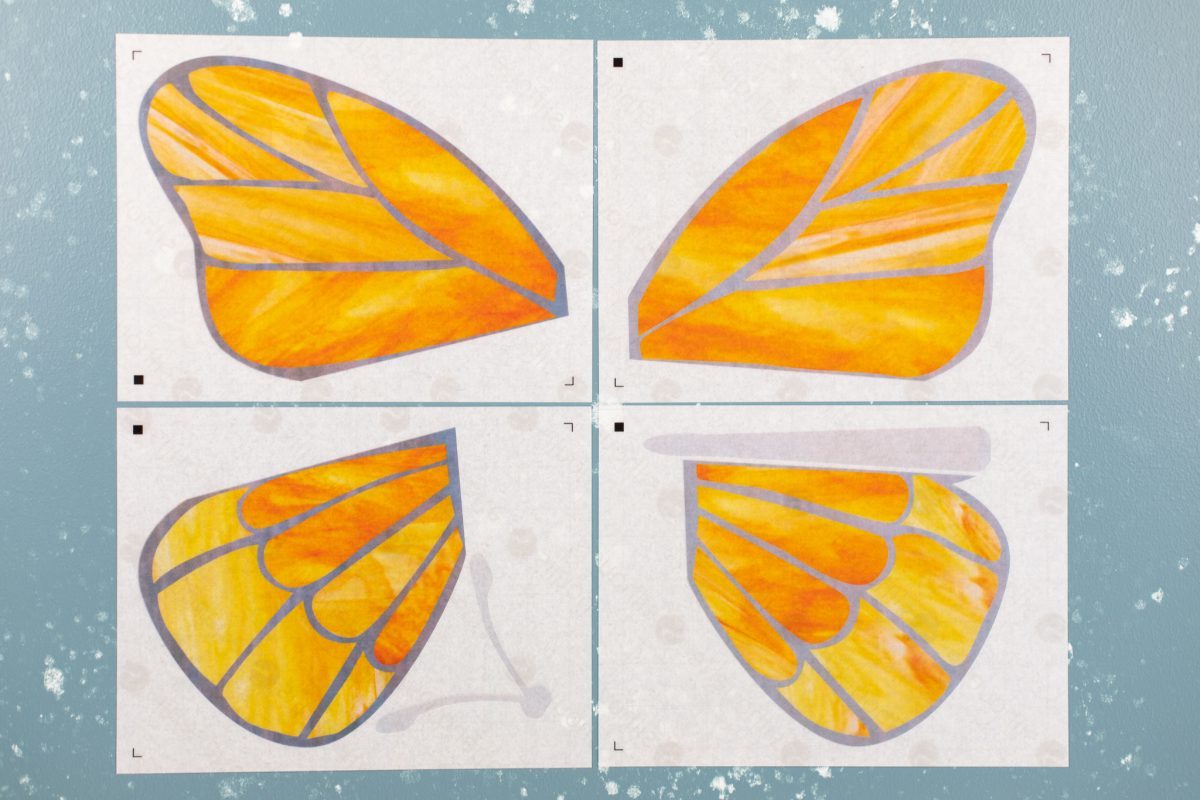
8. Now adjust the size of the butterfly so each section fits in a 8-inch-by-11-inch cut window. Turn on the Print & Cut feature on the Page Setup panel.
Step Two: Print & Cut Design
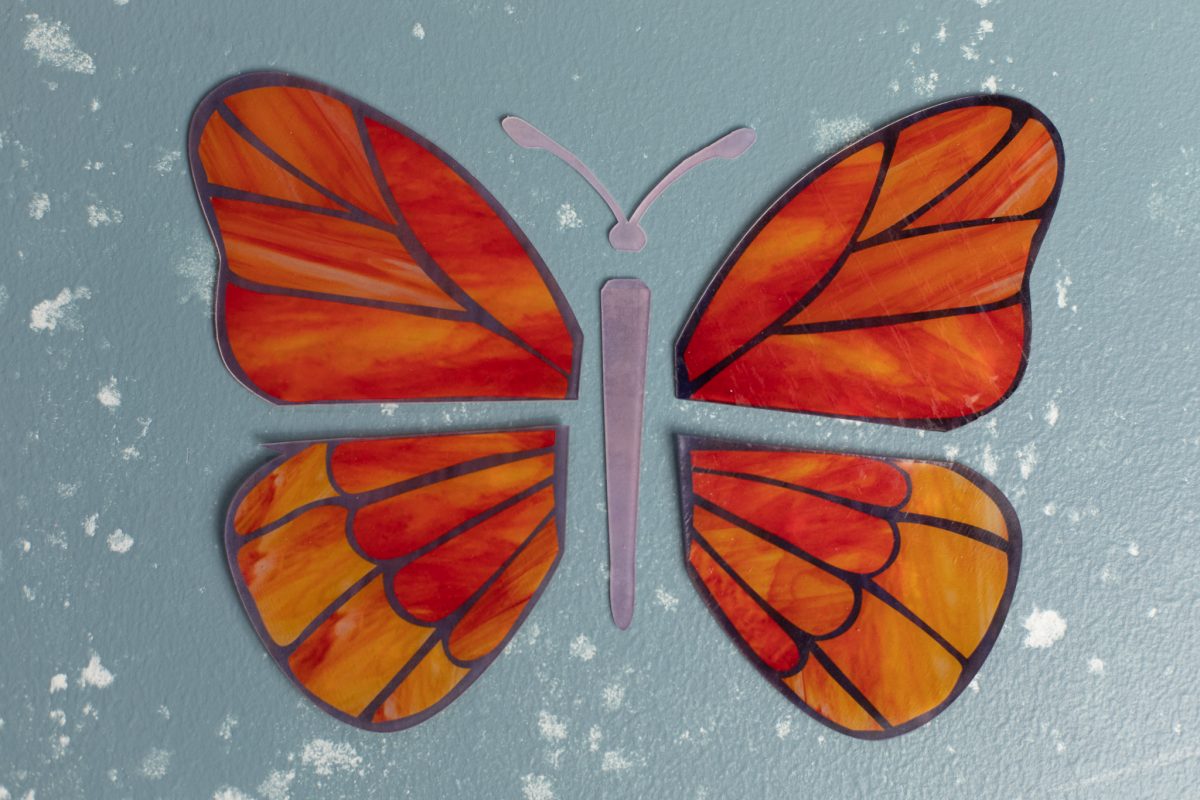
1. We printed our wings on four sheets of shrink plastic and put each section of wing on a page. For the middle part, we printed the head and the body on two separate sheets of shrink plastic.
2. We wanted the butterfly to be as large as possible when it was finished. Remember that shrink plastic shrinks to about 1/3 its original size.

3. Once your pages are printed, place each sheet on a cutting mat and have your Silhouette machine cut it out using the shrink plastic cut settings.
4. When the pages have been cut, carefully peel your design away from the grid Silhouette backing. Be very careful as the shrink plastic can tear easily if you move too quickly.

Step Three: Shrink, Assemble, and Add Leading
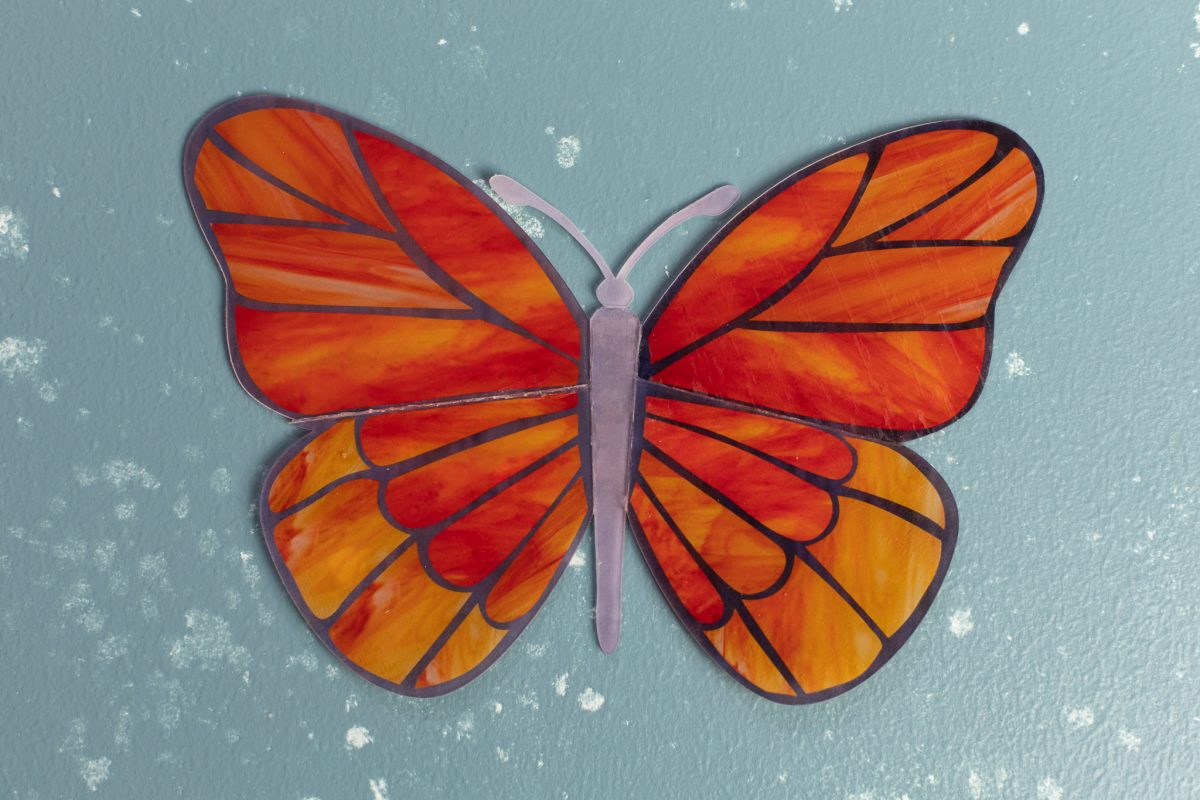
1. Place your shrink plastic, printed side up, on parchment paper and heat according to the directions on the shrink plastic package. Remember that different ovens will vary the results of the shrink plastic, so we recommend using a scrap of shrink plastic to test to make sure your oven has the right temperature set.
2. When all your pieces are finished shrinking, glue the pieces together.
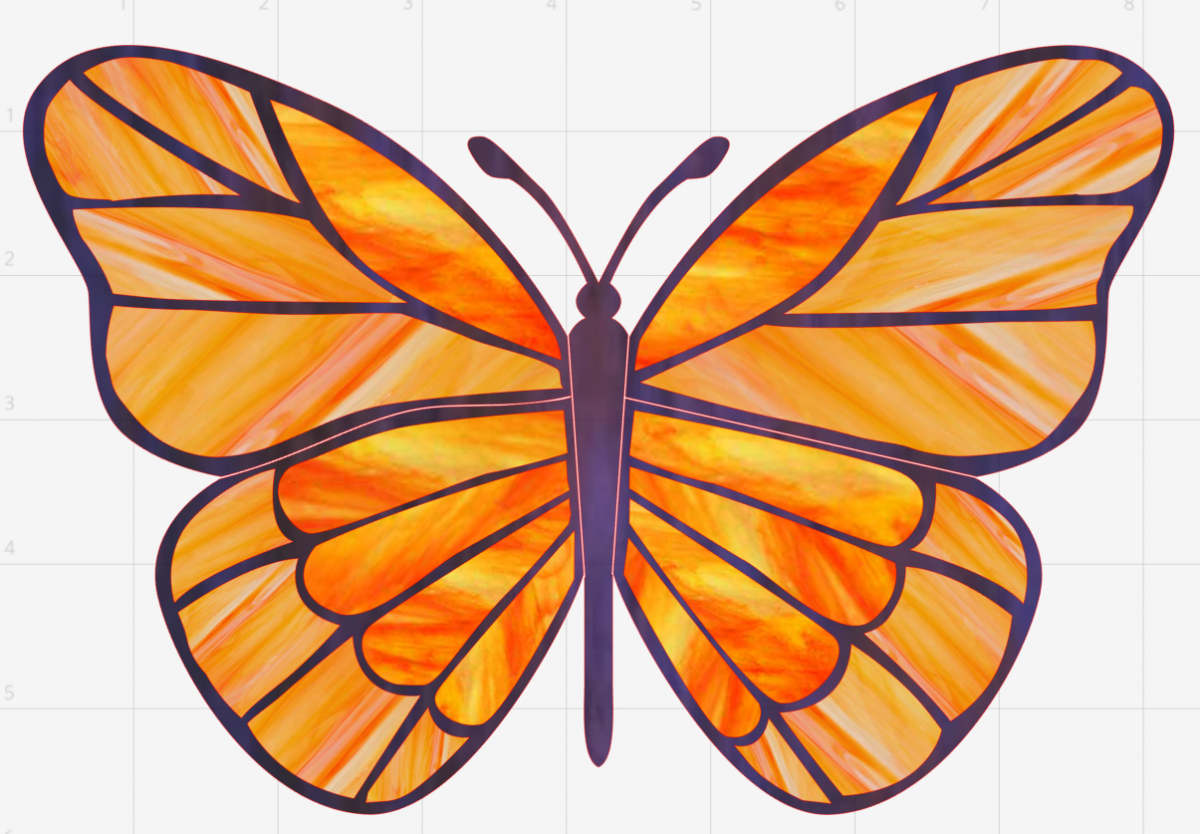
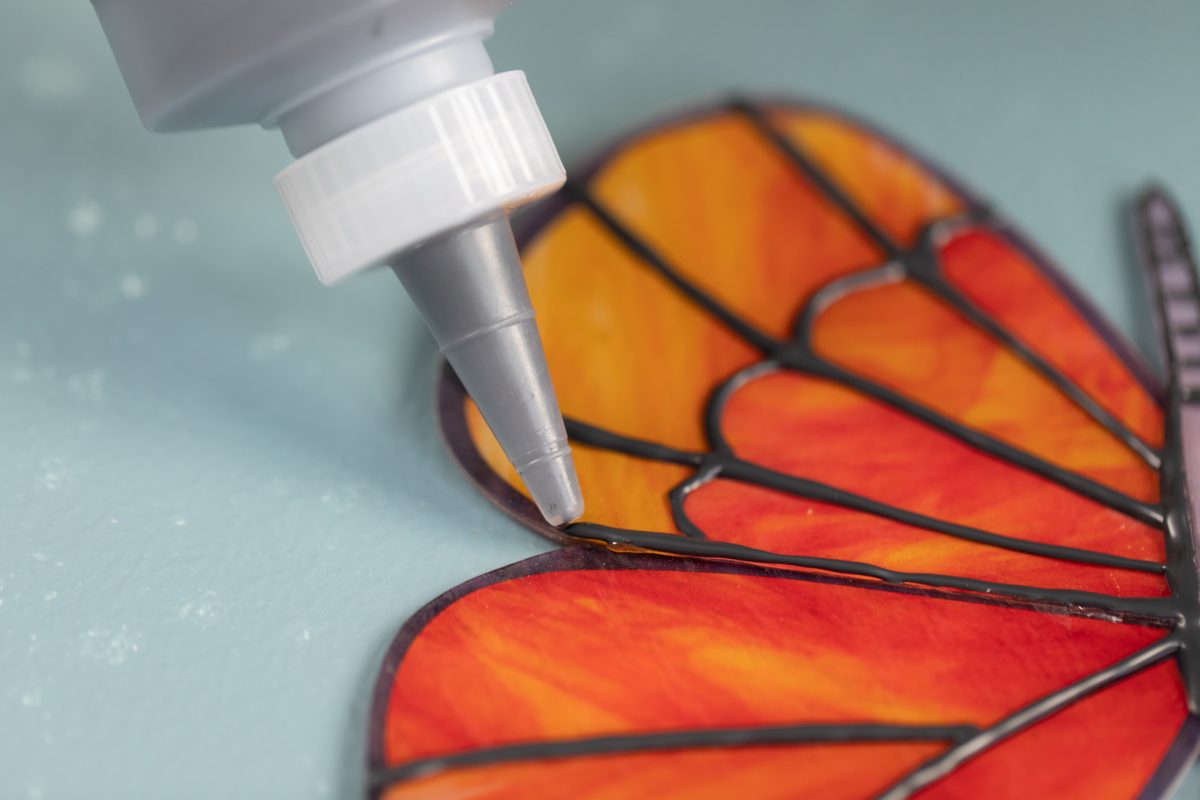
3. Now to add to the stain glass look we are going to use a faux leading. We found ours here. Trace around the orange sections of the wing.
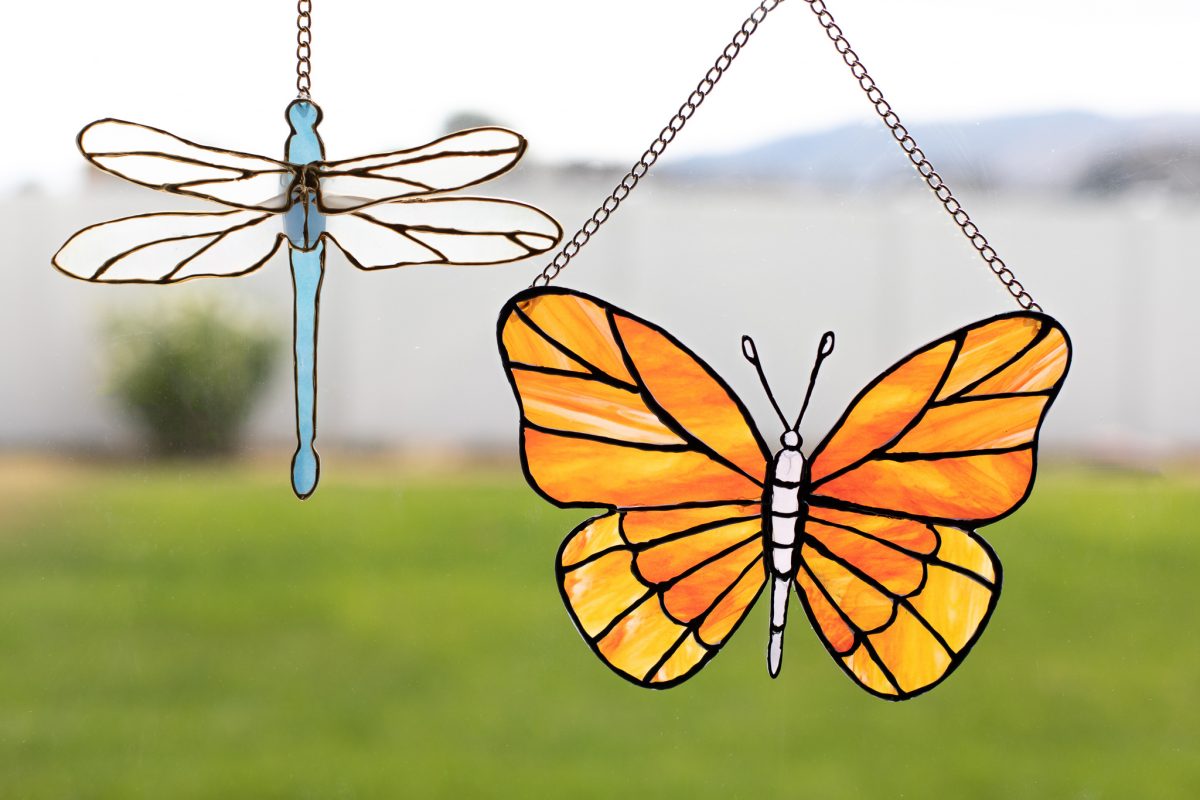
It should look something like the butterfly below.
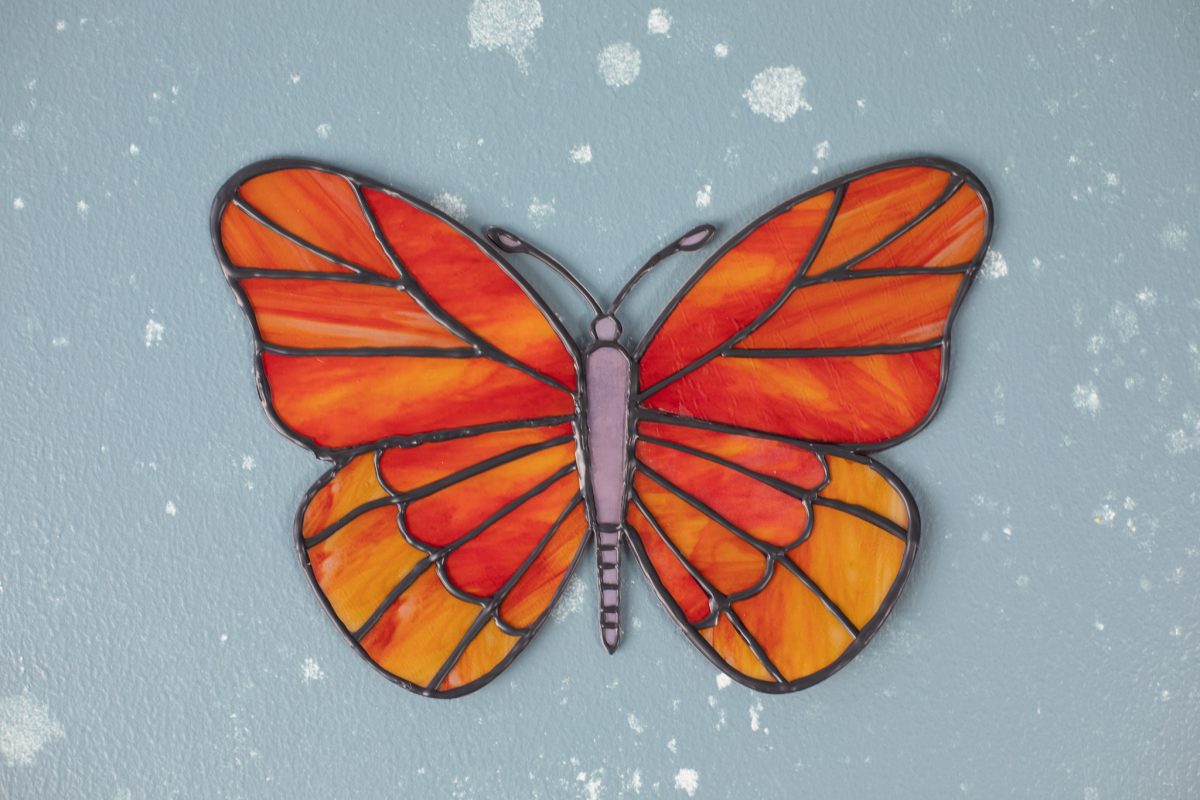
4. When the leading and glue is dry adhere a chain to the backside of the wings.
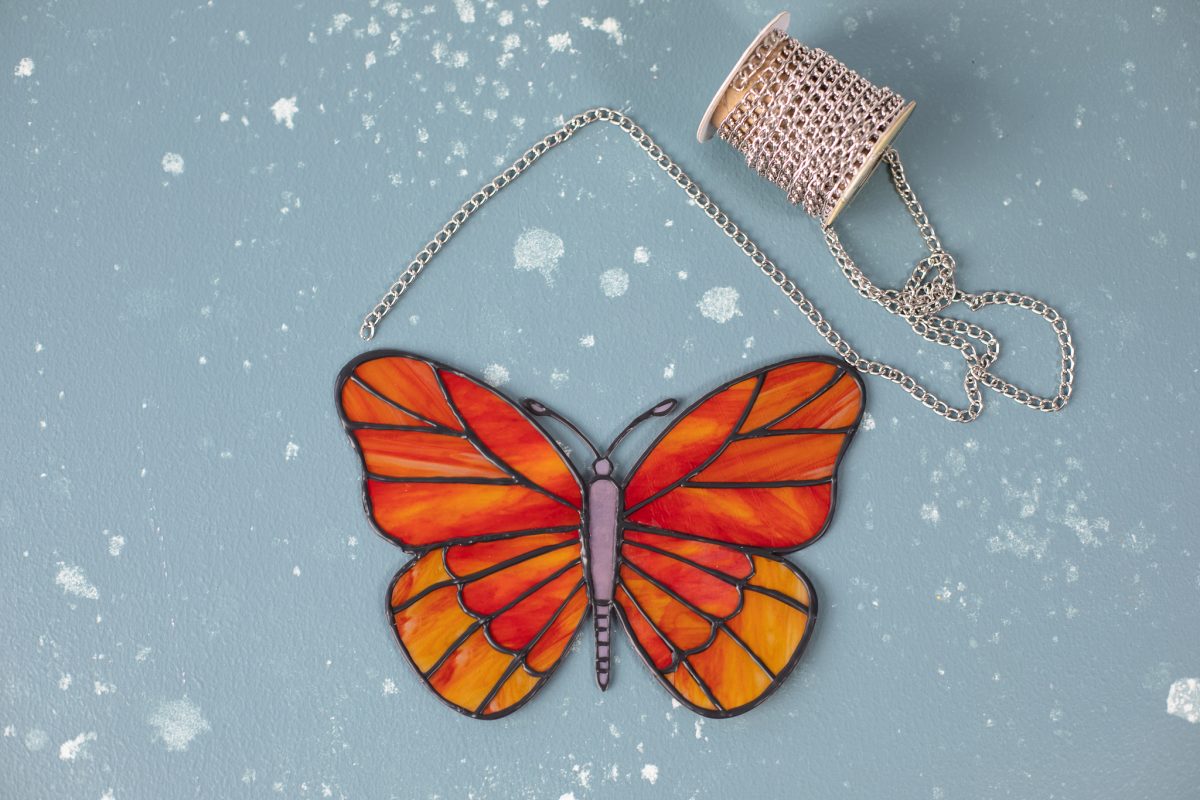
5. Place in a window and enjoy!
Nasze Naturalne
September 3, 2025
Your authentic voice really shines through in everything you create and share
Naszenaturalne
September 2, 2025
Really love your style
Kelly Wayment
June 28, 2024
You can use it with vinyl as long as it is smooth and flat to allow the static charge to hold on to it. Rolled vinyl that wants to go back to its rolled shape will not necessarily work well, and it would need to be trimmed to fit the ES mat cutting area.
Kelly Wayment
June 28, 2024
Yes, you can use the heat pen while using the ES mat. 🙂
Yurii
March 2, 2024
Hello. May it be used with heat pen?
Thanks
Jerome
February 24, 2024
Hi, works this with the normal vinyl foils or only with printer papter etc?